How to Update Email Signatures in Outlook for Windows 11
You update your email signature in the new Outlook for Windows 11 by accessing the signature settings directly from the composition window.
An email signature is a block of text or images automatically appended to the end of your outgoing emails, typically including your name, title, contact information, and company branding.
The new Outlook for Windows 11, which has replaced the Mail and Calendar apps for many, offers a straightforward method to manage this essential communication element.
Ensuring your signature is current is vital for professional presentation, especially when details like phone numbers or website URLs change. You can customize it with text, links, and even small images to make your emails stand out.
Access the signature settings by clicking the Settings gear icon in Outlook, then navigating to Accounts and Signatures. Select your email account, type your desired signature in the box, and click Save to apply it to new messages and replies.
Why use an email signature?
Think of an email signature as a block of text at the bottom of your emails. It displays your name, job title, and contact information, helping you look professional and build your personal brand.
What happens when you are done?
Your signature will appear automatically on every email you send. This keeps your contact details consistent for everyone. It saves you from typing your info every time.
How to update email signature in New Outlook for Windows
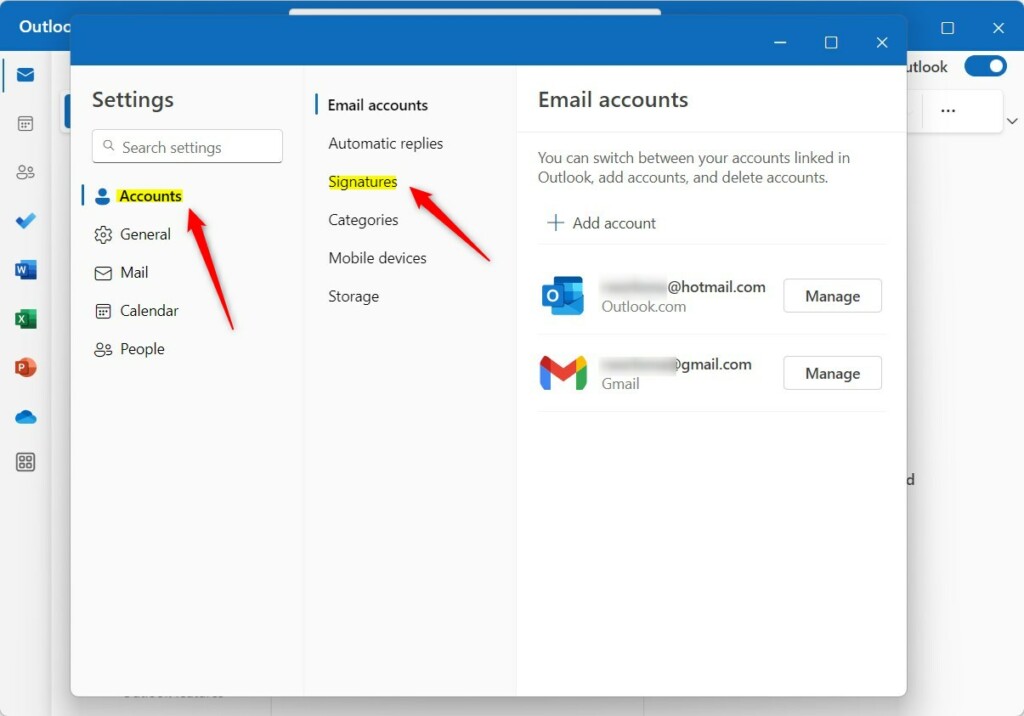
You can easily update your email signature in the new Outlook for Windows by opening the app and going to settings. Click the gear icon, then select Accounts and then Signatures to find where you can make changes to your current signature or create a new one.
1. Open the Outlook app on your computer.

2. Click the Settings gear icon in the top right corner.

3. Go to Accounts and select Signatures.
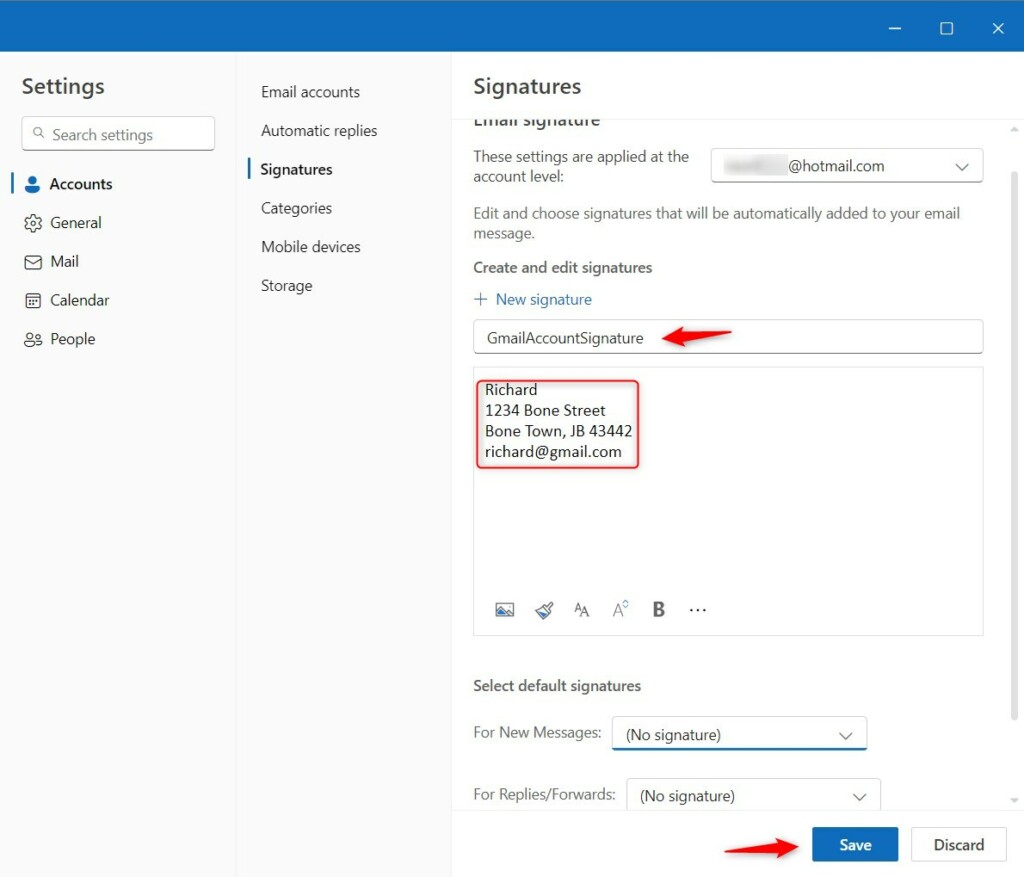
4. Select your email account. Type a name for your signature. Add your text in the box.
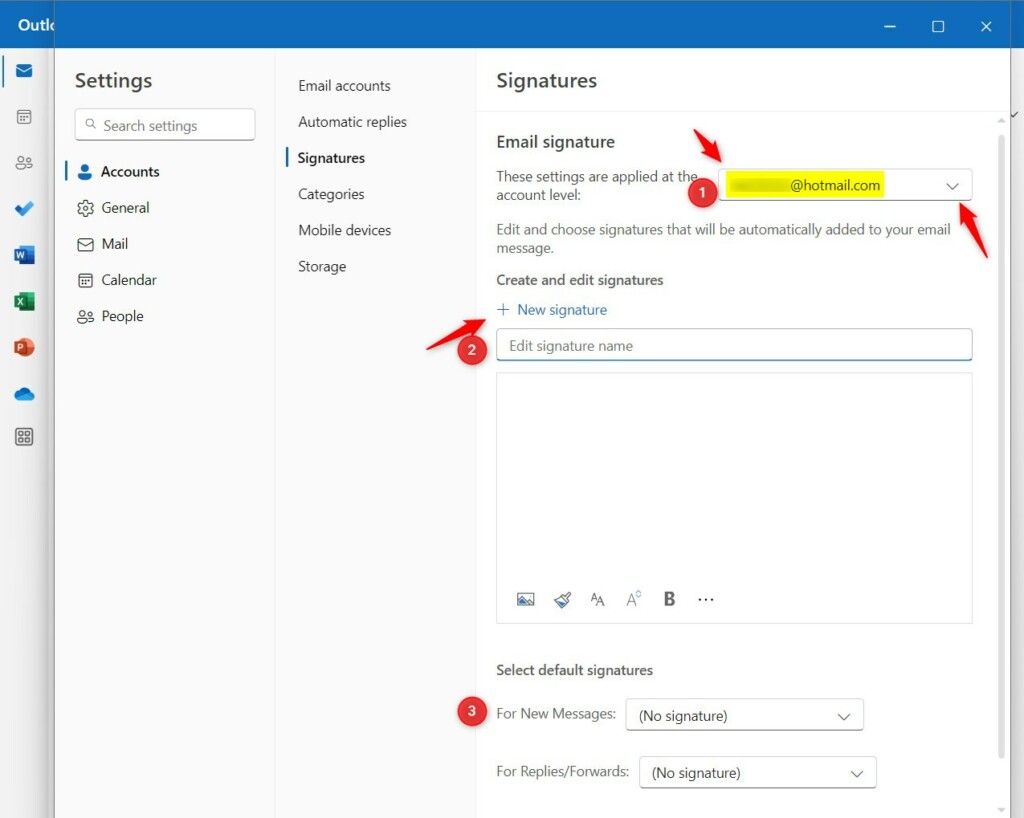
5. Click Save.
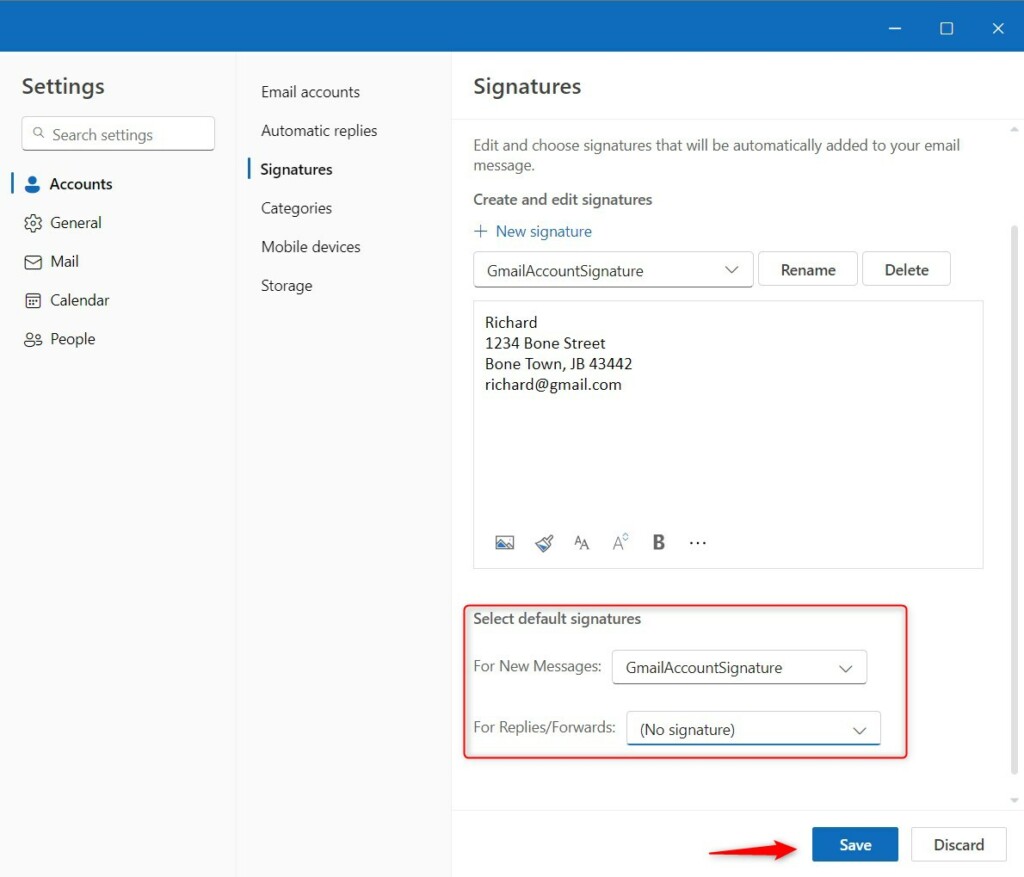
6. Choose your signature for New Messages and Replies/Forwards.
How to update email signature in Outlook on the Web
You can manage your signature online through any browser.
- Go to Outlook.com and sign in.
- Click the Settings gear icon.
- Select Mail and then Compose and reply.
- Under Email signature, type your details and click Save.
How to update email signature in Classic Outlook
- Open Outlook and click File > Options.
- Select Mail and click the Signatures button.
- Click New to create one or edit an existing one.
4. Click OK to save your changes.
Troubleshooting Outlook signature issues
If your Outlook signature isn’t showing up, the first step to troubleshoot is to check your Signature settings to ensure one is assigned as the default for your account.
Pro-tip: Default settings
Summary
Updating your email signature in Outlook is a simple way to keep your contact details current and professional across all versions of the app.
Can I have different signatures for different email accounts?
Yes. In the signature settings menu, you can select each email account individually from the dropdown list. You can then create and assign a unique signature for every account you have linked to Outlook, ensuring your professional and personal emails always have the correct contact information attached.
How do I add a logo or image to my Outlook signature?
In the signature editor, look for the image icon in the formatting toolbar. Click it to upload a file from your computer. Ensure your image is in a common format like JPG or PNG. Keep the file size small so your emails load quickly for the recipient.
Why is my email signature not showing up in replies?
This usually happens because the default signature is not set for replies. Go back to your signature settings and check the dropdown menu labeled For Replies/Forwards. Make sure you have selected your desired signature there instead of leaving it set to None.
Was this guide helpful?

About the Author
Richard
Tech Writer, IT Professional
Richard, a writer for Geek Rewind, is a tech enthusiast who loves breaking down complex IT topics into simple, easy-to-understand ideas. With years of hands-on experience in system administration and enterprise IT operations, he’s developed a knack for offering practical tips and solutions. Richard aims to make technology more accessible and actionable. He's deeply committed to the Geek Rewind community, always ready to answer questions and engage in discussions.

[…] app has many features, including support for email signatures, external email accounts, setting out-of-office automatic replies, email […]
[…] app has many features, including support for email signatures, external email accounts, setting out-of-office automatic replies, and email […]
[…] app has many features, including support for email signatures, external email accounts, setting out-of-office automatic replies, email sorting, subscription […]
[…] app has many features, including support for email signatures, external email accounts, setting out-of-office automatic replies, email […]
[…] app includes many features like email signatures, external email accounts, out-of-office automatic replies, email sorting, subscription management, […]
[…] Outlook.com, Hotmail, and Gmail accounts. The app is packed with tools, including support for email signatures, external email accounts, and automatic […]
[…] app includes many tools, such as support for email signatures, external email accounts, setting out-of-office automatic replies, email sorting, subscription […]
[…] app has many helpful tools like email signatures, external email accounts, out-of-office automatic replies, email sorting, subscription management, […]