How to Turn On or Off Focused Inbox in Outlook
You turn on or off Outlook’s Focused Inbox to automatically sort your emails into “Focused” and “Other” tabs, helping you prioritize important messages.
Focused Inbox is a feature that intelligently separates your most relevant emails from less important ones by learning from your habits. It ensures key communications land in the “Focused” tab, while newsletters and notifications go to the “Other” tab.
Using Focused Inbox in Outlook versions like Microsoft 365 or Outlook 2019 creates two distinct inbox sections. Disabling it consolidates all incoming mail into a single list for simpler management.
To turn Focused Inbox on or off, go to Settings, then Mail, then Layout. Choose your account and select “Sort messages into Focused and Other” or “Don’t sort my messages.” Save your changes and restart Outlook.
How to Toggle Focused Inbox on 🪟 Windows 11
You can easily turn the Focused Inbox on or off in the Outlook app on Windows 11 by changing a single setting. This feature helps you sort your most important emails from less urgent ones, making your inbox much easier to manage.
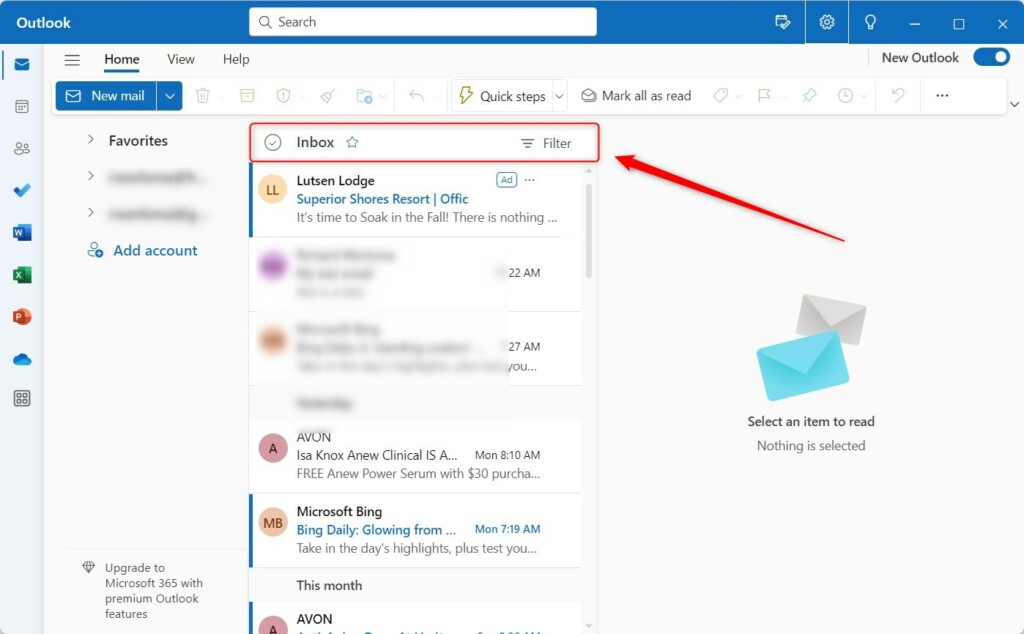
- Open the Outlook app on your computer.

Open the new Outlook app in Windows 11 - Click the Settings gear icon in the top right corner.

Add Gmail to Outlook app in Windows 11 - Select Mail and then Layout.
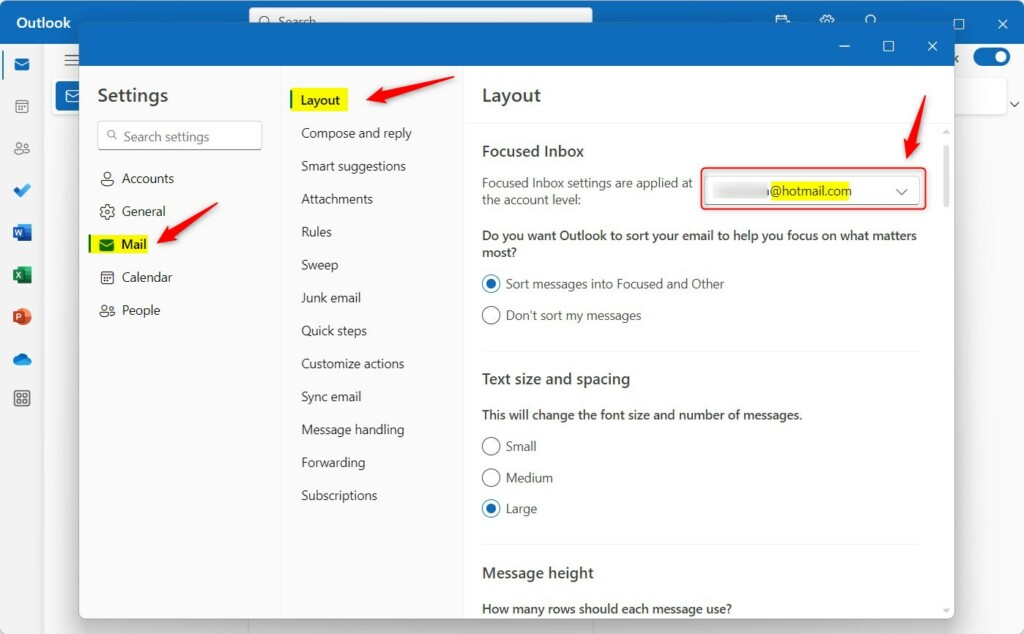
Turn focused inbox on or off in Outlook - Choose your email account.
- Under Focused Inbox, select Sort messages into Focused and Other or Don’t sort my messages.
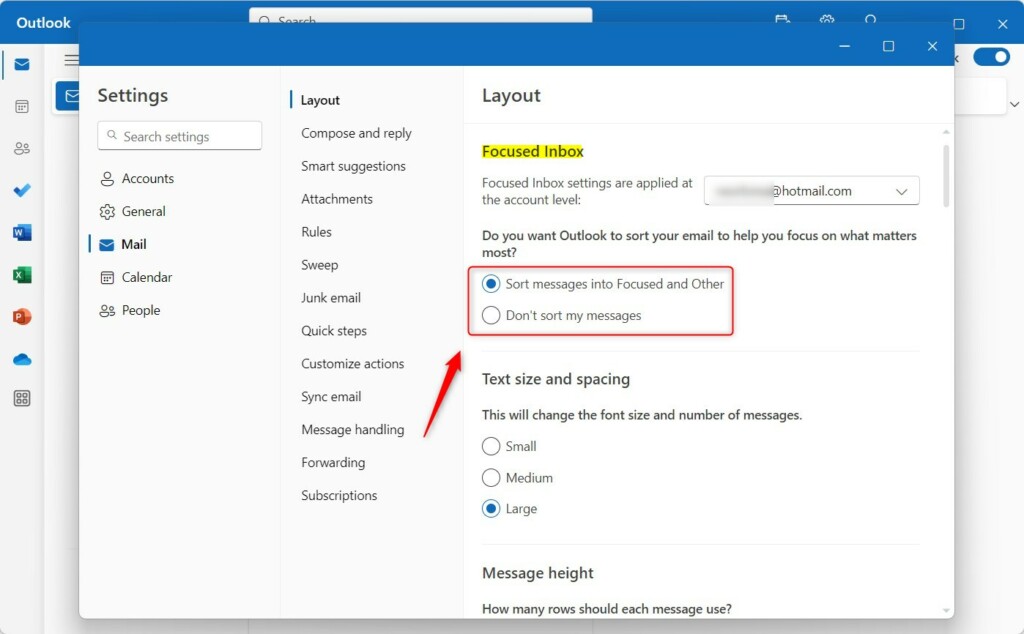
Turn focused inbox on or off in Outlook - Save your changes and restart the app.
Turn focused inbox on or off in Outlook
Managing Focused Inbox on Mobile
You can easily manage the Focused Inbox on your phone using the Outlook app for iOS or Android. Turning it on or off lets you keep your important emails separate from others, just like you can on your computer.
- Open the Outlook app on your phone.
- Tap your profile icon or the Home icon in the top left.
- Tap the Settings (gear) icon at the bottom.
- Find Focused Inbox and toggle the switch to On or Off.
Why: This ensures your mobile experience matches your desktop workflow. What happens: Your notifications will now only alert you for emails that land in the Focused tab.
How to Reclassify Emails
Sometimes the algorithm makes a mistake. You can teach it your preferences easily:
- Right-click an email in the “Other” tab.
- Select Move to Focused.
- To move from “Focused” to “Other,” select Move to Other.
The system learns from these actions to improve your future email organization.
Summary
Focused Inbox helps you manage your email better by sorting important messages separately, so you can focus on what truly matters.
Does Focused Inbox work with non-Microsoft email accounts?
Yes, Focused Inbox works with most email providers, including Gmail and Yahoo, when added to the Outlook app. It uses the same smart filtering technology to sort your messages regardless of the email host, helping you maintain consistent email productivity across all your connected accounts.
Will turning off Focused Inbox delete my emails?
No, turning off Focused Inbox will not delete your emails. It simply merges the “Focused” and “Other” tabs back into a single, chronological list. All your messages remain safely in your inbox, and you can toggle this setting back on at any time without losing data.
Was this guide helpful?

About the Author
Richard
Tech Writer, IT Professional
Richard, a writer for Geek Rewind, is a tech enthusiast who loves breaking down complex IT topics into simple, easy-to-understand ideas. With years of hands-on experience in system administration and enterprise IT operations, he’s developed a knack for offering practical tips and solutions. Richard aims to make technology more accessible and actionable. He's deeply committed to the Geek Rewind community, always ready to answer questions and engage in discussions.
[…] signatures, external email accounts, setting out-of-office automatic replies, email sorting, subscription management, email forwarding, Blind Carbon Copy (Bcc), and […]
[…] signatures, external email accounts, setting out-of-office automatic replies, email sorting, subscription management, email forwarding, setting default From […]
[…] signatures, external email accounts, setting out-of-office automatic replies, email sorting, subscription management, email forwarding, setting default From […]
[…] signatures, external email accounts, setting out-of-office automatic replies, email sorting, subscription management, email forwarding, setting default From address, choosing […]
[…] signatures, external email accounts, setting out-of-office automatic replies, email sorting, subscription management, email forwarding, setting default From address, and […]
[…] signatures, external email accounts, setting out-of-office automatic replies, email sorting, subscription management, email forwarding, switching layout ribbons, and […]
[…] signatures, external email accounts, setting out-of-office automatic replies, email sorting, subscription management, email forwarding, setting default From […]
[…] support for email signatures, external email accounts, setting out-of-office automatic replies, email sorting, and subscription […]
[…] The app has many features, including support for email signatures, external email accounts, setting out-of-office automatic replies, and email sorting. […]
[…] signatures, external email accounts, setting out-of-office automatic replies, email sorting, subscription management, email forwarding, setting default From […]