Set Up Facial Recognition Sign-in for Your Account in Windows 11

Windows Hello facial recognition lets you sign in to Windows 11 with your face instead of typing a password. Windows compares your face against a stored template and unlocks the PC in a second or two. It works the same on Windows 11 Home and Pro.
Before you start, check two things. First, you need a compatible infrared (IR) camera. Most ordinary webcams do not qualify, but many laptops have a suitable one built in. Second, you need a PIN on the account, because Windows asks for it during setup and uses it as a fallback. Your facial data stays on your device and is not sent anywhere, so the sign-in stays private.
To set up Windows 11 facial recognition, open Settings , go to Accounts Sign-in options, click Set up under Facial recognition (Windows Hello), enter your PIN, then position your face centered in front of your infrared camera while Windows scans it. You need a compatible IR camera and a PIN already created on your account.
How to Set Up Facial Recognition
With Windows Hello, you can sign in just by looking at the screen. The short version is: open the Settings app, go to Accounts, select Sign-in options, and follow the camera prompts to scan your face. The steps below go through each screen in order.
Another common cause is that no PIN has been created yet. Set up the PIN first, in the same Sign-in options page, and then come back.
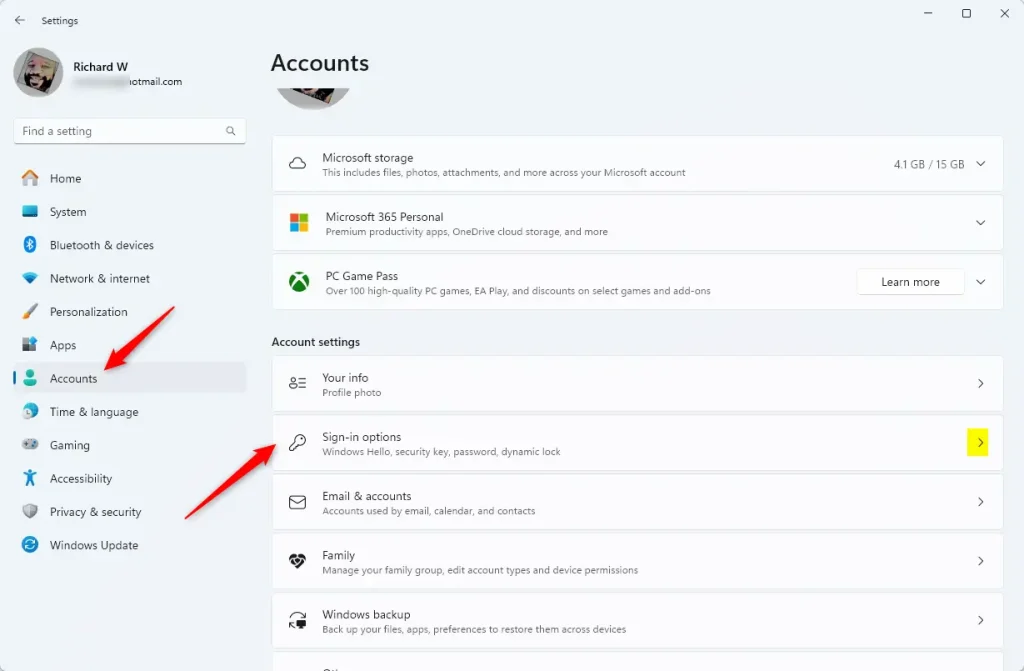
- Open Settings (press the Win+I), then go to Accounts Sign-in options You should see a list of sign-in methods, including Facial recognition (Windows Hello).
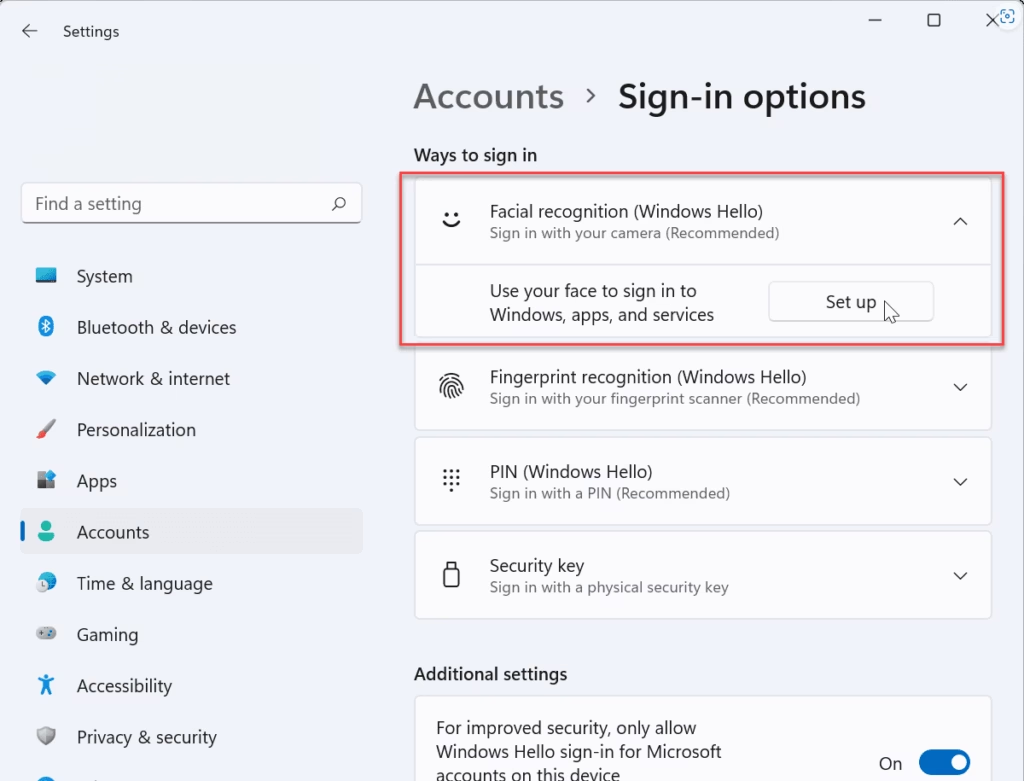
- Select Facial recognition (Windows Hello) to expand it, then click Set up. If the button is greyed out, see the note above about the camera and PIN. The Windows Hello setup window should open.
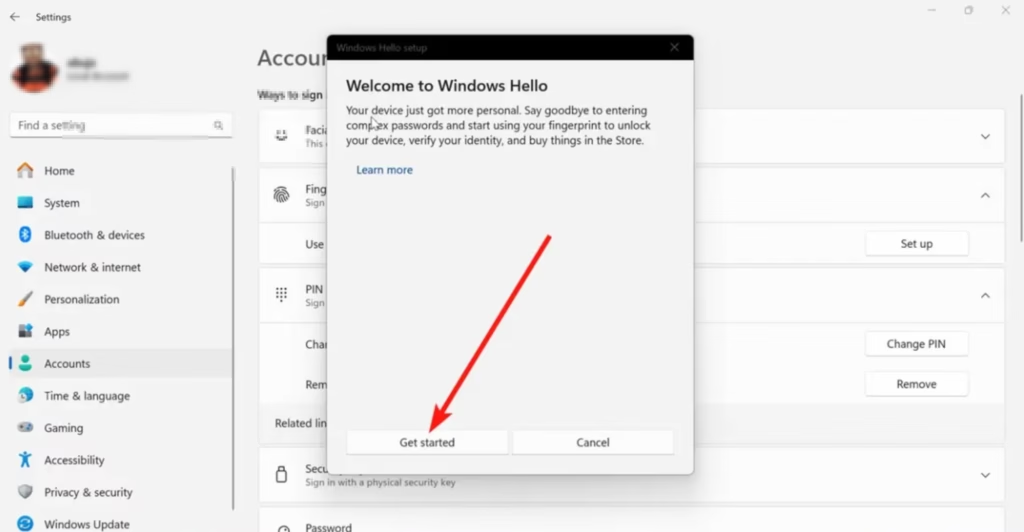
- Click Get started on the Windows Hello welcome screen.
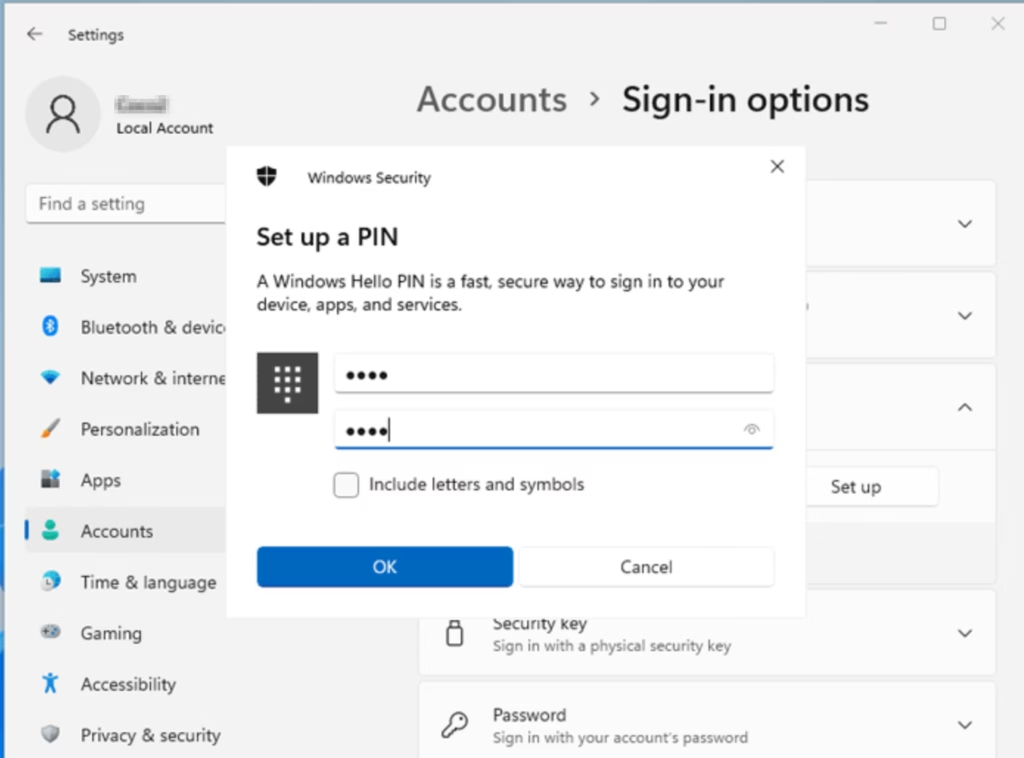
- Enter your PIN when Windows asks you to confirm it is really you. The camera should turn on and show a preview of your face.
- Look straight at the screen and keep your face centered while Windows scans it. Sit in even lighting, and keep your head still until the scan finishes. A confirmation message tells you when it is done.
- Click Close when Windows says you’re all set. You can now sign in with your face. No restart is needed, and the option appears the next time you lock the PC or sign out.
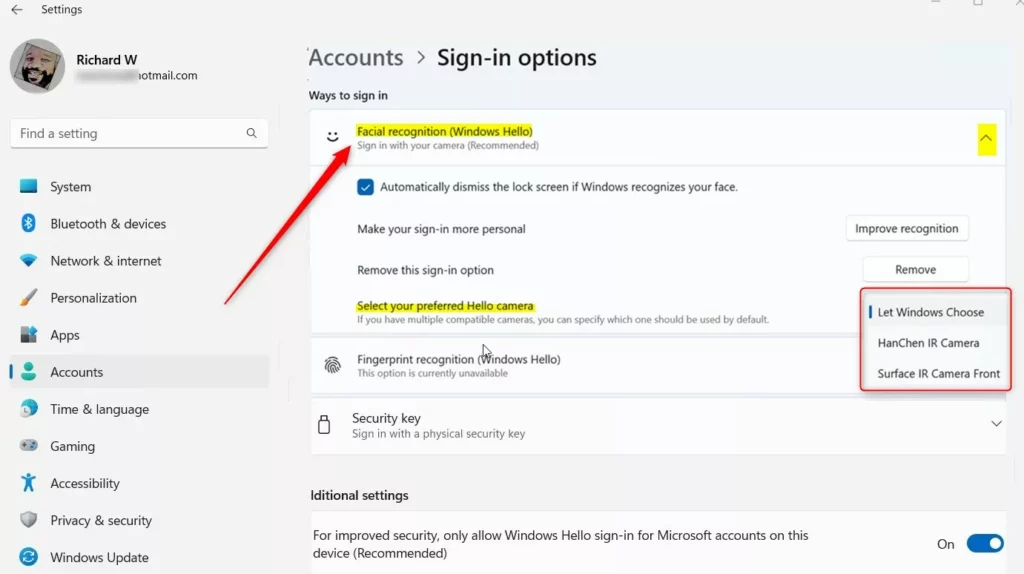
- If you wear glasses, or recognition is unreliable in some lighting, go back to Facial recognition (Windows Hello) and click Improve recognition. Run the scan again, with and without glasses if you wear them. This is optional.
The Settings window can now be closed.
This deletes your face data from the PC. Your PIN and password keep working either way.
Why Use Facial Recognition?
Windows 11 facial recognition provides a faster and more secure way to unlock your computer without typing a password. Using a compatible infrared camera, Windows Hello verifies your face instantly while keeping your biometric data stored safely on your device.- Better Security: Your face is unique, so it makes your sign-in safer than just a password.
- Quick and Easy: Just look at your PC to sign in fast.
- Your PIN is Safe: The PIN you use is tied to your device only.
- More Ways to Sign In: You can also use fingerprint or PIN if you prefer.
- Works with Your Camera: Uses your PC’s built-in or an external infrared camera.
- Help If Needed: If you have problems, check the official support links below.
Helpful Links
- Windows Hello face authentication
- Windows Hello biometric requirements
- Windows Hello biometrics in enterprise
- Troubleshoot Windows Hello problems
Enjoy signing in to the Windows 11 PC with a glance!
Was this guide helpful?

About the Author
Richard
Tech Writer, IT Professional
Richard is a writer at Geek Rewind who turns complex IT tasks into clear, step-by-step guides. He draws on years of hands-on experience in system administration and enterprise IT operations, focusing on Windows, Linux and WordPress: the problems people actually run into, and the fixes that work. His server and WordPress guides come from systems he runs himself. Richard builds and maintains the platform behind Geek Rewind, from its Ubuntu servers and Nginx configuration to its custom WordPress plugins. Many new tutorials start with readers' questions, and he's always glad to answer them in the comments.




No comments yet — be the first to share your thoughts!