How to Enable Windows Hello Sign-In for Microsoft Accounts in Windows 11
Windows Hello sign-in for Microsoft accounts in Windows 11 lets you use a PIN, fingerprint, or facial recognition to log into your computer instead of typing a password.
This feature provides a quick and secure way to prove it’s really you when you start up your PC.
By setting up Windows Hello, you can turn off password sign-in for your Microsoft account, making it the only way to unlock your device. This means no more forgotten passwords, just fast, personal, and safe access.
Go to Settings > Accounts > Sign-in options. Under Additional settings, toggle on “For improved security, only allow Windows Hello sign-in for Microsoft accounts on this device.” This lets you use a PIN, fingerprint, or face recognition instead of a password.
How to Enable Windows Hello Sign-In for Microsoft Accounts
Setting up Windows Hello sign-in for your Microsoft account on Windows 11 is done directly through your PC’s settings. This allows you to log in using your face, fingerprint, or a PIN instead of typing a password. Open Settings, navigate to Accounts, and then select Sign-in options to begin.
- Open Windows Settings:
- Click the Start button and select Settings, or
- Press
Windows key + Ion your keyboard.
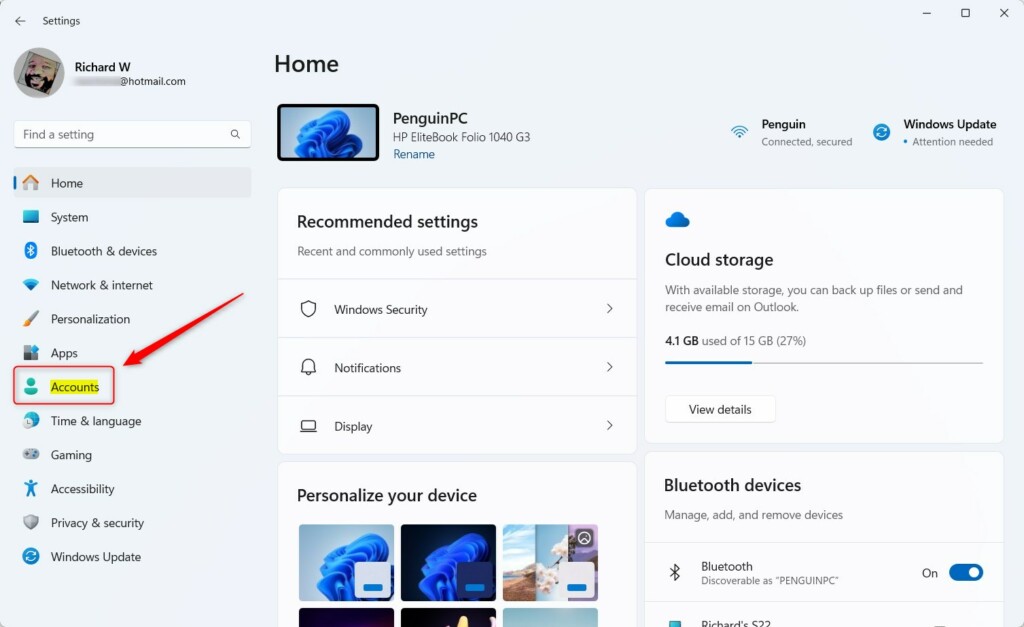
- In the Settings window, click on Accounts from the left menu.
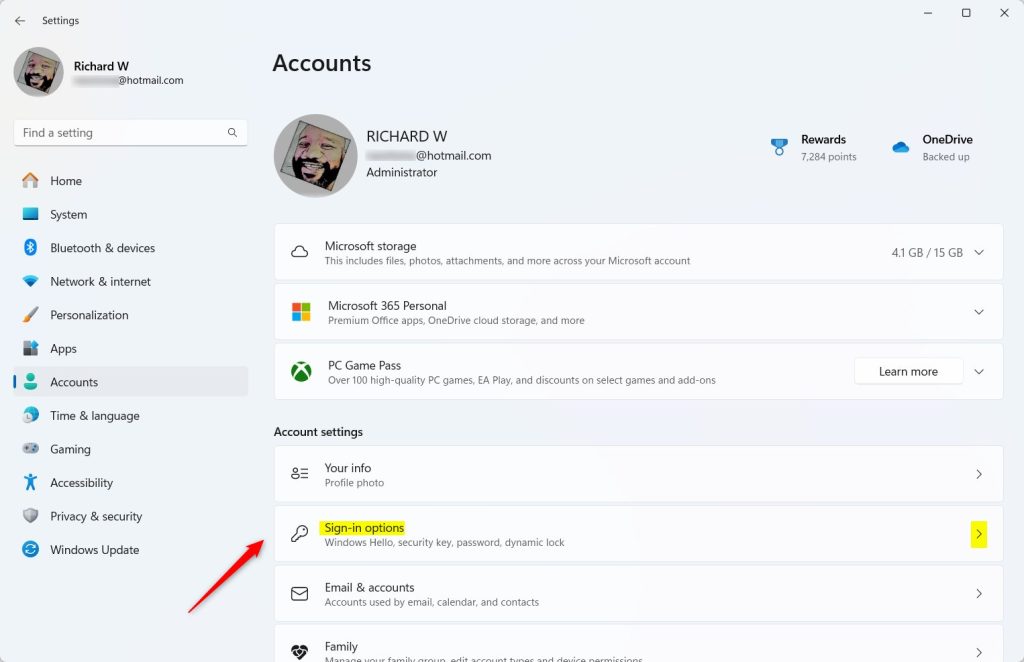
- Select Sign-in options on the right side.
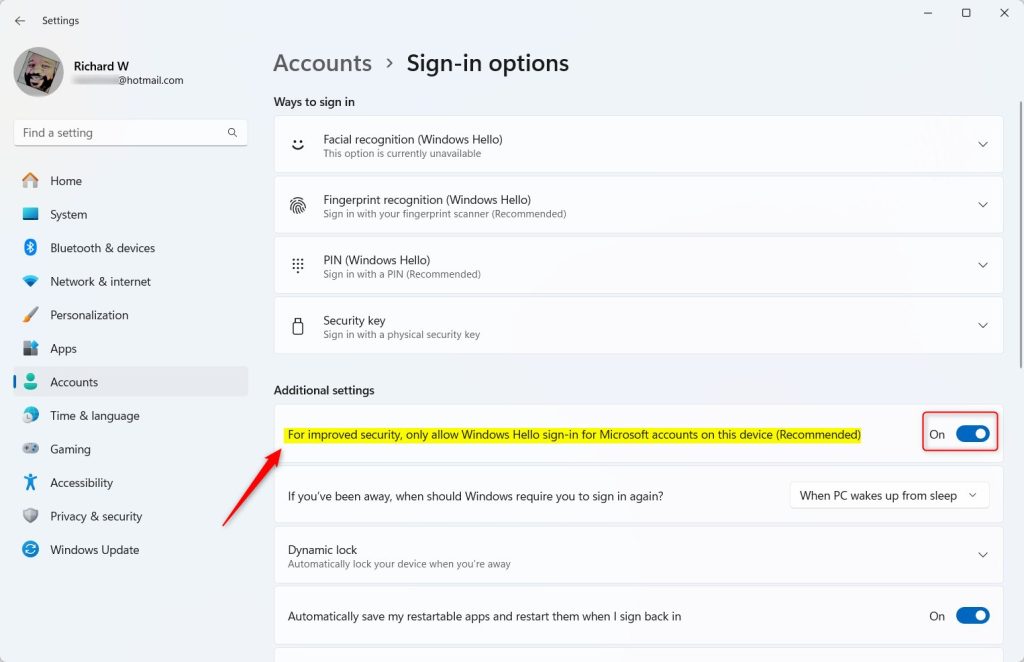
- Scroll down to the section labeled Additional settings.
- Find the option that says: “For improved security, only allow Windows Hello sign-in for Microsoft accounts on this device” and click the toggle switch to turn it On.
- Close the Settings app.
Here are some helpful pictures showing these steps:
Why Use Windows Hello Only for Microsoft Accounts?
- Better security: Only you can unlock your computer using your face, fingerprint, or PIN.
- No more passwords to remember: Signing in is fast and easy.
- Protects your personal info: Helps keep your data safe from others.
Using Windows Hello for your Microsoft account offers better security because only your face, fingerprint, or PIN can unlock your computer. It also makes signing in faster and easier since you won’t need to remember complex passwords. This helps protect your personal information and keeps your data safe from others.
How to Use Fingerprint Sign-In
That’s it! Your Windows 11 device is now safer and easier to use.
Summary
Windows Hello sign-in for your Microsoft account offers a fast and secure way to access your Windows 11 PC, letting you use your face, fingerprint, or PIN instead of a password. Setup is completed in Settings under Accounts > Sign-in options.
How do I turn off Windows Hello sign in for Microsoft accounts?
Open Settings. Click Accounts. Scroll to the Account Settings section, and click "Sign-in options" (Windows Hello, …). Under the "Additional settings" section, turn off the "For improved security, only allow Windows Hello sign-in for Microsoft account on this device" switch.
Why can't I sign in with Windows Hello?
If you encounter issues signing in with fingerprint recognition, use your PIN or password instead, and then re-register your fingerprints. Tips: Ensure your device’s fingerprint reader is clean and dry. If needed, re-register your fingerprints, making sure to capture different angles of your finger.
Was this guide helpful?

About the Author
Richard
Tech Writer, IT Professional
Richard, a writer for Geek Rewind, is a tech enthusiast who loves breaking down complex IT topics into simple, easy-to-understand ideas. With years of hands-on experience in system administration and enterprise IT operations, he’s developed a knack for offering practical tips and solutions. Richard aims to make technology more accessible and actionable. He's deeply committed to the Geek Rewind community, always ready to answer questions and engage in discussions.


No comments yet — be the first to share your thoughts!