Set up Facial Recognition Sign-in for Your Account in Windows 11
Set up Facial Recognition Sign-in for Your Account in Windows 11
This guide will help you set up Windows Hello facial recognition to sign in to your Windows 11 computer quickly and securely using your face.
Windows Hello lets you sign in with your face, a PIN, or fingerprint. Before setting up facial recognition, you need to create a PIN. You can still sign in with the PIN anytime if you want.
Using facial recognition and a PIN makes signing in easier and safer because your PIN is unique to your device and backed up with your Microsoft account.
You can use your PC’s built-in infrared camera or an external infrared camera for facial recognition.
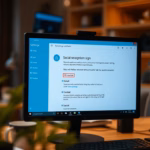
Open Settings, navigate to Accounts, then Sign-in options. Select Facial recognition (Windows Hello) and click Set up. Follow the on-screen prompts to scan your face with your camera after entering your PIN.
How to Set Up Facial Recognition
Windows key + I on your keyboard.
Click here to open Sign-in options directly.


You can now close the Settings window.
Why Use Facial Recognition?
- Better Security: Your face is unique, so it makes your sign-in safer than just a password.
- Quick and Easy: Just look at your PC to sign in fast.
- Your PIN is Safe: The PIN you use is tied to your device only.
- More Ways to Sign In: You can also use fingerprint or PIN if you prefer.
- Works with Your Camera: Uses your PC’s built-in or an external infrared camera.
- Help If Needed: If you have problems, check the official support links below.
Helpful Links
- Windows Hello face authentication
- Windows Hello biometric requirements
- Windows Hello biometrics in enterprise
- Troubleshoot Windows Hello problems
Enjoy signing in to your Windows 11 PC with just a smile or a glance!
Was this guide helpful?

About the Author
Richard
Tech Writer, IT Professional
Richard, a writer for Geek Rewind, is a tech enthusiast who loves breaking down complex IT topics into simple, easy-to-understand ideas. With years of hands-on experience in system administration and enterprise IT operations, he’s developed a knack for offering practical tips and solutions. Richard aims to make technology more accessible and actionable. He's deeply committed to the Geek Rewind community, always ready to answer questions and engage in discussions.


No comments yet — be the first to share your thoughts!