How to Export Search History in Outlook on Windows 11


Exporting search history in Outlook on Windows 11 saves a local copy of your past searches as a CSV file. You can open that file in Excel or any other spreadsheet program. The new Outlook app tracks what you search for to improve future results. It also lets you download that data whenever you want a permanent record.
Open Outlook, click Settings , select General, then Privacy and data, and click the export button under Search history. Outlook saves your search queries as a CSV file in your Downloads folder, which you can open in Excel.
Export your “Search history” in Outlook
The export saves your recent search queries to a file, so you can review them offline. It is useful if you want to back up your search data, or check an earlier search term without opening the app each time.
The classic Outlook desktop app (the one with the File menu and ribbon) does not have this setting. If your screen looks different from the one below, you are probably in classic Outlook. Check for a Try the new Outlook toggle in the top right corner of the window.
Here’s how to do it.
- Open Outlook. Click Start All apps Outlook You can also type Outlook in the Start menu search box and open it from the results.
Make sure you open the new Outlook app and not classic Outlook. Wait for your mailbox to finish loading before you go on.

- Click the
Settingsbutton, which is the gear icon in the top right corner of the window. The Settings window opens.

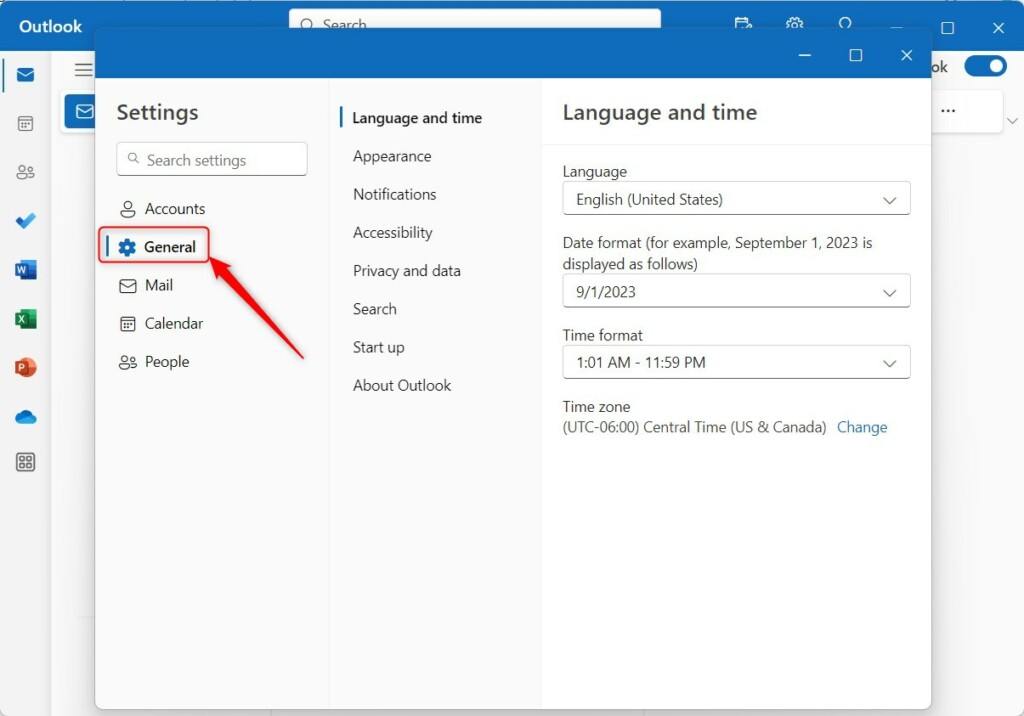
- In the Settings window, click the
Generaltab in the left sidebar. The options for that tab appear on the right.
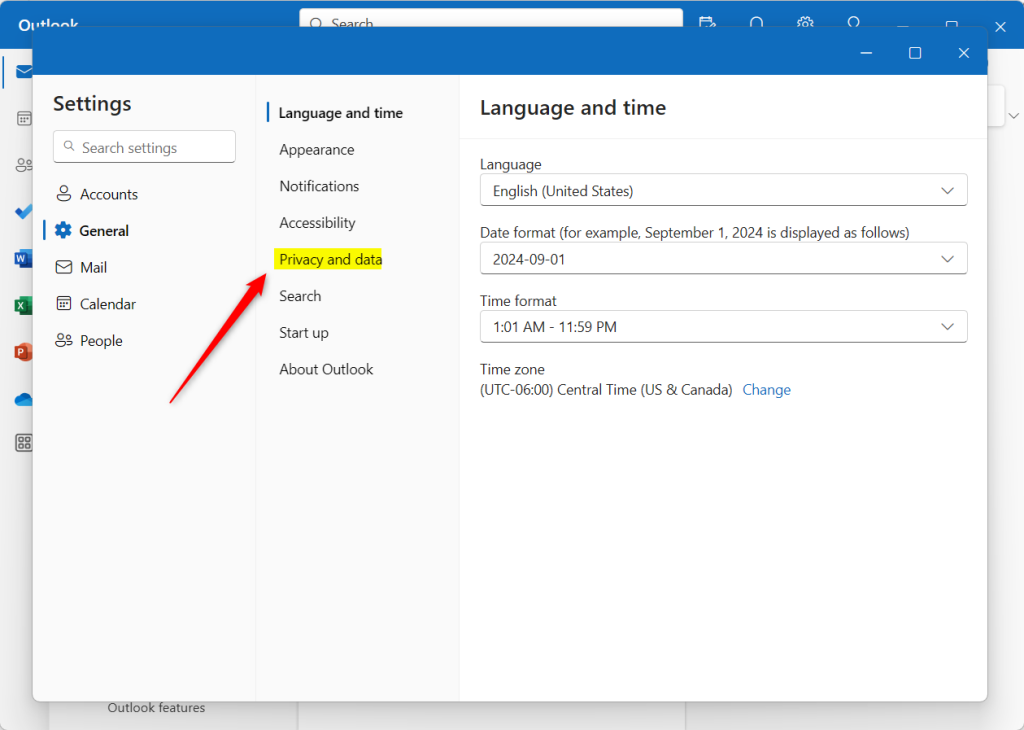
- Select Privacy and data on the right. Its settings page opens.
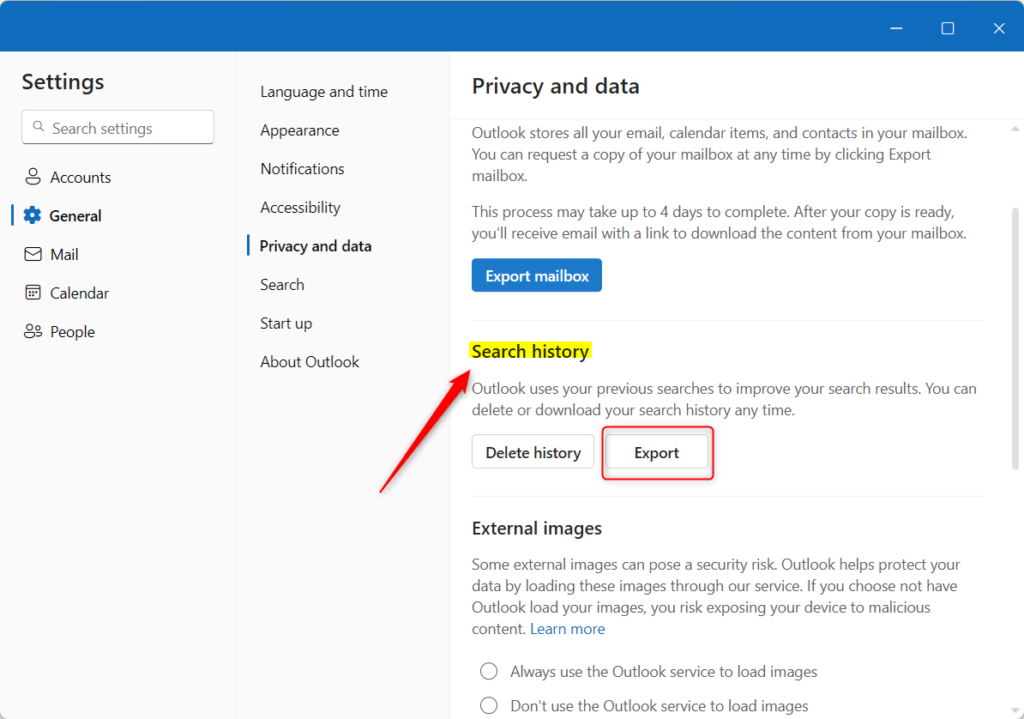
- Find the Search history section and click the export button there. Outlook saves your search history as a CSV file in your Downloads folder.
If you can’t find the export option, your Outlook build may not have it yet, or your account may not support it. Work and school accounts can have some privacy and data options limited by an administrator. Updating Outlook from the Microsoft Store can also help.
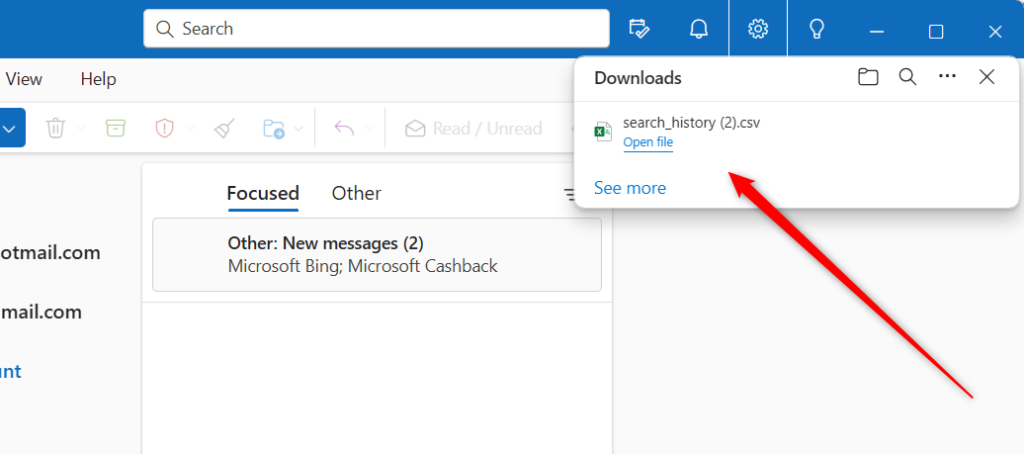
- Check the result. After you click Export, a file called search_history is saved in your Downloads folder.
- Close the settings page. To open the file, go to your Downloads folder in File Explorer and double-click search_history. If Excel is installed, it should open the file as a spreadsheet.
The export only creates a copy and does not change or delete your search history in Outlook. To undo it, delete the CSV file from your Downloads folder. The file is plain text, so store it somewhere safe if you want to keep it, because it lists everything you searched for.
That should do it!
Conclusion:
- Exporting your search history in Outlook lets you analyze your search behavior and trends in a spreadsheet.
- The file helps you keep track of search activity, build reports, or share search data with others.
- The steps above work in the new Outlook app on Windows 11: open Settings, go to Privacy and data, and click the export button under Search history.
- If something on your screen differs from this guide, or you have a tip to add, use the comments section below.
Was this guide helpful?

About the Author
Richard
Tech Writer, IT Professional
Richard is a writer at Geek Rewind who turns complex IT tasks into clear, step-by-step guides. He draws on years of hands-on experience in system administration and enterprise IT operations, focusing on Windows, Linux and WordPress: the problems people actually run into, and the fixes that work. His server and WordPress guides come from systems he runs himself. Richard builds and maintains the platform behind Geek Rewind, from its Ubuntu servers and Nginx configuration to its custom WordPress plugins. Many new tutorials start with readers' questions, and he's always glad to answer them in the comments.




[…] format, public a calendar, show week numbers in Outlook calendar, deleting your search history, export your search history, add or remove events from emails to your Calendar, switch to dark mode, and […]
[…] a calendar, show week numbers in Outlook calendar, deleting your search history, export your search history, add or remove events from emails to your Calendar, switch to dark mode, link preview, and […]
[…] a calendar, show week numbers in Outlook calendar, deleting your search history, export your search history, add or remove events from emails to your calendar, and […]
[…] a calendar, show week numbers in Outlook calendar, deleting your search history, export your search history, and […]