How to Delete Search History in Outlook App
Deleting search history in the Outlook app removes past search terms from suggestions.
The Outlook app saves recent searches to speed up future queries, but clearing this list can improve privacy and reduce clutter.
This process is helpful if you share your computer or simply want a clean slate for your Outlook searches.
Clearing the history gets rid of all saved search suggestions within the Outlook application.
After you clear it, old search ideas will disappear when you click into the search bar.
This action only affects your search history; your emails and files are completely unaffected.
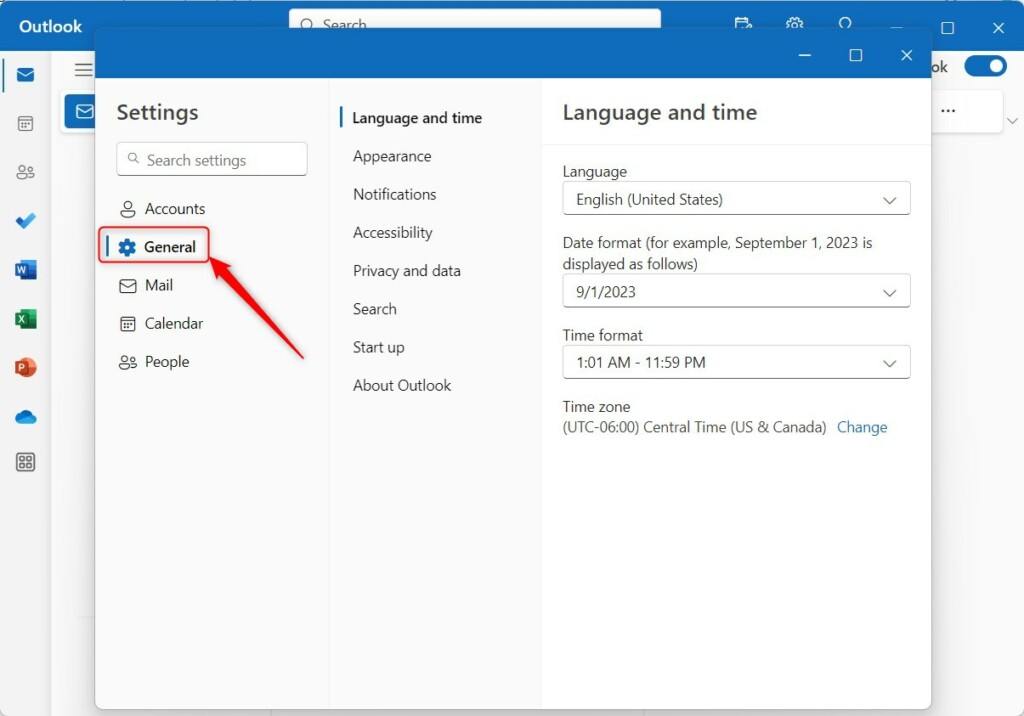
In the New Outlook app, click Settings, then General, and select Privacy and data. Click “Delete history” under the Search history section and confirm to clear your past search terms.
Comparison: Deleting Search History by Outlook Version
| Outlook Version | Primary Method |
|---|---|
| New Outlook (Windows) | Settings > Privacy and Data |
| Classic Outlook (Desktop) | Search Bar > Recent Searches > Remove |
| Outlook Web (OWA) | Settings > General > Privacy |
How to Clear Search History in New Outlook for Windows
You can easily clear your search history in the new Outlook for Windows right from the app. Just open Outlook, click the gear icon for settings, go to General, then Privacy and data, and finally click the ‘Delete history’ button. This will remove all your past searches from the app.
- Open the Outlook app on Windows 11.

Open the new Outlook app in Windows 11 - Click the Settings button (the gear icon) at the top right.

Add Gmail to Outlook app in Windows 11 - Click the General tab on the left.
Outlook for Windows 11 General settings tab for search history export. - Select Privacy and data.
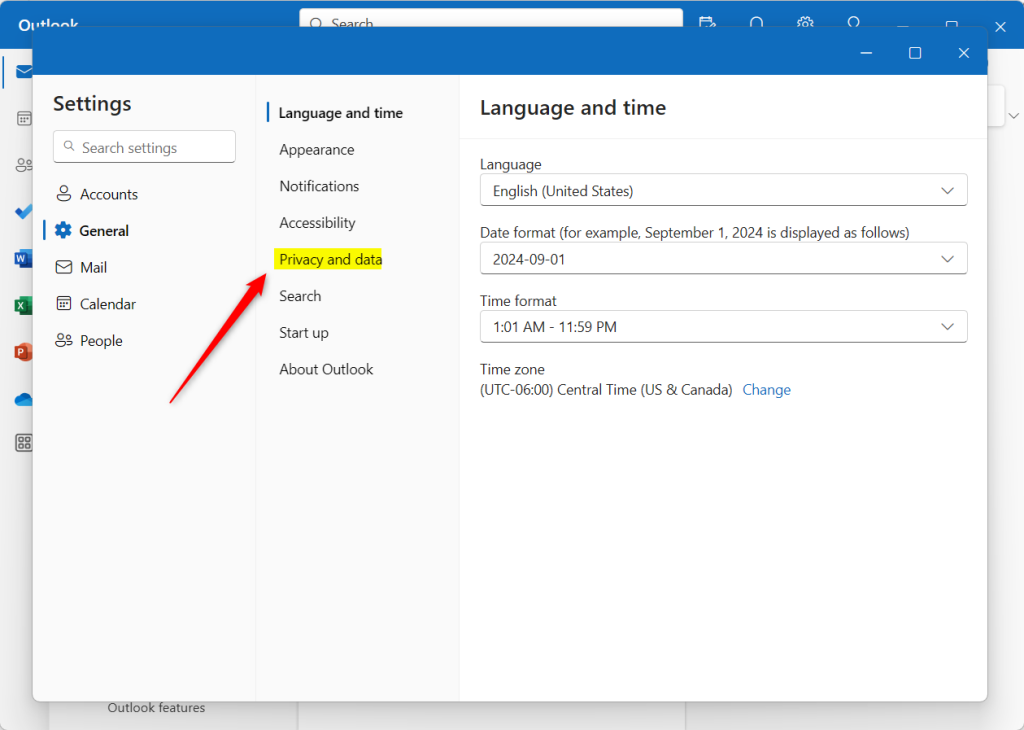
Outlook app privacy and data settings - Click the Delete history button under the Search history section.
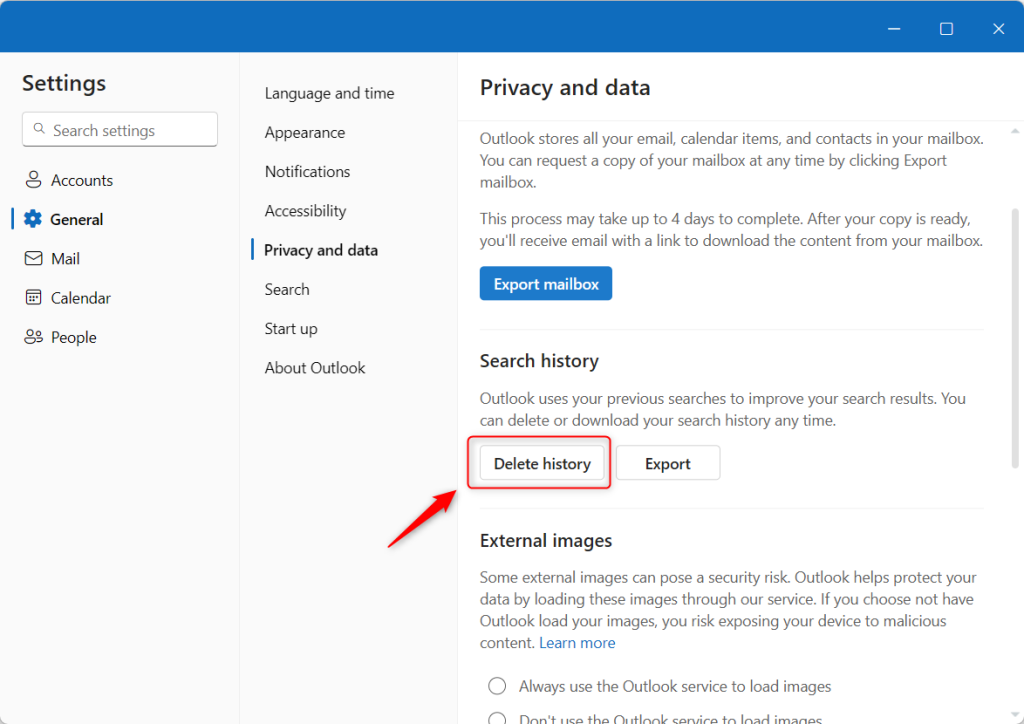
Outlook app privacy and data settings delete history button - Click Continue to confirm.
Advanced Troubleshooting: Registry and AppData Fixes
If you can’t delete Outlook search history using the normal settings, you might need to fix it in your computer’s registry. This involves closing Outlook, opening the registry editor, and deleting a specific folder related to search. This is a more advanced step for when the usual method doesn’t work.
2. Press ⊞ Win+R, type regedit, and press Enter.
3. Navigate to:
HKEY_CURRENT_USER\Software\Microsoft\Office\16.0\Outlook\Profiles.4. Locate your profile folder and delete the Search subkey if present.
5. Restart your computer.
Summary
Clearing your search history is a simple way to keep your Outlook app private. Whether you use the simple settings menu or advanced registry edits, removing your search cache helps maintain a clean and secure workspace. Always ensure your app is updated to avoid bugs that prevent history deletion.” }
Does deleting Outlook search history remove emails?
No, deleting your search history only removes the list of terms you have previously typed into the search bar. It does not delete, move, or modify any of your actual emails, attachments, or calendar appointments stored in your mailbox.
Why does my search history reappear after deleting it?
If your search history reappears, it is likely because your Outlook account is synced with the cloud. If you are signed into multiple devices, the search cache may be re-syncing from another machine. Ensure you clear the history on all devices or disable search suggestions in your privacy settings.
Was this guide helpful?

About the Author
Richard
Tech Writer, IT Professional
Richard, a writer for Geek Rewind, is a tech enthusiast who loves breaking down complex IT topics into simple, easy-to-understand ideas. With years of hands-on experience in system administration and enterprise IT operations, he’s developed a knack for offering practical tips and solutions. Richard aims to make technology more accessible and actionable. He's deeply committed to the Geek Rewind community, always ready to answer questions and engage in discussions.

[…] date and time format, public a calendar, show week numbers in Outlook calendar, deleting your search history, export your search history, add or remove events from emails to your calendar, and […]
[…] language, date and time format, public a calendar, show week numbers in Outlook calendar, deleting your search history, export your search history, add or remove events from emails to your Calendar, switch to dark […]
[…] language, date, and time format, public a calendar, show week numbers in Outlook calendar, deleting your search history, export your search history, add or remove events from emails to your Calendar, switch to dark […]
[…] app has many features, including support for showing week numbers in Outlook calendar, deleting your search history, exporting your search history, adding or removing events from emails to your […]
[…] app has many features, including support for showing week numbers in Outlook calendar, deleting your search history, exporting your search history, adding or removing events from emails to your […]