How to Optimize Windows 11 Settings for Performance

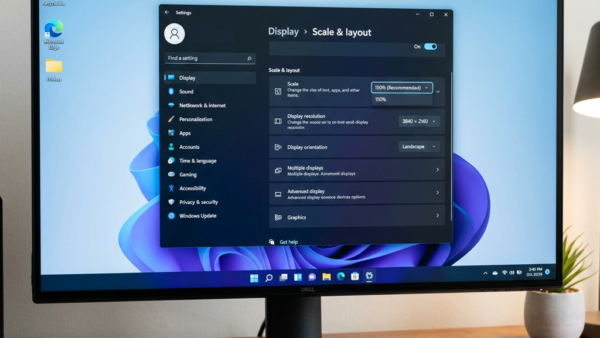
Scaling in Windows 11 changes the size of text, apps, and taskbar items on your screen to help you read everything comfortably. You can adjust this display size from 100% up to 225% or higher depending on your monitor dimensions. Open the Settings app to change these values whenever items look too small or hard to see.
To check your current value, go to Settings System Display and look at the Scale box. Pick a new percentage from the list. The change applies right away, with no restart. Some older desktop apps may look blurry until you close and reopen them, or sign out and back in. If the result is worse, go back to the same box and choose the value that was marked (Recommended).
Scaling is a comfort setting, not a speed setting. Still, it is a good first stop. The rest of this guide covers the settings that do affect how fast and how efficiently your PC runs.
Windows 11 system settings let you change how your PC looks and runs. To make text and icons bigger, go to Settings Accessibility Text size and use the slider. You can also change screen resolution in Settings System Display to make items appear larger.
Adjusting Your PC's Appearance and Basic Behavior
Configure a Windows 11 PC by balancing visual preferences with automated background behavior. This section suits anyone wanting clearer display text or better control over hardware and file interactions.
The usual trade-off is simple. Every visual effect and every background service uses a little CPU, memory, or disk time. On a modern PC you will not notice it. On an older laptop, a machine with 4 GB or 8 GB of RAM, or a PC with a mechanical hard drive, trimming these things can make a visible difference. Change one setting at a time so you know which one helped, and note what you changed so you can undo it.

Optimizing Performance and Power Settings
Adjust response times and power draw to make your hardware run more efficiently. These guides target users experiencing slowdowns, those chasing better speed, or anyone exploring system capabilities.
Two quick changes are worth trying first:
- Open Settings System Power & battery and find Power mode. You should see a drop-down with options such as Best power efficiency, Balanced, and Best performance. Choose Best performance when you want the fastest response and are plugged in. Choose Balanced to go back.
- Open Settings Accessibility Visual effects and switch off Transparency effects and Animation effects. The taskbar and menus will look flatter, and windows will open without fading or sliding. On slower graphics hardware this feels snappier. Switch them back on at any time.
Neither change needs a restart. On a laptop, Best performance will drain the battery faster, so use it on mains power.
Managing Power States and Scheduled Tasks
Automate sleep schedules and routine system tasks to keep background operations running without interruption. Managing power consumption ensures hardware remains responsive and ready on demand.
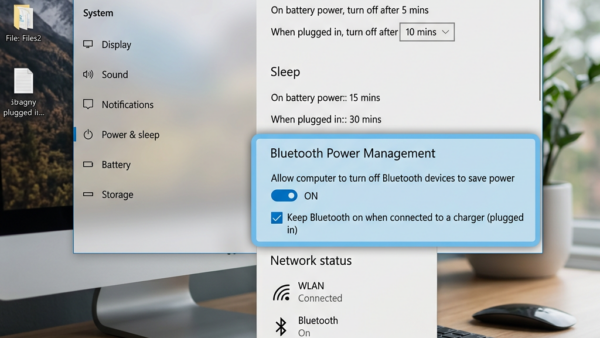
Sleep timers are set in Settings System Power & battery under Screen, sleep & hibernate timeouts. Open that section and you will see separate drop-downs for the screen and for sleep, each with an on-battery and a plugged-in value. A shorter screen timeout saves the most power. A longer sleep timeout stops the PC from dropping off during downloads, updates, or long jobs.
For routine housekeeping, open Settings System Storage and look at Storage Sense. It can clear temporary files and empty the Recycle Bin on a schedule, which keeps your drive from filling up unnoticed. Home and Pro editions both have it.

Common questions
How do I make text and icons bigger on my 🪟 Windows 11 PC?
Head to Settings Accessibility Text size to drag the slider and enlarge everything on screen. Altering the screen resolution via Settings System Display also helps make stubborn items appear larger.
- Open Settings Accessibility Text size
- Drag the Text size slider to the right. A preview box shows how large the text will be.
- Select Apply. Windows briefly shows a "Please wait" screen, and then text in menus, Settings, and most apps is larger.
This slider mainly enlarges text. If icons and buttons still look small, use the Scale setting from the introduction. It enlarges everything together.
If something is still too small, lower the resolution:
- Open Settings System Display
- Under Scale & layout, open the Display resolution drop-down.
- Choose a lower resolution. The screen flickers, then shows a prompt asking whether to keep the change.
- Select Keep changes. If you do nothing, Windows reverts after about 15 seconds.
Be aware that a flat-panel monitor looks sharpest at its native resolution, the one marked (Recommended). A lower value makes things larger but a bit soft. Try scaling before you lower the resolution.
Why is my 🪟 Windows 11 PC running slow?
Sluggish behavior often stems from background application bloat, cramped storage drives, or outdated device drivers. Task Manager helps pinpoint these hardware bottlenecks by displaying real-time processor and memory usage.
- Press Ctrl + Shift + Esc to open Task Manager. If you see a small window with only a list of apps, select More details.
- Stay on the Processes tab and select the CPU, Memory, or Disk column header. This sorts the list so the heaviest user is at the top.
- Select an app you do not need, then select End task. Save your work first, because unsaved data in that app is lost.
- Open the Startup apps tab, select a program you do not need at sign-in, and select Disable. It will stop launching at boot, and you can enable it again later from the same place.
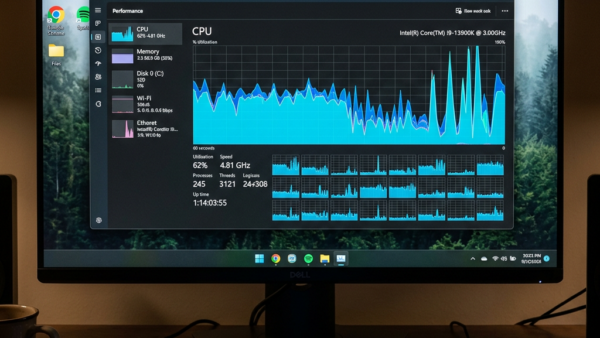
- Open the Performance tab to see overall CPU, memory, and disk graphs. A disk sitting near 100% on a mechanical drive, or memory almost full, tells you where the bottleneck is.
For a cramped drive, open Settings System Storage and see what is using the space. Aim to keep at least 15 to 20 percent of the system drive free. For drivers, open Settings Windows Update Advanced options Optional updates and check Driver updates. Install what is listed, then restart if Windows asks. Your PC maker's support site is the other good source, especially for graphics and chipset drivers.
How can I improve my PC's battery life?
Stretching out battery life requires trimming power draws like Bluetooth radios and excessive screen brightness. Windows 11 also includes an integrated Battery Saver mode to curb background drain.
- Open Settings System Display and lower the Brightness slider. The screen is usually the biggest power draw on a laptop.
- Open Settings Bluetooth & devices and switch Bluetooth to Off if you are not using any wireless accessories.
- Open Settings System Power & battery and find the battery saver option. Select Turn on now. The battery icon in the taskbar gets a small leaf, and Windows reduces background activity and dims the screen.
- In the same section, set the option to turn it on automatically at a battery percentage of your choice, such as 20%.
Newer builds of Windows 11 (version 24H2 and later) call this feature Energy saver instead of Battery Saver. It works the same way, and it also appears on desktop PCs that have no battery. Battery saver switches itself off when you plug in or charge past its threshold. You can also turn it off by hand at any time.
What is Windows Search Indexing and should I disable it?
What is Windows Search Indexing and should I disable it? Windows Search Indexing (a background service that catalogs your files) helps searches return results instantly. Disabling the feature frees up hardware resources, though file searches take significantly longer. Managing these preferences happens inside Settings Search Advanced search
On current Windows 11 builds, this page is usually found at Settings Privacy & security Searching Windows. Use whichever path your version shows.
- Open the Searching Windows page. Under Find my files you will see Classic and Enhanced. Classic indexes only your user folders, such as Documents, Pictures, and Music, and Enhanced indexes the whole PC. Classic is lighter and is the better choice on a slow machine.
- Scroll down and select Advanced indexing options. The Indexing Options window opens.
- Select Modify to choose which folders are indexed. Untick locations you never search, such as large archive folders.
- Select OK. The index updates in the background, and the first rebuild may briefly use extra CPU and disk.
Should you disable it? Usually not. On an SSD with a recent CPU, indexing barely registers, and without it every search must read through your files. It may be worth trimming on an older PC with a hard drive or little RAM. Narrowing the indexed folders gives you most of the saving and still lets searches stay fast. To undo, add the folders back in the Indexing Options window.
How do I know if my PC supports Modern Standby?
Confirm Modern Standby capability by opening Command Prompt and typing 'powercfg /a'. Review the generated output for 'Standby (S0 Low Power Idle) Network Connected' or matching power states.
- Select Start, type Command Prompt, and open it. A black window with a text prompt appears.
- Type 'powercfg /a' and press Enter. The window lists the sleep states your PC supports, and the ones it does not, with reasons.
- Look under the available states for 'Standby (S0 Low Power Idle) Network Connected'. If it is there, your PC supports Modern Standby. It sleeps like a phone, wakes instantly, and can keep the network alive in the background.
If you instead see an older state such as Standby (S3), your hardware uses traditional sleep. That is normal on many desktops and older laptops, and it is not a fault. The command only reads information and changes nothing, so you can run it as often as you like. If it complains about permissions, close the window and reopen Command Prompt with Run as administrator.
Was this guide helpful?

About the Author
Richard
Tech Writer, IT Professional
Richard is a writer at Geek Rewind who turns complex IT tasks into clear, step-by-step guides. He draws on years of hands-on experience in system administration and enterprise IT operations, focusing on Windows, Linux and WordPress: the problems people actually run into, and the fixes that work. His server and WordPress guides come from systems he runs himself. Richard builds and maintains the platform behind Geek Rewind, from its Ubuntu servers and Nginx configuration to its custom WordPress plugins. Many new tutorials start with readers' questions, and he's always glad to answer them in the comments.
No comments yet — be the first to share your thoughts!