How to Pause Search Indexing in Windows 11

Pausing search indexing in Windows 11 stops your PC from cataloging files for up to 15 minutes. That frees up CPU and disk activity for demanding tasks. Search indexing is the background process that builds a database of your files, emails, and apps so you can find them quickly.
After you set up Windows or install a major update, indexing runs automatically in the background. Windows normally slows it down while you are using the computer, but you can also pause it by hand when you need the extra power. You need to be signed in to an administrator account to change this setting.
Open Settings , navigate to Privacy & security, then Search, and click Advanced indexing options. If indexing is running, select the Pause button. Indexing will stop for 15 minutes before resuming automatically.
How to Pause Search Indexing
- Press Win+I to open Settings. The Settings window opens on the System page.

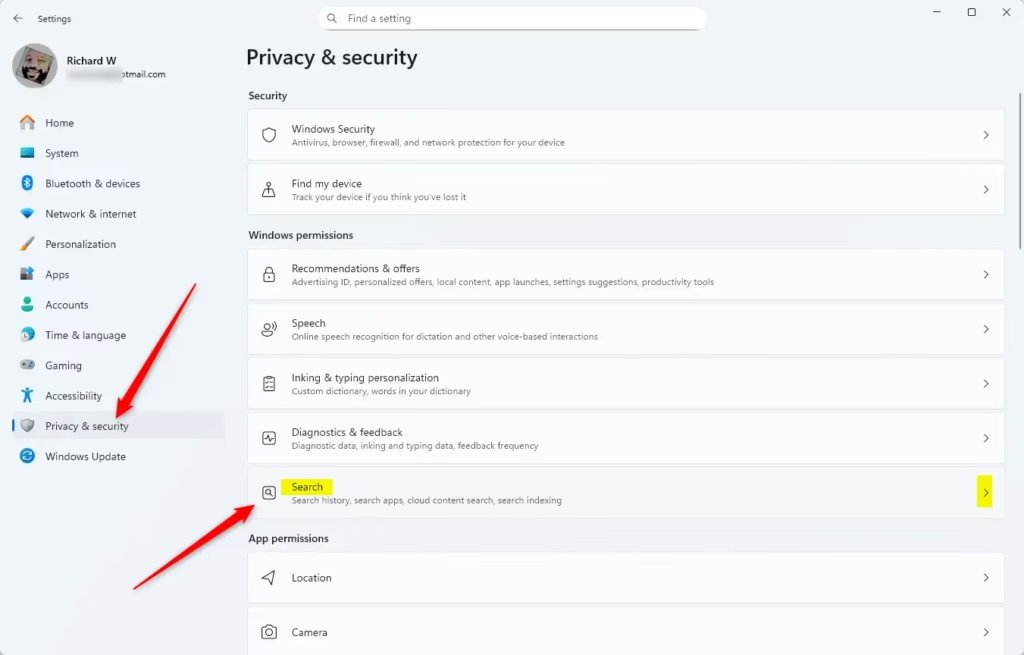
Windows 11 Start menu with Settings gear icon highlighted. - Click Privacy & security in the left-hand menu. On the right side, click Search. On some Windows 11 builds this page is labeled Searching Windows. It is the same page. Open Search settings
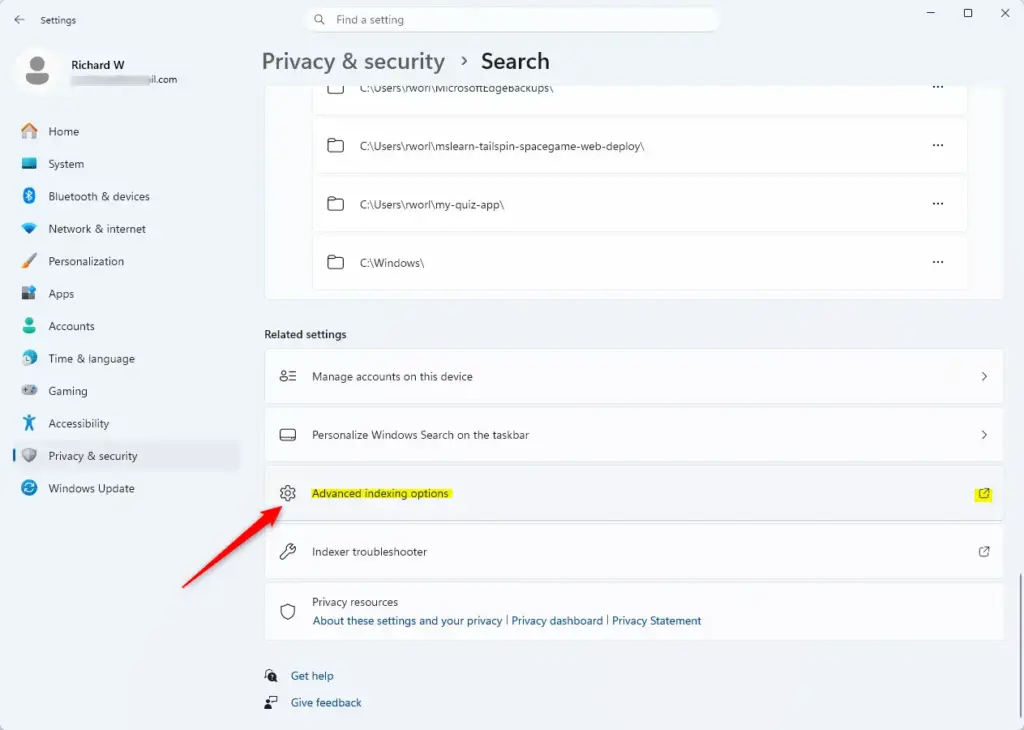
Windows 11 Search bar with the 'Search' tile highlighted. - Scroll to the Related settings section and click Advanced indexing options. The Indexing Options window opens and shows how many items have been indexed.
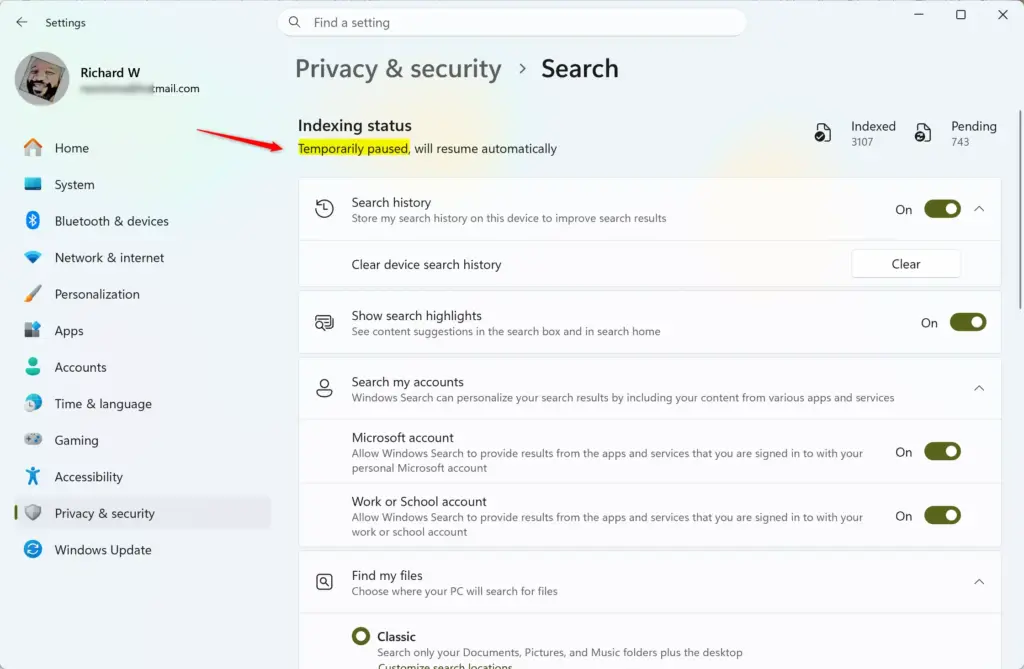
Windows 11 advanced indexing options for file types. - Click Pause. The button only appears while indexing is running. If you don’t see it, indexing has already finished or is idle, so there is nothing to pause. After you click it, the status should show that indexing is paused.
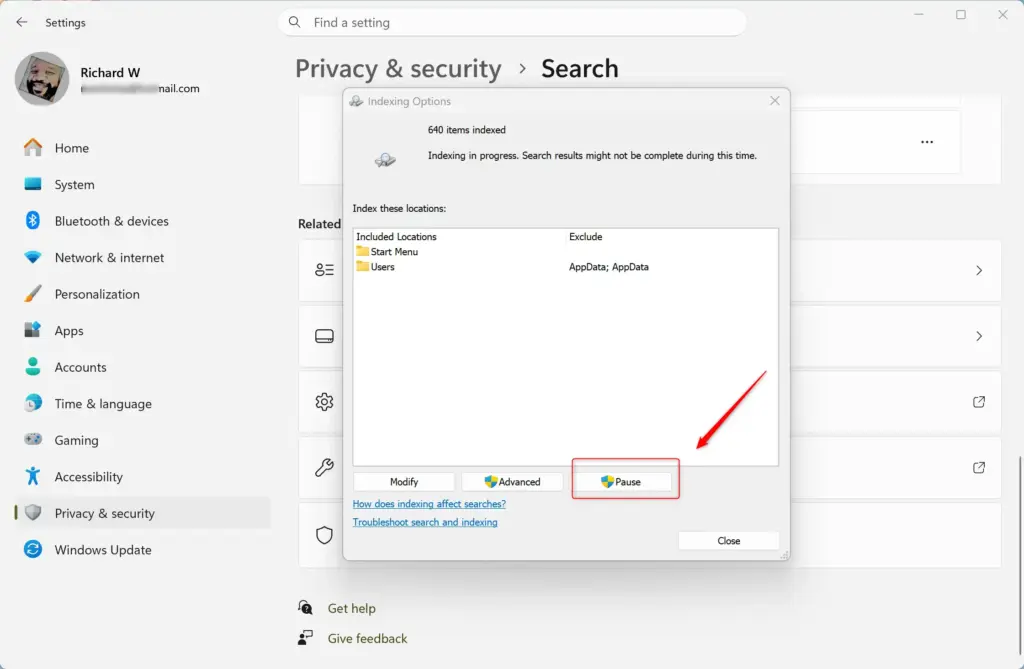
The pause lasts 15 minutes. After that, Windows starts indexing again on its own. This is useful when your computer is running slow, a game or video export needs every bit of performance, or a disk is busy and you want it to settle. Pausing doesn’t delete anything. Search still works while indexing is paused, but results for new or changed files may be missing until indexing catches up.
How to Resume Indexing Sooner
You don’t have to wait for the 15 minutes to run out. You can start indexing again sooner in two ways: restart the Windows Search service, or rebuild the whole index. Which one you pick depends on whether you want to carry on or start over.
- Restart the Windows Search service: This makes indexing continue from where it left off. It is the quicker option and the right one if you simply paused to free up resources. You can restart the service from the Services app, where it is listed as Windows Search.
- Rebuild the index: This starts the indexing process over from the beginning. Use it if search results are missing or wrong. In the Indexing Options window, click Advanced, then Rebuild. A rebuild can take a long time on a large drive, and search results will be incomplete until it finishes. It also uses more resources than the pause saved, so don’t start it when you need the PC for heavy work.
References:
Summary
Temporarily pausing Windows 11 search indexing is easy from the Settings app, especially when indexing is using too many resources. The pause lasts 15 minutes, and then indexing starts again by itself. If you want it back sooner, restart the Windows Search service to pick up where it left off, or rebuild the index to start from scratch.
Was this guide helpful?

About the Author
Richard
Tech Writer, IT Professional
Richard is a writer at Geek Rewind who turns complex IT tasks into clear, step-by-step guides. He draws on years of hands-on experience in system administration and enterprise IT operations, focusing on Windows, Linux and WordPress: the problems people actually run into, and the fixes that work. His server and WordPress guides come from systems he runs himself. Richard builds and maintains the platform behind Geek Rewind, from its Ubuntu servers and Nginx configuration to its custom WordPress plugins. Many new tutorials start with readers' questions, and he's always glad to answer them in the comments.



No comments yet — be the first to share your thoughts!