How to Check Search Indexing Status in Windows 11

Checking search indexing status in Windows 11 shows if your computer is ready to find files quickly.
Windows Search Indexing is a background feature that creates a list of your files, making searches happen almost instantly. It’s like an index in a book, but for your entire computer.
If this list is not up-to-date or is broken, your Windows 11 searches might be slow or not find things correctly. This happened to many users after the Windows 11 22H2 update.
Knowing the status helps you figure out if Windows is still building the list or if there’s another problem. It ensures you can find what you need without waiting.
You can check Windows 11 search indexing status in Settings under Privacy & security > Searching. Alternatively, open Indexing Options from the Control Panel for more detail on indexed locations and file counts.
Performance Tuning and Impact
Windows search indexing uses your computer’s power, but how much it uses depends on whether you have a fast Solid State Drive (SSD) or a slower Hard Disk Drive (HDD). SSDs usually require less power for indexing, meaning they affect your computer’s speed less than HDDs.
How to Check the Windows Search Service
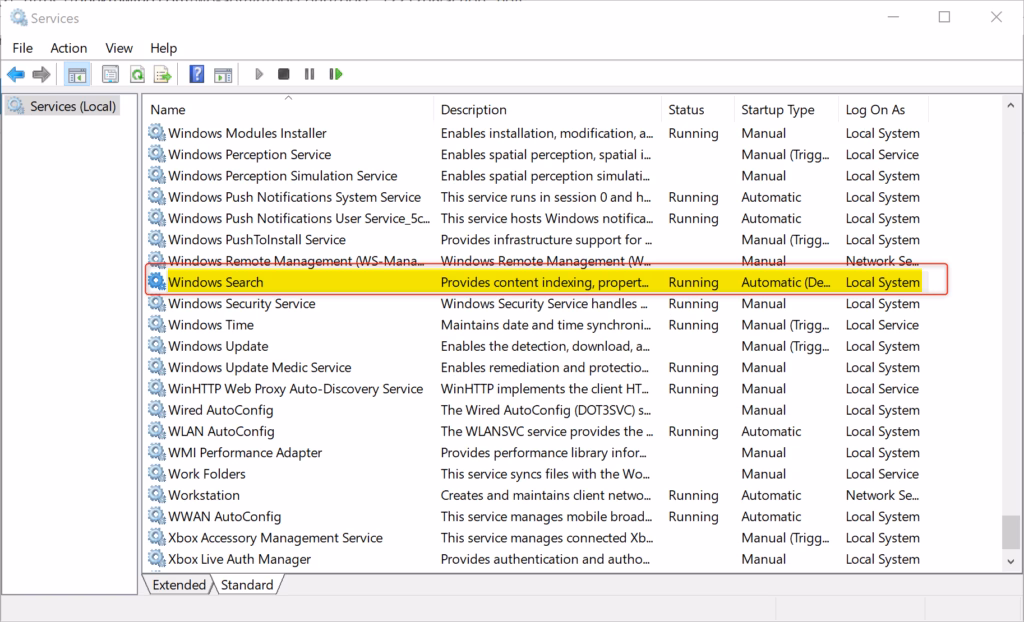
The Windows Search service is essential for Windows 11’s search capabilities. If Windows Search isn’t working, this service might be stopped. You’ll need administrator permission to check its status. Restarting this service often resolves search issues, so knowing how to check it is key for troubleshooting.
- Press Windows key + R, type services.msc, and press Enter.
- Scroll down to find Windows Search.
- Check the Status column. It should say Running.
- If it is not running, right-click it and select Start.
Option 1Check Status in Settings
You can check your Windows search indexing status in the Settings app to see how many files are ready for fast searching. This quick check shows you the current state of your search index, helping you understand if it’s up to date.
- Open Settings by pressing Windows key + I.
- Click Privacy & security on the left.
- Click Searching on the right.

The Windows 11 Search Indexing status appears at the top of the Indexing Options window, telling you how many items are currently indexed. This count helps you understand the scope of your searchable files.

Option 2Using Indexing Options
For more detailed control over your search index, you can use the classic Indexing Options tool. This tool shows you exactly which folders Windows is monitoring for searches and the total number of files it has indexed.
- Open the Control Panel.
- Click Indexing Options.

The Windows 11 Search Indexing Status window clearly lists the folders the search function actively monitors, along with the exact count of files in the search index database. This information allows you to understand which locations Windows 11 searches for information and how large the search data collection has become, with over 50,000 files often found in a typical installation.

Advanced Troubleshooting
- Open Indexing Options.
- Click the Advanced button.
- Click Rebuild under the Troubleshooting section.
How much disk space does the search index use?
The index database size depends on how many files you have. For most users, it takes up between 500MB and 2GB of disk space. If you have millions of files, the database can grow larger. You can check the location of this database in the Advanced Indexing Options menu.
Why does indexing consume high CPU usage?
SearchIndexer.exe uses CPU power to read and catalog your files. If you recently added a large number of files, the system works hard to update the index. This is normal behavior. If it stays high for days, it may indicate a corrupted index that needs to be rebuilt.
Summary
Windows search indexing is key for finding files quickly on your PC.
Note: Administrative privileges are required for changing index locations or rebuilding the database.
Was this guide helpful?

About the Author
Richard
Tech Writer, IT Professional
Richard, a writer for Geek Rewind, is a tech enthusiast who loves breaking down complex IT topics into simple, easy-to-understand ideas. With years of hands-on experience in system administration and enterprise IT operations, he’s developed a knack for offering practical tips and solutions. Richard aims to make technology more accessible and actionable. He's deeply committed to the Geek Rewind community, always ready to answer questions and engage in discussions.


No comments yet — be the first to share your thoughts!