How to Schedule Automatic Wake Time in Windows 11
You can schedule Windows 11 to automatically wake your PC at a specific time so it’s ready when you need it.
This feature allows your computer to exit modern standby or hibernation on its own, rather than waiting for your manual input.
Setting an automatic wake time is especially useful for remote access or ensuring your system is fully booted and waiting the moment you start your workday.
For example, you might schedule your PC to wake up at 7:00 AM every weekday so you can immediately connect to it for remote work.
Once configured, your computer will independently transition from sleep or hibernation at your chosen time, preparing itself for immediate use or to run scheduled tasks.
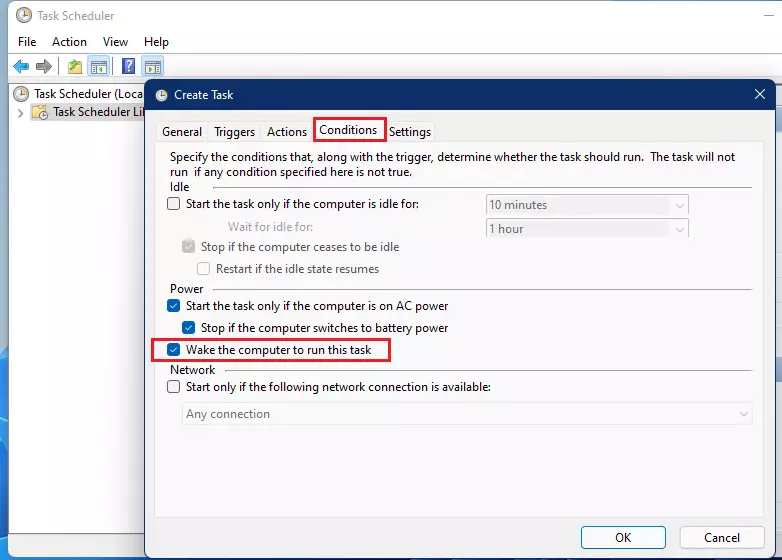
Use Task Scheduler to create a task. Name it, set it to run when logged off with highest privileges, and configure triggers for your desired wake time. In the Conditions tab, check “Wake the computer to run this task.
How to wake a PC at a specific time
You can schedule your Windows 11 PC to wake up automatically at a specific time using the Task Scheduler. This lets you set your computer to turn on and start tasks even when it’s asleep, making sure important jobs run on time without you needing to be there.
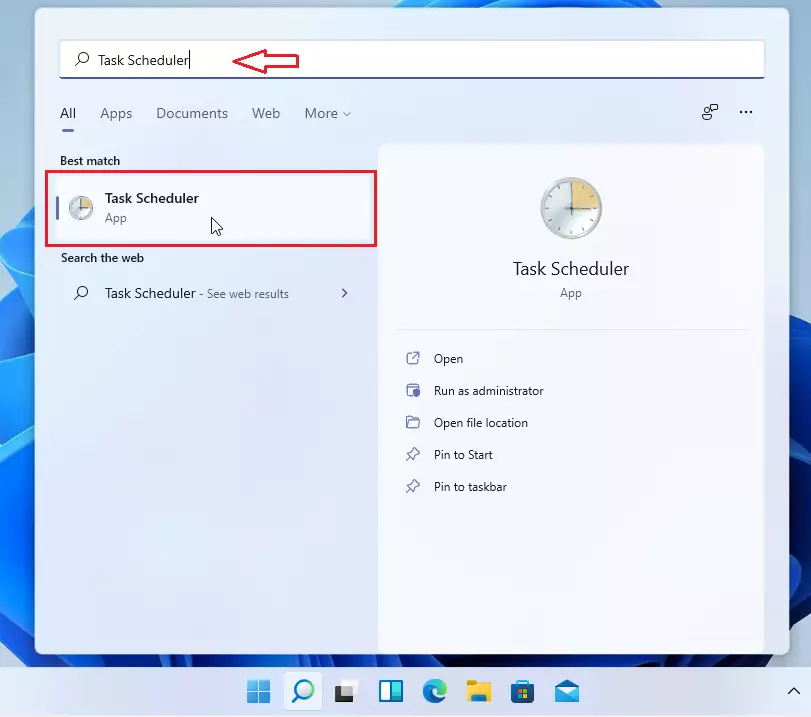
First, open the Task Scheduler in Windows. In Windows 11, go to the Start Menu, then search for and open the Task Scheduler app.
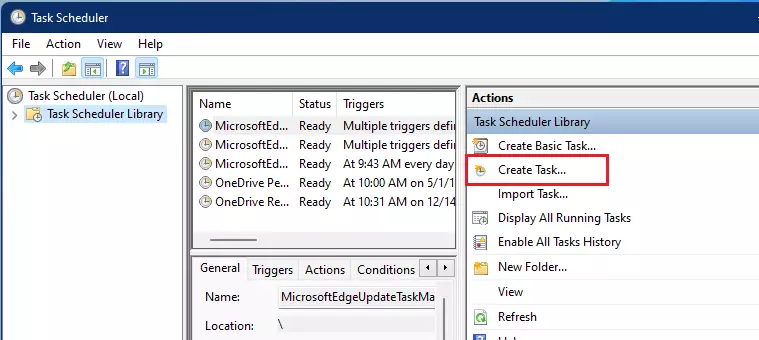
In the Task Scheduler, click on Task Scheduler Library. Then, on the right side, click Create Task.
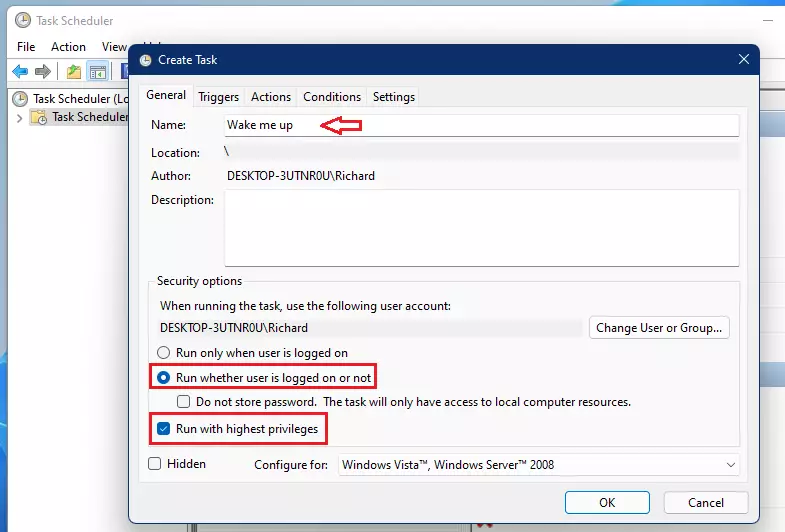
On the General tab, name your task something like “Wake me up.” You’ll want to select ‘Run whether user is logged on or not.’ Make sure to also check the box for ‘Run with highest privileges’ (this usually requires administrator rights).
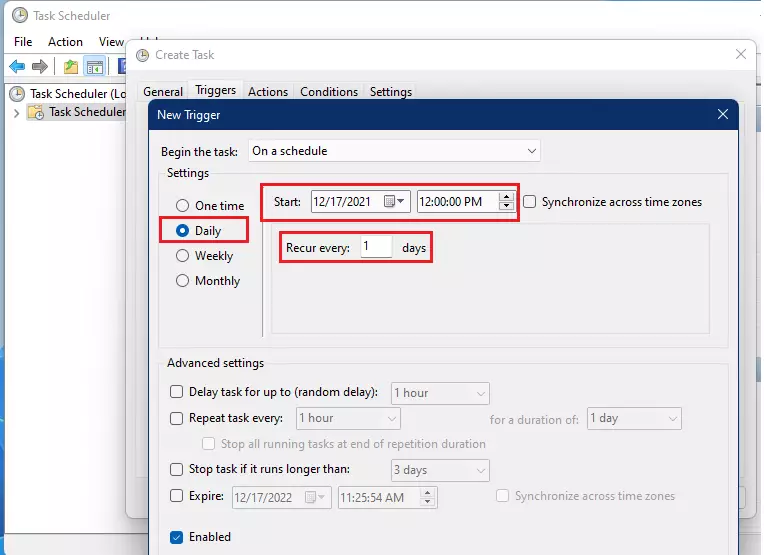
Go to the Triggers tab and click New. Choose the time you want the computer to wake up. You can pick a one-time event or a recurring schedule.
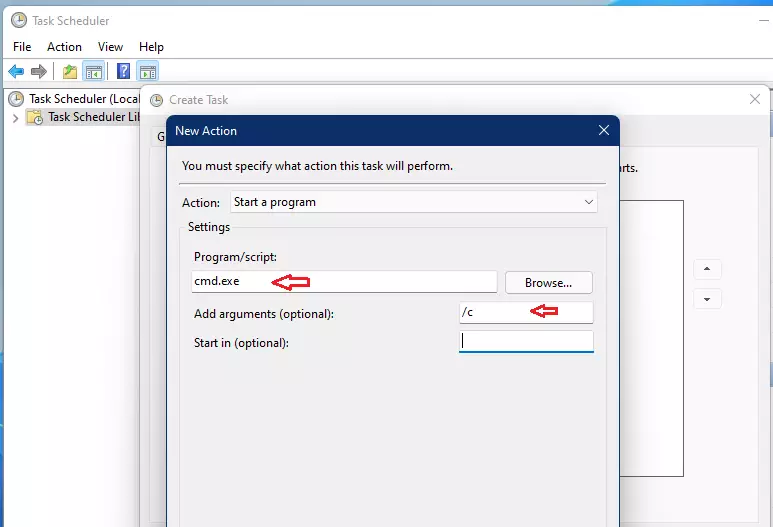
Go to the Actions tab and click New. To get this going, set the program to run C:\Windows\System32\cmd.exe and add /c in the arguments box. This action will open and close the command window in an instant.
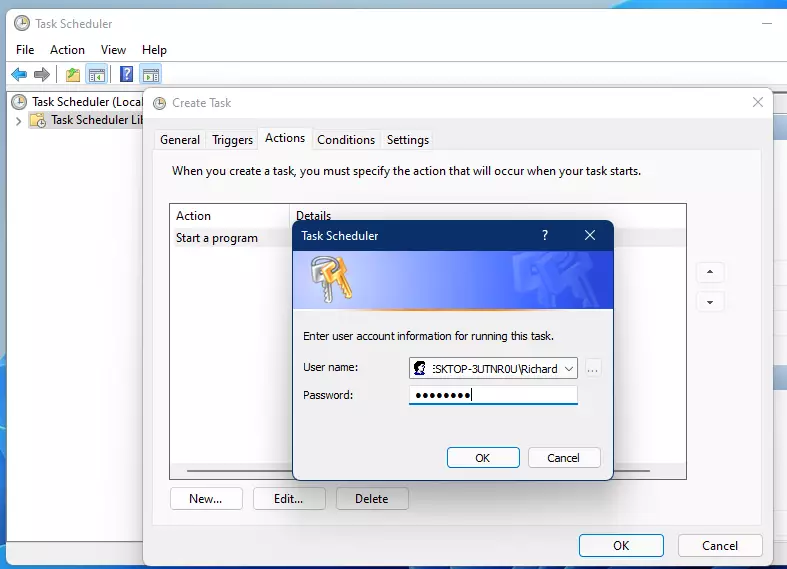
Save your task. You will be asked to enter your system password to confirm the changes.
BIOS/UEFI Wake Configuration
Sometimes Windows settings aren’t enough to schedule wake time, so you might need to check your computer’s BIOS or UEFI settings.
Troubleshooting Power Options
If your PC isn’t waking up when scheduled, checking your Windows 11 power options is a good next step, as settings like Fast Startup can sometimes interfere.
How to turn on Wake Timers
To allow your Windows 11 PC to wake up automatically from Sleep or hibernation, you need to turn on wake timers in your power settings. This setting ensures that scheduled tasks, like waking up your computer at a specific time, can actually happen.
Search for and open the Control Panel, then go to Hardware and Sound > Power Options. Click Change plan settings next to your active plan, then select Change advanced power settings.
Expand the Sleep section, then expand Allow wake timers and set both On battery and Plugged in to Enable.
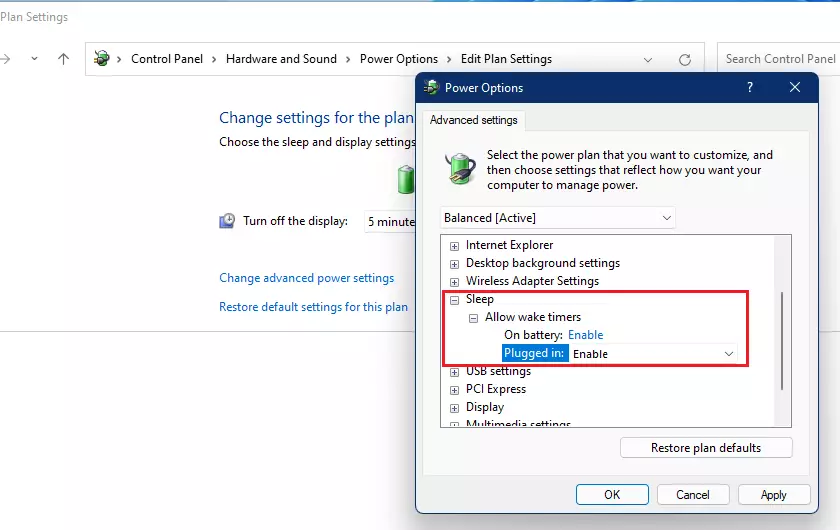
Click OK to save your settings. For more details, refer to official Microsoft documentation on power management.
Summary
By using the Task Scheduler, configuring BIOS wake alarms, and enabling Wake Timers in your power settings, you can force your Windows 11 computer to wake up at any time. This is a great way to ensure your PC is ready for remote access or daily tasks without manual input.
Why does my PC not wake up even with Task Scheduler enabled?
This often happens because Windows Wake Timers are disabled in your Power Options. Additionally, check your BIOS settings to ensure the RTC Alarm is active. Finally, ensure that no background processes are preventing the system from transitioning out of sleep mode by checking the powercfg -requests command.
Do I need to change BIOS settings to wake my 🪟 Windows 11 PC?
For most modern PCs, Windows settings are sufficient. However, if your computer fails to wake, you may need to enter your BIOS/UEFI menu and enable the “Resume by RTC Alarm” feature. This feature allows the motherboard to trigger a wake event at a specific hardware-level time.
What is the difference between ‘Wake Timers’ and ‘Fast Startup’?
Wake Timers are specific settings that allow Windows to wake the PC for scheduled tasks. Fast Startup is a hybrid shutdown feature that saves the system state to a file to boot faster. Fast Startup can sometimes interfere with wake timers, so disabling it is recommended for reliable scheduling.
Was this guide helpful?

About the Author
Richard
Tech Writer, IT Professional
Richard, a writer for Geek Rewind, is a tech enthusiast who loves breaking down complex IT topics into simple, easy-to-understand ideas. With years of hands-on experience in system administration and enterprise IT operations, he’s developed a knack for offering practical tips and solutions. Richard aims to make technology more accessible and actionable. He's deeply committed to the Geek Rewind community, always ready to answer questions and engage in discussions.


completely useless, my problem is that even though I move or press the left button on the mouse, it doesn’t start