Windows 11 Settings app open on a Privacy and security page, showing rows of on/off toggle switches on a laptop screen.
Before you start
🔢 14 steps
🛡 Needs administrator rights
Privacy settings in Windows 11 live in Settings›Privacy & security. That page controls what Windows collects about you, which apps can use your camera, microphone and location, and whether Microsoft can show you personalized ads. The quickest route is to press Win+I (the Win and the I key together), then select Privacy & security, and work through each page.
Each page holds a set of toggles (on/off switches). Changes apply the moment you flip a toggle, and none of them need a restart. Below are the pages most people change, what each toggle does, and how to undo a change.
⚡ Quick Answer
Open Settings with Win+I, select Privacy & security, then work through its pages: General, Speech, Diagnostics & feedback, Search permissions and the App permissions pages. Turn off toggles such as Let apps show me personalized ads by using my advertising ID. Changes apply immediately, and no restart is needed.
Advertisement
Before you start
The Settings app controls what happens on this PC. Data that Microsoft already stores in your account is managed on the Microsoft privacy dashboard at account.microsoft.com/privacy, not in Settings. Examples are browsing and search history tied to a Microsoft account. Sign in there with the same account you use on the PC.
Check these two points before you change anything:
Wording varies by build, which means the specific Windows 11 version you have installed. Microsoft renames and moves privacy toggles between Windows 11 updates. If a label below differs slightly from yours, look for the toggle with the closest name on the same page.
Some switches need an administrator account, which is a Windows account allowed to change settings for the whole PC. App-level toggles apply to your own account. Switches that affect the whole device, such as the main Location services toggle, may ask for administrator permission or appear greyed out on a standard account.
The section below lists the toggles most people change, and what each one does.
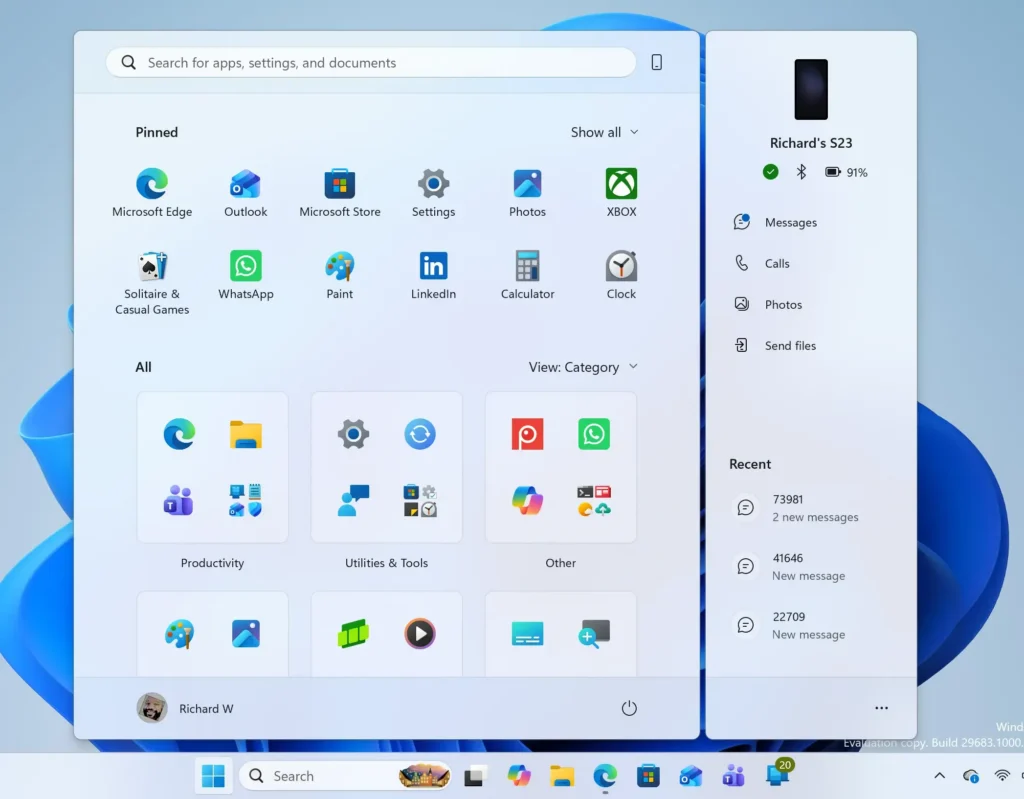
Open Settings⚙️. Press Win+I, or right-click the Start button⊞ and choose Settings. The Settings⚙️ window opens with a list of categories on the left. Windows 11 Start menu search panel for opening OpenSSH Client settings
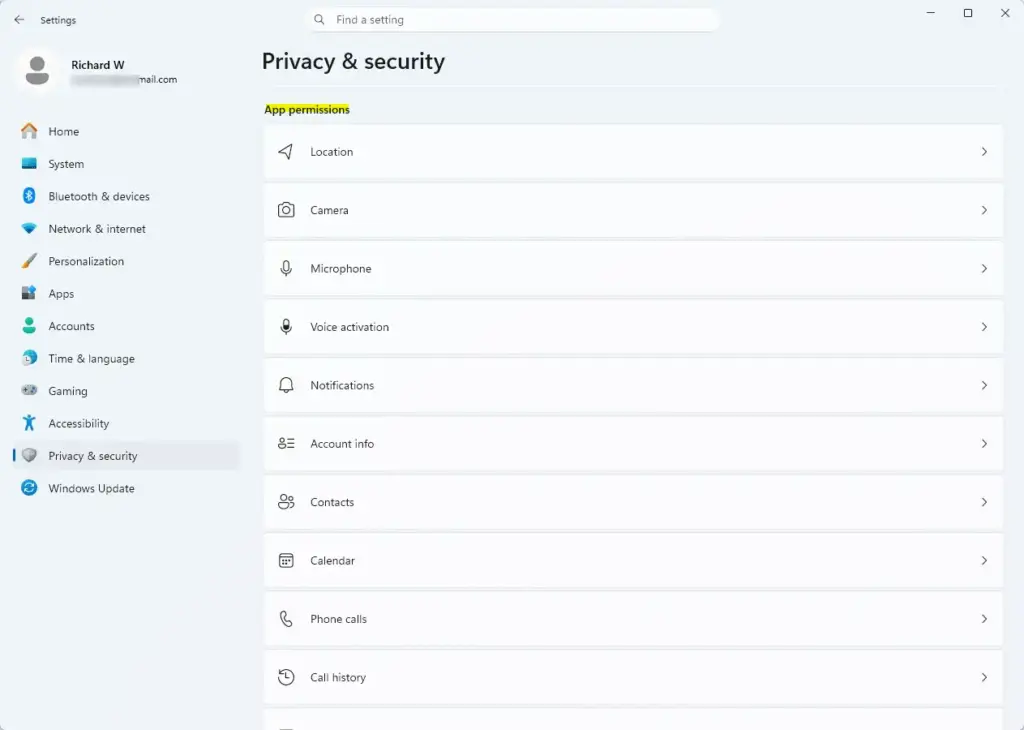
Select Privacy & security. It sits in the left-hand list. The right side now shows three groups: Security, Windows permissions and App permissions.
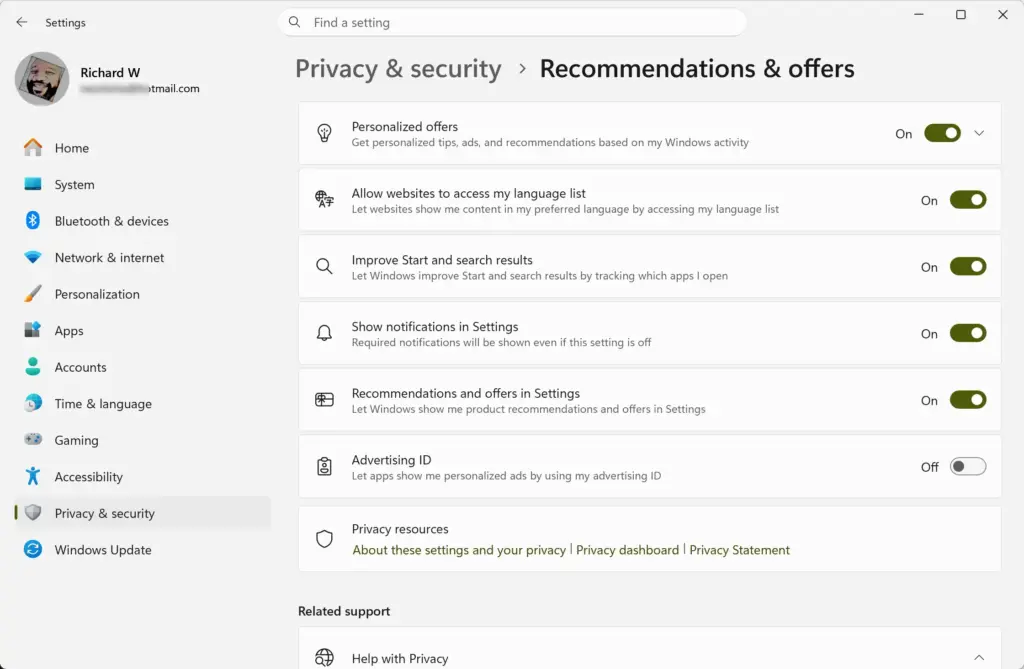
Select General. It is the first item under Windows permissions. The page shows a short list of toggles about advertising, language and suggested content. Settings › Privacy & security › Recommendations & offers
Turn off the advertising ID toggle. It reads Let apps show me personalized ads by using my advertising ID. The toggle changes to Off, and apps can no longer use a per-user ID to tailor ads.
Review the remaining General toggles. Turn off the ones you do not want, such as Show me suggested content in the Settings⚙️ app. The exact list depends on your Windows 11 version.
Return to Privacy & security. Select Privacy & security in the breadcrumb at the top of the page, or press Alt+← arrow.
Select Speech. Turn off Online speech recognition if you do not use voice typing or similar features. Windows stops sending your voice clips to Microsoft for processing.
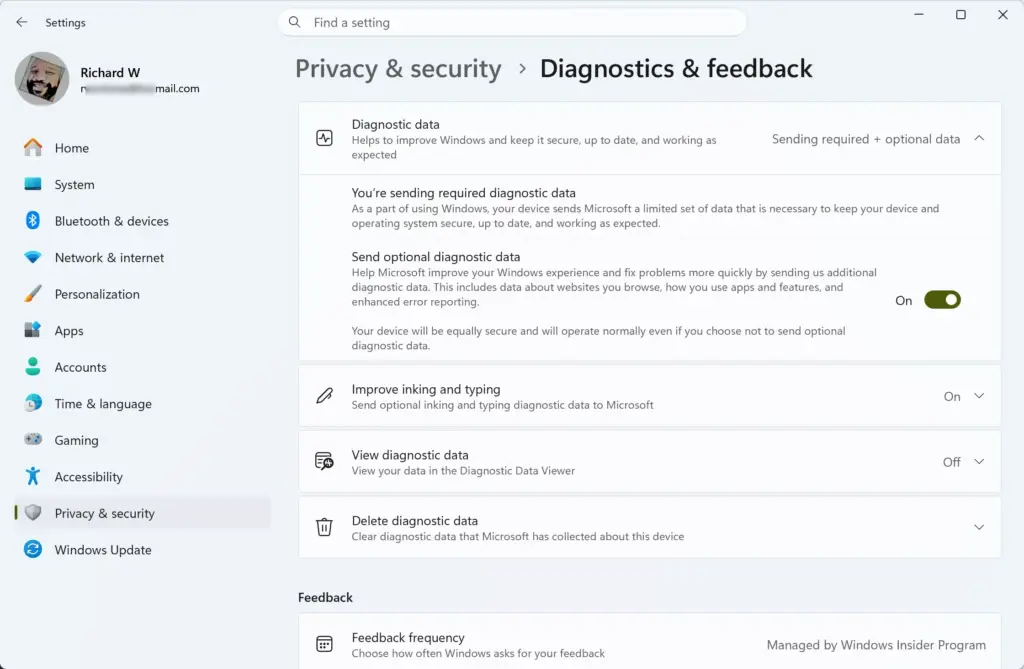
Go back and select Diagnostics & feedback. This page controls how much usage data Windows sends to Microsoft. Settings › Privacy & security › Diagnostics & feedback
Turn off Send optional diagnostic data. Expand the Diagnostic data section if the toggle is hidden. Required diagnostic data cannot be switched off.
Turn off Tailored experiences. This stops Windows from using your diagnostic data to suggest tips and offers. Scroll down the same page to find it.
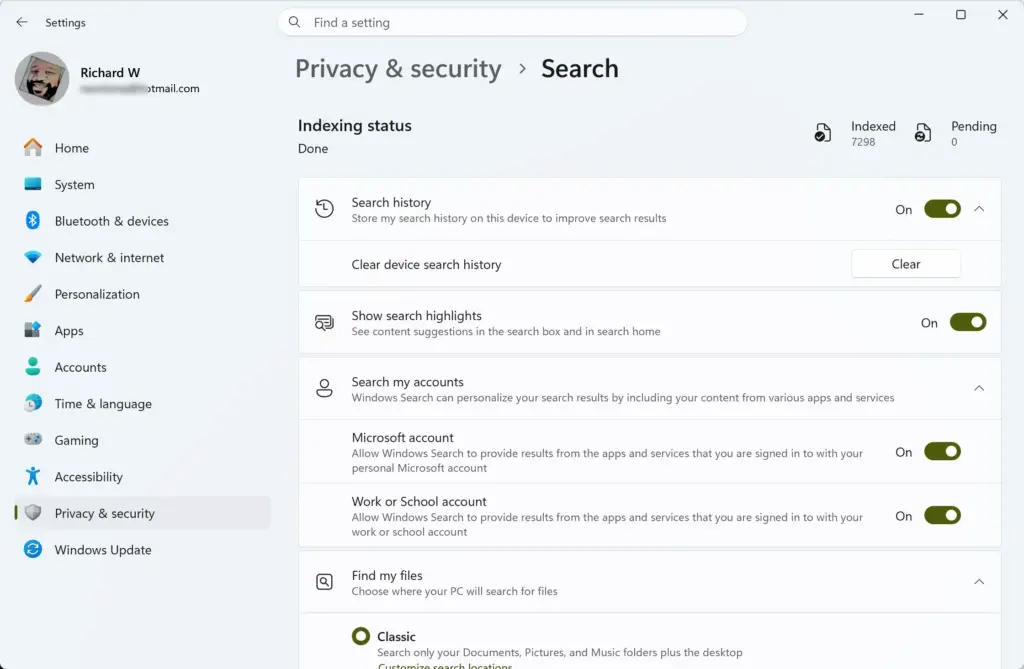
Go back and select Search permissions. Choose your SafeSearch level and turn off Cloud content search for any Settings › Privacy & security › Searchaccount listed. Select Clear device search history if you want to remove stored searches.
Go back and select an App permissions page. Start with Camera, Microphone or Location. Each page lists the apps that have asked for access. Settings › Privacy & security › App permissions
Turn off the toggle next to any app you do not trust. The app keeps working but loses access to that device or data. Some apps ask again the next time they need it.
Close Settings. No restart is needed. Apps that were already running may need to be closed and reopened before the new permission takes effect.
What each Windows permissions page controls
The Windows permissions group covers what Windows itself collects and shares. The following pages are the ones most readers change.
General
General holds the advertising ID and a few related toggles. The advertising ID is a unique number Windows assigns to your account so apps can show ads based on your activity. Turning it off does not remove ads. It makes them less targeted.
Speech contains one main toggle, Online speech recognition. When it is on, Windows sends what you say to Microsoft’s online servers, known as the cloud, to improve accuracy. When it is off, voice typing and some other speech features may stop working or switch to a limited mode that runs on the PC itself. Turn it back on if dictation stops responding.
Diagnostics & feedback
Diagnostic data is information about how Windows and your apps behave, including errors and crashes. Windows always sends a minimum amount, called required diagnostic data. Everything beyond that is optional and covered by Send optional diagnostic data.
The page also contains View diagnostic data, which lets you inspect what Windows collects through the Diagnostic Data Viewer app. It also has Delete diagnostic data, which removes the data Microsoft holds for this device. Deleting does not stop new data from being collected. Switching off the optional toggle does that.
Search permissions
This page controls what Windows Search can read and remember. Cloud content search lets search include results from your Microsoft or work account. Search history on this device stores your past searches locally. Turn either off if you share the PC.
A related page, Searching Windows, controls which files Windows indexes (scans so it can find them quickly). It mainly affects speed and how well you can find things, rather than privacy, so change it only if you have a reason.
Activity history
Some Windows 11 builds include an Activity history page under Windows permissions. Newer builds have removed or changed that page. If you do not see it in your list, nothing is wrong, and there is nothing to configure there.
What each App permissions page controls
App permissions decide which installed apps can reach hardware and personal data. Each page follows the same pattern: a main switch for the whole category (the master toggle), then a per-app list. Turning off the master toggle blocks every app in that category, which is the faster option when you rarely use the feature.
Camera and microphone
On the Camera and Microphone pages, switch off the master toggle to block everything, or leave it on and disable individual apps. Both pages also include a toggle for desktop apps, meaning traditional programs that you install outside the Microsoft Store.
Blocking access can cause a video call app to show a black picture or report that no microphone is found. If that happens, return to the page and re-enable the app. For more detail on the camera page, see the guide to changing app permissions for webcam access.
Location
The Location page has a master toggle called Location services and a second toggle, Let apps access your location. You may need administrator permission to change the main Location services toggle for everyone on the PC.
Further down the list are pages for contacts, calendar, email, messaging, notifications, documents, pictures, videos and file system access. They work the same way: a master toggle plus a list of apps. The names and number of pages depend on your Windows 11 version, so scroll the whole App permissions list once to see what your build offers.
A greyed-out toggle or a banner reading Some settings are managed by your organization means a policy (a rule set by an administrator) is controlling the setting. This is common on PCs joined to a work or school account. Your administrator has locked the option, and you cannot change it from Settings.
⚠️WarningIf the PC is your own and you still see this message, check Settings > Accounts > Access work or school. A leftover work account can apply policies to the device. Removing it may restore control, but only do this if you are sure you no longer need that account.
A missing page usually means your Windows 11 build has renamed or removed it. Run Windows Update and check again, or look under a nearby page. If a toggle is greyed out without any organization message, sign in with an administrator account and try again.
Windows 11 Home and Pro show the same Privacy & security pages. The difference appears when a work or school account manages the device.
Every toggle on these pages is reversible. Return to the same page in Settings›Privacy & security and switch the toggle back to On. The change applies at once.
⚠️WarningTwo actions cannot be undone. Delete diagnostic data removes data already collected, and clearing location or search history removes stored entries. Windows begins collecting again if the related toggles stay on, but the old entries do not return.
What to do next
Check your app permissions again after you install new software, because many apps ask for camera, microphone or location access the first time you open them. A Windows feature update can also add privacy toggles, so revisit Privacy & security after a major update. For a fuller checklist that goes beyond the Settings app, work through the guide to securing Windows 11 privacy and security settings.
📬 Get new Windows tips in your inbox
One email when we publish something worth your time. We send a link to confirm. No spam, unsubscribe anytime.
Share
Have a question about this guide?
Answered by AI from this guide. Good questions may be added to this page — please don't include personal details.
Richard is a writer at Geek Rewind who turns complex IT tasks into clear, step-by-step guides. He draws on years of hands-on experience in system administration and enterprise IT operations, focusing on Windows, Linux and WordPress: the problems people actually run into, and the fixes that work.
His server and WordPress guides come from systems he runs himself. Richard builds and maintains the platform behind Geek Rewind, from its Ubuntu servers and Nginx configuration to its custom WordPress plugins.
Many new tutorials start with readers' questions, and he's always glad to answer them in the comments.



No comments yet — be the first to share your thoughts!