What to Do When Windows 11 Camera Privacy Settings Block Your Webcam Apps

Windows 11 camera privacy settings block webcam apps when camera permission is turned off in Settings. The privacy controls work as a gatekeeper. They stop programs from using your video feed unless you have allowed them to.
When an app tries to open your camera and fails, check the privacy switches first. They are the most common cause, and the fix takes under a minute. You usually do not need to reinstall camera drivers or buy new hardware. The steps below are the same on Windows 11 Home and Pro.
To fix Windows 11 camera privacy settings blocking your webcam apps, open Settings with Win+I, go to Privacy & security Camera, and turn On both the Camera access toggle and Let apps access your camera toggle. Then find your specific app in the list below and turn On its individual toggle.
How to Turn on Global Camera Access in 🪟 Windows 11
The global camera switch is the master control. If it is off, every webcam app on the computer stops working, no matter how its individual permission is set. Check this switch before you look at anything else.
Follow these steps to check and enable global camera access:
- Click the Start button on the taskbar and select Settings. You can also press Win+I to open it directly. The Settings window opens.

Taskbar - Click Privacy & security in the left-hand menu. The privacy categories appear on the right.
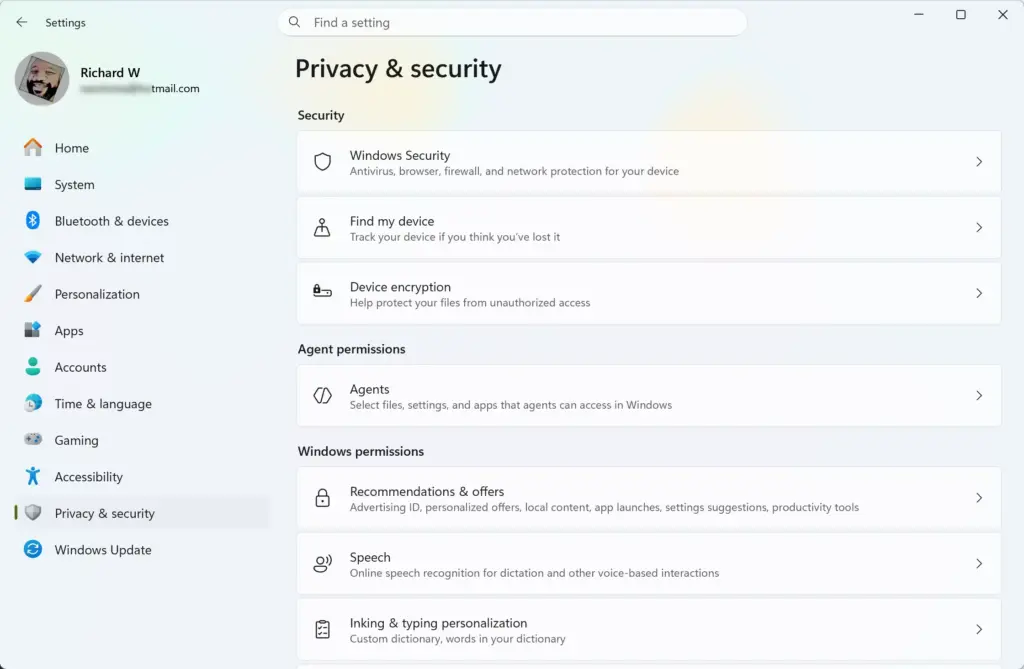
Settings › Privacy & security - Scroll down the right side to the App permissions section and click Camera. The camera privacy page opens.
- Find Camera access near the top of the page. If the toggle is Off, click it so it shows On.
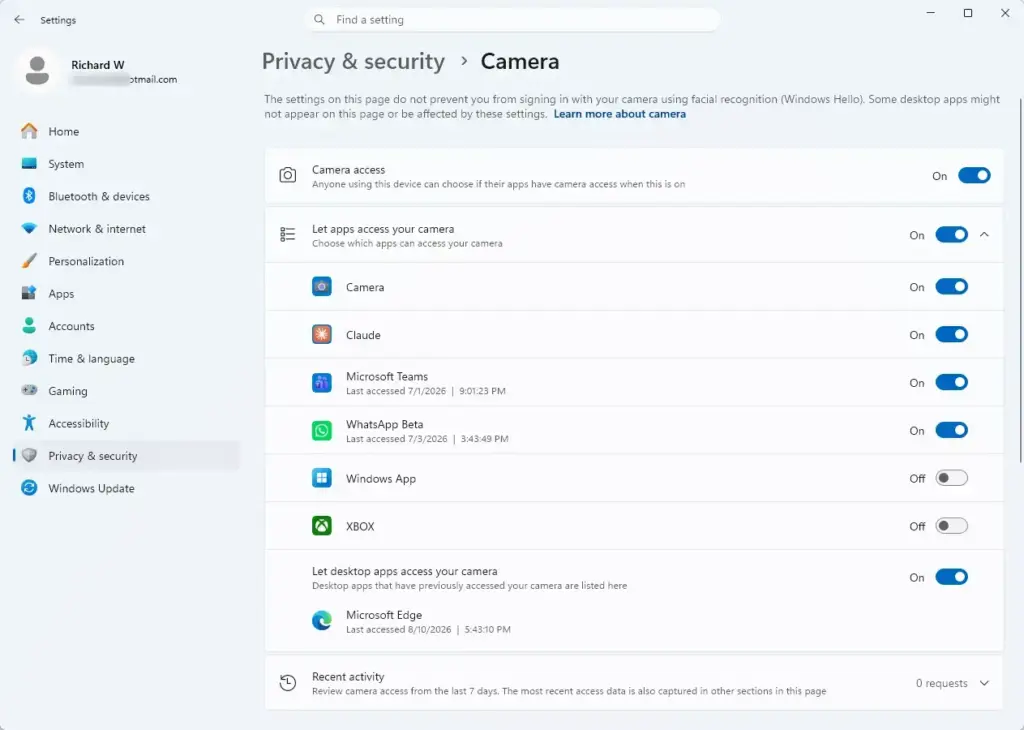
Settings › Privacy & security › Camera - Find Let apps access your camera just below it. Make sure this toggle is also On. The list of individual apps below it becomes available once it is on.
- Close and reopen the app that could not see your webcam. A restart of Windows is not normally needed.
An administrator has set a policy that locks them, and you will need to ask your IT team. To undo the change later, return to this page and switch the toggles Off.
How to Control Which Apps Can Use the Camera
Once global access is on, you can choose which apps are allowed to use the camera. If one video chat app or recording tool fails while others work, its own switch is probably off in the camera privacy list. The steps below turn it on.
- Press Windows Key + I to open Settings.

Settings - Click Privacy & security in the left menu.
- Under App permissions, select Camera.
- Make sure Let apps access your camera is On, then scroll down past the global switches. You will see a long list of applications. It includes built-in Windows programs and software you installed yourself.
- Find the app that is having trouble reaching your webcam and look at the toggle next to its name.
- Click the toggle so it shows On. Then reopen the app and test the camera.
If your desktop program is not in the list, do not worry. Classic desktop apps are controlled by a separate master switch. Scroll to the bottom of the page, find Let desktop apps access your camera, and make sure it is On. Desktop apps are not listed one by one for the on/off choice, so this single switch covers all of them.
To block an app again later, return to this list and turn its toggle Off.
Manage Connected Cameras and Hardware Settings
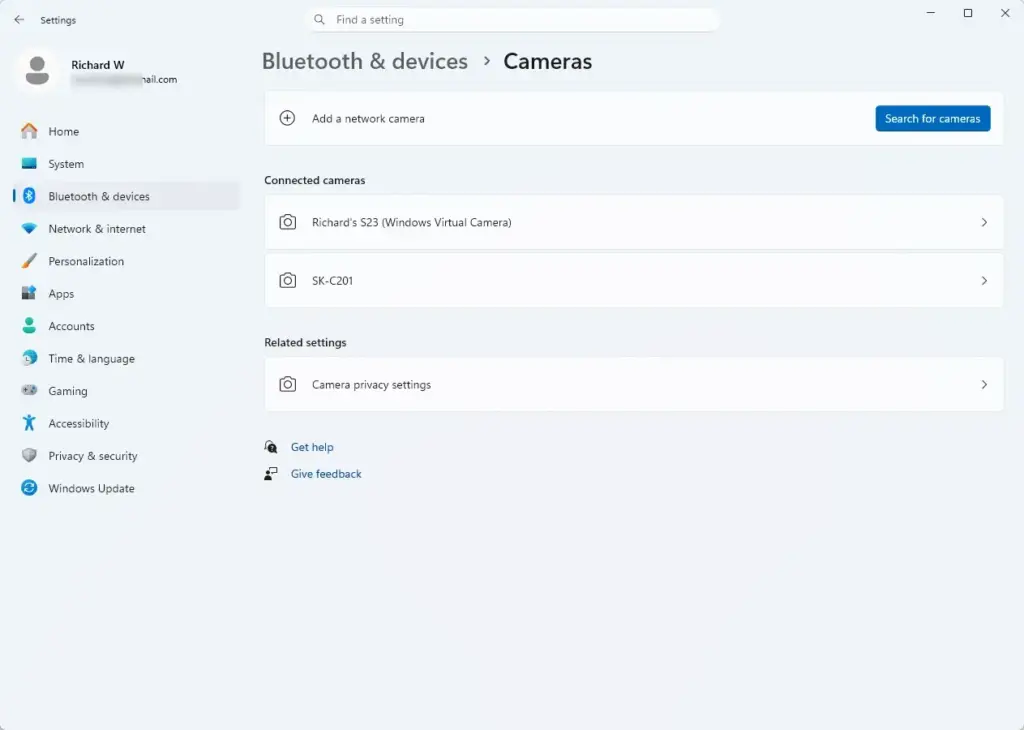
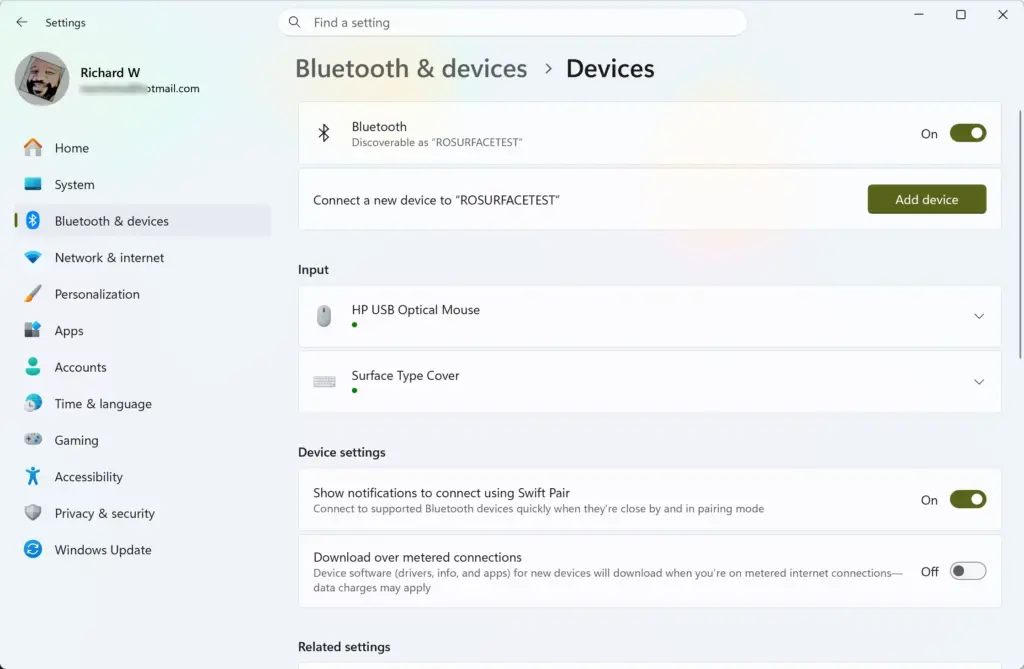
Sometimes the privacy settings are correct but Windows is using the wrong camera, or a camera has been disabled. The Cameras page under Bluetooth & devices shows every connected camera. You can check its state there, enable it, and adjust basic settings. This helps most when an external USB webcam or a virtual camera from software does not show up in an app.
Follow these steps to manage your connected cameras:
- Open Settings with Windows Key + I.
- Click Bluetooth & devices in the left-hand menu.
Settings › Bluetooth & devices 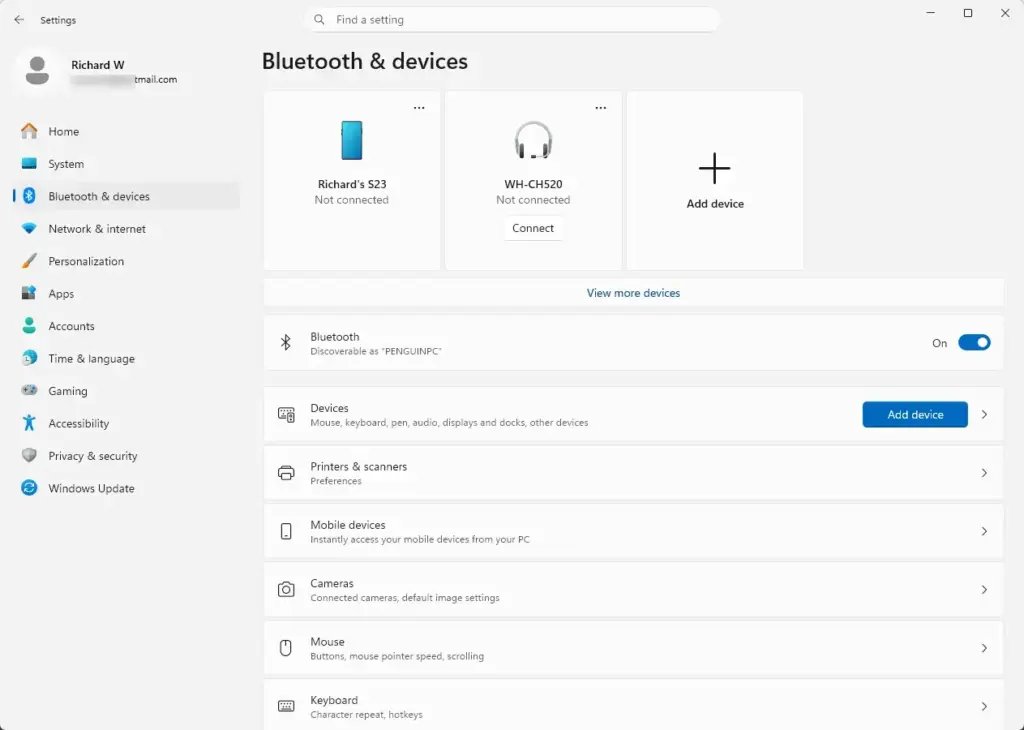
- Click Cameras on the right side of the window.
- Look at the list of cameras connected to your PC. It should include your built-in webcam and any external USB devices. If an external camera is missing, unplug it, plug it into a different USB port, and check again.
- Click a camera in the list to open its properties. There you can adjust the Brightness and Contrast sliders or rename the device.
- If a camera is listed as disabled, click it and select Enable. The camera should now be available to your apps.
If you disable a camera here, you can undo it the same way by selecting Enable.
Allowing Websites to Use Your Camera in Microsoft Edge
When you join a video meeting in a browser, two layers of permission apply. Windows must allow the browser to use the camera, and the website must be allowed inside the browser. Check the Windows side first, using the steps above. Make sure Microsoft Edge is allowed in the app list, or that the desktop apps switch is on. Then check the site permission in Edge.
Follow these steps to allow a website to use your camera:
- Open Microsoft Edge and go to the website that needs your camera.
- Look at the address bar at the top of the window. Click the lock icon, camera icon, or settings symbol to the left of the web address (such as https://example.com). A small menu opens.
- Click Permissions for this site, or look directly for the Camera drop-down menu.
- Change the camera setting from Block or Ask (default) to Allow.
- Refresh the page so the new setting takes effect. The site can now use your webcam without prompting you each time.
You can also review all site rules in one place. Click the three dots in the top right corner of Edge, choose Settings, click Cookies and site permissions, and scroll down to Camera. Make sure sites are allowed to ask for access, and check whether the site you need is on the block list.
To stop a website from using your camera later, follow the same steps and change the setting back to Block, or remove the permission entirely.
Exceptions to Camera Privacy Settings
Not every camera use follows the privacy toggles. Some system-level tools and trusted background processes have built-in permission, so core Windows features do not get blocked by your usual privacy controls.
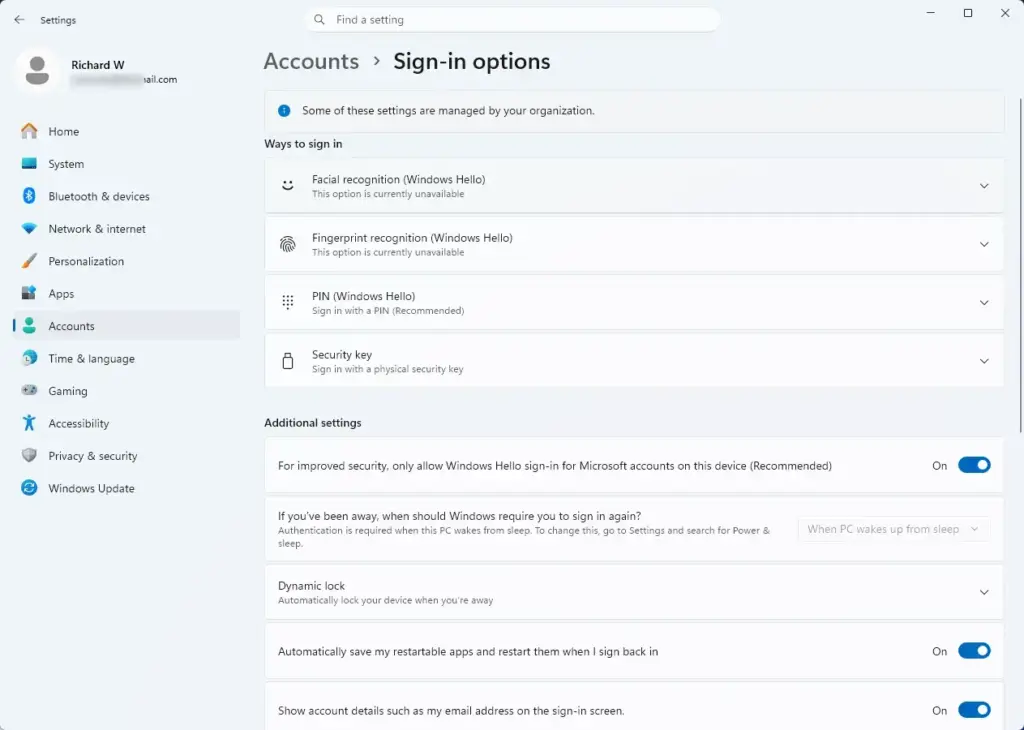
Windows Hello facial recognition is a good example. It uses your camera to sign you in to your user account securely. It bypasses the standard app permission toggles because it is a core Windows function managed directly by the operating system.
Older desktop apps built for earlier versions of Windows can also behave differently. If such an app runs with administrator privileges, it may connect directly to your webcam driver and skip the standard Windows 11 privacy prompt. If you notice an app using your camera without your permission, check whether that program is running with administrator rights. Also check whether you still need it installed.
Unique Expert Tips: Fixing Hidden Webcam Conflicts
Standard privacy settings fix most webcam problems, but some apps keep failing. These two checks cover the usual causes that basic guides skip.
Tip 1Check for Background App Conflicts
Most webcams can only serve one program at a time. If a hidden recording app or a minimized video call is still holding your camera, any new app you open will be blocked or show a black screen. To find the culprit, follow these steps:
- Press Ctrl + Shift + Esc to open Task Manager.
- Look through the running apps and background processes for video software. Examples are meeting apps, screen recorders, and other camera tools.
- Select each one, click End task, and then try your webcam app again.
Save any work in those programs before you end them.
Tip 2Reset Camera App Data
Follow these steps:
- Open Settings, then go to Apps and click Installed apps.
- Find Windows Camera in the list and click the three dots next to it.
- Choose Advanced options.
- Scroll down and click the Reset button, then confirm if Windows asks.
This clears the app's own data and settings. It does not delete your personal files. Reopen the Camera app afterward. You may need to accept the camera permission prompt again.
Summary
Most webcam privacy blocks come down to two things: the master system switch and the individual app toggle. Open the privacy settings, turn on global camera access, enable the apps that need it, and check your connected hardware and browser permissions. If the camera still fails, look for another app holding it and reset the Camera app. Once both the master switch and the app toggle are on, your video should work across all your programs.
What do you do when you have answered that you don't allow a program access to your camera?
Open Settings, then go to Privacy & security Camera. Turn on "Let desktop apps access your camera" so programs like Zoom or Teams can use your webcam again. Then close the program completely and open it again. The app should now be able to use the camera.
What to do if camera won't be allowed on any apps even if it says its allowed on settings*?
Check two switches in Settings Privacy & security Camera The "Camera access" switch at the top must be on, and "Let desktop apps access your camera" must also be on. Close any other app that may be using the camera, restart the program, and then restart your PC if it still fails.
How can I view the video with no control in Microsoft camera?
Open the Camera app and move your mouse over the preview to bring up the controls. If you still see no controls, maximize the window. Also confirm that the Camera app is allowed under Settings Privacy & security Camera
Have a question about this guide?
Answered by AI from this guide. Good questions may be added to this page — please don't include personal details.
Did this guide fix your problem?

About the Author
Richard
Tech Writer, IT Professional
Richard is a writer at Geek Rewind who turns complex IT tasks into clear, step-by-step guides. He draws on years of hands-on experience in system administration and enterprise IT operations, focusing on Windows, Linux and WordPress: the problems people actually run into, and the fixes that work. His server and WordPress guides come from systems he runs himself. Richard builds and maintains the platform behind Geek Rewind, from its Ubuntu servers and Nginx configuration to its custom WordPress plugins. Many new tutorials start with readers' questions, and he's always glad to answer them in the comments.
No comments yet — be the first to share your thoughts!