Turn On Passwordless Sign-In with Windows Hello in Windows 11

Windows Hello in Windows 11 lets you sign in with a PIN, fingerprint or face instead of a password. To go passwordless with Windows Hello, set up a PIN and a biometric method (a fingerprint or face scan) under Settings Accounts Sign-in options Then turn on the Windows Hello-only setting.
A Windows Hello PIN is not a short password. It is tied to one device and never travels to Microsoft’s servers. That makes it harder to steal in a phishing attack (a scam that tricks you into typing your password into a fake sign-in page) or a data leak.
The whole job takes about ten minutes. Windows 11 Home and Pro both support it.
To go passwordless with Windows Hello in Windows 11, open Settings , go to Accounts Sign-in options, and set up a PIN (Windows Hello) and, if your PC has a fingerprint reader or IR camera, a fingerprint or face sign-in. Then turn on the Windows Hello-only setting to remove the password from sign-in. The whole job takes about ten minutes.
What You Need Before You Start
A PIN works on every Windows 11 PC. Fingerprint and face sign-in need matching hardware. Check the points below first so you know which options you will see.
Hardware for Fingerprint and Face Sign-In
Fingerprint sign-in needs a fingerprint reader that supports Windows Hello. Many business laptops have one built into the power button or beside the keyboard. Face sign-in needs an infrared (IR) camera, which sees depth and works in low light. A standard webcam does not qualify.
If your PC has neither, use the PIN alone. You can still go passwordless, because the PIN replaces the password at the sign-in screen.
Account Type and Permissions
The steps work with a Microsoft account or a local account. The Windows Hello-only setting appears only for Microsoft accounts (see step 12 in the list below). Local accounts do not show it.
Setting up Windows Hello for your own account does not need administrator rights on a personal PC. On a work or school PC, your organization may control these options through a policy (a rule set by your IT team). If so, the options may be missing or locked, and your IT team has to change them.
Know your Microsoft account password before you start. Windows asks for it to confirm your identity, and you may need it later to reset a forgotten PIN.
Go Passwordless with Windows Hello in 🪟 Windows 11
The steps below go passwordless with Windows Hello by adding a PIN, adding a fingerprint or face, and then removing the password from the sign-in screen. Skip the fingerprint or face steps if your PC lacks the hardware.
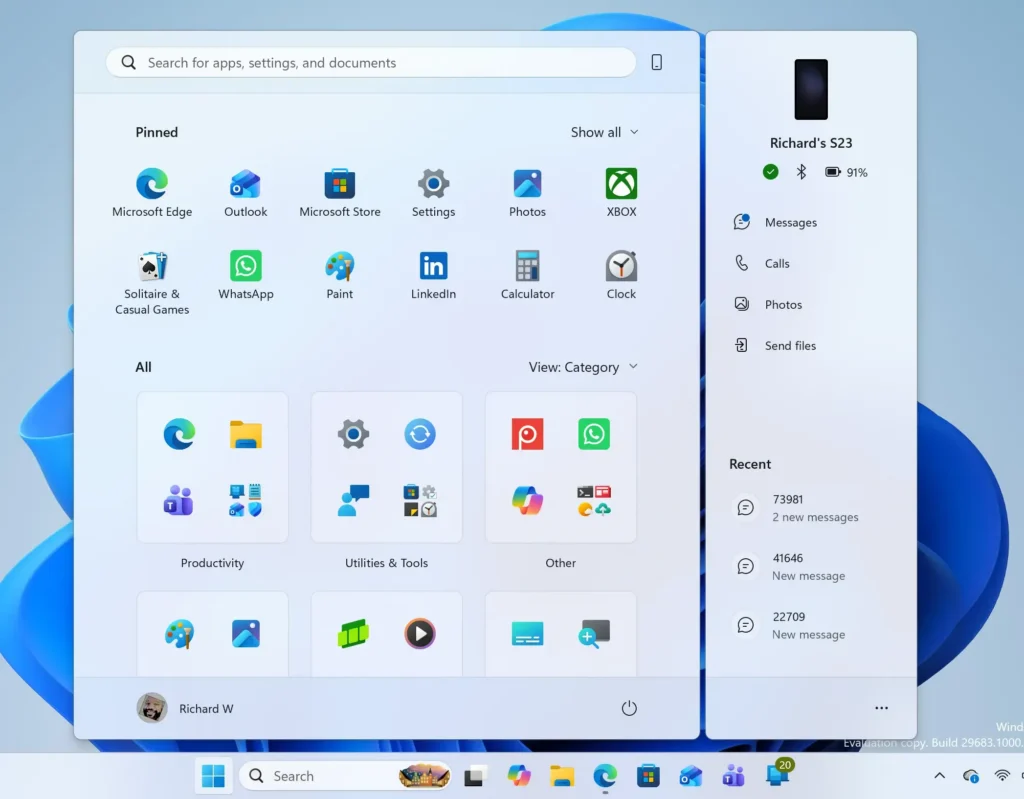
- Open Settings. Press the Windows key + I. The Settings window opens on the System page.
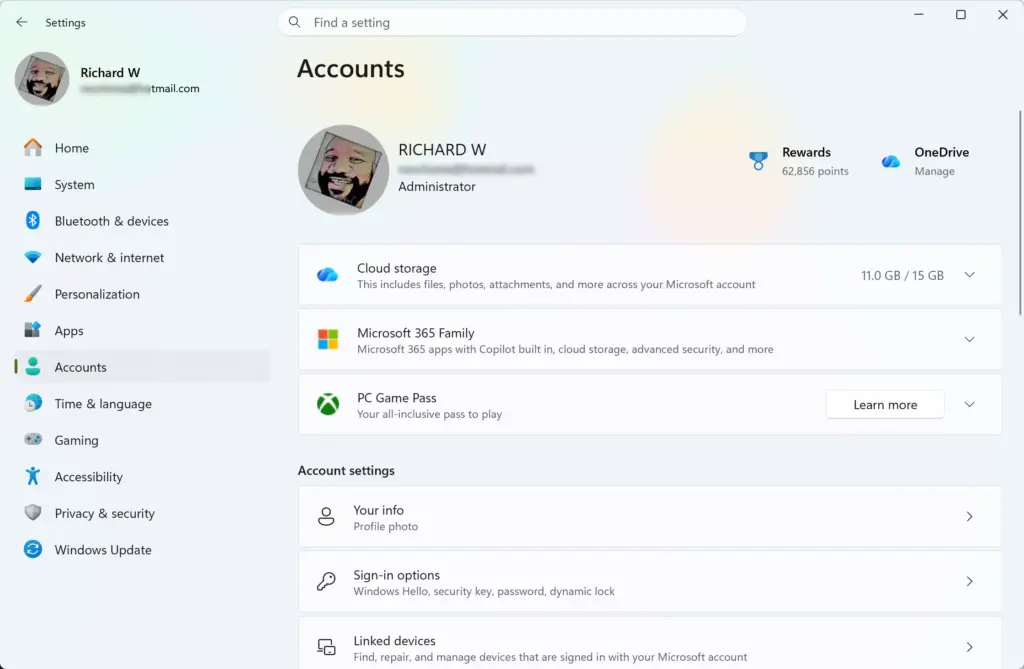
- Select Accounts in the left pane. The page shows your account name and picture at the top.
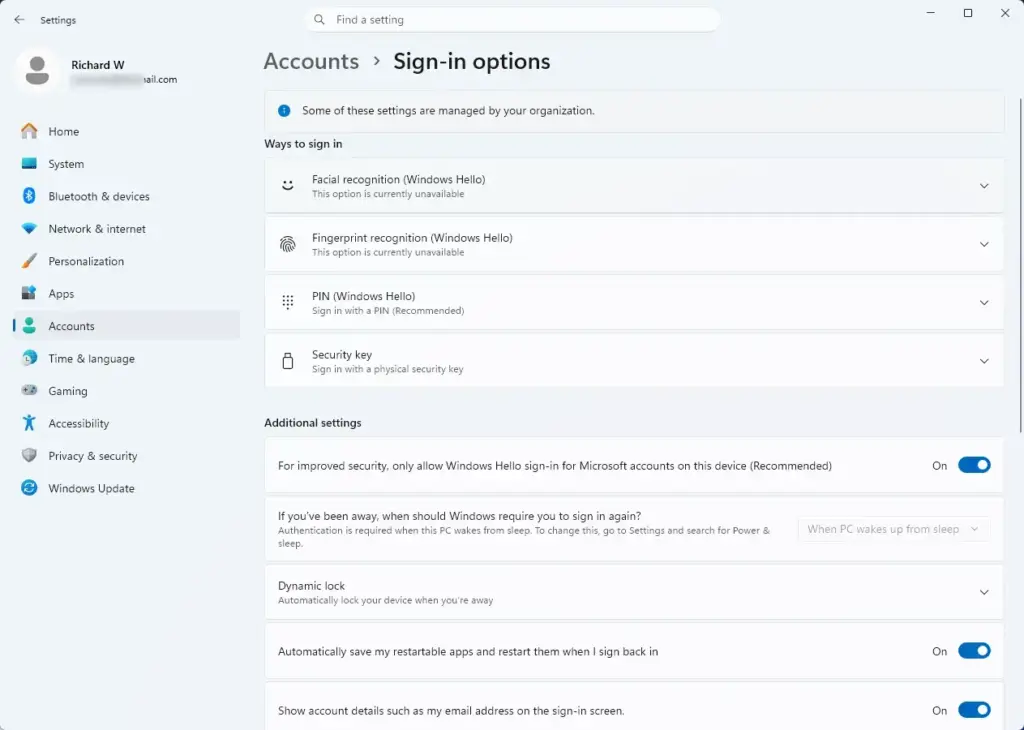
Settings › Accounts - Select Sign-in options. A list of sign-in methods appears under Ways to sign in. It can include Facial recognition (Windows Hello), Fingerprint recognition (Windows Hello), PIN (Windows Hello), Security key and Password. Methods your hardware does not support are missing or greyed out.
Settings › Accounts › Sign-in options - Expand PIN (Windows Hello). Select the row to open it. If a PIN already exists, you see Change PIN and I forgot my PIN instead of Set up. In that case, go to step 8.
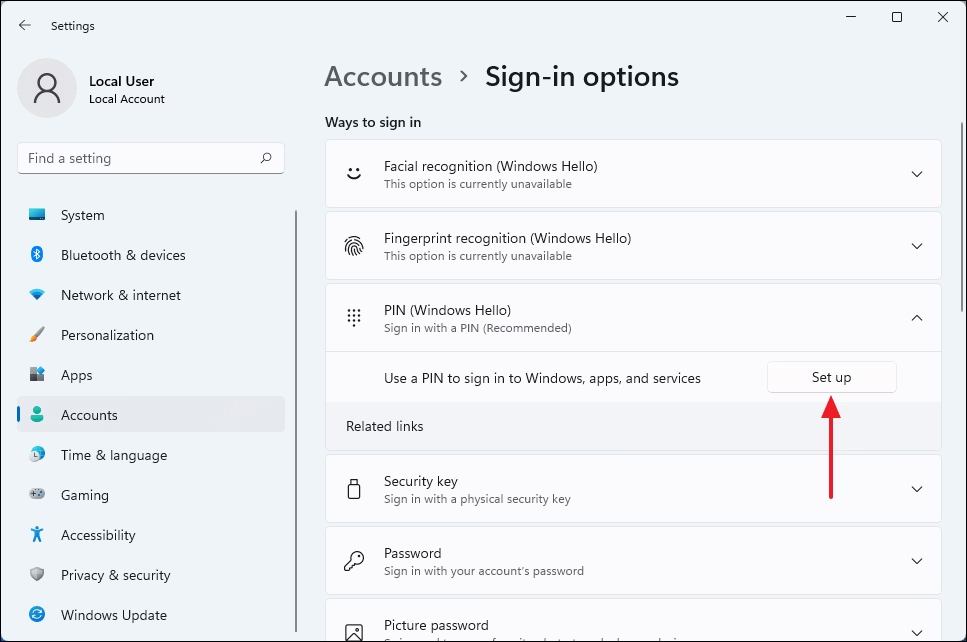
- Select Set up. Windows asks you to confirm your identity, usually with your account password. Enter it and continue.
- Type your new PIN in both boxes. Windows asks for at least four digits by default. A longer PIN is safer. Select Include letters and symbols if you want a stronger one.
- Select OK. The setup window closes and the PIN is active. Your PIN does not replace your password yet. Both work until you finish the last steps.
- Expand Fingerprint recognition (Windows Hello). Skip to step 11 if your PC has no fingerprint reader.
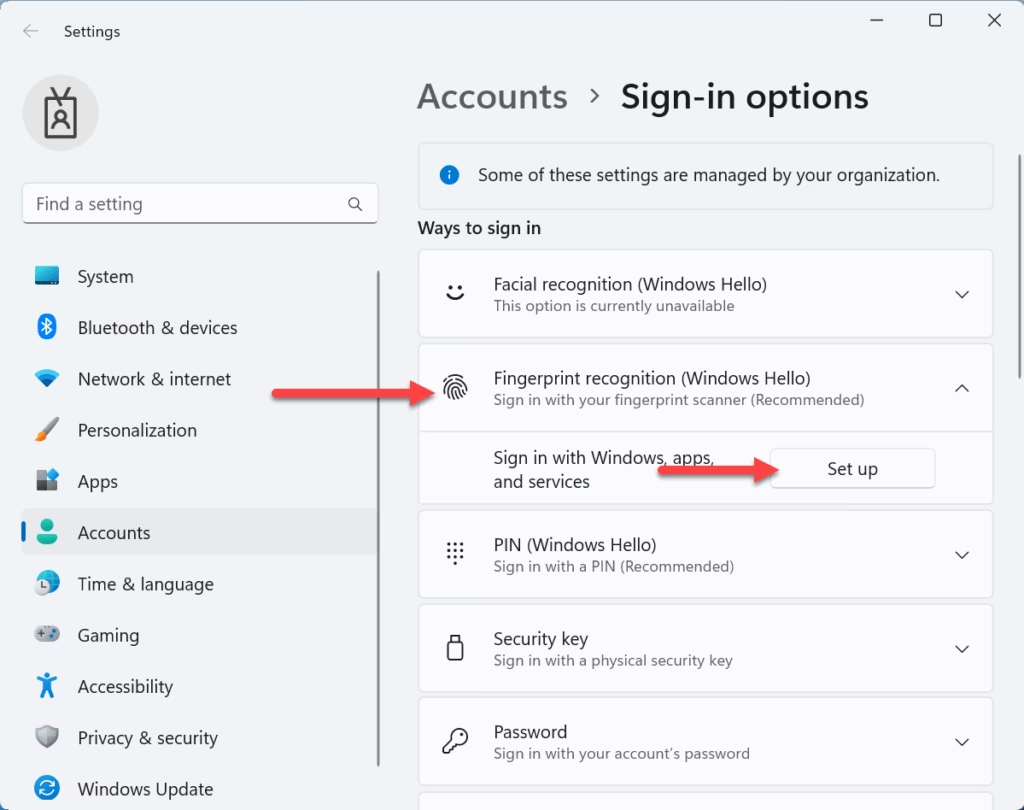
Windows 11 fingerprint recognition setup button for Windows Hello. - Select Set up, then Get started. Enter your PIN when asked. The setup screen then tells you to touch the sensor.
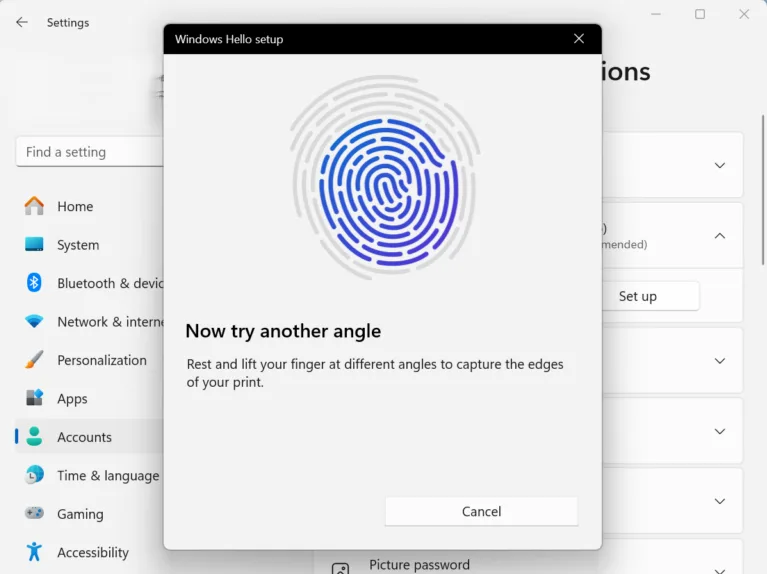
- Touch the reader repeatedly with the same finger. Lift and reposition the finger slightly each time so Windows captures the whole print. When it finishes, a confirmation screen appears. Select Add another finger to enroll a second one, which helps if you injure the first. Select Close when done.
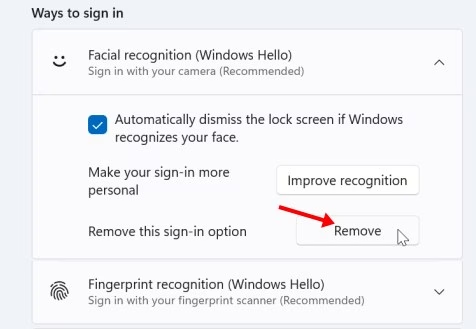
- Set up face recognition if your PC has an IR camera. Expand Facial recognition (Windows Hello), select Set up, then Get started. Enter your PIN, look straight at the camera, and wait for the confirmation. Select Improve recognition afterwards if you wear glasses or sign in under different lighting.
- Turn on the Windows Hello-only setting. Under Additional settings, switch on For improved security, only allow Windows Hello sign-in for Microsoft accounts on this device (Recommended). The toggle moves to On. This is the step that takes the password off the sign-in screen. If you do not see it, read the section on missing options below.
- Press the Windows key + L. This locks the PC and shows the lock screen without signing you out.
- Select the lock screen, then check the sign-in options. Windows now offers your PIN, and your fingerprint or face if you set them up. The password option no longer appears. If Windows still shows the password option, restart the PC and check again.
- Sign in with your PIN, fingerprint or face. The desktop opens. You are now signing in without a password.
Windows 11 shows these labels on current builds, including versions 22H2, 23H2 and 24H2. On an older build, a label may differ slightly. The path and the order stay the same.
How to Choose Between Methods at the Sign-In Screen
Windows uses the method you used last, or the fastest one available. To switch, select Sign-in options on the lock screen. This is the icon below the sign-in box. Pick the PIN, the fingerprint or the face option from the icons that appear.
Keep the PIN as a backup even if you mostly use biometrics. A fingerprint reader can fail with wet or dirty fingers. A face scan can fail after a haircut or in strong sunlight. The PIN always works as long as the PC is on.
If Windows Hello Options Are Missing or Greyed Out
Most problems come from hardware, account type or policy. Work through the cause that matches what you see.
Fingerprint or Face Recognition Is Greyed Out
Windows shows the message that the option is unavailable when it finds no compatible device. First, install pending updates under Settings Windows Update Then restart the PC. Windows needs a driver (the small program that lets Windows talk to the reader or camera) to work.
To check the driver, right-click the Start button and select Device Manager. Look for a Biometric devices category. If it is missing, or the device has a yellow warning icon, install the driver from the PC maker's support page. A webcam that has no IR sensor will never enable face sign-in.
The Windows Hello-Only Toggle Is Missing
The toggle appears only for Microsoft accounts. If you sign in with a local account, Windows hides it. You can still set up a PIN and a fingerprint, but the password stays available at the sign-in screen.
To switch to a Microsoft account, open Settings Accounts Your info and select Sign in with a Microsoft account instead. Follow the prompts. Your files and settings stay as they are.
The PIN Option Says "This Option Is Currently Unavailable"
Restart the PC and open the page again. If the message stays, your PC may be managed by a work or school account with its own sign-in rules. In that case, you cannot change the setting yourself.
You Forgot Your PIN
Select I forgot my PIN under PIN (Windows Hello) in Settings Accounts Sign-in options, or on the sign-in screen. Windows asks you to verify your Microsoft account, then lets you set a new PIN. This is why you need your account password on hand.
Remote Desktop Stops Accepting Your Password
If you connect to this PC remotely, turn the setting off before you rely on it. When you connect remotely, you cannot use your fingerprint or PIN in the same way as you would at the PC itself.
Understand What "Passwordless" Means Here
Passwordless does not mean the password is gone. Your account still has one, and Windows can ask for it in some situations. For example, it may ask when you change account settings or reset a PIN. What changes is that you stop typing it for everyday sign-in, and the sign-in screen stops offering it.
Your Microsoft account password is a separate matter. To remove the password from the account itself, use the security page on your Microsoft account. You need the Microsoft Authenticator app (a phone app that confirms sign-ins) on your phone for this. Removing the Microsoft account password is optional. Windows Hello works without doing it.
Organizations that manage many PCs can roll out a similar experience through Microsoft Intune (a cloud tool for managing devices). That route needs licensing and policy settings, and it is outside the scope of this single-PC setup.
How to Undo Passwordless Sign-In
You can go back to password sign-in at any time. The change takes seconds and does not touch your files.
- Open Settings. Press the Windows key + I.
- Go to Settings Accounts Sign-in options
- Switch off For improved security, only allow Windows Hello sign-in for Microsoft accounts on this device (Recommended). The toggle moves to Off, and the password option returns to the sign-in screen after you lock or restart the PC.
- Expand the method you want to remove, such as PIN (Windows Hello) or Fingerprint recognition (Windows Hello), and select Remove. Confirm when Windows asks.
Turn it off first, then try again. Keep at least one working way to sign in before you remove a method.
What to Do Next
Add a second fingerprint, or a second finger on the same reader, so a minor injury does not send you back to the PIN. If you use more than one Windows 11 PC, repeat these steps on each one, because a Windows Hello PIN belongs to a single device.
For extra protection, review Dynamic lock under Settings Accounts Sign-in options It can lock the PC when your phone, connected to the PC over Bluetooth (a short-range wireless link), moves out of range. You can also look at the Microsoft account security page to add Microsoft Authenticator.
Have a question about this guide?
Answered by AI from this guide. Good questions may be added to this page — please don't include personal details.
Did this guide fix your problem?

About the Author
Richard
Tech Writer, IT Professional
Richard is a writer at Geek Rewind who turns complex IT tasks into clear, step-by-step guides. He draws on years of hands-on experience in system administration and enterprise IT operations, focusing on Windows, Linux and WordPress: the problems people actually run into, and the fixes that work. His server and WordPress guides come from systems he runs himself. Richard builds and maintains the platform behind Geek Rewind, from its Ubuntu servers and Nginx configuration to its custom WordPress plugins. Many new tutorials start with readers' questions, and he's always glad to answer them in the comments.
No comments yet — be the first to share your thoughts!