How to Turn On or Off Automatic Lock on Your Windows 11 PC
Windows 11 can lock your computer automatically if you don’t use it for a while. This helps keep your files safe from others when you step away.
When your PC locks, you’ll see the lock screen. This is the screen that appears before you sign in. You can also lock your PC anytime by pressing Windows key + L.
Control automatic PC locking in Windows 11 via Power & Sleep settings or Local Security Policy/Registry Editor. Adjust inactivity time in seconds or set to 0 to disable.
How to Change When Your PC Locks Automatically
You can set how long your computer waits before locking itself when you’re not using it. Or you can turn off this automatic lock if you want.
For 🪟 Windows 11 Pro, Enterprise, or Education Users:
Follow these steps to change the lock settings using the Local Security Policy:
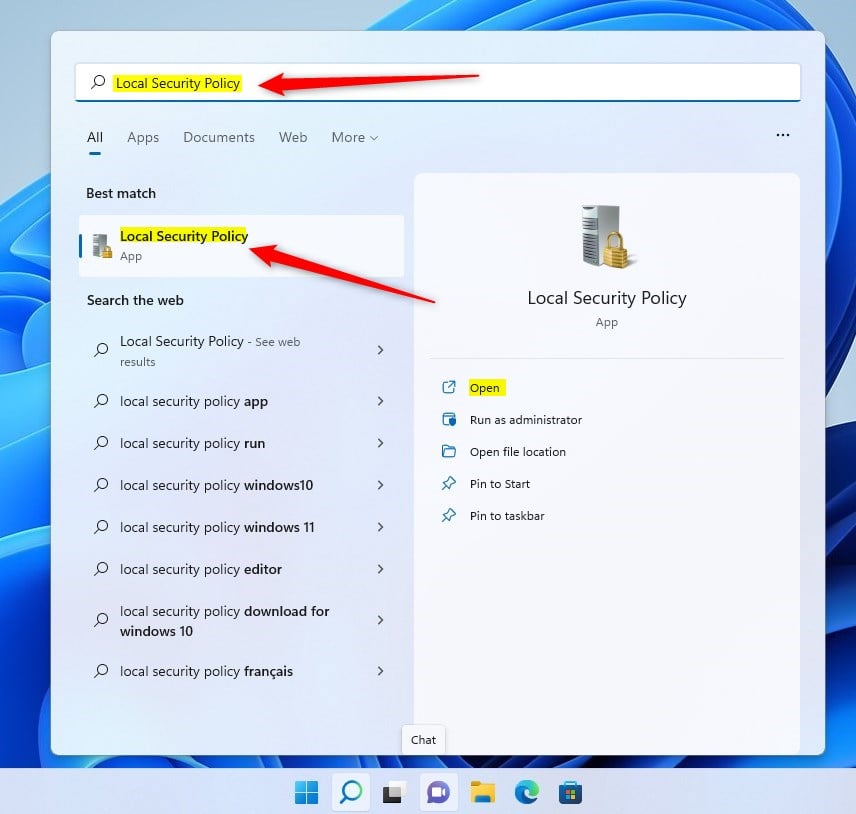
- Click the Start Menu (Windows icon at the bottom left).
- Type Local Security Policy or secpol.msc in the search box and click on it to open.
In the window that opens:
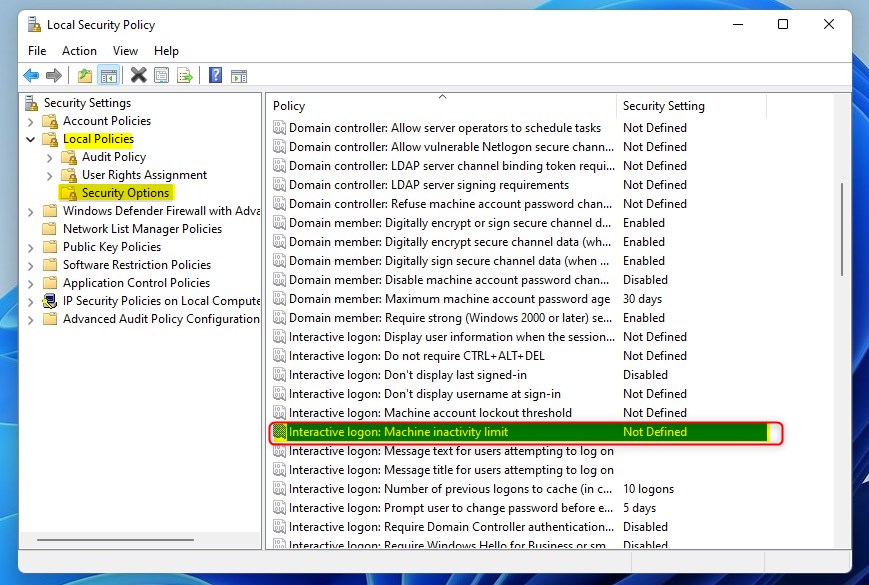
- In the left panel, click the arrow next to Local Policies, then click Security Options.
- On the right side, find Interactive logon: Machine inactivity limit and double-click it.
In the box that appears:
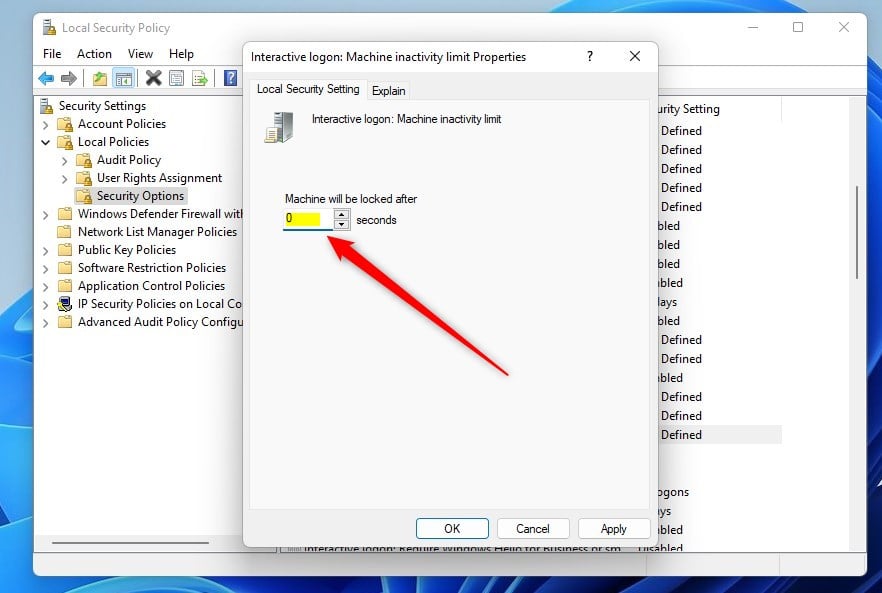
- Type the number of seconds you want your PC to wait before locking. For example, 600 means 10 minutes.
- Type 0 to turn off automatic locking.
- Click OK to save.
For 🪟 Windows 11 Home Users:
If you have Windows 11 Home, you won’t see the Local Security Policy. Instead, you can change the lock time by editing the Windows Registry. Be careful when editing the Registry — making wrong changes can cause problems.
- Press Windows key + R to open the Run box.
- Type regedit and press Enter to open the Registry Editor.
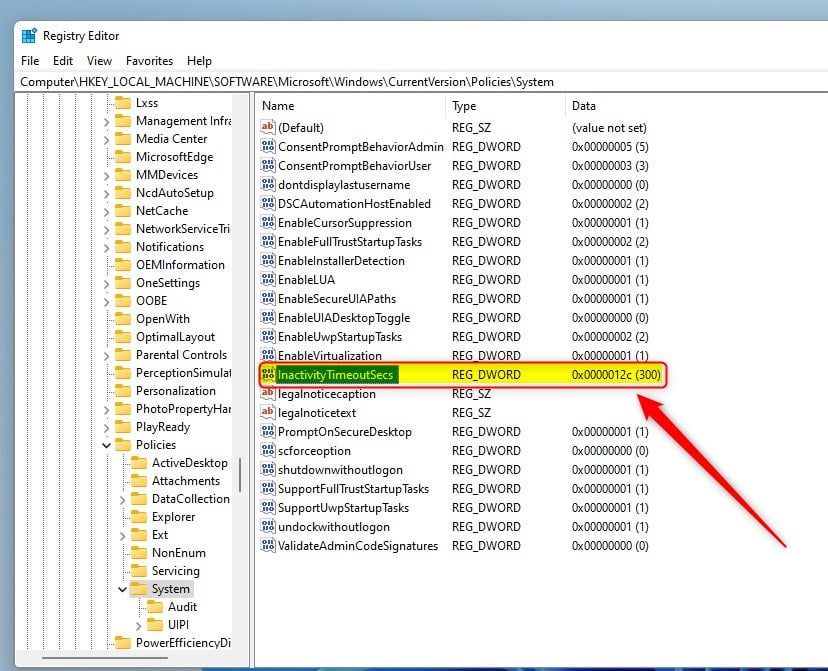
In Registry Editor, go to this path:
HKEY_LOCAL_MACHINE\SOFTWARE\Microsoft\Windows\CurrentVersion\Policies\System
On the right side, look for a setting named InactivityTimeoutSecs.
- If you don’t see it, right-click on an empty space, choose New > DWORD (32-bit) Value, and name it InactivityTimeoutSecs.
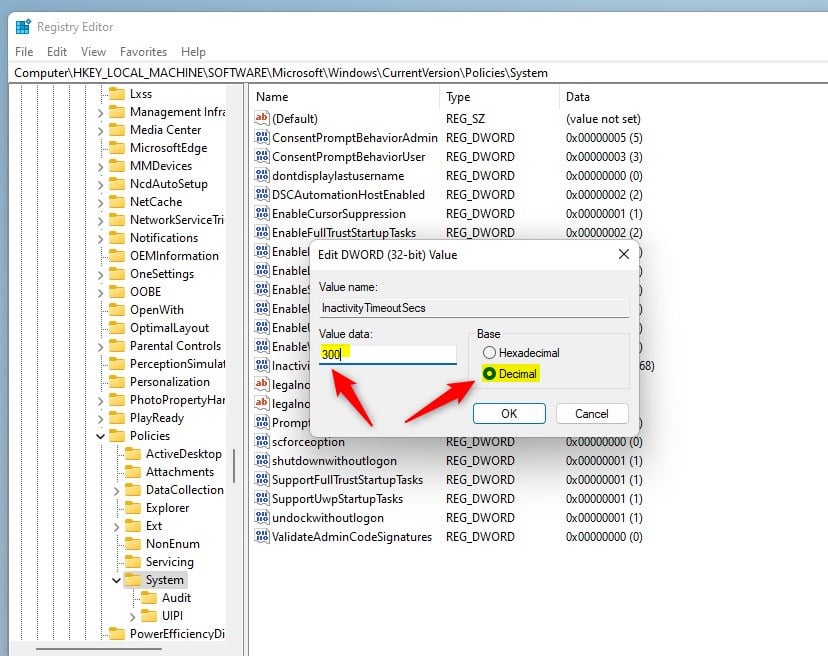
- Double-click InactivityTimeoutSecs and select Decimal.
- Enter the number of seconds you want your PC to wait before locking (for example, 600 for 10 minutes).
- Enter 0 to turn off automatic locking.
- Click OK and close Registry Editor.
Summary
- Windows 11 locks automatically after a set time of no use to keep your PC safe.
- If you want to change or stop this automatic lock, you can do it in Local Security Policy (for Pro and similar editions) or by editing the Registry (for Home edition).
- Set the time in seconds (like 600 seconds = 10 minutes) or use 0 to turn off automatic locking.
That’s it! Now you can control when your PC locks automatically and keep your computer just the way you want.
Was this guide helpful?
100% of readers found this helpful (2 votes)

About the Author
Richard
Tech Writer, IT Professional
Richard, a writer for Geek Rewind, is a tech enthusiast who loves breaking down complex IT topics into simple, easy-to-understand ideas. With years of hands-on experience in system administration and enterprise IT operations, he’s developed a knack for offering practical tips and solutions. Richard aims to make technology more accessible and actionable. He's deeply committed to the Geek Rewind community, always ready to answer questions and engage in discussions.


No comments yet — be the first to share your thoughts!