How to Enable or Disable Camera in Windows 11

Cut the feed to your webcam whenever you need privacy. Controlling the camera stops unauthorized apps and malware from using the lens. This guide covers three ways to do it: a physical switch, Windows Settings , and Device Manager.
Press Win+I to open Settings , click Bluetooth & devices, then Cameras, select your camera, and click Enable or Disable. The camera turns on or off immediately for all apps without requiring a restart.
Why Control Your Camera?
They also raise privacy concerns, because any app with permission can use the lens. Turning the camera off at the device level is a stronger step than closing an app. While the camera is disabled, no app can use it.
Windows also has per-app permissions under Settings Privacy & security Camera. Those decide which apps may use the camera. The methods below switch the camera itself off, so they apply to every app.
How Do You Know When Your Camera Is On?
Look for a small light next to the lens to see whether the camera is active. If your device has an indicator light, it turns on while the camera is in use. That makes it easy to confirm the result after you enable or disable the camera in Windows 11. If your device has no light, Windows shows an onscreen notification instead.
- If your device has a camera light, it turns on when the camera is in use.
- If your device doesn’t have a light, you’ll see a notification telling you the camera is on or off.
Disabling the camera while you aren’t using it prevents accidental recording. Turning the hardware off from the computer’s settings is a reliable way to be sure nothing can use it. You can turn it back on at any time using the same steps.
Reference: Manage cameras with Camera settings in Windows 11 – Microsoft Support | Camera doesn’t work in Windows – Microsoft Support
Option 1Use a Physical Kill Switch
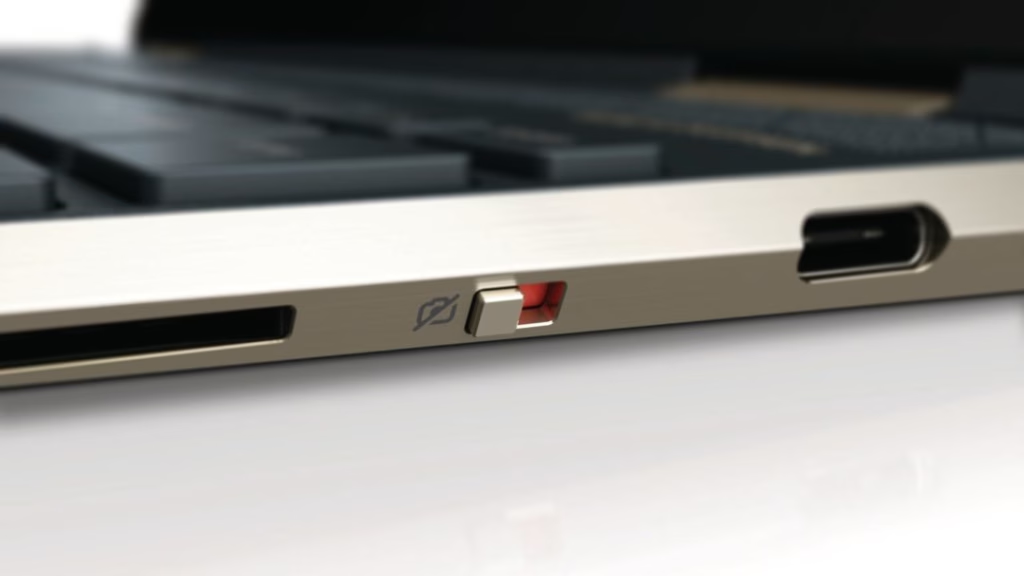
Some laptops have a physical switch that cuts the camera feed. Certain HP Spectre x360 models include one. It is the simplest method because it needs no settings and no administrator rights. Many models also have a sliding shutter that covers the lens. A shutter blocks the image but may not disable the camera itself.
- Find the privacy camera kill switch on your laptop. Check the keyboard row, the edges of the chassis, and the bezel around the lens.
- Toggle it on or off, depending on what you want. With the switch off, apps that try to use the camera usually report that no camera was found. This is normal. Turn the switch back on and the camera returns without a restart.
If you can't find a switch, your model probably doesn't have one. Use one of the software methods below.
Option 2Use Windows Settings
You need administrator access for this method. If you're signed in with a standard account, Windows may ask for an administrator password. The buttons also work the same in Windows 11 Home and Pro.
Here is the procedure:
- Press
Win+Ito open Settings. - Click Bluetooth & devices on the left side.
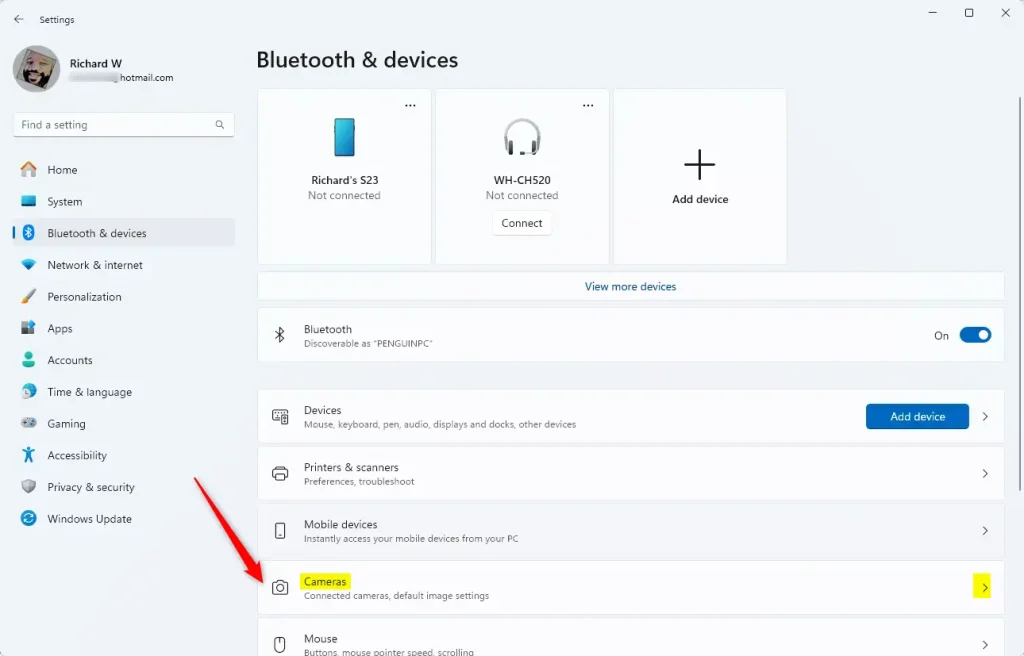
- Click Cameras on the right side. You should see a list of the cameras Windows detects.
If the Cameras page is empty, Windows isn't detecting a camera. Check the physical switch or shutter first, then check Device Manager.
To Turn Your Camera On
- Find the camera you want to turn on. A camera that is currently off is listed as disabled.
- Click it to open its page, then click Enable.
- Close Settings when you're done. No restart is needed.
If Enable is missing or greyed out, the camera may be turned off by a physical switch or by device policy. A work or school PC may block changes. In that case, ask your IT administrator.
To Turn Your Camera Off
- Find the camera you want to turn off.
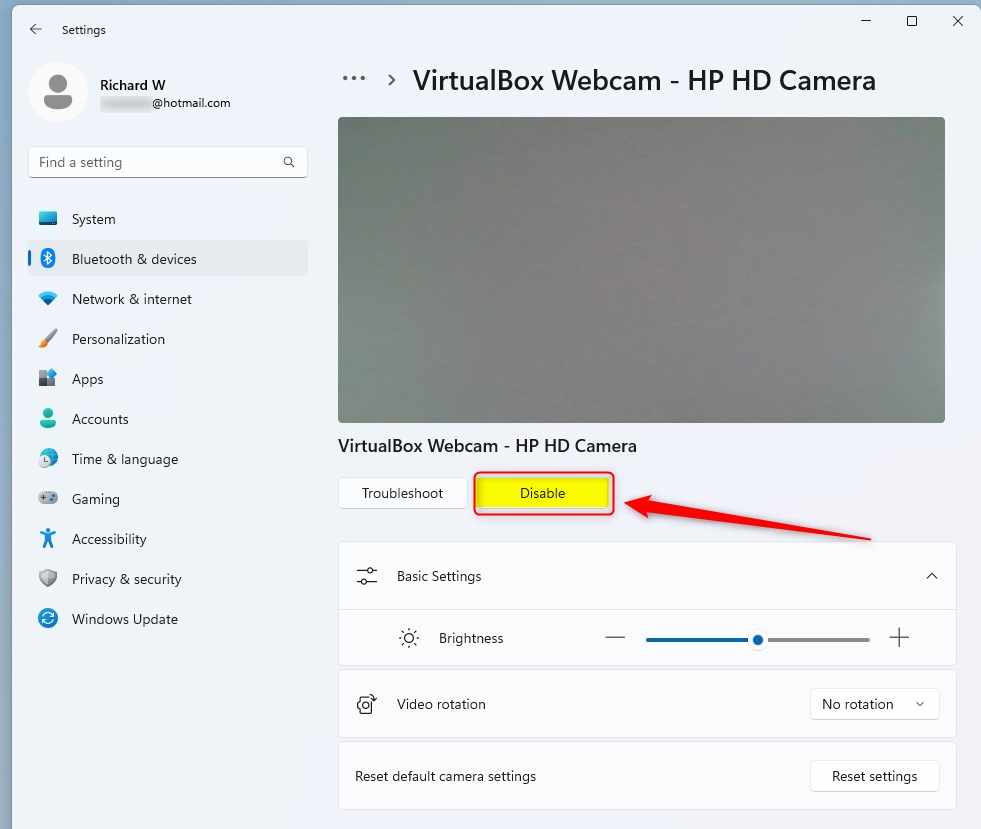
- Click it to select it. Its settings page opens.
- Click Disable.
- Click Yes to confirm.
- Close Settings when you're done. The camera is now off for all apps until you enable it again.
Option 3Use Device Manager
Administrator permissions are needed for this option.
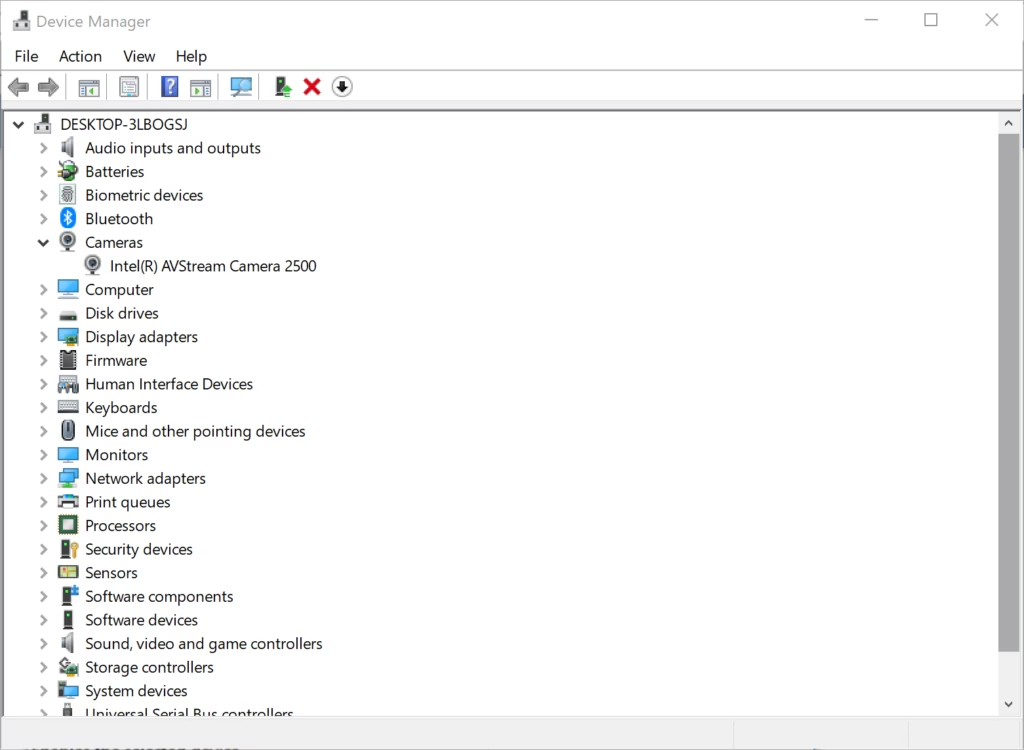
Device Manager is the built-in utility for managing computer hardware. It gives you deeper control over the camera driver. It's also useful if the camera doesn't appear in Settings. It works the same in Home and Pro.
- Open Device Manager by typing
devmgmt.mscin the search box and pressing Enter. The Device Manager window opens with a list of hardware categories.
To Turn Your Camera On
- Expand Cameras or Imaging devices (whichever one you have). Your camera is listed underneath.
- Right-click the camera you want to turn on. A disabled device shows a small down-arrow on its icon.
- Click Enable device. The arrow disappears from the icon.
- Close Device Manager when you're done.
To Turn Your Camera Off
- Expand Cameras or Imaging devices (whichever one you have).
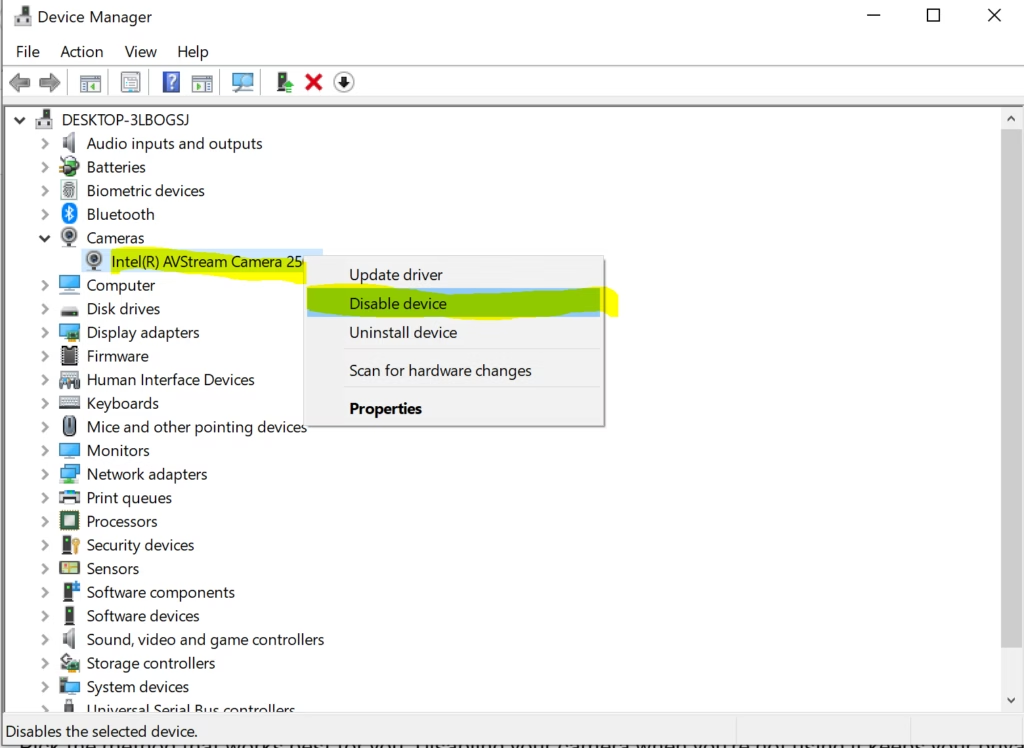
- Right-click the camera you want to turn off.
- Click Disable device.
- Click Yes to confirm. The camera icon now shows the down-arrow.
- Close Device Manager when you're done.
Don't choose Uninstall device unless you mean to. Uninstalling removes the driver entry, and Windows then has to detect the camera again.
Summary
This tutorial covered three ways to manage camera access in Windows 11: a physical switch, Windows Settings, and Device Manager. Each one turns the camera off at the hardware level, so use whichever suits your device, and turn the camera back on whenever you need it.
Was this guide helpful?

About the Author
Richard
Tech Writer, IT Professional
Richard is a writer at Geek Rewind who turns complex IT tasks into clear, step-by-step guides. He draws on years of hands-on experience in system administration and enterprise IT operations, focusing on Windows, Linux and WordPress: the problems people actually run into, and the fixes that work. His server and WordPress guides come from systems he runs himself. Richard builds and maintains the platform behind Geek Rewind, from its Ubuntu servers and Nginx configuration to its custom WordPress plugins. Many new tutorials start with readers' questions, and he's always glad to answer them in the comments.

No comments yet — be the first to share your thoughts!