How to Enable or Disable Diagnostic Data Viewer in Windows 11

The Diagnostic Data Viewer in Windows 11 lets you see exactly what information your PC sends to Microsoft about its usage.
This built-in tool shows you the details of the diagnostic data your computer collects, offering transparency into system configurations and general usage patterns.
By default, Windows 11 collects diagnostic data to help Microsoft improve its products, like making Windows more stable and secure. Essential data collection for core functions always stays active.
Turning on the viewer gives you a clear look at this data in real-time. Turning it off stops the detailed logging, but vital security and operational data sharing continues.
To enable or disable the Diagnostic Data Viewer in Windows 11, open Settings, navigate to Privacy & security, then Diagnostics & feedback. Expand the View diagnostic data section and use the toggle switch.
Is the Diagnostic Data Viewer Installed by Default?
The Diagnostic Data Viewer isn’t pre-installed on Windows 11; you need to download it from the Microsoft Store. After downloading, the Diagnostic Data Viewer uses the privacy settings you choose in the Settings app. You can find the Diagnostic Data Viewer app by searching for ‘Diagnostic Data Viewer’ in the Microsoft Store.
Using the Settings App
Turning the Diagnostic Data Viewer on or off in Windows 11 is done through the Settings app. Open Settings, navigate to Privacy & security, then select Diagnostics & feedback. A toggle switch is available there to control the viewer.
- Open the Windows Settings app.
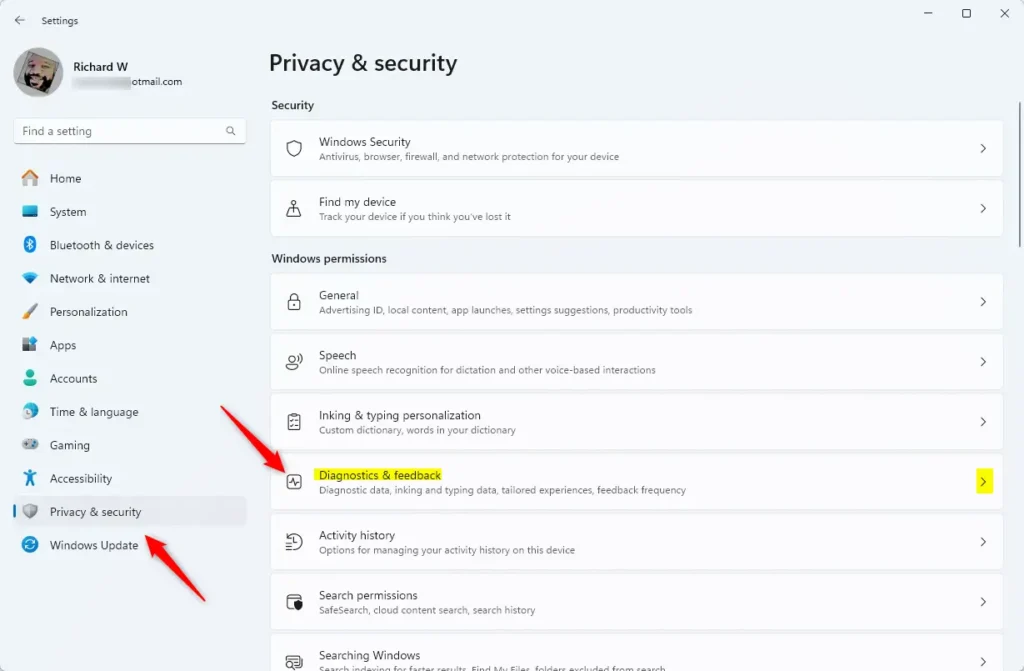
- Select Privacy & security on the left.
- Click the Diagnostics & feedback tile on the right.
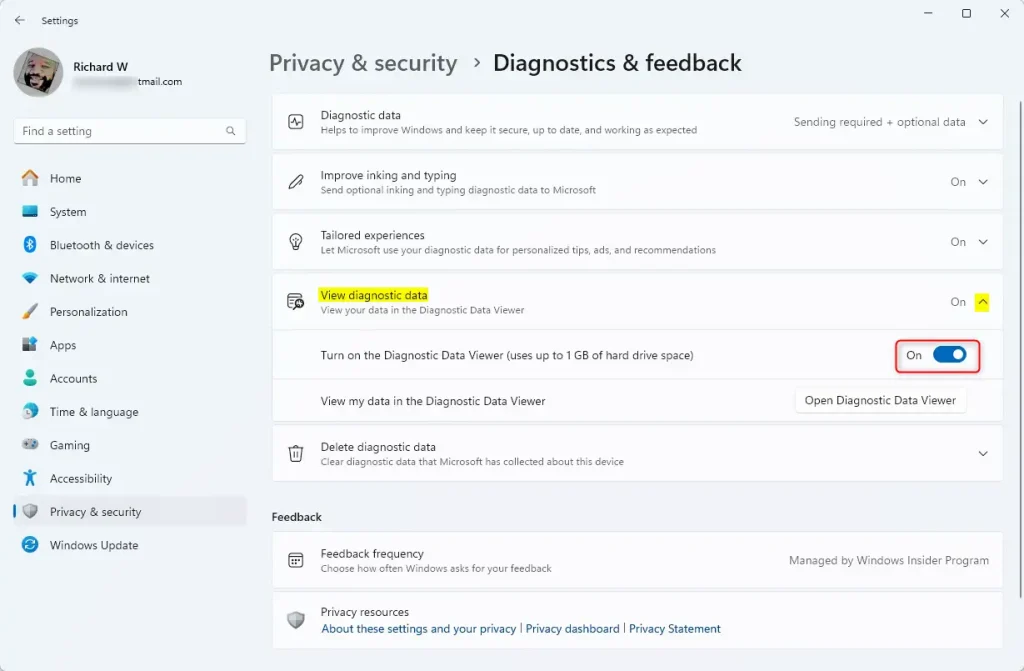
- Select the View diagnostic data tile to expand it.
- Use the toggle switch to turn it On or Off.
Managing diagnostic data viewing in Windows 11 is done through **Settings**. First, select **Privacy & security** from the left-hand menu. Next, click the **Diagnostics & feedback** tile on the right. Then, expand the **View diagnostic data** tile and use the toggle to turn diagnostic data viewing **On** or **Off**. The Settings app can be closed once you're finished.
Troubleshooting: Cannot Find or Enable the App
If you cannot locate the Diagnostic Data Viewer in Windows 11, verify first that you have downloaded it from the Microsoft Store.
Enterprise and Privacy Context
IT administrators manage diagnostic data settings across multiple computers using Group Policy, ensuring all devices adhere to privacy rules. Home users manage these settings directly. Your diagnostic data history can be reviewed online via the Microsoft Privacy Dashboard.
Data Management and History
The Diagnostic Data Viewer allows you to see what data your Windows 11 device has collected and when it was collected.
Using the Local Group Policy Editor
Controlling the Diagnostic Data Viewer in Windows 11 can be accomplished using the Local Group Policy Editor, although administrator privileges are required. Open the Start menu, type 'gpedit.msc', and press Enter. The setting is located under Windows Components > Data Collection.
- Open the Start menu, type
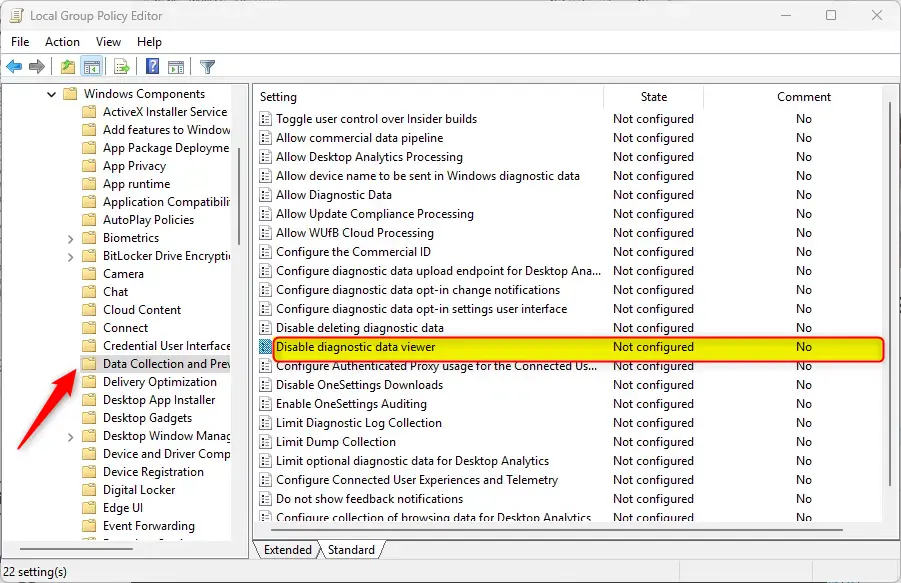
gpedit.msc, and press Enter. - Navigate to this folder path: Computer Configuration > Administrative Templates > Windows Components > Data Collection and Preview Builds.
- Find Disable diagnostic data viewer in the list and double-click it.
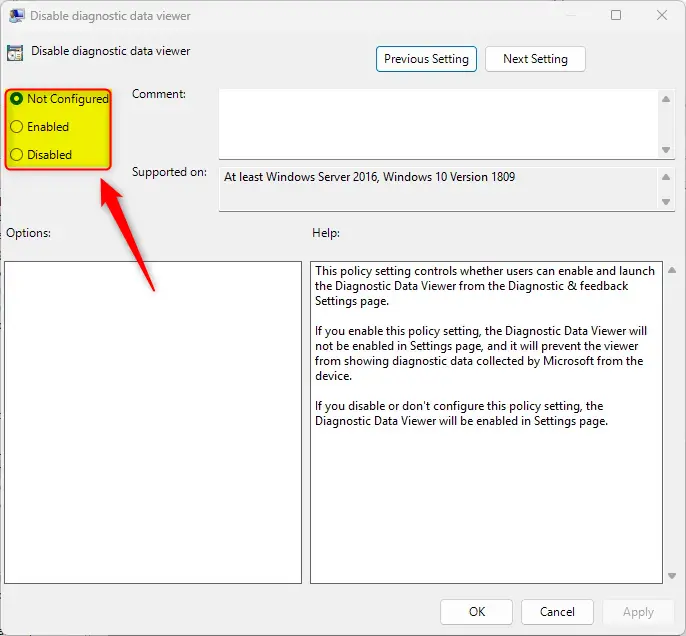
- Choose Not Configured, Enabled, or Disabled.
- Click OK to save. You may need to restart your computer for these changes to take effect.
Using the Registry Editor
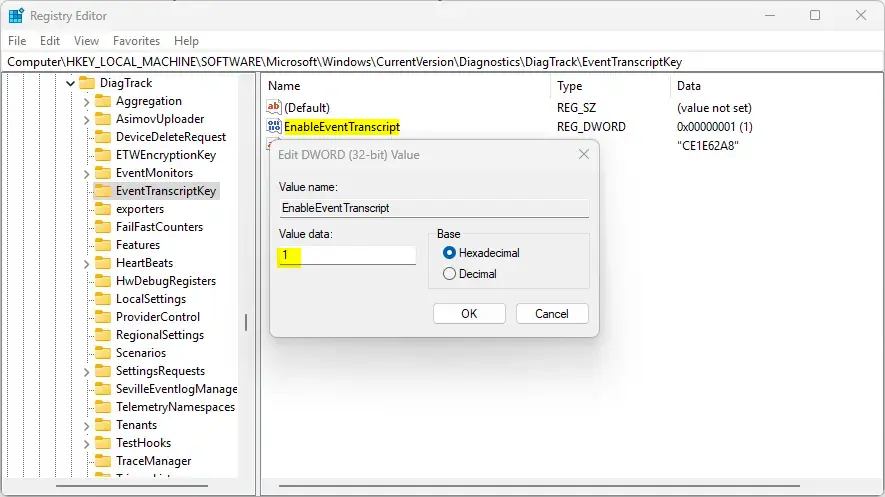
For those comfortable with advanced system settings, the Registry Editor in Windows 11 allows you to manage the Diagnostic Data Viewer. It's important to proceed with caution and ensure you have administrator privileges. Open the Registry Editor and navigate to HKEY_LOCAL_MACHINE\SOFTWARE\Policies\Microsoft\Windows\DataCollection. Change the 'EnableEventTranscript' value to 1 to enable it, or 0 to disable it.
- Open the Windows Registry.
- Go to the following path:
HKEY_LOCAL_MACHINE\SOFTWARE\Policies\Microsoft\Windows\DataCollection - Double-click EnableEventTranscript.
- Change the value to 1 to turn it on, or 0 to turn it off.
- If you do not see this item, right-click in the empty space, select New > DWORD (32-bit) Value, and name it
EnableEventTranscript.
Save your changes and restart your computer.
Summary
Several methods exist for managing the amount of data your Windows 11 computer sends to Microsoft, including the Settings app, Group Policy Editor, or Registry Editor.
Can I view Microsoft 365 diagnostic data in the same viewer?
Yes, the Diagnostic Data Viewer is designed to show diagnostic information from Windows. If you have Microsoft 365 apps installed, the viewer can often display diagnostic logs for those applications as well, provided the diagnostic data settings are enabled within the individual Office application privacy settings.
Does disabling diagnostic data affect Windows updates?
Disabling diagnostic data does not stop your computer from receiving critical security updates. However, it may limit the information Microsoft receives to troubleshoot specific update errors. Essential data required for the Windows Update service to function remains active even if you turn off optional diagnostic data collection.
Was this guide helpful?

About the Author
Richard
Tech Writer, IT Professional
Richard, a writer for Geek Rewind, is a tech enthusiast who loves breaking down complex IT topics into simple, easy-to-understand ideas. With years of hands-on experience in system administration and enterprise IT operations, he’s developed a knack for offering practical tips and solutions. Richard aims to make technology more accessible and actionable. He's deeply committed to the Geek Rewind community, always ready to answer questions and engage in discussions.


[…] can turn on or off required or optional diagnostic data collection, turn on or off diagnostic data viewer, enable or disable tailored experiences, and […]