How to Change Your Diagnostic Data Setting in Windows 11
Hey there, fellow Windows users! Ever feel like your PC is sharing too much with Microsoft? Windows collects information, called “diagnostic data,” to help fix problems and make the operating system better. But what is it sending? And how much control do you have? This guide will show you how to manage your diagnostic data settings in Windows 11. We’ll go step-by-step so you can decide what works for you.
Go to Settings, then Privacy & security, and select Diagnostics & feedback. Here, you can choose between “Required” and “Optional” diagnostic data settings. “Required” sends only essential information, while “Optional” includes more details to help improve Windows.
What is Diagnostic Data?
Before we change settings, let’s understand diagnostic data. Think of it as your computer sending reports to Microsoft.
There are two main types:
- Required diagnostic data: This is the basic info needed to keep Windows safe, updated, and working. It includes your device’s setup and if it’s running okay.
- Optional diagnostic data: This is more detailed. It can include extra info about your device, how you use apps (called “usage data”), and more detailed error reports. Sending this helps Microsoft find and fix problems faster, making Windows better for everyone.
Even if you only send Required data, your device stays secure and works normally. The choice is about how much extra information you’re okay with sharing to help improve products.
Ready to take control? Here’s how to adjust your diagnostic data settings in Windows 11.
Open the Settings App
Let’s find the right place in Windows. You can do this a couple of ways.- Click the Start button (usually in the center of your taskbar). Then, click the Settings icon (it looks like a gear).
- Or, press the Windows key + I on your keyboard. This shortcut opens Settings quickly.
Navigate to Privacy & security
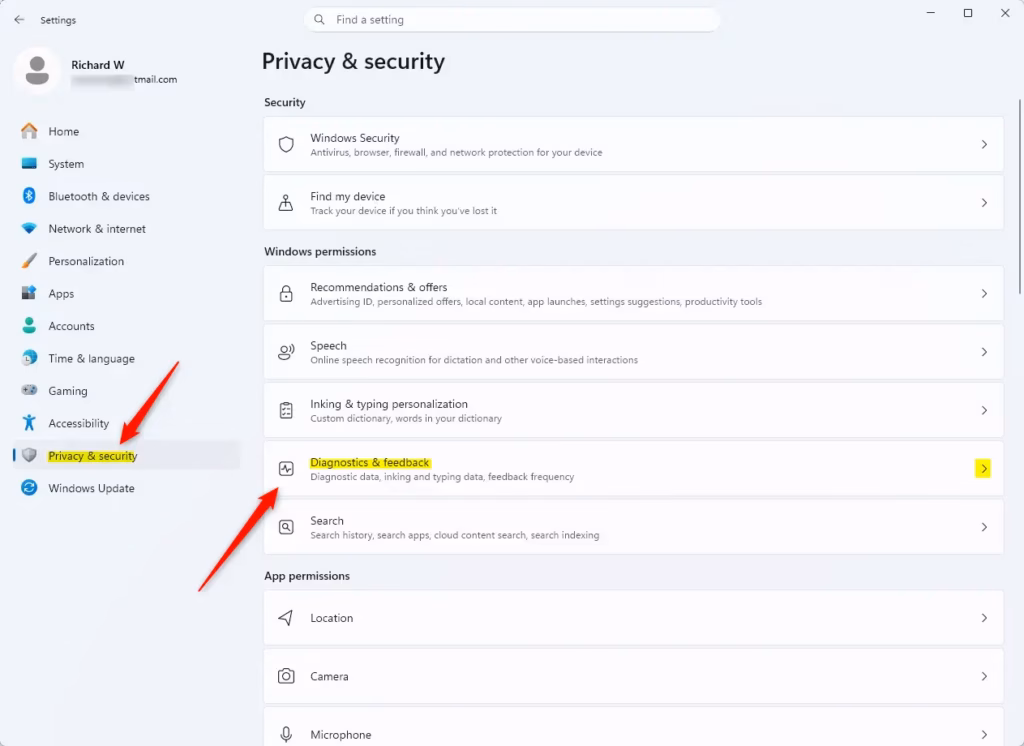
In the Settings window, look at the list on the left. Scroll down to Privacy & security and click it.💡TipThe Settings app has many options. If you can’t find something, use the search bar at the top. Type “diagnostics” to go straight there.Locate Diagnostics & feedback
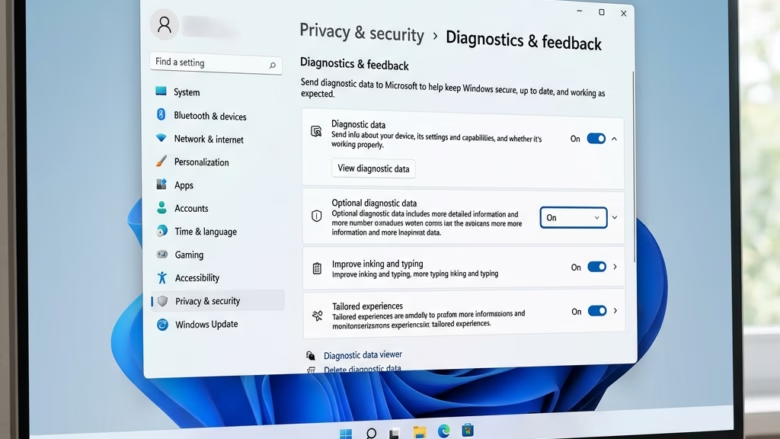
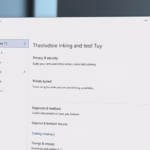
In the “Privacy & security” section, find Diagnostics & feedback. This is where you control what Windows sends to Microsoft. Click on it.Adjust the Diagnostic data setting
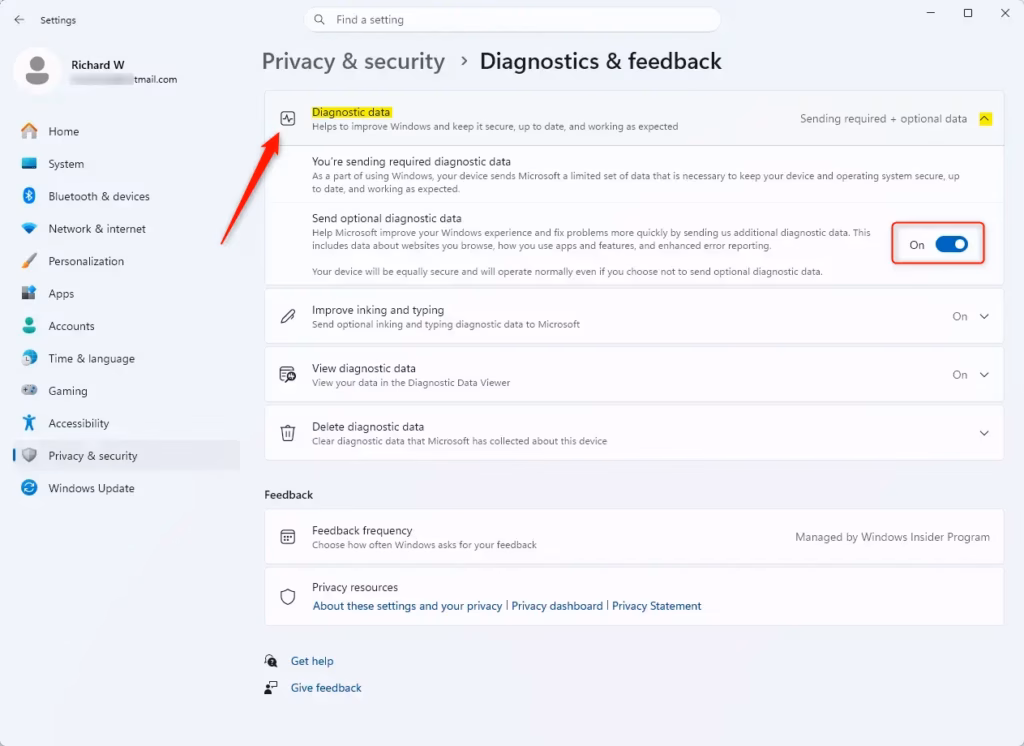
Now you’re in the right spot! Look for the Diagnostic data section. You’ll see choices for how much data you want to send.You usually have two main options:
Click the option you are most comfortable with. If you’re not sure, choosing “Required” is a good start.Practical Tip: If you want to know more about what “Optional” data includes, look for links on this screen. Microsoft often provides more details there.
Warning: You might need to restart your PC for these changes to fully work, especially if you switch between Required and Optional. Windows will usually tell you if a restart is needed.- Required: Sends only the essential data for security, reliability, and basic functions.
- Optional: Includes Required data plus extra information to help Microsoft improve products and features.
Review Other Related Settings
While you are in “Diagnostics & feedback,” look at the other settings:Review these settings and change them how you like. You can fine-tune your Windows experience!
- Improve inking & typing: If you use a pen or touch screen, this lets Windows collect samples to improve handwriting recognition and text suggestions.
- Tailored experiences (or Personalized offers): This uses your diagnostic data to give you personalized tips and recommendations in Microsoft services. Turn this off if you prefer not to have personalized offers.
- Delete diagnostic data: You might see an option to delete diagnostic data already collected from your device.
Reference:
Summary
In Windows 11, you can control how much diagnostic data your computer sends to Microsoft. By going to Settings > Privacy & security > Diagnostics & feedback, you can choose between “Required” and “Optional” diagnostic data. “Required” is the minimum needed for security and basic function. “Optional” provides more details to help Microsoft improve products. You can also manage settings for inking and typing, tailored experiences, and delete previously collected data. Changing these settings helps you manage your privacy while using Windows.
Was this guide helpful?

About the Author
Richard
Tech Writer, IT Professional
Richard, a writer for Geek Rewind, is a tech enthusiast who loves breaking down complex IT topics into simple, easy-to-understand ideas. With years of hands-on experience in system administration and enterprise IT operations, he’s developed a knack for offering practical tips and solutions. Richard aims to make technology more accessible and actionable. He's deeply committed to the Geek Rewind community, always ready to answer questions and engage in discussions.

No comments yet — be the first to share your thoughts!