How to Change Your Diagnostic Data Setting In Windows 11

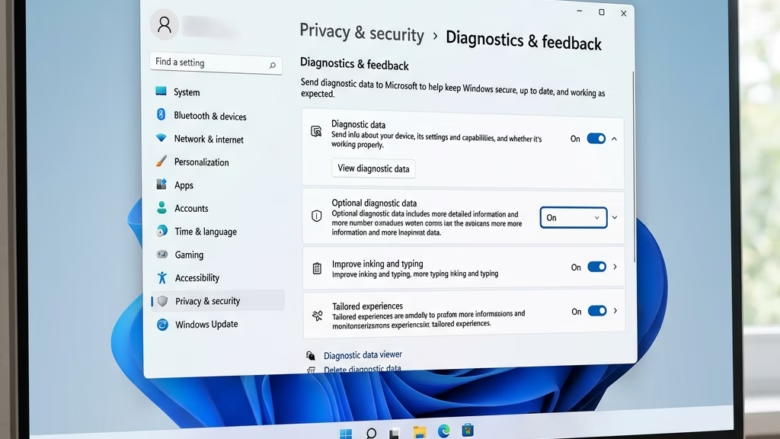
Diagnostic data in Windows 11 is background information about your PC and apps that Windows sends to Microsoft. Microsoft uses it to fix bugs and improve stability. You can choose between two levels: Required (basic details to keep your device secure) or Optional (extra details about websites you visit and app usage).
You can change this setting at any time. Open Settings and go to Privacy & security. Lowering the setting to Required stops the extra sharing, and your PC keeps running normally. Nothing is uninstalled, and no restart is needed.
Open Settings , go to Privacy & security, click Diagnostics & feedback, then toggle Send optional diagnostic data Off for Required only or On for Optional. The change applies immediately with no restart needed.
What is Diagnostic Data?
Windows 11 diagnostic data is the information your computer automatically sends to Microsoft about your device health and how you use the system. Microsoft splits it into two levels: required data for basic security and optional data that adds details about app usage and website visits.
There are two main types:
- Required diagnostic data: This is the basic info needed to keep Windows safe, updated, and working. It includes your device’s setup and whether it is running okay. You cannot turn this level off.
- Optional diagnostic data: This is more detailed. It can include extra info about your device, how you use apps (called “usage data”), and more detailed error reports. Sending it helps Microsoft find and fix problems faster, which makes Windows better for everyone. This is the level you can switch off.
Even if you only send Required data, your device stays secure and works normally. You still get Windows Update and security fixes. The choice is only about how much extra information you are okay with sharing to help improve products.
Ready to take control? Here is how to adjust your diagnostic data settings in Windows 11.
- Press the Windows key + I on your keyboard at the same time. The Settings app opens right away.
- If you prefer the mouse, click the Start button on the taskbar, then click Settings (the gear icon). It opens the same Settings window. Use whichever method is quicker for you.
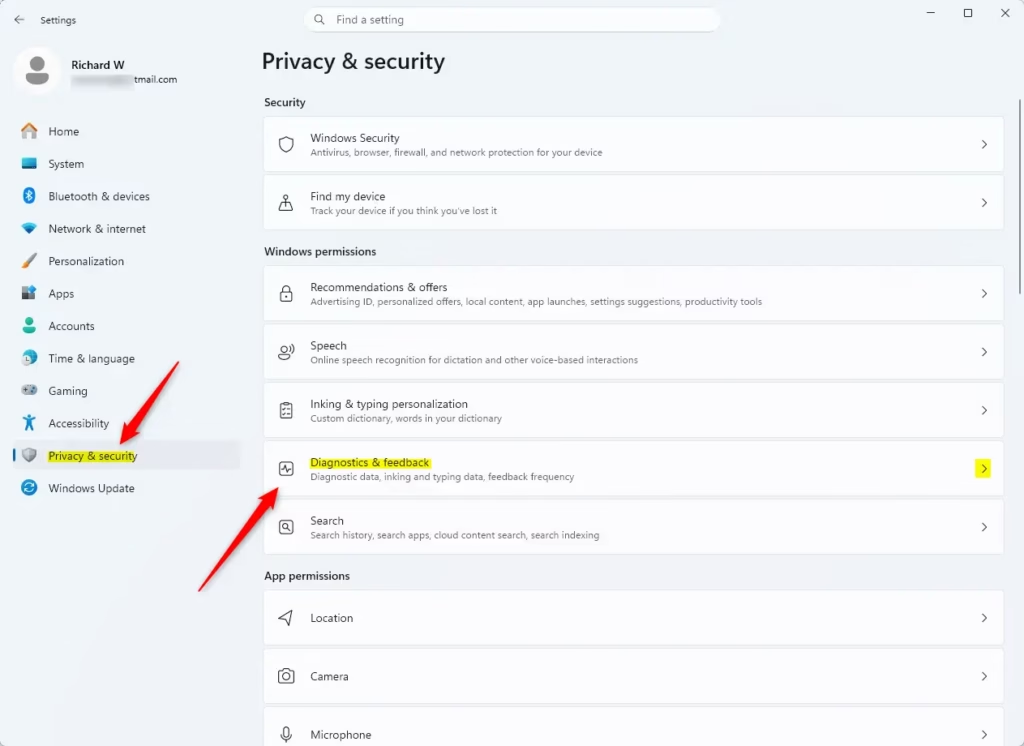
- In the left-hand menu, click Privacy & security. The right-hand pane now shows privacy options grouped by topic.
- Scroll down to the Windows permissions section and click Diagnostics & feedback. You should now see the diagnostic data options, with more settings below them.
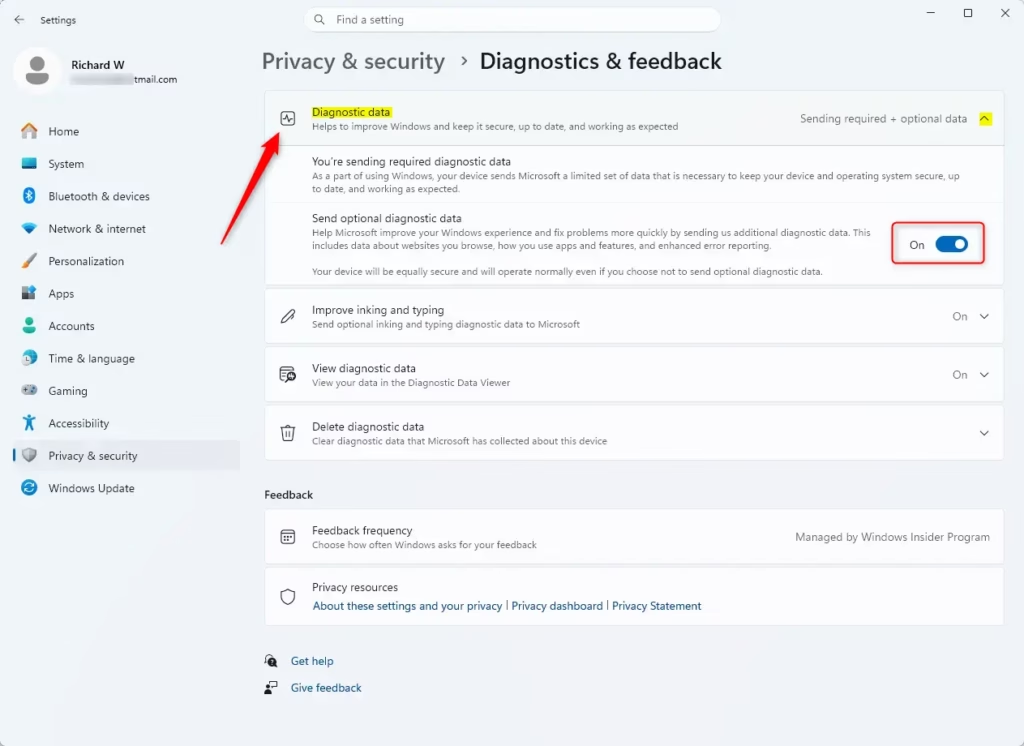
- Find Send optional diagnostic data and click its toggle. Turn it Off to send Required data only. Turn it On if you want to share Optional data. The change applies immediately, so you do not need to click Save or restart.
Navigate to Privacy & security
In the Settings window, look at the list on the left. Scroll down to Privacy & security and click it.If you can't find something, use the search bar at the top. Type "diagnostics" to go straight there.
Locate Diagnostics & feedback
In the "Privacy & security" section, find Diagnostics & feedback. This is where you control what Windows sends to Microsoft. Click on it.Adjust the Diagnostic data setting
Now you're in the right spot! Look for the Diagnostic data section. You'll see choices for how much data you want to send.Change your windows 11 diagnostic data setting by going to Privacy & security and then Diagnostics & feedback inside the Settings app. From that menu, you can switch your preference between the Required and Optional choices depending on how much system information you want to share with Microsoft.
Click the option you are most comfortable with. If you're not sure, choosing "Required" is a good start.Microsoft often provides more details there.
Warning: You might need to restart your PC for these changes to fully work, especially if you switch between Required and Optional. Windows will usually tell you if a restart is needed.- Required: Sends only the essential data for security, reliability, and basic functions.
- Optional: Includes Required data plus extra information to help Microsoft improve products and features.
If the toggle is greyed out, or you see a message that some settings are managed by your organization, a policy is controlling it. This is common on work or school PCs and on Windows 11 Pro devices managed by an administrator. Windows 11 Home has no such local management unless a policy was applied some other way. Ask your IT department if you need the setting changed. To undo your choice, return to the same screen and flip the toggle back.
-
Review Other Related Settings
While you are on the Diagnostics & feedback screen, look at the other settings below the main toggle. They control extra features such as inking and typing improvements and tailored experiences. These secondary toggles decide whether Microsoft can use your writing samples and diagnostic data to personalize your device.
The exact list can vary a little between Windows 11 versions, so you may not see every option described here. Each toggle works on its own and can be switched back at any time.
- Improve inking & typing: If you use a pen or touch screen, this lets Windows collect samples of your handwriting and typing to improve handwriting recognition and text suggestions. If you only use a keyboard and mouse, you can safely leave it off.
- Tailored experiences (or Personalized offers): This uses your diagnostic data to give you personalized tips and recommendations in Microsoft services. Turn it off if you prefer not to see personalized offers. In most Windows 11 builds this option works best when optional diagnostic data is on, so it may be unavailable once you switch to Required only.
- Delete diagnostic data: You might see an option to delete diagnostic data already collected from your device. Deleting clears what Microsoft has stored so far. It does not stop future collection, so set the toggle above to the level you want first.
Reference:
Summary
You can manage Windows 11 diagnostic data from the privacy settings. Open Privacy & security and then Diagnostics & feedback to switch between Required and Optional reporting. From the same screen you can turn off tailored experiences and delete the diagnostic data already collected. Come back whenever you want to limit what your computer shares. Every change here can be reversed the same way you made it.
Did this guide fix your problem?

About the Author
Richard
Tech Writer, IT Professional
Richard is a writer at Geek Rewind who turns complex IT tasks into clear, step-by-step guides. He draws on years of hands-on experience in system administration and enterprise IT operations, focusing on Windows, Linux and WordPress: the problems people actually run into, and the fixes that work. His server and WordPress guides come from systems he runs himself. Richard builds and maintains the platform behind Geek Rewind, from its Ubuntu servers and Nginx configuration to its custom WordPress plugins. Many new tutorials start with readers' questions, and he's always glad to answer them in the comments.
No comments yet — be the first to share your thoughts!