How to Delete Services in Windows 11

Deleting a service in Windows 11 removes a background program that starts with your PC. Windows services are helper programs that handle everyday tasks such as your network connection and security. Most are needed, but some are leftovers from software you have already uninstalled.
Those leftover entries clutter the system, and a service that points to a missing program can log errors at every startup. Removing them is a reasonable cleanup, but deleting the wrong service can stop Windows or a device from working properly.
Command Prompt, the text-based tool for running commands, can permanently remove a service when you run it with administrator rights. The Registry Editor can clear out entries that remain afterwards. Go through the steps below in order, and make a restore point before you change anything.
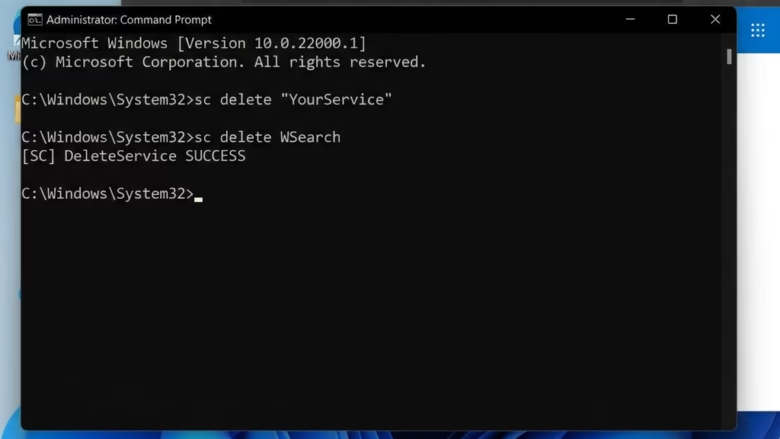
You can delete Windows 11 services using Command Prompt or Registry Editor. Open Command Prompt as administrator and type `sc delete “ServiceName”`. Alternatively, open Registry Editor, navigate to 🗝️HKEY_LOCAL_MACHINESYSTEMCurrentControlSetServices, find the service folder, and delete it.
How to Identify Safe Services
Before you delete anything, work out which services are safe to remove. The Services console, the Windows tool that manages background programs, shows the details you need. A service is a good candidate when the program it points to no longer exists on the drive.
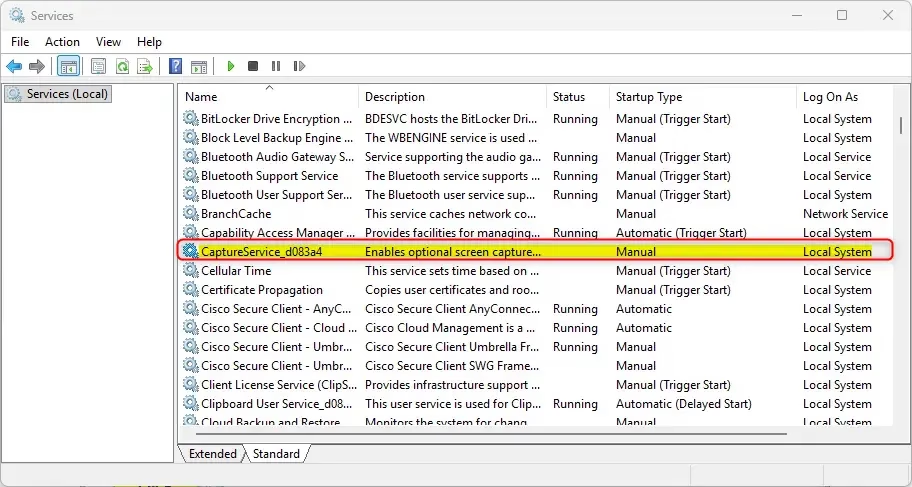
- Press the Start button, type Services, and open the Services app. You should see an alphabetical list of services with their status and startup type.
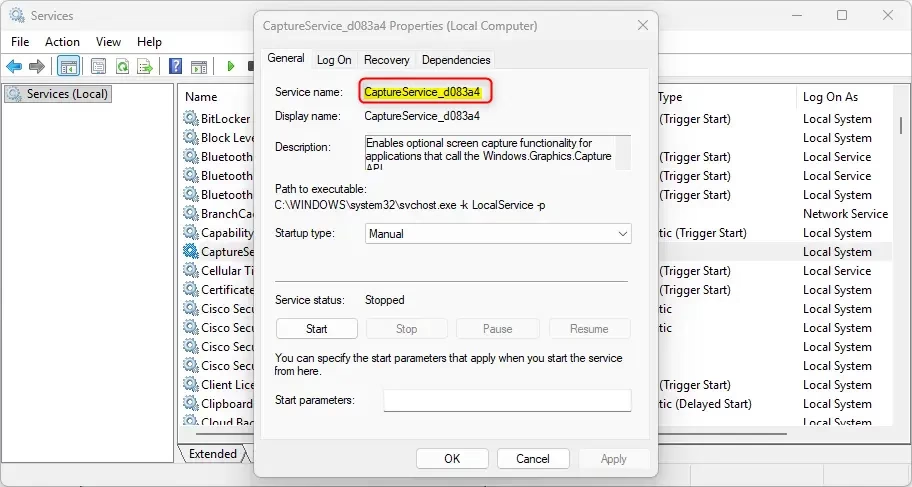
- Double-click the service you suspect is a leftover. Its Properties window opens on the General tab.
- Read the Service name field and write it down exactly. This is the short name you will use later. It is often different from the longer name in the list.
- Read the Path to executable field. Open File Explorer and go to that folder. If the folder or file is gone, the service is an orphan and is usually safe to remove.
- Read the Description as well. If it mentions Windows, your security software, drivers, or your network, leave the service alone.
If you are unsure about a service, do not delete it. Setting its startup type to Disabled stops it from running and is easy to reverse. Deletion is much harder to undo.
How to Delete Services via Command Prompt (Admin)
The sc command inside Command Prompt deletes the service from your system. The removal is permanent, so check the service name first. It works the same on Windows 11 Home and Pro.
- Press the Start key and type cmd.
- Right-click Command Prompt in the results and select Run as administrator. This step needs administrator privileges. Click Yes if User Account Control asks for permission. The window title should now start with "Administrator".
- Have the service name from the Services console ready, as described in the previous section.
- Type the delete command below, replace SERVICENAME with the exact service name, and press Enter. If the service was removed, you should see a success message.
sc delete "ServiceName"
- To confirm the deletion, type
sc query "ServiceName"and press Enter. The message "The specified service does not exist as an installed service" confirms the service was removed.
If the service was running when you deleted it, Windows may only mark it for deletion. It disappears completely after you stop it or restart the PC. Close the Services app before you check again, because an open Services window can keep the entry alive.

How to Delete Services via Registry Editor
The Registry Editor can delete a service by removing its key, which is the folder in the left pane that matches the service name. This is useful for entries left behind that you cannot clean up another way. The registry holds core Windows settings, so back it up first. A wrong deletion can stop Windows from starting.
- Back up the registry. In Registry Editor, select File Export, choose All under Export range, name the file, and click Save. You can also create a system restore point from the Start menu search.
- Press the Windows key + R, type regedit, and press Enter. Click Yes if User Account Control appears. Registry Editor opens with a tree of keys in the left pane.
- Go to the following path:
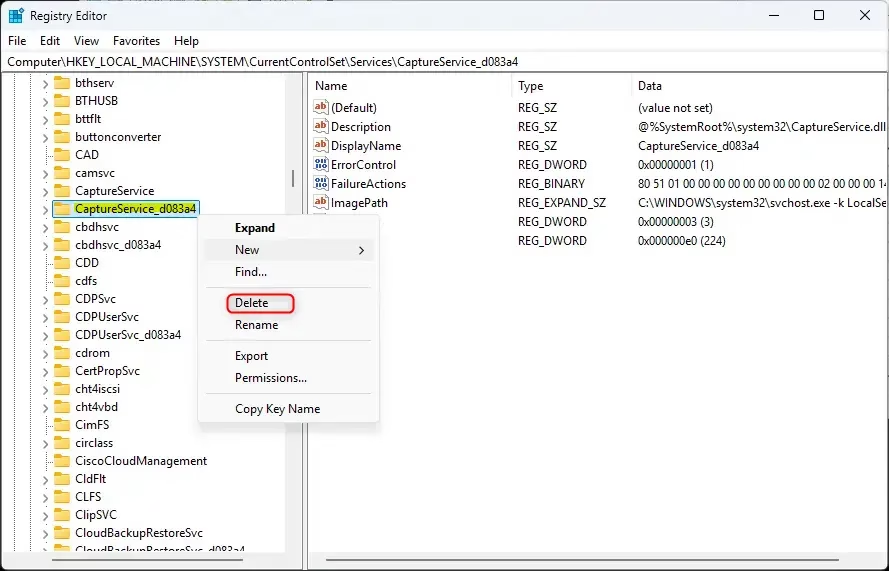
HKEY_LOCAL_MACHINE\SYSTEM\CurrentControlSet\Services. You can paste it into the address bar at the top of the window. You should see a long list of service keys. - Find the key that matches your service name in the left pane and click it once. Check that the values on the right, such as ImagePath, point to the missing program.
- Right-click the key and select Delete.
- Click Yes to confirm the action.
- Restart your computer to apply the changes.
To undo a registry deletion, double-click the .reg file you exported and confirm the prompt, then restart. You can also use the restore point you created.
Troubleshooting
A permission error while deleting a service, such as "Access is denied", almost always means the Command Prompt window is not running as administrator. Close the window and open it again with these steps:
- Press the Start key and type cmd.
- Right-click Command Prompt and select Run as administrator.
- Check that the title bar says "Administrator: Command Prompt", then run the command again.
If you still get an error, check that you typed the service name exactly as it appears in the Service name field. Also confirm that you are signed in with an administrator account. A service that Windows protects may refuse deletion even with admin rights, which is a sign you should leave it alone.
Summary
Deleting a service clears out leftover entries from uninstalled software. Before you start, create a system restore point or back up the registry so you can recover from a mistake. Command Prompt is the quicker way to remove a service, and Registry Editor is better for manual cleanup of what remains. Always verify the service name and the program path first. That check does more than anything else to keep Windows stable.
Have a question about this guide?
Answered by AI from this guide. Good questions may be added to this page — please don't include personal details.
Did this guide fix your problem?

About the Author
Richard
Tech Writer, IT Professional
Richard is a writer at Geek Rewind who turns complex IT tasks into clear, step-by-step guides. He draws on years of hands-on experience in system administration and enterprise IT operations, focusing on Windows, Linux and WordPress: the problems people actually run into, and the fixes that work. His server and WordPress guides come from systems he runs himself. Richard builds and maintains the platform behind Geek Rewind, from its Ubuntu servers and Nginx configuration to its custom WordPress plugins. Many new tutorials start with readers' questions, and he's always glad to answer them in the comments.
No comments yet — be the first to share your thoughts!