How to Defragment Windows 11 for Better Performance
Defragmenting Windows 11 organizes your hard drive’s data to make your PC run faster. This process, often called optimizing your drive, fixes file fragmentation.
File fragmentation happens when parts of a single file get scattered across your storage drive. Imagine a book where each page is in a different room – it takes much longer to find and read the whole story.
When your computer needs to open a file, it has to hunt for all its scattered pieces. This takes time and slows things down.
Defragmentation brings these pieces back together. For traditional Hard Disk Drives (HDDs), this means much quicker file access. Windows 11 also optimizes Solid State Drives (SSDs) using a related process called TRIM.
How to Defragment Your System Drive
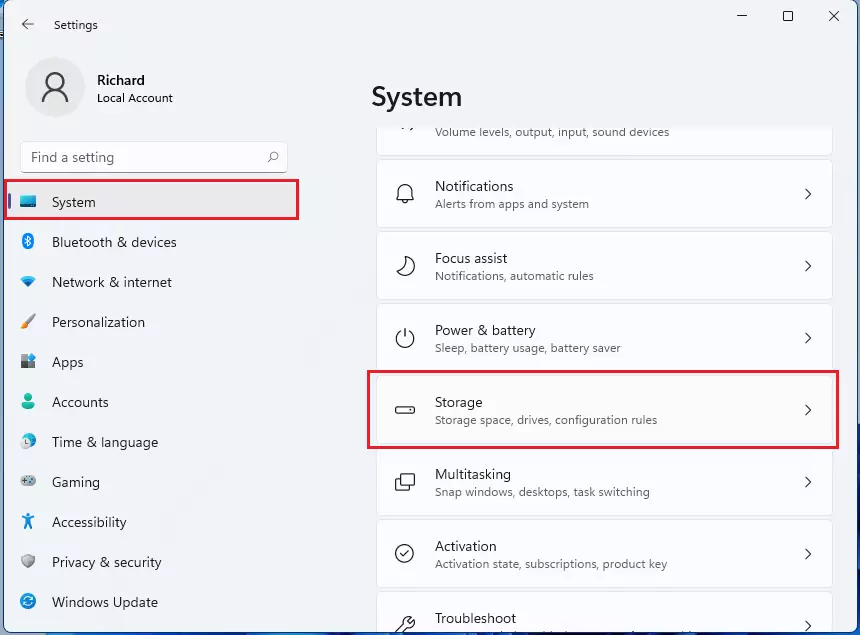
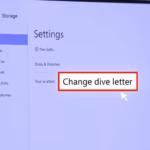
You can defragment your Windows 11 system drive in the Settings app to help your computer run faster. This process organizes files on your drive so Windows can find them more quickly. To start, open Settings by pressing the Windows key and I, then go to System, and click on Storage.
- Open the Settings app by pressing Windows key + I or by clicking Start and selecting Settings.

- Click on System, then select Storage on the right side of the screen.
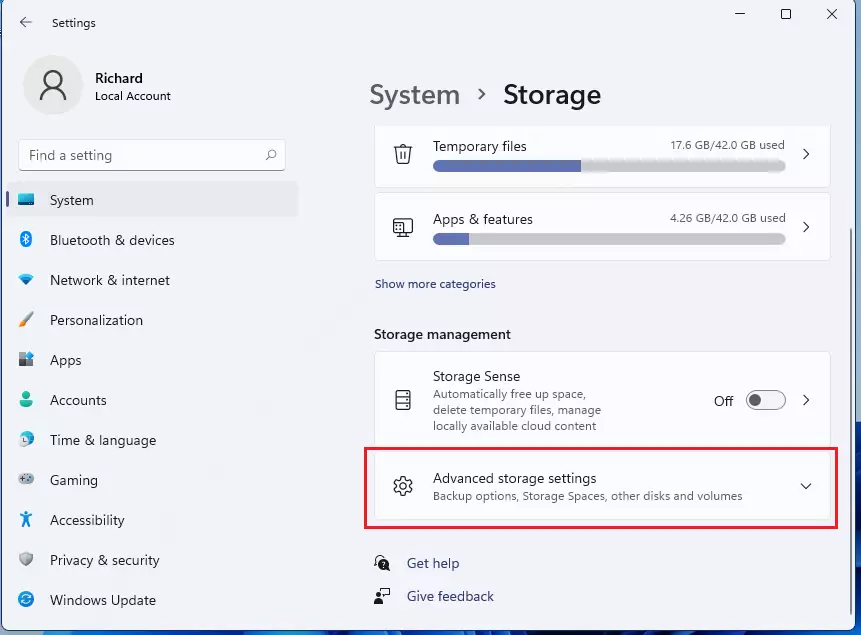
- Click on Advanced storage settings.
- Select Drive optimization from the menu.
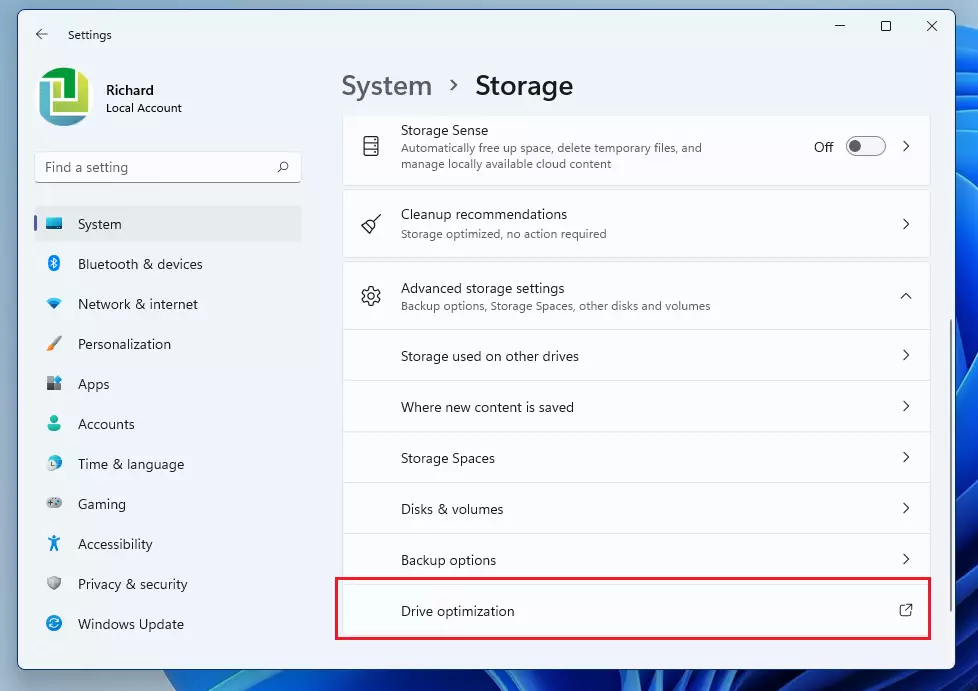
- You will see a list of your drives and their current status.

If you want to set a specific time for this to run, make sure Schedule optimization is turned off by clicking Change settings.
How to Schedule Defragmentation
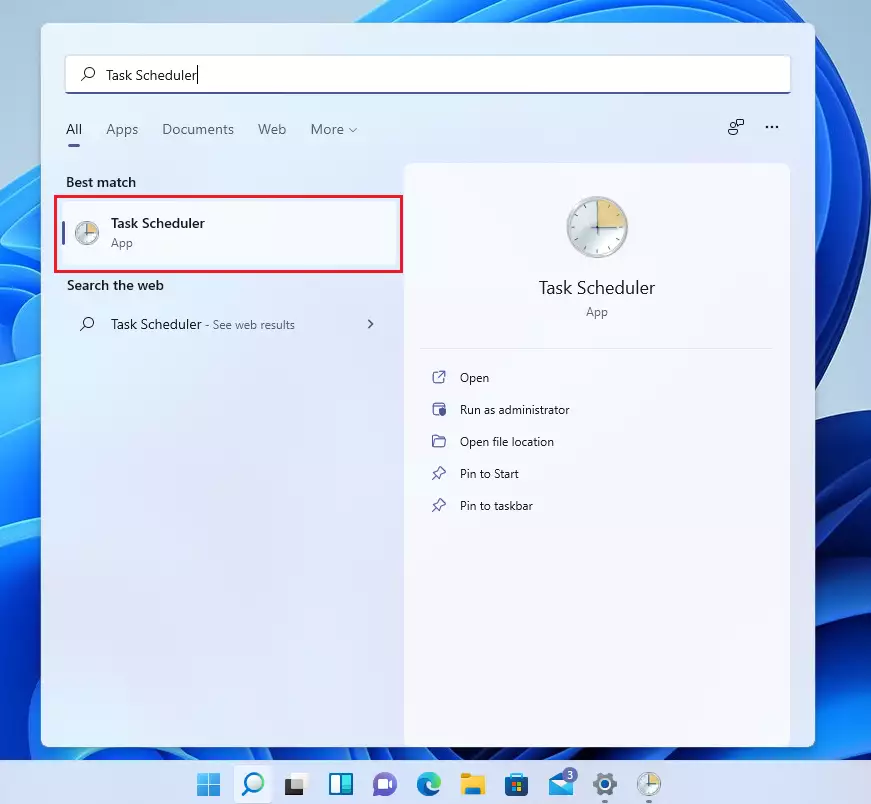
Windows 11 normally defragments your drives automatically, but you can schedule this task to run at a specific time using Task Scheduler. This is useful if you want more control over when your computer performs this maintenance. You’ll need administrator rights to set this up. Open Task Scheduler by searching for it.
- Search for Task Scheduler in the search bar and open the app.
- In the menu on the left, go to Task Scheduler Library %📂%LNK0%% > Microsoft > Windows > Defrag.

- Double-click the defrag schedule or click Properties on the right side.
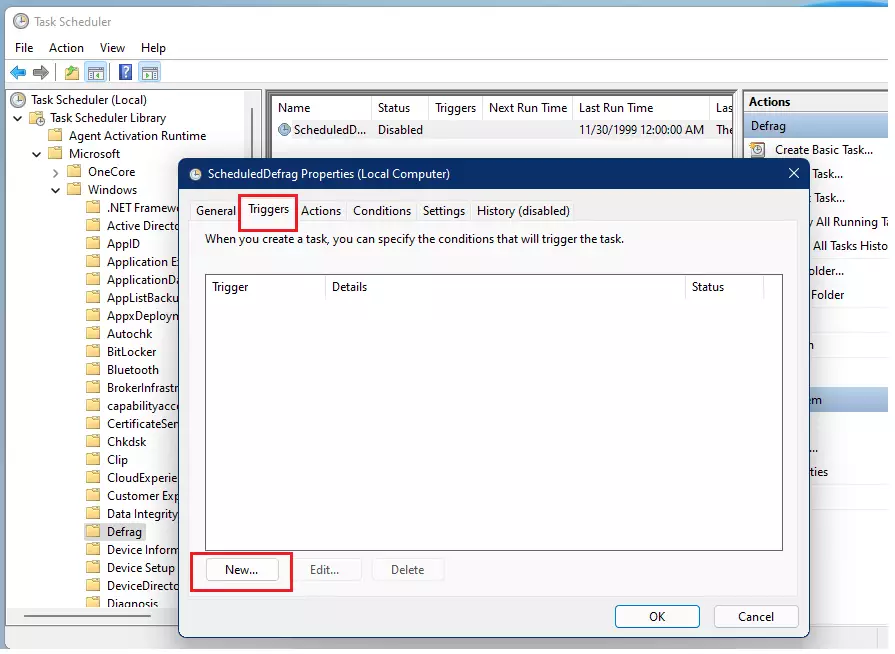
- Click the Triggers tab and click New to choose your preferred time and frequency.
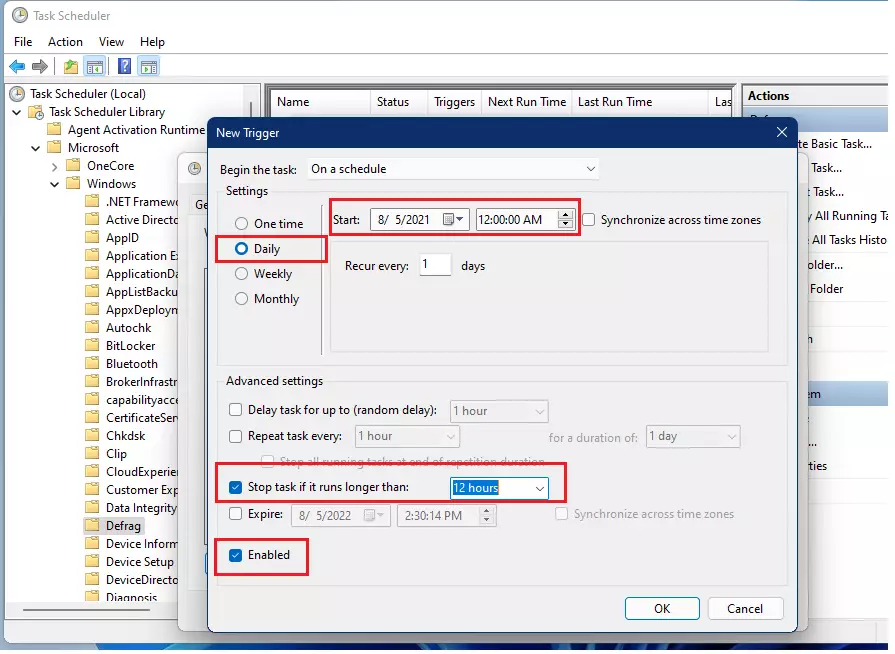
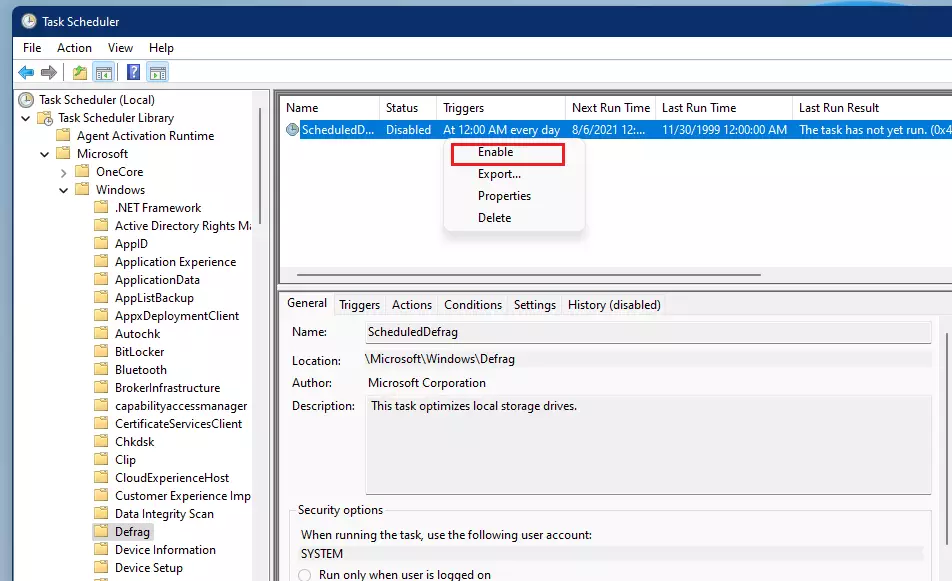
- Click OK to save your settings. Finally, right-click the task and select Enable to turn it on.
Summary
Defragmenting your Windows 11 drive helps organize files, making your computer find them quicker and improving overall performance.
Was this guide helpful?

About the Author
Richard
Tech Writer, IT Professional
Richard, a writer for Geek Rewind, is a tech enthusiast who loves breaking down complex IT topics into simple, easy-to-understand ideas. With years of hands-on experience in system administration and enterprise IT operations, he’s developed a knack for offering practical tips and solutions. Richard aims to make technology more accessible and actionable. He's deeply committed to the Geek Rewind community, always ready to answer questions and engage in discussions.

No comments yet — be the first to share your thoughts!