How to Change Screen Timeout to Turn Off Display After in Windows 11

This tutorial shows you how to set how long your Windows 11 computer waits before turning off the display when it’s idle. You can choose a screen timeout, which is the amount of time your PC stays inactive before the display automatically turns off.
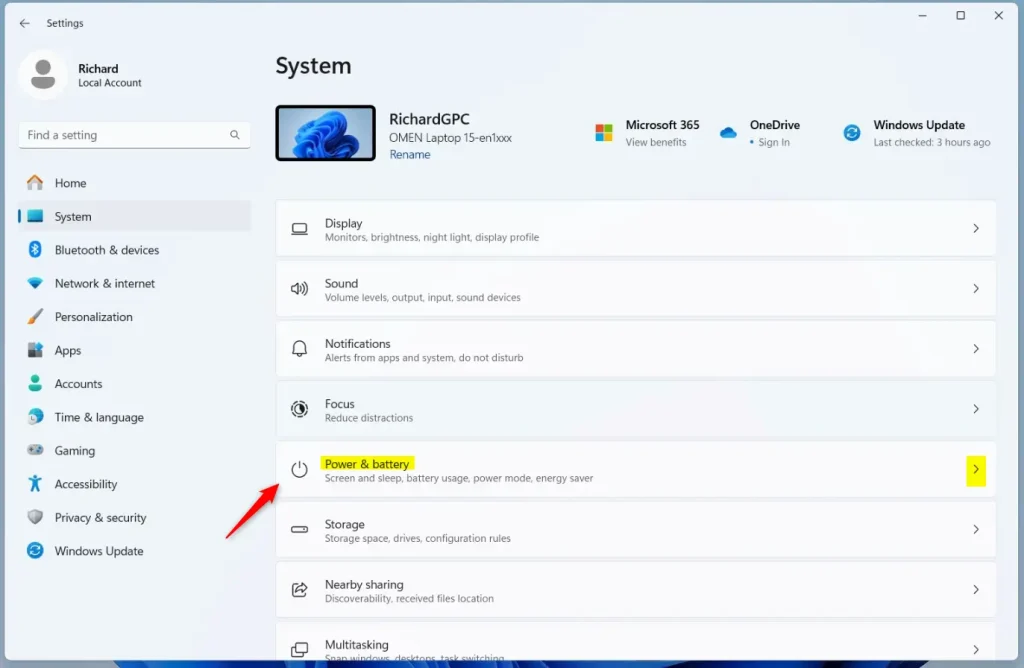
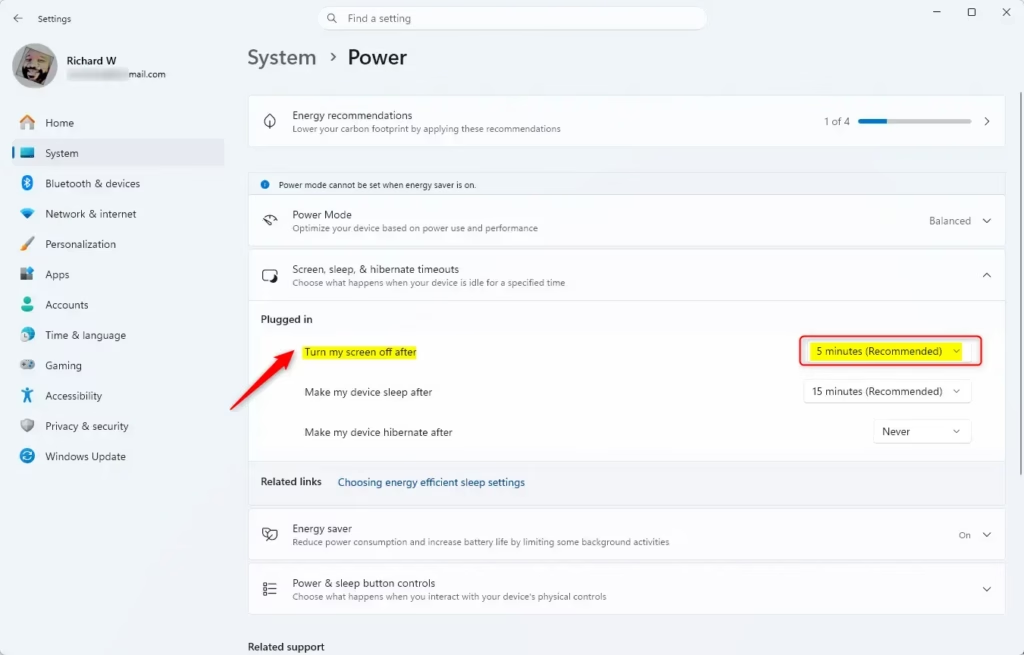
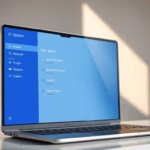
Press ⊞ Win+I to open Settings, navigate to System > Power & battery > Screen and sleep, and select your desired timeout duration from the dropdown menus. You can choose specific times for when on battery or plugged in, or select “Never.
Why does this matter?
Turning off your Windows 11 display after a set period of inactivity conserves electricity, directly extending your device's battery life. For instance, setting the display to turn off after 5 minutes of no use prevents unnecessary power drain.
What happens when you do this?
Changing the screen timeout in Windows 11 lets you control how long your screen stays on before it automatically turns off to save power.
By default, Windows 11 turns off your screen after 5 minutes when running on battery power and 15 minutes when plugged in.
Reference:
Power settings in Windows 11 – Microsoft Support
You can use screen and sleep settings to save energy and make your battery last longer.
If your device has a presence sensor, you can turn on or off Automatically turn off my screen when I leave and turn on or off Automatically wake up my device when I approach. The location of presence detection settings varies depending on your device brand and model.
Option One
You can easily change your screen timeout in Windows 11 using the Settings app by going to System, then Power & battery, and finally Screen and sleep.
- Press
Win+Ito open Settings. - Click
Systemon the left side. - Click
Power & batteryon the right side (depending on whether your PC has a battery). - Click
Screen and sleepon the right side. - Select
Neveror choose how many minutes or hours you want for screen timeout. Use the drop-down menus for “On battery power, turn off my screen after” and/or “When plugged in, turn off my screen after.” - Close Settings.
Change Screen Timeout in Settings
Option Two Open Power & battery settings
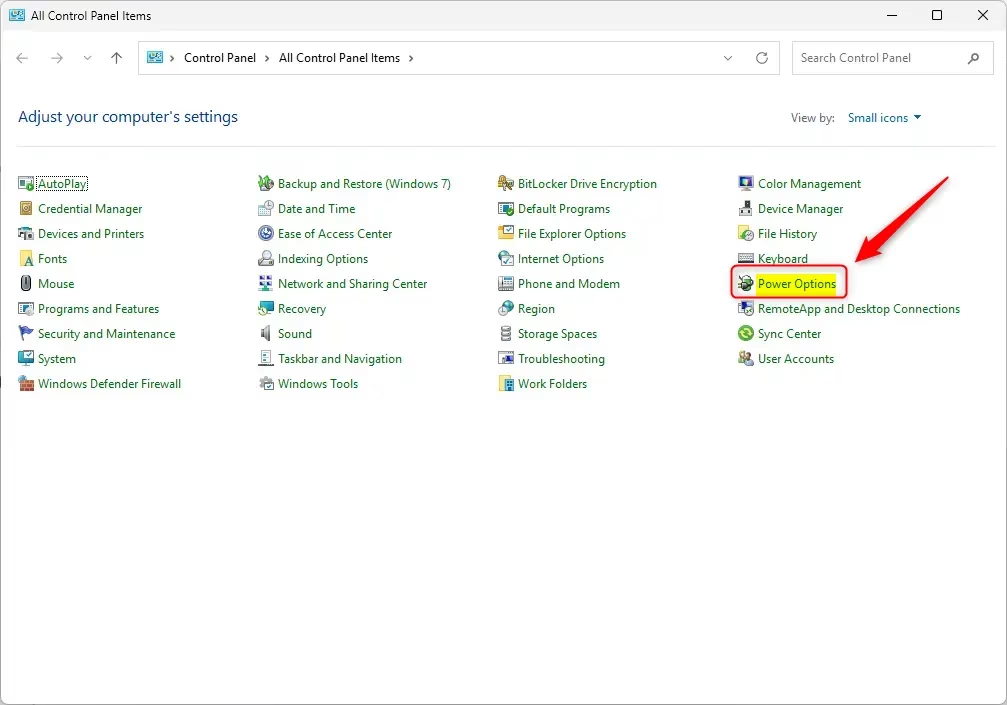
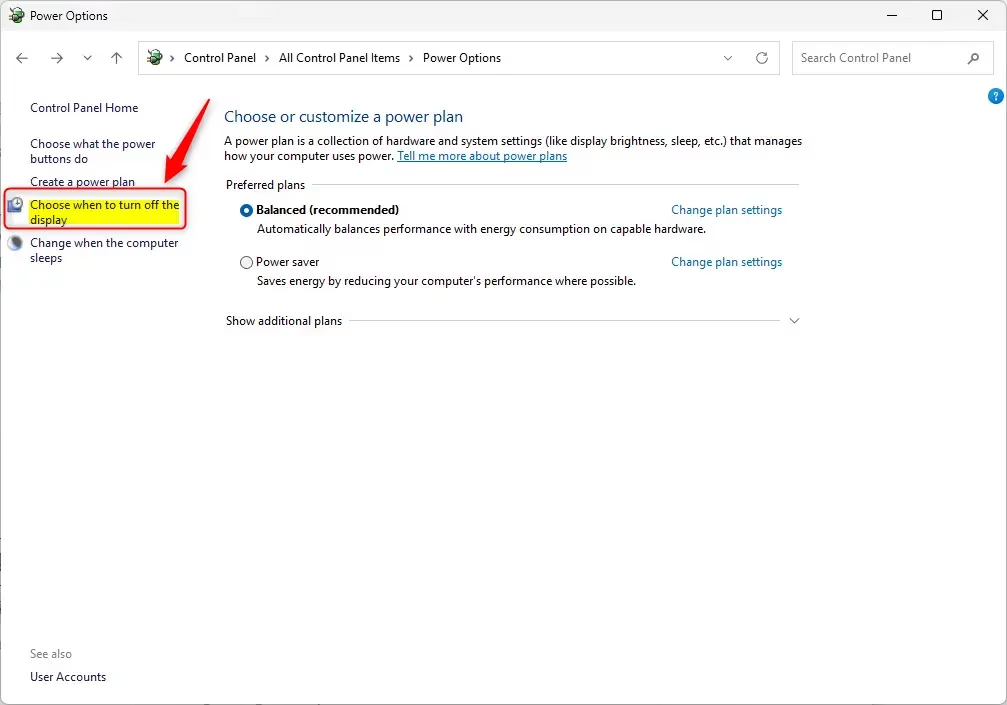
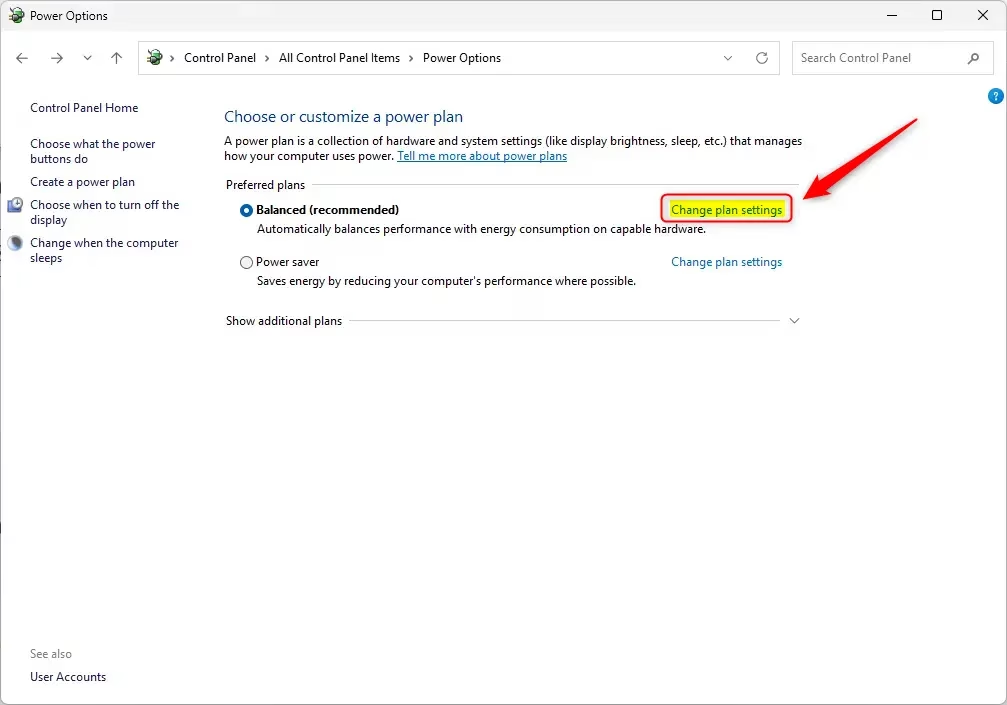
Changing your screen timeout in Windows 11 can also be done through the Control Panel by opening Power Options and selecting when to turn off the display.
- Open Control Panel in icons view.
- Click the
Power Optionsicon. - Click
Choose when to turn off the displayon the left side. - Select
Neveror choose how many minutes or hours you want for screen timeout. Use the drop-down menus for “On battery” and/or “Plugged in.” - Click
Save changes. - Close Control Panel.
Change Screen Timeout in Power Plan Settings
Option Three
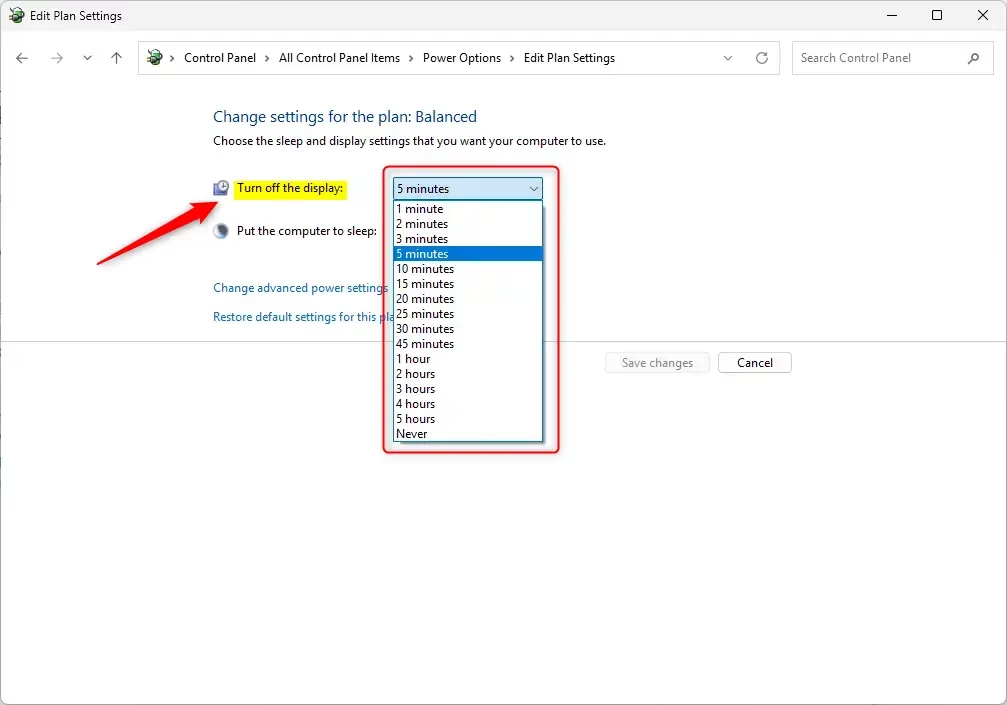
For more control over your screen timeout in Windows 11, use the Advanced Power Plan Settings by changing plan settings in the Control Panel’s Power Options.
- Open Control Panel in icons view.
- Click the
Power Optionsicon. - Click
Change plan settingsfor your active power plan (for example: “Ultimate Performance”). - Click
Change advanced power settings. - Scroll down and expand
DisplayandTurn off display after. - Select
Neveror choose how many minutes or hours you want for screen timeout. Use the drop-down menus for “On battery” and/or “Plugged in.” - Click
OK. - Close Control Panel.
Change Screen Timeout in Advanced Power Plan Settings
Option Four
You can change your screen timeout in Windows 11 using commands in the Windows Terminal by opening it as an administrator and typing specific powercfg commands.
If you prefer typing commands, you can use Windows Terminal to change your screen timeout.
- Open Windows Terminal and select
Command PromptorWindows PowerShell. - Type one of the commands below and press Enter.
For battery power:
powercfg -change -monitor-timeout-dc <minutes>OR
powercfg /SETDCVALUEINDEX SCHEME_CURRENT 7516b95f-f776-4464-8c53-06167f40cc99 3c0bc021-c8a8-4e07-a973-6b14cbcb2b7e <seconds>For plugged in:
powercfg -change -monitor-timeout-ac <minutes>OR
powercfg /SETACVALUEINDEX SCHEME_CURRENT 7516b95f-f776-4464-8c53-06167f40cc99 3c0bc021-c8a8-4e07-a973-6b14cbcb2b7e <seconds>Important:
- Replace
<minutes>with how many minutes you want before the display turns off. - Replace
<seconds>with how many seconds you want before the display turns off. - Using
0(zero) minutes or seconds works the same as choosing “Never.”
- Close Windows Terminal.
Summary
Changing your screen timeout in Windows 11 is possible through four main methods: the Settings app, Control Panel, Advanced Power Plan Settings, or command-line tools like Windows Terminal.
- Option One: Use the Settings app for a quick and easy change.
- Option Two: Use Power Options in Control Panel to adjust when your display turns off.
- Option Three: Use Advanced Power Plan Settings for more detailed control.
- Option Four: Use command-line tools if you prefer typing commands (requires admin privileges).
Choose the option that works best for you. All of these methods will help you save power and extend your battery life.
How do I change the screen timeout setting in 🪟 Windows 11?
Adjust default screen and sleep settings To adjust power and sleep settings in Windows 11, select Start > Settings > System > Power & battery > Screen, sleep, & hibernate timeouts.
How do I change the screen time limit on 🪟 Windows 11?
To set screen time limits: Step 1 – From your account, search family options in the centre menu search bar. Click Family options. Step 2 – Click View family settings and click on your child's profile. Click Screen time from the left-hand menu.
Was this guide helpful?

About the Author
Richard
Tech Writer, IT Professional
Richard, a writer for Geek Rewind, is a tech enthusiast who loves breaking down complex IT topics into simple, easy-to-understand ideas. With years of hands-on experience in system administration and enterprise IT operations, he’s developed a knack for offering practical tips and solutions. Richard aims to make technology more accessible and actionable. He's deeply committed to the Geek Rewind community, always ready to answer questions and engage in discussions.

No comments yet — be the first to share your thoughts!