How to Manage Tailored Experiences in Windows 11

Tailored experiences in Windows 11 let your PC learn how you use it to offer helpful suggestions. These experiences work by using your diagnostic data and app activity to show you relevant tips and app recommendations.
For example, Windows 11 might suggest a video editing program if you often edit videos. You can control these personalized features to decide how much Windows learns about your habits.
You can find these settings in Privacy & security > Diagnostics & feedback. Adjusting them helps you balance useful recommendations with your privacy preferences.
You manage tailored experiences in Windows 11 through Settings > Privacy & security > Diagnostics & feedback. Flip the “Tailored experiences” switch to On or Off to control personalized tips and app suggestions based on your diagnostic data.
How to turn Tailored experiences On or Off in Settings
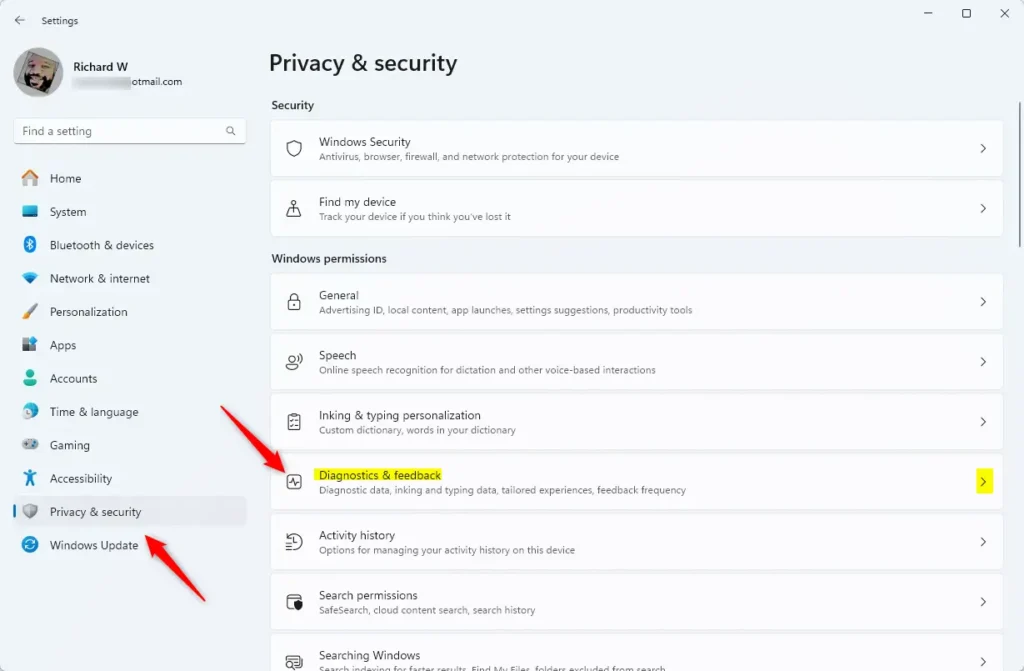
You can manage tailored experiences in Windows 11 directly from the Settings app to control personalized tips and recommendations you see. This setting lets you decide if Windows shows you helpful suggestions based on how you use your PC.
- Open the Windows Settings app.
- Select Privacy & security on the left.
- Click on the Diagnostics & feedback tile on the right.
- Click the Tailored experiences tile to open it.
- Flip the switch to On or Off based on your preference.
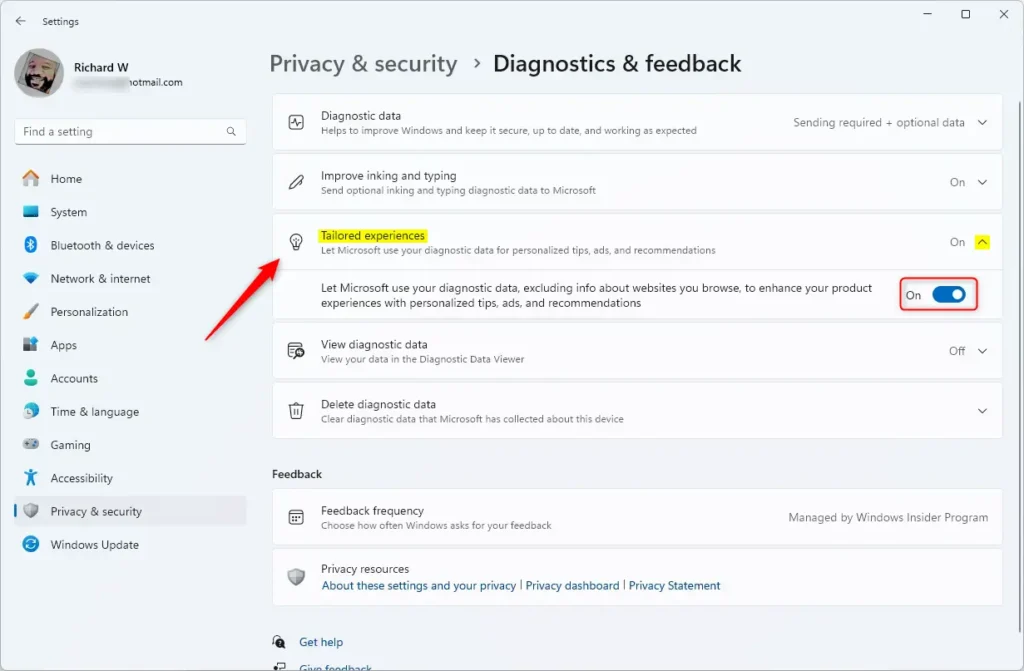
Close the Settings app when finished.
Manage Tailored experiences using Group Policy
For more control over tailored experiences in Windows 11, consider using the Local Group Policy Editor. This tool requires administrator rights and lets you manage the setting for multiple users or your entire computer. It’s a powerful way to control this feature.
You can also use the Local Group Policy Editor to manage this setting.
- Press the Windows key, type
gpedit.msc, and hit Enter. - Go to: User Configuration > Administrative Templates > Windows Components > Cloud Content.
- Double-click Do not use diagnostic data for tailored experiences.
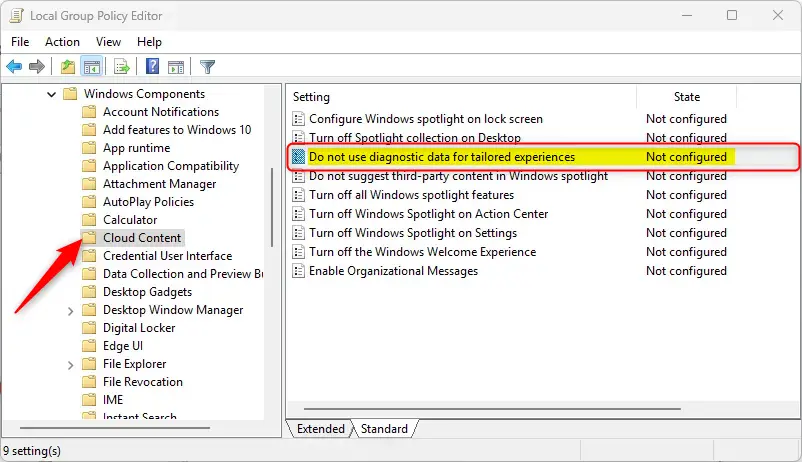
Choose your setting:
- Not Configured: Uses the default Windows setting.
- Enabled: Turns off tailored experiences (Microsoft will not use your data for ads or tips).
- Disabled: Turns on tailored experiences (Microsoft will use your data for personalized content).

Click OK and restart your computer to apply the changes.
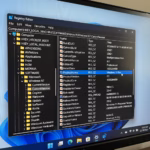
Manage Tailored experiences using the Registry Editor
Managing tailored experiences in Windows 11 can also be done through the Registry Editor. This advanced method requires administrator privileges. You’ll need to be careful when making changes in the registry, as incorrect edits can cause system issues.
- Open the Windows Registry by searching for
regeditin the Start menu. - Navigate to this path:
Computer\HKEY_CURRENT_USER\Software\Policies\Microsoft\Windows\CloudContent - If you do not see DisableTailoredExperiencesWithDiagnosticData, right-click in the empty space, select New > DWORD (32-bit) Value, and name it
DisableTailoredExperiencesWithDiagnosticData. - Double-click the value and set it to
1to turn off tailored experiences. Set it to0or delete the item to turn them back on.
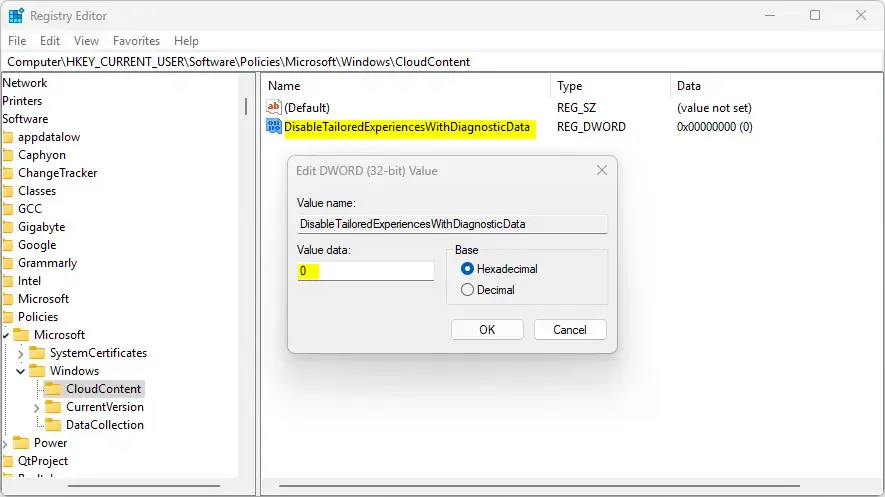
Restart your computer to save your changes.
Summary
Tailored experiences in Windows 11 offer personalized tips and recommendations. You can switch them on or off through Settings, or use Group Policy and the Registry Editor for more detailed management.
What is tailored experience in 🪟 Windows 11?
Microsoft uses Windows diagnostic data to keep Windows secure and up-to-date, troubleshoot problems, and make product improvements. For users who have turned on "Tailored experiences", it can also be used to offer you personalized tips, ads, and recommendations to enhance Microsoft products and services for your needs.
How do I turn off tailored experiences in 🪟 Windows 11?
Click Start > Settings > Privacy & security. Go to Diagnostics and feedback. Find the Tailored experiences menu, and toggle it off.
How to get new experiences for 🪟 Windows 11?
(How can you be among the first to experience new features? Navigate to Settings > Windows Update, and turn on “Get the latest updates as soon as they’re available.”) For more information on ways to get the update, watch this video.
Was this guide helpful?

About the Author
Richard
Tech Writer, IT Professional
Richard, a writer for Geek Rewind, is a tech enthusiast who loves breaking down complex IT topics into simple, easy-to-understand ideas. With years of hands-on experience in system administration and enterprise IT operations, he’s developed a knack for offering practical tips and solutions. Richard aims to make technology more accessible and actionable. He's deeply committed to the Geek Rewind community, always ready to answer questions and engage in discussions.


[…] setup, you can also choose whether or not you’d like Tailored experiences set to On or Off. On newer versions of Windows, you can choose whether or not you’d like […]
[…] related feature called Tailored experiences lets you use your device’s diagnostic data to offer personalized tips, ads, and […]
[…] related feature called Tailored experiences also uses your device’s diagnostic data to offer you personalized tips, ads, and […]
[…] on or off required or optional diagnostic data collection, turn on or off diagnostic data viewer, enable or disable tailored experiences, and […]