How to Change Feedback Frequency in Windows 11


Feedback frequency in Windows 11 controls how often Microsoft asks you to fill out surveys about the operating system. By default, the system sets this schedule to “Automatically,” which triggers pop-up prompts several times a year.
You can turn off these annoying survey windows completely by changing the schedule to “Never” inside the Privacy & security menu. Stopping these alerts keeps your screen clear so you can work or play without sudden interruptions.
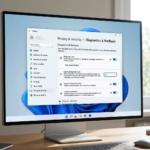
Go to Settings Privacy & security Diagnostics & feedback Under “Feedback frequency,” use the dropdown menu to select “Never” or a less frequent interval. This adjusts how often Windows 11 prompts you for feedback.
Feedback Frequency Options
| Option | Description |
|---|---|
| Automatically | Microsoft decides when to ask based on usage. |
| Always | Frequent prompts for input. |
| Once a day | Limited to one request per 24 hours. |
| Once a week | Limited to one request per 7 days. |
| Never | Disables all feedback prompts. |
How to Change Feedback Frequency in 🪟 Windows 11
Follow these steps to manage your preferences:
- Click the Start button and open Settings.
- Select Privacy & security on the left sidebar.
- Click on Diagnostics & feedback.
- Locate the Feedback frequency section.
- Use the drop-down menu to select your preferred interval.

Your changes apply immediately without needing a restart.
Advanced Method: Registry Editor
You can change feedback frequency Windows 11 using the Registry Editor (an advanced tool for changing system settings). Open the Registry Editor by pressing Win+R, typing regedit, and pressing Enter. Go to 🗝️HKEY_CURRENT_USER\
For a more advanced change, use the Registry Editor: Press Win+R, type regedit, and press Enter to open the Registry Editor. Navigate to:
- Press Win+R, type regedit, and press Enter.
- Navigate to:
HKEY_CURRENT_USER\Software\Microsoft\Windows\CurrentVersion\Feedback - If the key does not exist, right-click the Feedback folder and create a new DWORD (32-bit) Value named FB_Frequency.
- Double-click FB_Frequency and set the value to your preference (e.g., 0 for Never, 1 for Automatically).
Summary
Taming feedback requests in Windows 11 helps cut down on screen clutter. Using the Settings menu or the Registry Editor lets you customize how often Microsoft requests your input. This ensures your privacy preferences are met while maintaining the health of your operating system.
Was this guide helpful?

About the Author
Richard
Tech Writer, IT Professional
Richard is a writer at Geek Rewind who turns complex IT tasks into clear, step-by-step guides. He draws on years of hands-on experience in system administration and enterprise IT operations, focusing on Windows, Linux and WordPress: the problems people actually run into, and the fixes that work. His server and WordPress guides come from systems he runs himself. Richard builds and maintains the platform behind Geek Rewind, from its Ubuntu servers and Nginx configuration to its custom WordPress plugins. Many new tutorials start with readers' questions, and he's always glad to answer them in the comments.


No comments yet — be the first to share your thoughts!