How to Access and View Passkeys in Windows 11 Settings
Windows 11 Settings lets you see the passkeys you’ve saved for apps and websites.
Passkeys are a safer and easier way to sign in to your accounts. Instead of passwords, you can use your Windows Hello PIN, face scan, or fingerprint.
When you create a passkey, Windows saves it securely on your computer for just that one website or app. This means if one passkey is ever compromised, your other accounts stay safe.
You can check which passkeys Windows 11 has stored for you directly within the Settings app. This makes it easy to manage your saved login information.
Open Windows Settings, click Accounts, then select Passkey settings to view a list of all passkeys stored on your computer. You can manage or delete them from this screen.
Access and view passkeys in Windows
Accessing and viewing your passkeys in Windows is done through the Settings app. Here’s how to get started:
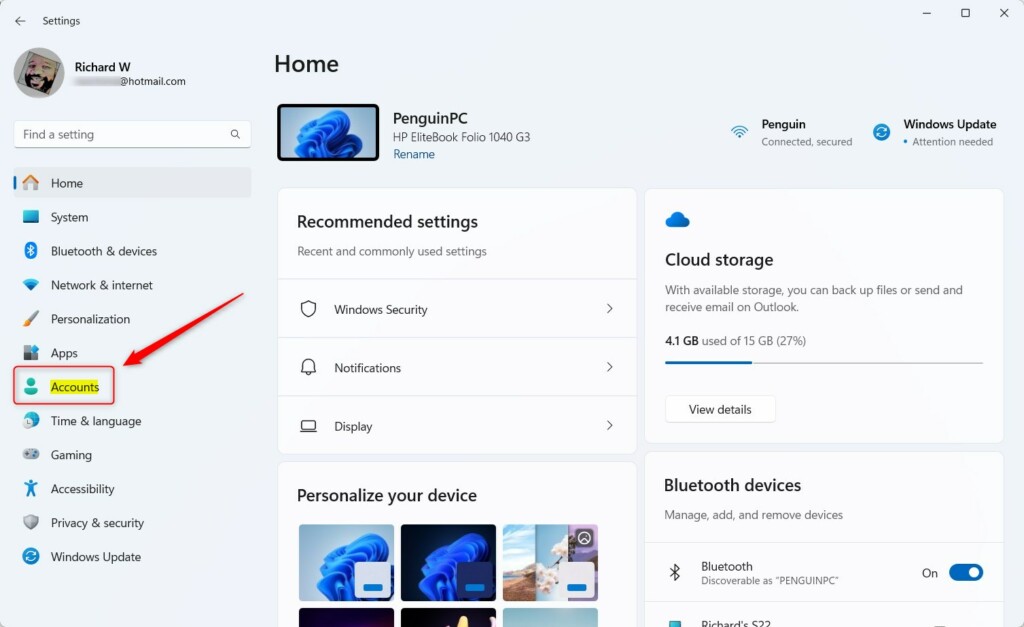
First, open the Windows Settings app. You can do that by clicking on the Start menu and selecting Settings, or by pressing the keyboard shortcut (Windows key + I) to launch it.
Once the Settings app opens, click the Accounts button on the left-hand side.
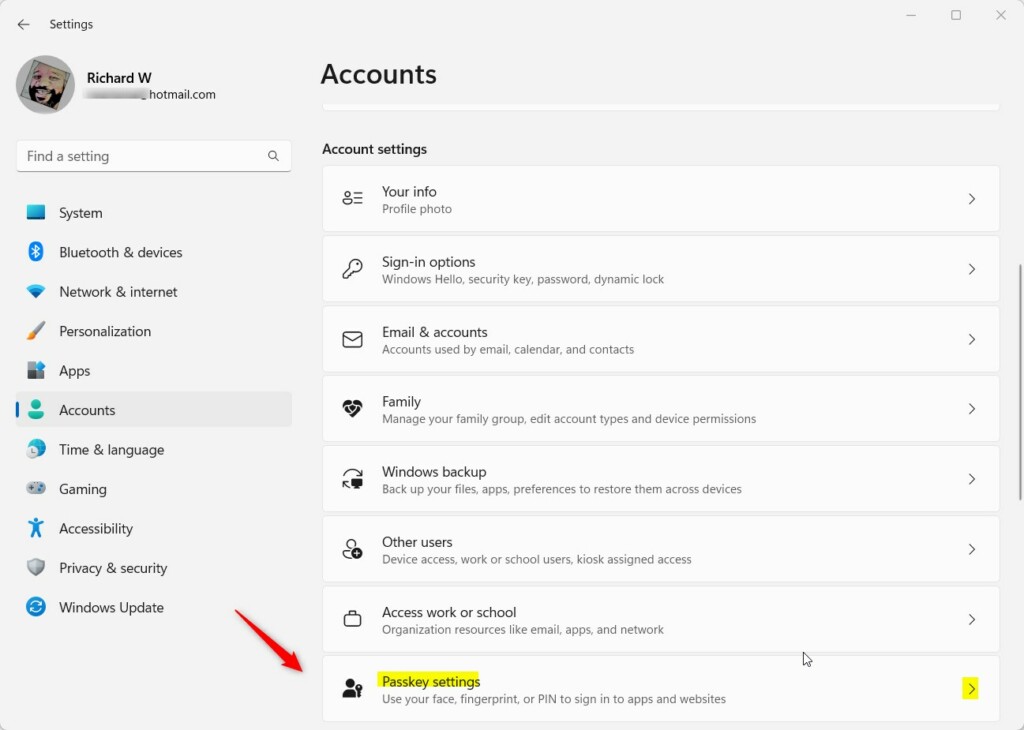
On the right pane, select the Passkey settings tile to expand it.
On the Accounts > Passkey settings pane, you will see a list of passkeys created on your Windows machine.
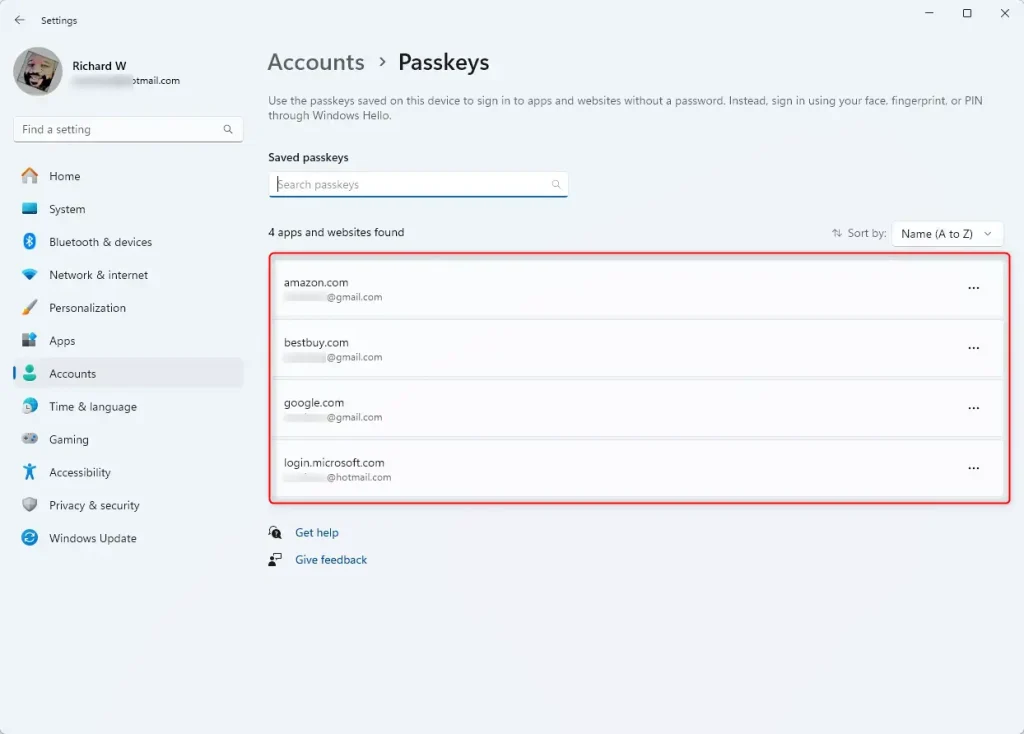
That should do it!
Conclusion:
- Passkeys offer a more secure and convenient sign-in method
- Windows Hello enables sign-in with PIN, facial recognition, or fingerprint
- Passkeys are unique to each website or application, ensuring security
- Windows Settings provides easy access to view and manage passkeys for websites and apps
Was this guide helpful?
0% of readers found this helpful (4 votes)

About the Author
Richard
Tech Writer, IT Professional
Richard, a writer for Geek Rewind, is a tech enthusiast who loves breaking down complex IT topics into simple, easy-to-understand ideas. With years of hands-on experience in system administration and enterprise IT operations, he’s developed a knack for offering practical tips and solutions. Richard aims to make technology more accessible and actionable. He's deeply committed to the Geek Rewind community, always ready to answer questions and engage in discussions.


No comments yet — be the first to share your thoughts!