How to Sign In and out of Widgets on Windows 11

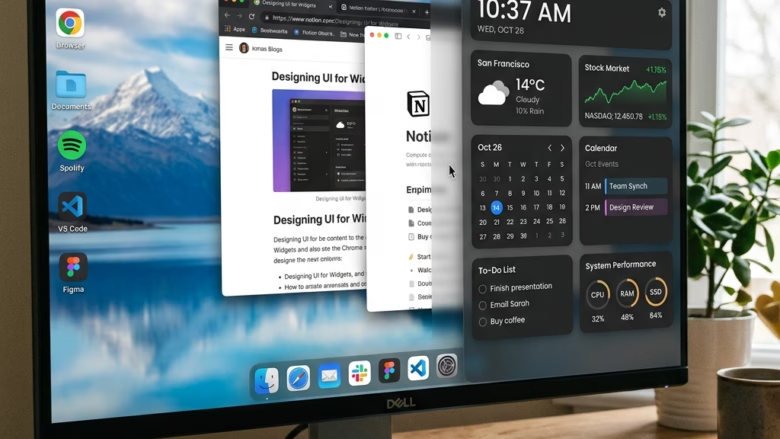
Signing in and out of widgets on Windows 11 controls which Microsoft account is tied to your Widgets board and the personalized feed on it. Widgets are small panels that slide out from the left side of your screen. They show live weather, news, calendar info and similar content.
Signing in links the board to your personal Microsoft account and saved preferences. Signing out removes your profile from the board and hides that data. You can also switch to a different account, or turn off the Widgets board entirely in Windows Settings .
Signing Out of Widgets
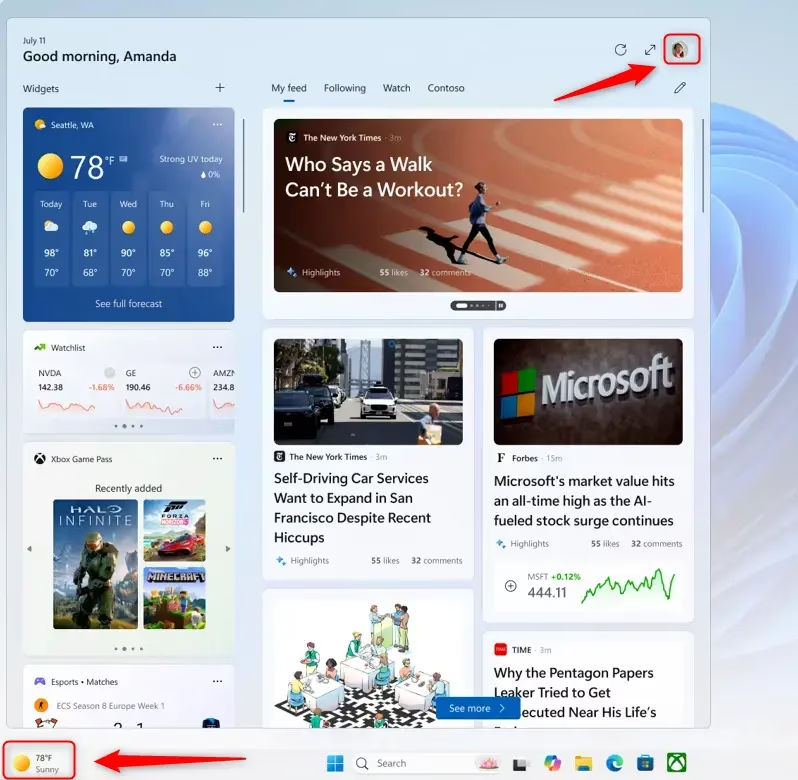
Sign out when you want to switch accounts, or when you are on a shared computer and don’t want personalized content to show up for the next person. The quick version: press the Win+W to open the Widgets board, click your profile picture or account button in the top right corner, and select Sign out. Your Microsoft account is disconnected right away.
A few things to know before you start:
- Clicking your profile picture opens the Widgets settings panel. The Sign out option is in there, so don’t worry if you don’t see it directly on the board.
- You don’t need to restart Windows. The board refreshes as soon as you sign out.
- If you can’t find a profile picture, you are probably already signed out. In that case, the board shows a Sign in button instead.
The steps below show the process screen by screen.
- Open the Widgets board. Click the Widgets icon on your taskbar . Or, press
Windows key + Won your keyboard. The Widgets board will slide out from the left.
- Find your user account button. Look for a button, usually in the top-left corner. It might show your picture or initials. Click this button.
💡TipIf you don’t see your picture, it might show your name or a generic icon.Clicking it is how you get to your account settings in Widgets.
- Select “Sign Out”. A menu will show up after you click your account button. Look for “Sign Out” and click it.
Warning: Signing out will reset your Widgets board to how it was when you first got it. Any Widgets you added might disappear. The content will not be picked just for you anymore.
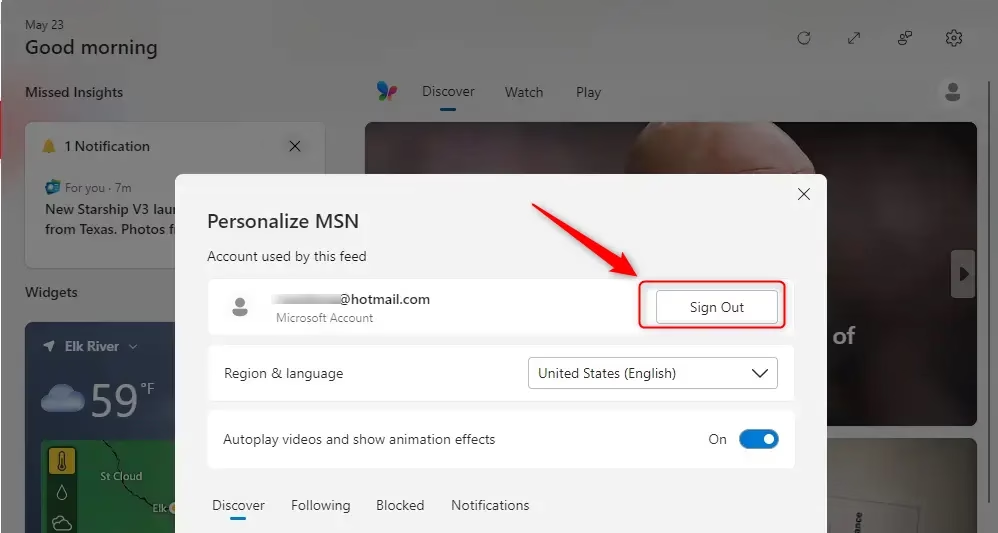
Keep in mind that signing out resets the board to its default state. Any custom widgets you added will disappear, and the feed reverts to generic content, which keeps local browsing private.
If you only want the board out of the way and don’t need to sign out, you can hide the taskbar button instead. Go to Settings Personalization Taskbar and switch Widgets off. Switching it back on later brings the button back. Your account link is not the same thing as the taskbar button, so check the board itself if you want to be sure you are signed out.
Signing In to Widgets (or Switching Accounts)
Sign in again to restore your personal news feed, weather and calendar events. The quick version: press the Win+W to open the Widgets board, click the Sign in button or your account icon, and follow the prompts to enter your account details and connect your profile.
Before you start, have these ready:
- The email address and password for your Microsoft account.
- Access to your second sign-in step, such as an authenticator app or a text message, if you use two-step verification.
- A working internet connection. The board can’t load a feed or finish signing in without one.
The steps below show each screen.
- Open the Widgets board. Click the Widgets icon on your taskbar or press
Windows key + W.
- Look for the “Sign in” option. When you open Widgets after signing out, or if you have never signed in, you will likely see a “Sign in” button. Or, there might be a message at the top asking you to sign in.
💡TipIf you signed out and want to use the same account, you might see your picture or name again.Clicking it might let you sign back in. If you want to use a different account, look for something like “Sign in with a different account”.
- Choose your account. A box will ask you to sign in with your Microsoft account. You might see a list of accounts already on your PC. Pick the one you want to use for Widgets.
Practical Tip: Make sure you sign in with the Microsoft account that has your favorite settings and subscriptions. This helps Widgets know what content is best for you.
- Enter your details. If asked, type your Microsoft account password. Or, use other ways to prove it’s you, like a PIN or Windows Hello. Follow the steps on the screen to finish signing in.
Warning: Be careful when you type your login details. Always check that you are on a real Microsoft sign-in page. This stops you from falling for scams. If you are not sure, close Widgets and go to the official Microsoft website to sign in there.
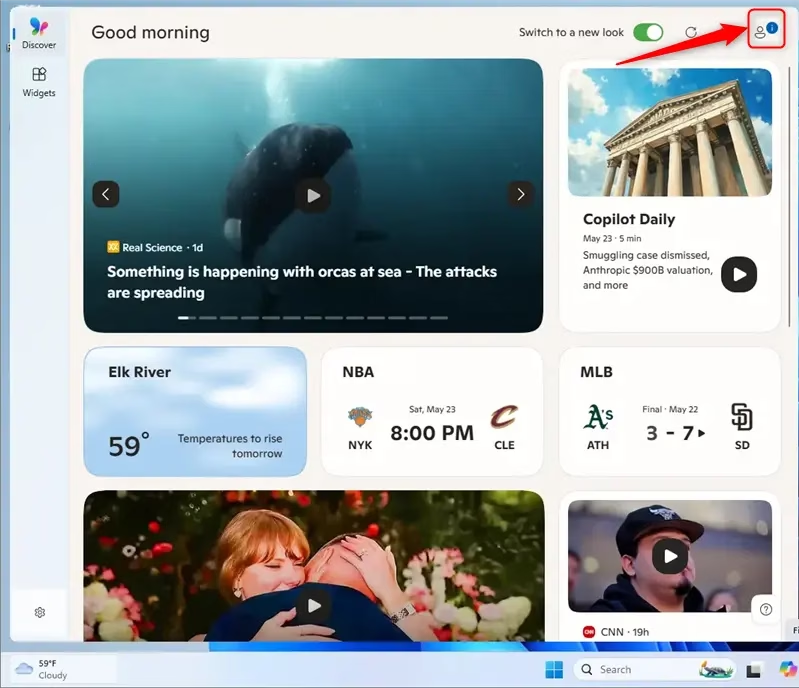
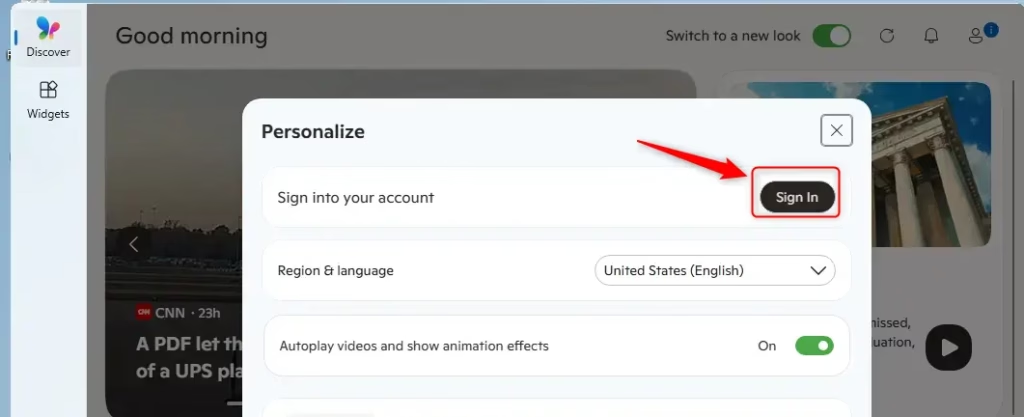
Signing in updates the board automatically. Your stories, weather and calendar details appear based on your past activity. It can take a few moments for the feed to fill in, so give it a minute before assuming something went wrong.
If the board still shows the generic feed or keeps asking you to sign in, close it and press the Windows key + W again. Then check your internet connection and try once more. To switch to a different account, sign out first, then sign in with the other one.
Reference:
Summary
Signing out of Windows 11 Widgets keeps information private on shared PCs, while signing in uses a Microsoft account for tailored news and weather. Sign out whenever someone else will use the PC, and sign back in when you want your own feed back.
Have a question about this guide?
Answered by AI from this guide. Good questions may be added to this page — please don't include personal details.
Did this guide fix your problem?

About the Author
Richard
Tech Writer, IT Professional
Richard is a writer at Geek Rewind who turns complex IT tasks into clear, step-by-step guides. He draws on years of hands-on experience in system administration and enterprise IT operations, focusing on Windows, Linux and WordPress: the problems people actually run into, and the fixes that work. His server and WordPress guides come from systems he runs himself. Richard builds and maintains the platform behind Geek Rewind, from its Ubuntu servers and Nginx configuration to its custom WordPress plugins. Many new tutorials start with readers' questions, and he's always glad to answer them in the comments.
No comments yet — be the first to share your thoughts!