How to Sign In Using Microsoft Authenticator

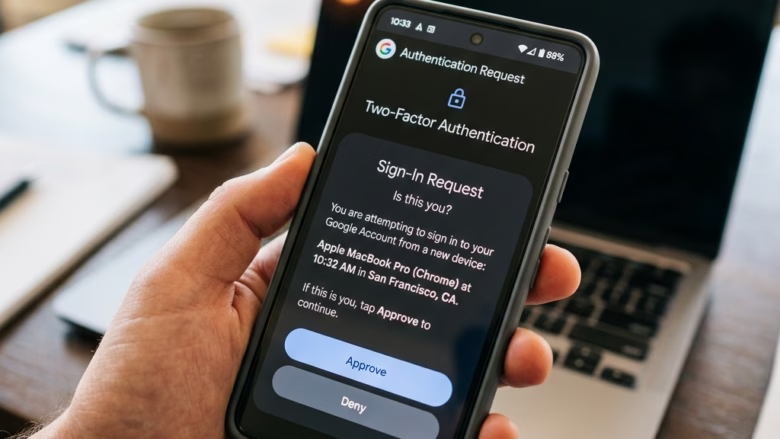
Microsoft Authenticator is a free security app that lets you sign in to your accounts with a tap on your phone instead of typing a password. You approve sign-in requests directly on your device, or you use a one-time code that refreshes every 30 seconds to verify your identity.
Setup takes a few minutes for a personal Microsoft account, a work profile, or a school login. The extra step blocks unauthorized access even if someone figures out your password. This guide covers adding your account to the app and then using it to sign in on a computer.
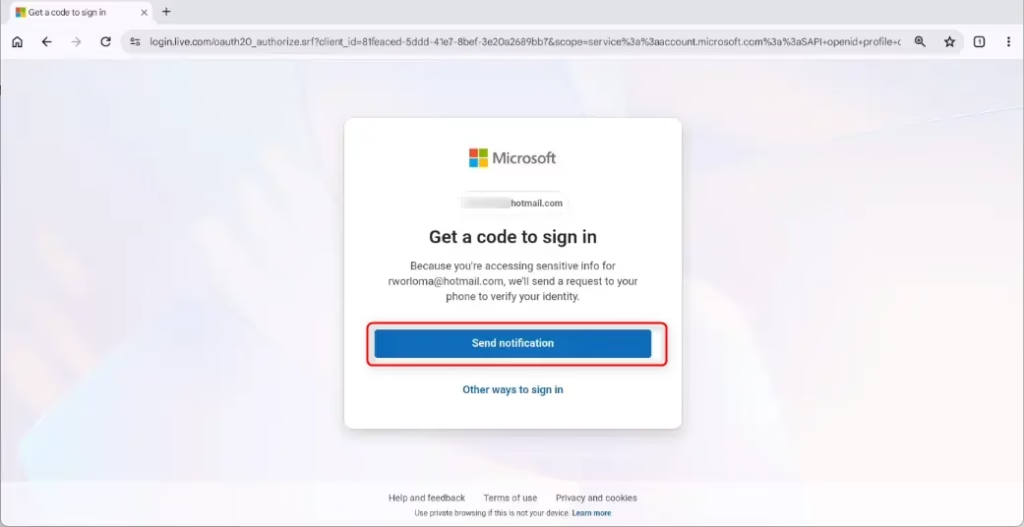
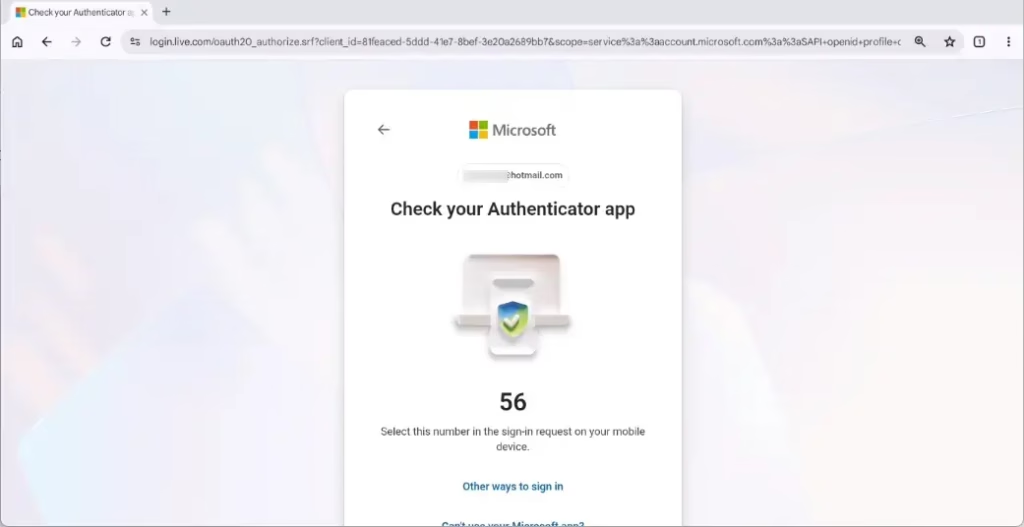
Open the Microsoft Authenticator app on your phone, enter your email on the login page, click Send notification, then tap Approve on the notification that arrives in the app. If a number appears on your computer screen, verify it matches the number in the app before approving.
Before You Start: What You Need
The first is the free app on your smartphone. The second is your work, school, or personal account added to that app. Do both before you try to log in on a computer or in a web browser. If you skip the second part, the sign-in page has nothing to send a request to.
- Get the App: Open your phone’s app store, search for Microsoft Authenticator, and install it . It’s free. Check that the publisher is Microsoft Corporation, because lookalike apps exist. Open the app once after installing so you can accept its permission prompts.
- Allow Notifications: When the app asks to send you notifications, say yes. Push sign-in requests depend on this. If you declined by mistake, turn notifications back on for Authenticator in your phone’s system settings.
- Add Your Accounts: Once the app is on your phone, add each account you want to protect. On a computer, go to your account’s security settings online. Look for the security info or sign-in methods area, and choose the option to add the Authenticator app. Follow the on-screen steps to link your account. The page may show a QR code to scan with the app, or a code to type in. After you finish, the account should appear in the app’s list.
- Check That It Works: Look for your account in the app. If it shows a six-digit code that changes every 30 seconds, the account is linked. Work and school accounts may show only approval requests instead. If you can’t add a work or school account, your organization’s administrator may control which sign-in methods are allowed, so ask them.
- Know About Future Changes: Microsoft is changing some Authenticator features. Starting in July 2025, the app won’t fill in passwords for you. By August 2025, you can’t save passwords in the app anymore. From then on, the app is mainly for approving sign-in requests. If you were using it to store passwords, save any important ones somewhere else first. Your two-step sign-in approvals and one-time codes are not affected by this change.
Signing In with a Notification
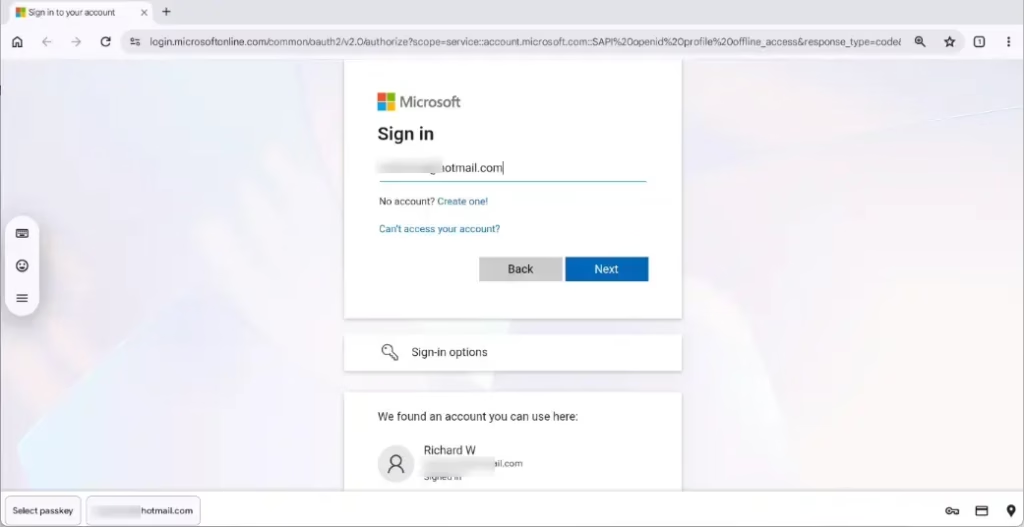
You start it by entering your email on the login screen and choosing the notification option. Have your phone nearby and unlocked before you begin.
- Go to the Login Page: Visit the website or app where you want to sign in. You should see a box asking for your email, phone number, or username.
- Enter Your Username: Type your username (like your email address) and click Next. The page may now ask for a password or show other sign-in choices.
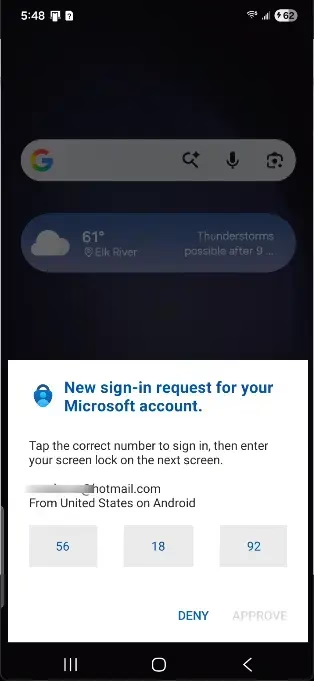
- Request the Notification: Click the option that says Send notification or something similar. The wording varies by service. This tells the service to send a request to your Authenticator app. The page should now say it is waiting for you to approve, and it may show a number.
- Check Your Phone: Pick up your phone. You’ll get a notification from the Microsoft Authenticator app. If the website showed a number, remember it. The number makes sure you approve your own sign-in and not someone else’s.
- Approve the Request: Open the Authenticator app and unlock it if asked. Tap the notification or the sign-in request. If you saw a number on your computer, tap or enter that same number in the app. Then tap Approve. If you didn’t start this sign-in, tap Deny instead, and change your password afterward.
- Finish Signing In: After you approve on your phone, the website or app on your computer signs you in. You might have one last step on your computer, such as a prompt asking whether to stay signed in.
If no notification arrives, open the Authenticator app yourself, since pending requests often show up there. Also check that your phone has an internet connection and that notifications are allowed for the app. If it still doesn’t work, look for a link on the sign-in page such as Sign in another way, so you can use the six-digit code from the app instead.
Summary
Microsoft Authenticator hardens account security by replacing static passwords with single-tap sign-in approvals. Keep notifications turned on, and keep a backup sign-in method on your account in case you lose or replace your phone.
Was this guide helpful?
0% of readers found this helpful (1 votes)

About the Author
Richard
Tech Writer, IT Professional
Richard is a writer at Geek Rewind who turns complex IT tasks into clear, step-by-step guides. He draws on years of hands-on experience in system administration and enterprise IT operations, focusing on Windows, Linux and WordPress: the problems people actually run into, and the fixes that work. His server and WordPress guides come from systems he runs himself. Richard builds and maintains the platform behind Geek Rewind, from its Ubuntu servers and Nginx configuration to its custom WordPress plugins. Many new tutorials start with readers' questions, and he's always glad to answer them in the comments.
No comments yet — be the first to share your thoughts!