How to Select Preferred Windows Hello Camera for Facial Recognition in Windows 11
Selecting a preferred Windows Hello camera for facial recognition on Windows 11 lets you pick the specific camera Windows 11 uses to unlock your computer, creating a more personalized security experience.
Open Settings, navigate to Accounts, then Sign-in options. Expand Facial recognition (Windows Hello) and select your preferred camera from the drop-down menu. This lets you choose which camera Windows Hello uses for sign-in if you have multiple options.
What is Windows Hello?
Windows Hello is a feature that lets you sign into your Windows 11 computer with your face, fingerprint, or a PIN, bypassing the need for a traditional password.
Why Choose Your Preferred Camera?
If your Windows 11 computer has multiple Windows Hello-compatible cameras, you can choose the one that performs best for facial recognition.
You can use your PC’s built-in infrared camera or connect an external infrared camera for facial recognition sign-in.
How to Select Your Preferred Windows Hello Camera
- Open Settings by pressing
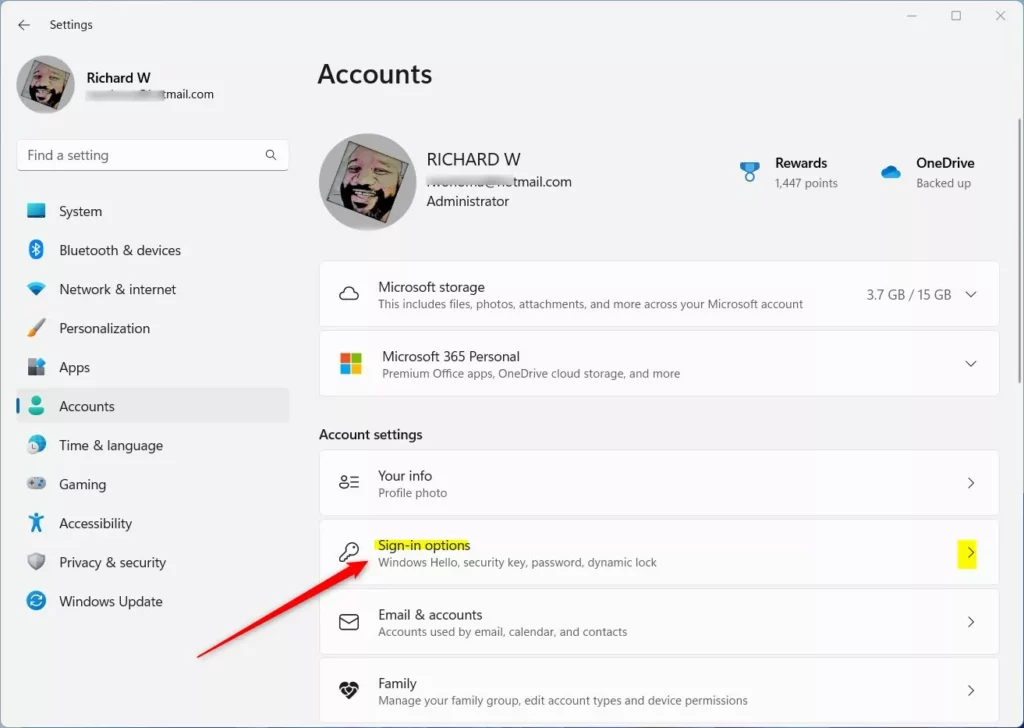
Win+I. - Click Accounts on the left side. Then click Sign-in options on the right side.
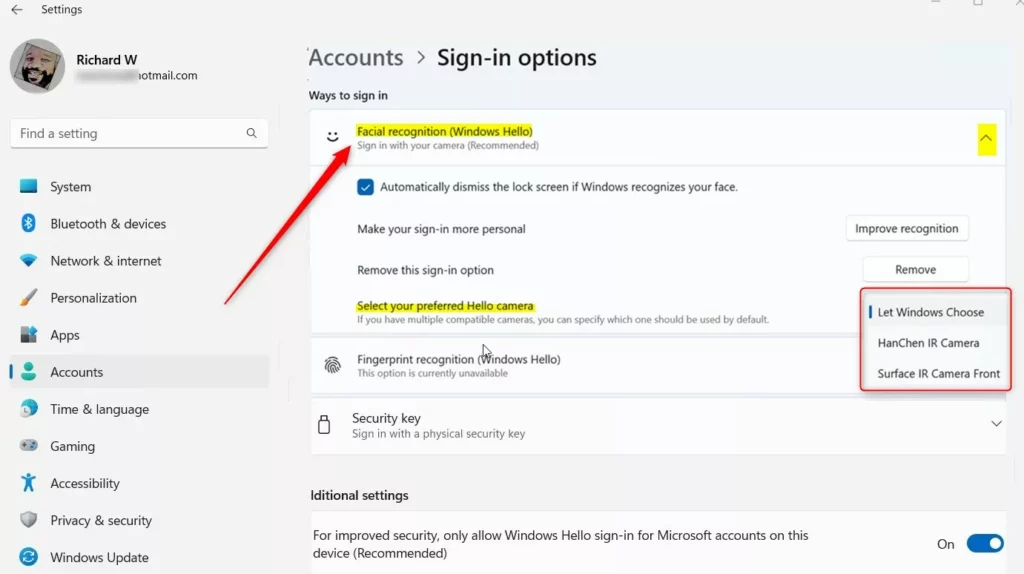
- Under Ways to sign in, click Facial recognition (Windows Hello) to open it.
- Select your preferred camera from the drop-down menu.
Windows 11 lets you pick which camera Windows Hello uses for facial recognition if you have more than one. This helps make sure your computer signs you in using the best camera available, which can make logging in faster and more reliable.
- You can close Settings now if you want.
Done! Your preferred camera is now set.
Summary
Picking your preferred Windows Hello camera in Windows 11 makes sure facial logins use the best camera you have, leading to faster and more reliable sign-ins. Windows Hello provides secure and convenient PC access through facial recognition, and you can select which camera it uses if you have more than one.
Windows Hello makes signing into your PC easier and more secure using facial recognition, fingerprints, or a PIN. If you have multiple cameras on your Windows 11 device, you can now choose which camera to use for facial recognition. Press the Windows key + I to open Settings. Navigate to Accounts > Sign-in options, expand ‘Facial recognition (Windows Hello),’ and then pick your preferred camera from the drop-down menu. The default setting is ‘Let Windows Choose,’ but you can change it anytime.
How do I choose which camera to use for Windows Hello?
Click on “Set up” or “Manage” under Windows Hello Face. 5. Choose Camera: • You should see an option to choose which camera to use for Windows Hello. If your external monitor camera is detected, it should appear in the dropdown list.
How to change default camera for Windows Hello?
To adjust your camera’s default settings, go to Start > Settings > Bluetooth & devices > Cameras. Within the Cameras window, under ‘Connected cameras,’ select the camera you wish to use. Windows will then launch the camera, show a preview, and provide controls for various adjustments.
Do I need a special camera for Windows Hello?
Yes, you need a special camera that’s compatible with Windows Hello to sign in using your face.
What camera is needed for Windows Hello face recognition?
Face Recognition: For facial recognition, your device needs an infrared (IR) camera. Many modern Dell laptops come equipped with this feature. If you're using a monitor, models like the Dell C2422HE and U3224KB have integrated IR webcams that work seamlessly with Windows Hello.
Was this guide helpful?

About the Author
Richard
Tech Writer, IT Professional
Richard, a writer for Geek Rewind, is a tech enthusiast who loves breaking down complex IT topics into simple, easy-to-understand ideas. With years of hands-on experience in system administration and enterprise IT operations, he’s developed a knack for offering practical tips and solutions. Richard aims to make technology more accessible and actionable. He's deeply committed to the Geek Rewind community, always ready to answer questions and engage in discussions.


No comments yet — be the first to share your thoughts!