How to Use Windows Hello in Google Chrome


Windows Hello in Google Chrome lets you confirm your identity with your face, fingerprint, or PIN before Chrome fills in a saved password. It works on Windows 11 PCs where Windows Hello is already set up. Anyone who sits down at your signed-in PC can’t use your saved logins without passing that check.
Chrome asks for the check when it fills in a saved password. If you can’t use your face or fingerprint at that moment, you can use your Windows Hello PIN instead.
Windows Hello must already be configured in Windows 11 first. You can do that in Settings Accounts Sign-in options If it isn’t set up, the Chrome option described below may be missing or may not work. The steps are the same on Windows 11 Home and Pro.
Enable Windows Hello in Chrome by going to Settings, then Autofill and passwords, followed by Google Password Manager, and finally Settings again. Toggle on “Use Windows Hello when filling passwords” to require your PIN, face, or fingerprint for autofill.
How to turn it on or off
You turn Windows Hello on or off for password filling from Chrome’s own settings. You can switch between a biometric or PIN check and filling passwords without a check whenever you like. The setting is in Google Password Manager, not under the passkeys options. The steps below take you there one screen at a time.
- Open Google Chrome browser.
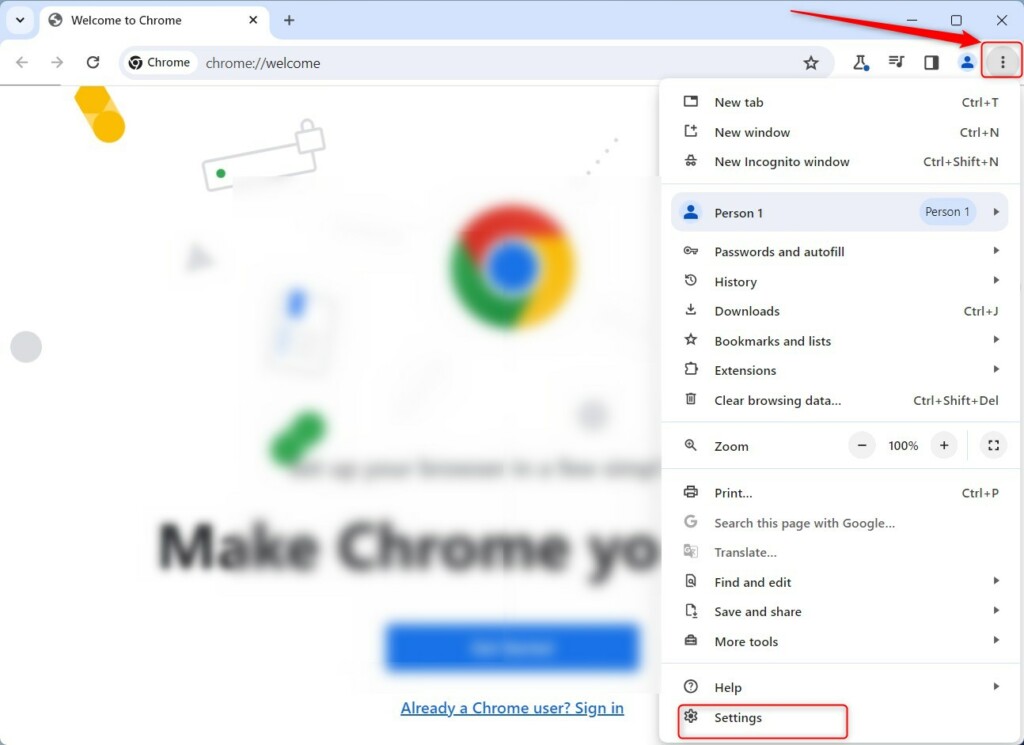
- Click the Customize and Control icon (the three vertical dots in the top right corner).
- Select Settings from the menu.
Start with steps 1 to 3 to reach Chrome’s Settings page:
- Open Google Chrome.
- Click the Customize and control Google Chrome icon, the three vertical dots in the top right corner. A menu opens.
- Click Settings. The Settings page opens in a new tab.
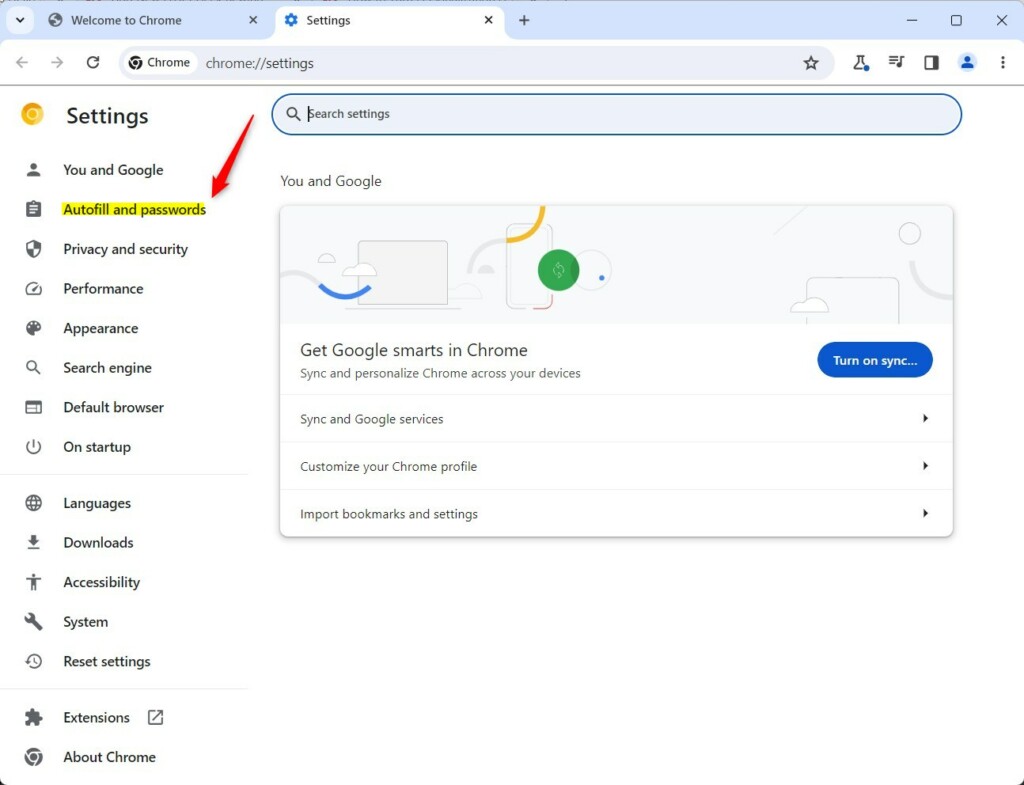
- On the left side of the Settings page, click Autofill and passwords. The autofill options appear on the right.
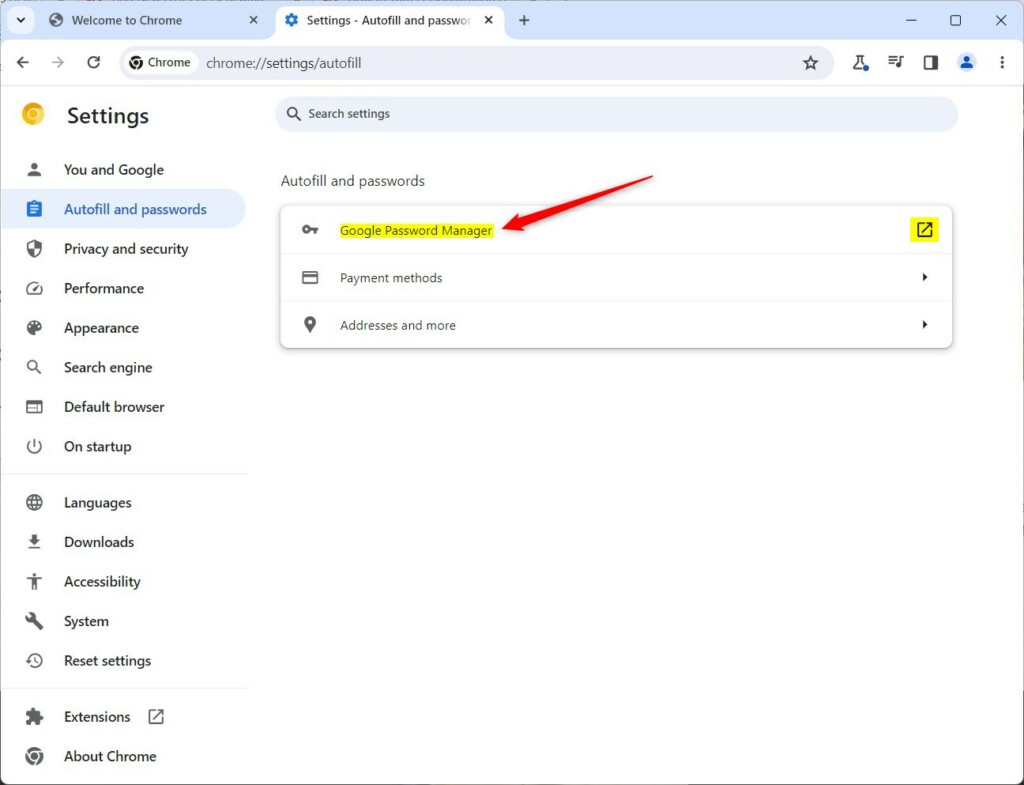
- Click the Google Password Manager tile on the right side. The Password Manager page opens, listing your saved passwords.
- On the Password Manager page, click Settings in the left-hand list. This is a different Settings link from the one in step 3.
- Find the toggle next to Use Windows Hello when filling passwords and click it to turn the feature on or off. A blue toggle means it is on.
If you don’t see this toggle, check that Windows Hello is set up in Windows 11 and that Chrome is up to date. You don’t need to restart Chrome or Windows for the change to apply.
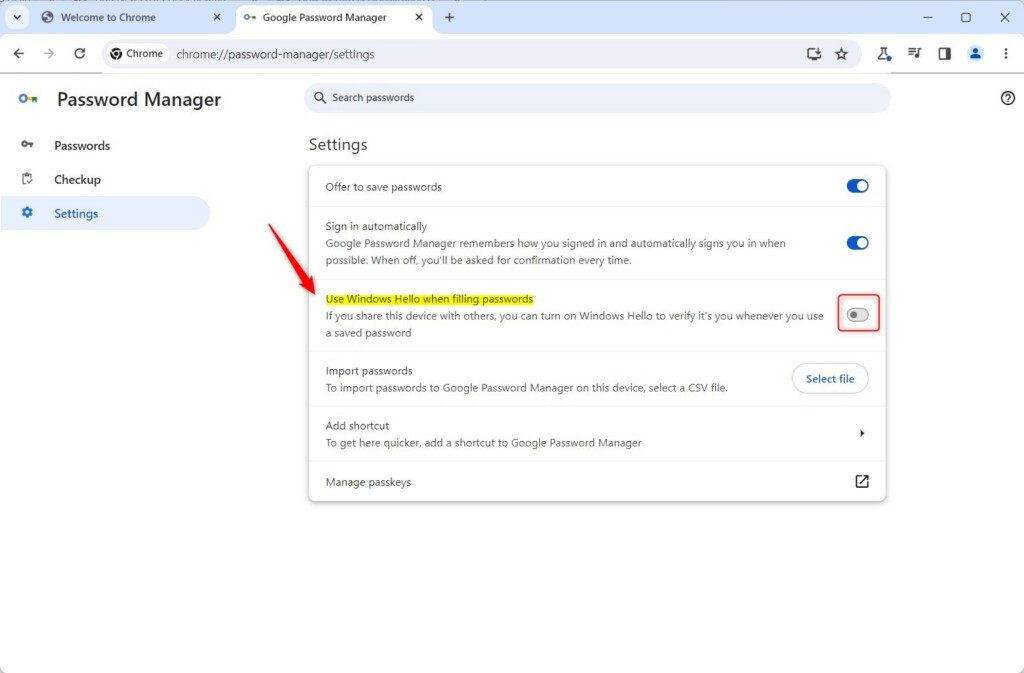
With the toggle on, Chrome asks for your face, fingerprint, or PIN each time it fills in a saved password. With the toggle off, Chrome fills passwords without asking for any extra check. To undo the change, go back to the same toggle and click it again.
Summary
Requiring Windows Hello before Chrome uses your stored passwords adds a useful layer of protection. To find the control again, go to Settings Autofill and passwords > Google Password Manager Settings It matters most on shared computers, or on a PC that other people can reach while you are signed in. Keep it on if you ever step away from your desk without locking the screen.
Have a question about this guide?
Answered by AI from this guide. Good questions may be added to this page — please don't include personal details.
Did this guide fix your problem?

About the Author
Richard
Tech Writer, IT Professional
Richard is a writer at Geek Rewind who turns complex IT tasks into clear, step-by-step guides. He draws on years of hands-on experience in system administration and enterprise IT operations, focusing on Windows, Linux and WordPress: the problems people actually run into, and the fixes that work. His server and WordPress guides come from systems he runs himself. Richard builds and maintains the platform behind Geek Rewind, from its Ubuntu servers and Nginx configuration to its custom WordPress plugins. Many new tutorials start with readers' questions, and he's always glad to answer them in the comments.
No comments yet — be the first to share your thoughts!