How to Create a Passkey for a Website in Windows 11

Creating a passkey for a website in Windows 11 lets you log in without typing a password. A passkey acts like a digital key, using your Windows Hello face scan, fingerprint, or PIN to securely sign you into websites instead of a traditional password.
This passwordless method relies on strong encryption stored right on your PC. Windows 11 often asks if you want to save a new passkey during sign-up or login.
You can choose to store these passkeys directly on your Windows 11 device, or on your phone or a security stick for access across different devices.
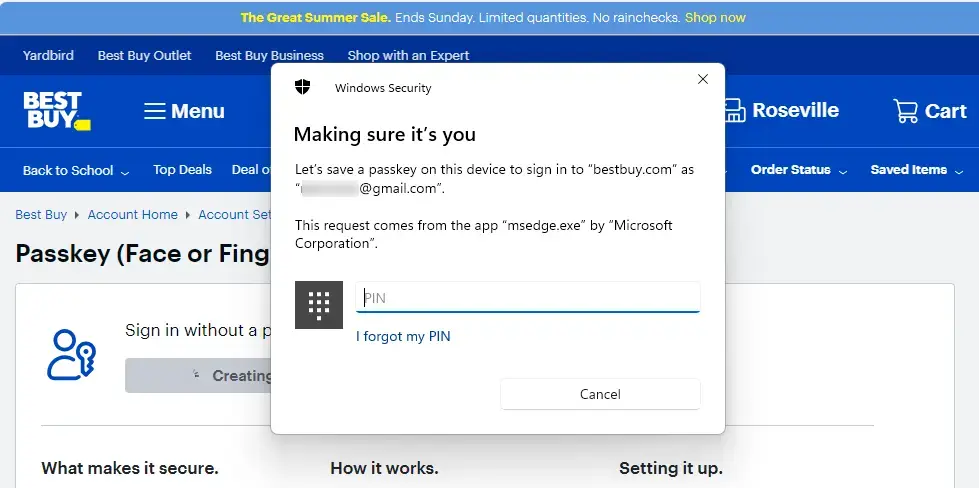
Create a passkey in Windows 11 by logging into a supporting website, navigating to account settings, and clicking “Create a Passkey”. You’ll then confirm your identity with your Windows Hello PIN, facial recognition, or fingerprint.
Why use a passkey?
Passkeys offer a safer login method than passwords, as hackers can steal or guess passwords. Passkeys use your device’s built-in security, such as your fingerprint or PIN, making it difficult for attackers to compromise them.
What happens when you are done?
Once you finish these steps, you’ll no longer need to remember complex passwords for that website. Instead, you’ll use your Windows Hello PIN or fingerprint to sign in.
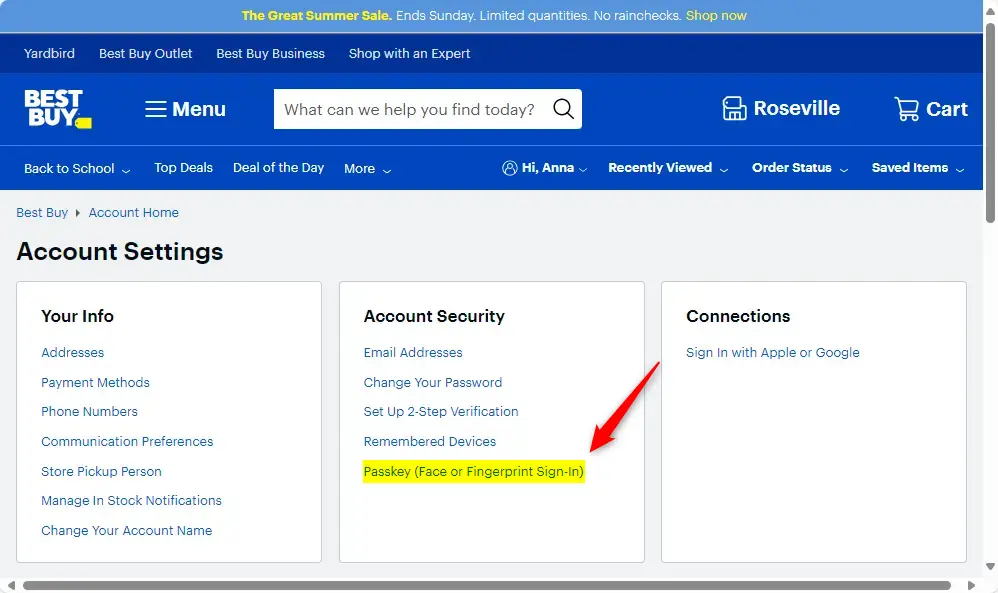
How to create a passkey
Creating a passkey in Windows 11 is possible if the website you’re using supports them and you’ve already set up Windows Hello on your PC. Look for a button like ‘Create a Passkey’ on the website to start the process. This passkey will then be linked to your Microsoft account, which helps keep your logins secure.
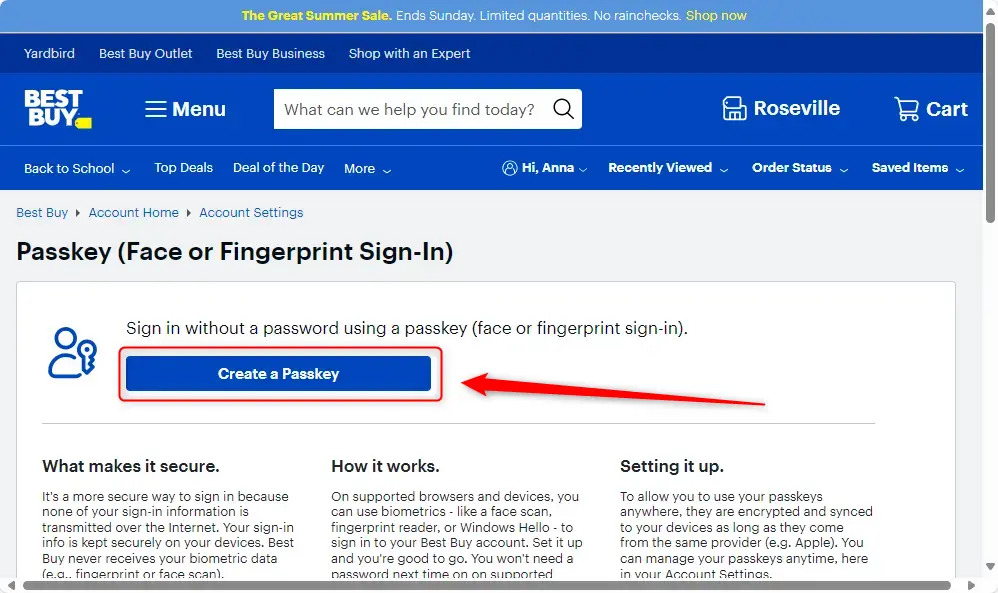
Click the Create a Passkey button. Keep in mind that the button might have a slightly different name on different websites.
Click the OK button to finish the setup.
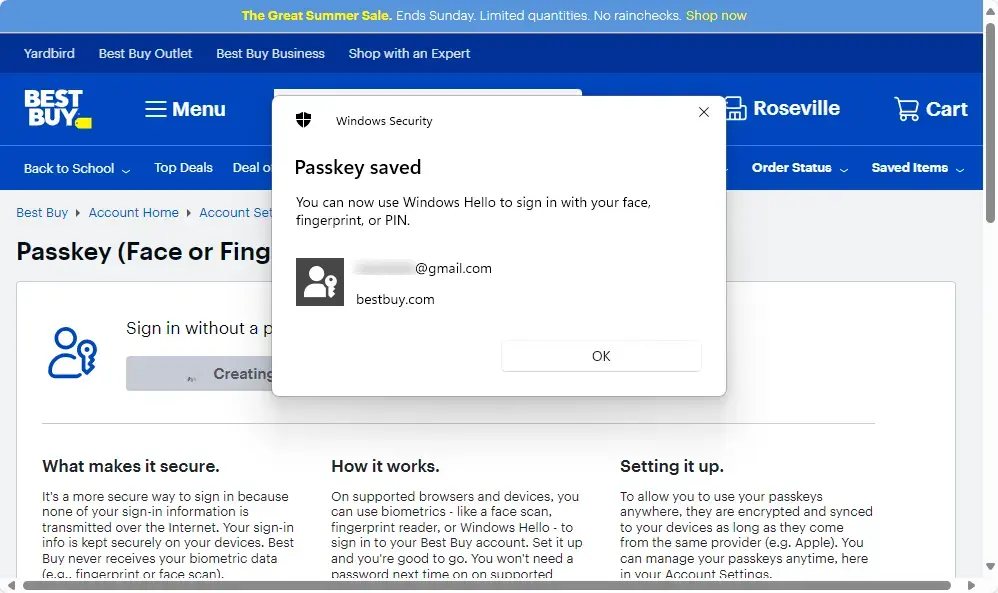
You can now use the created passkey to sign in to the website, replacing the need for a traditional password.

For more information, see this reference: Microsoft.com
Summary
Passkeys offer a secure login by using your device’s built-in protection. By following these steps, you’re swapping vulnerable passwords for a quick login with your biometrics. Always check your account settings to see if a website supports passkeys before you start.
Where are my passkeys on 🪟 Windows 11?
To manage where your Windows passkeys are saved, open the Settings app on your Windows device and select Accounts > Passkeys > Advanced options. You can enable or disable the passkey services available on your Windows device by toggling them on or off.
How to stop 🪟 Windows 11 from asking for passkey?
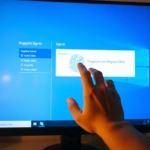
Using a passkey with your Microsoft Account allows you to sign in without a password. As you can see in the screen, you can quickly sign into your Microsoft Account using a passkey. A passkey is basically
Was this guide helpful?

About the Author
Richard
Tech Writer, IT Professional
Richard, a writer for Geek Rewind, is a tech enthusiast who loves breaking down complex IT topics into simple, easy-to-understand ideas. With years of hands-on experience in system administration and enterprise IT operations, he’s developed a knack for offering practical tips and solutions. Richard aims to make technology more accessible and actionable. He's deeply committed to the Geek Rewind community, always ready to answer questions and engage in discussions.


No comments yet — be the first to share your thoughts!