How to Add or Remove Pinned Section on Start Menu in Windows 11
The Pinned section on your Windows 11 Start menu lets you choose which apps appear at the very top.
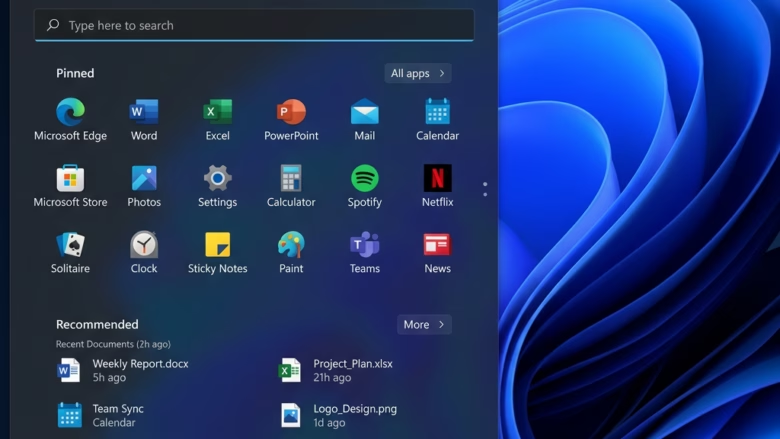
This area displays your favorite or most-used applications for quick access. Windows 11’s Start menu has a Pinned section, an All apps list, and a Recommended area.
By default, you see 12 pinned apps in the smaller Start menu size and 18 when you expand it. A recent update, specifically build 26300.8553, introduced an option to completely turn this Pinned section on or off.
You can add or remove the Pinned section on your Windows 11 Start menu via Settings. Navigate to Personalization Start and toggle the “Pinned” option on or off. This setting controls whether your frequently used apps appear at the top of the Start menu.
Option 1Add or Remove Pinned Section using Settings
Adding or removing the Pinned section on your Windows 11 Start menu is achievable with the Settings app. Locate the correct option and flip a switch to display or hide your most used applications.- Open Settings. You can do this by pressing the Windows key + I on your keyboard.
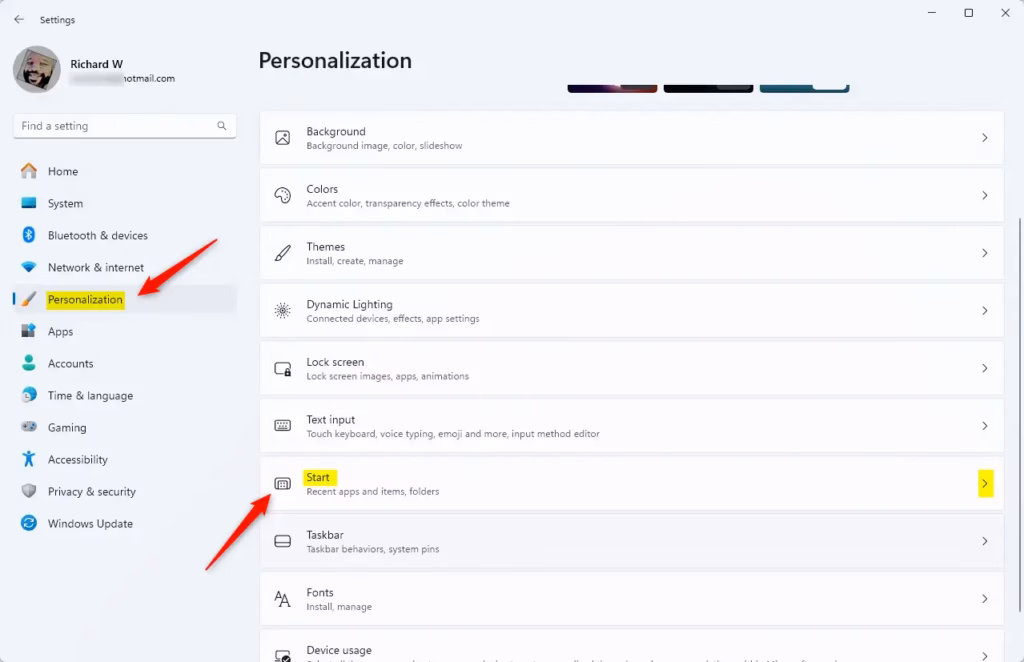
- On the left side, click Personalization. Then, on the right side, click Start.
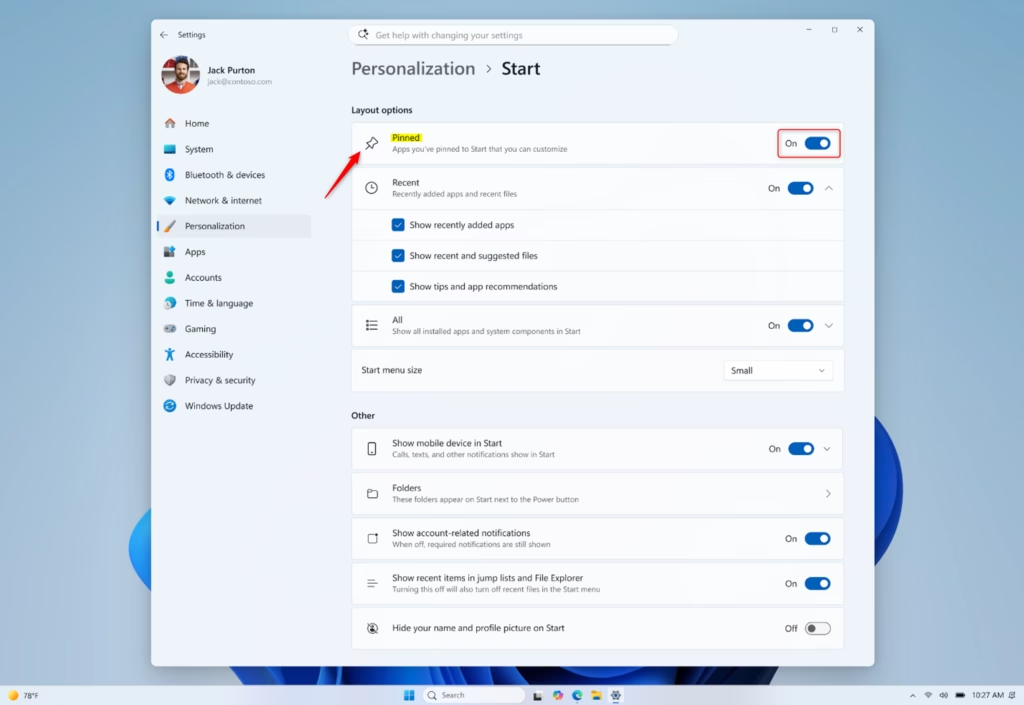
- Look for Layout options. You will see a toggle for Pinned.
- Turn the toggle On to add the Pinned section. Turn it Off to remove it (this is the default).
- You can now close the Settings window.
Option 2Add or Remove Pinned Section using Registry Editor
Alternatively, the Registry Editor offers another way to control the Pinned section’s visibility on your Windows 11 Start menu . This method is more advanced, so proceed with caution to ensure your system functions as expected.
What happens when done? Your Start menu will either show or hide the Pinned apps section based on the change you make.
- Open the Registry Editor. You can do this by searching for regedit in the Windows search bar and clicking on the result.
- Admin Privileges Required: You may need to click "Yes" on a User Account Control (UAC) prompt to open Registry Editor.
- Navigate to the following key in the Registry Editor:
HKEY_CURRENT_USER\Software\Microsoft\Windows\CurrentVersion\Explorer\Advanced - In the right-hand pane, find a DWORD value named Start_UseCustomLayout.
- To Add Pinned Section: Double-click on Start_UseCustomLayout. Set the Value data to 1. Click OK.
- To Remove Pinned Section: Double-click on Start_UseCustomLayout. Set the Value data to 0. Click OK.
- Close the Registry Editor.
- You may need to restart your computer or sign out and back in for the changes to take effect.
Reference:
Summary
This guide has outlined two methods for controlling the Pinned apps section on your Windows 11 Start menu: the user-friendly Settings app and the more advanced Registry Editor.
How do I remove the pinned section in 🪟 Windows 11?
To remove the Pinned section in Windows 11, open Settings (Windows key + I), navigate to Personalization > Start. Under Layout options, find the 'Pinned' toggle and turn it Off. This will hide the Pinned apps area from your Start menu.
Where are pinned items stored in 🪟 Windows 11?
Pinned items in the Windows 11 Start menu are not stored in a single, easily accessible file. They are managed by the Windows operating system through registry keys and internal system data, allowing for dynamic display and management within the Start menu interface.
Why is the PIN option not available in 🪟 Windows 11?
The option to toggle the entire Pinned section on or off was introduced in Windows 11 build 26300.8553. If this option is not available, your Windows 11 version may be older. Ensure your system is updated to receive this customization feature.
How to increase pinned items in 🪟 Windows 11?
Windows 11 displays 12 pinned apps by default in the smaller view and 18 in the larger view. While you can't directly increase this number beyond the larger view, you can manage which apps appear by unpinning less-used ones and pinning your favorites.
Was this guide helpful?

About the Author
Richard
Tech Writer, IT Professional
Richard, a writer for Geek Rewind, is a tech enthusiast who loves breaking down complex IT topics into simple, easy-to-understand ideas. With years of hands-on experience in system administration and enterprise IT operations, he’s developed a knack for offering practical tips and solutions. Richard aims to make technology more accessible and actionable. He's deeply committed to the Geek Rewind community, always ready to answer questions and engage in discussions.


No comments yet — be the first to share your thoughts!