Windows 11 RAM Usage High? 8 Ways to Free Up Memory

- 8 ways to do it
- Needs administrator rights
- Includes a restart or sign-out
High RAM usage in Windows 11 happens when background apps, bad drivers, or too little memory push your PC past its limit. The result is a slow or frozen computer. RAM is your computer’s short-term memory. It holds the data for open apps, and unlike a hard drive it clears completely every time the PC loses power or restarts.
To fix high RAM usage in Windows 11, press the Ctrl+Shift+Esc keys on your keyboard to open Task Manager, click the Performance tab, select Memory to check your usage, and close resource-heavy background apps or restart your computer to immediately free up valuable memory space.
Seeing Windows use 2GB to 4GB of memory while sitting idle is normal on a machine with 8GB or 16GB of total RAM. Windows deliberately uses spare memory as cache, so a high number alone is not a problem. Trouble starts when usage jumps to 90% or higher during basic tasks like web browsing, or when the PC stutters and apps take a long time to switch. These are the usual causes:
- Too many background appsApps that start automatically when you turn on your computer and keep running quietly in the background. Chat tools, cloud sync clients, and updaters are the usual suspects.
- Web browser bloatDozens of browser tabs open at the same time, especially in memory-heavy browsers like Google Chrome or Microsoft Edge. Each tab and each extension runs as its own process.
- Visual effects and animationsWindow animations and transparency effects look nice but use system resources. The effect is small on a modern PC, but it can matter on an older one. Transparency can also be switched off in Settings Personalization Colors.
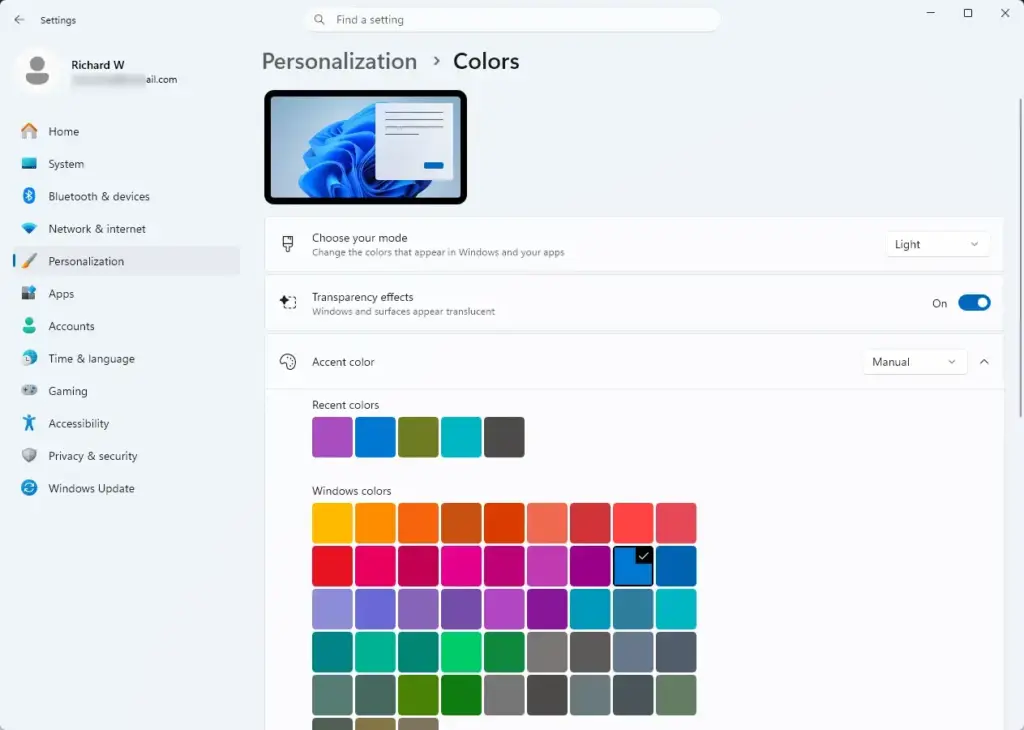
Settings › Personalization › Colors - Outdated software or driversOld software bugs can create memory leaks, meaning an app asks for memory and never gives it back. The longer the PC runs, the worse it gets.
First you will check your current memory usage, then work through eight fixes, roughly in order from quickest to most involved. Test after each one. You may not need to do them all.
How to Check Your Current RAM Usage
Task Manager shows every active app and background process and how much memory each one is using. It is the first place to look, because it tells you whether the problem is one misbehaving program or the whole system.
- Press Ctrl+Shift+Esc to open Task Manager . Alternatively, right-click the Start button on your taskbar and select Task Manager .
- If Task Manager opens as a small window with very few details, click More details at the bottom of the window. You should now see the full window with a navigation list on the left.
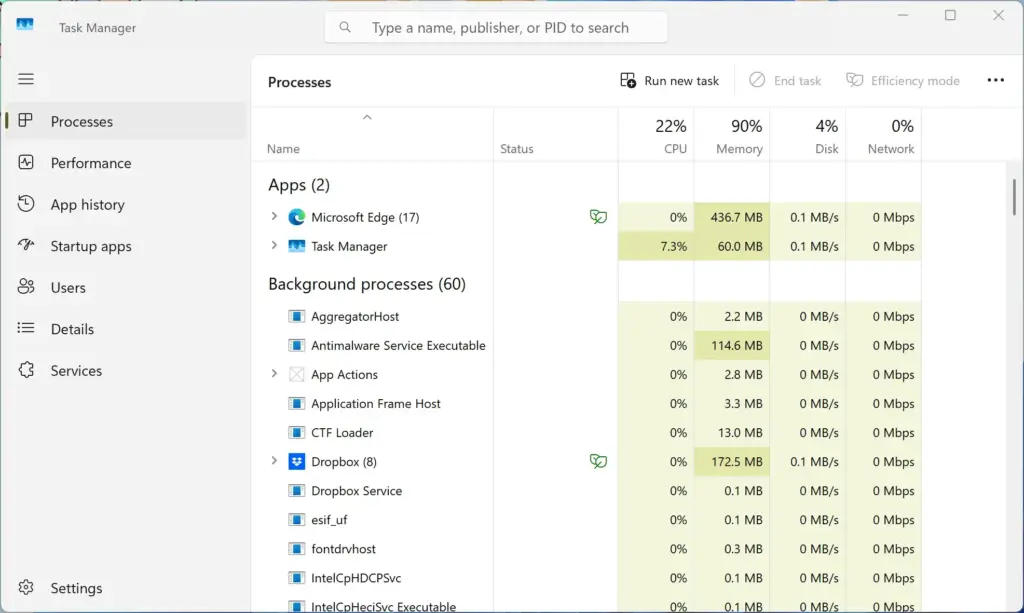
Task Manager - Click Performance (the icon looks like a small heartbeat graph). In current Windows 11 versions it sits in the left-hand list. If the list shows only icons, click the three-line menu icon at the top left to expand it.
- Click Memory in the list on the left of the Performance screen.
On this screen you will see your total memory (for example, 8.0 GB or 16.0 GB), how much is in use, and how much is available. You will also see your memory speed and how many memory slots on the motherboard are in use. Note these details, because they matter if you later decide to upgrade.
- Click Processes in the left-hand list to see which apps are using your memory.
- Click the Memory column header at the top of the list. The list now sorts from the highest memory user to the lowest. Click it again if the order is reversed.
Look at the top few entries. If one app uses several gigabytes, close it, or restart it and see whether the number comes back. A browser using a lot of memory is normal. Click the arrow next to it to see which tabs or extensions are responsible.
Method 1Restart Your Computer
Restarting your computer clears high RAM usage by wiping the temporary data that builds up when apps run for a long time. It closes stuck background tasks and frees memory without changing any settings.
When a PC runs for days, apps and background processes can leave data behind in memory. This is the memory leak described earlier. When an app closes improperly or misbehaves, it does not clean up after itself, and chunks of memory stay locked and unusable.
Use Restart rather than Shut down. With Fast Startup turned on, which is the default on many PCs, a shutdown saves part of the system state to disk and loads it again at the next boot. A restart does not do this, so it gives you a truly fresh start.
- Save your work and close your open apps.
- Click the Start button on your taskbar .
- Click the Power icon in the bottom-right corner of the Start menu .
- Click Restart and wait for your computer to turn off and back on again.
When you are back at the desktop, open Task Manager and check the Memory figure on the Performance tab. Idle usage should now be well below where it was. If it climbs back to a high level within a few hours, one of the fixes below should find the cause.
Method 2Disable Unnecessary Startup Apps
Disabling unnecessary startup apps stops programs from launching automatically when you sign in. Chat tools, music players, and updaters then no longer use memory from the moment your desktop appears.
Startup apps run in the background as soon as you sign in, and they take RAM before you have opened anything yourself. Many programs add themselves to startup during installation without asking. Over time this adds up, and the PC wastes memory and boots more slowly. Cutting the list down frees memory for the programs you actually use.
- Press Ctrl+Shift+Esc to open Task Manager .
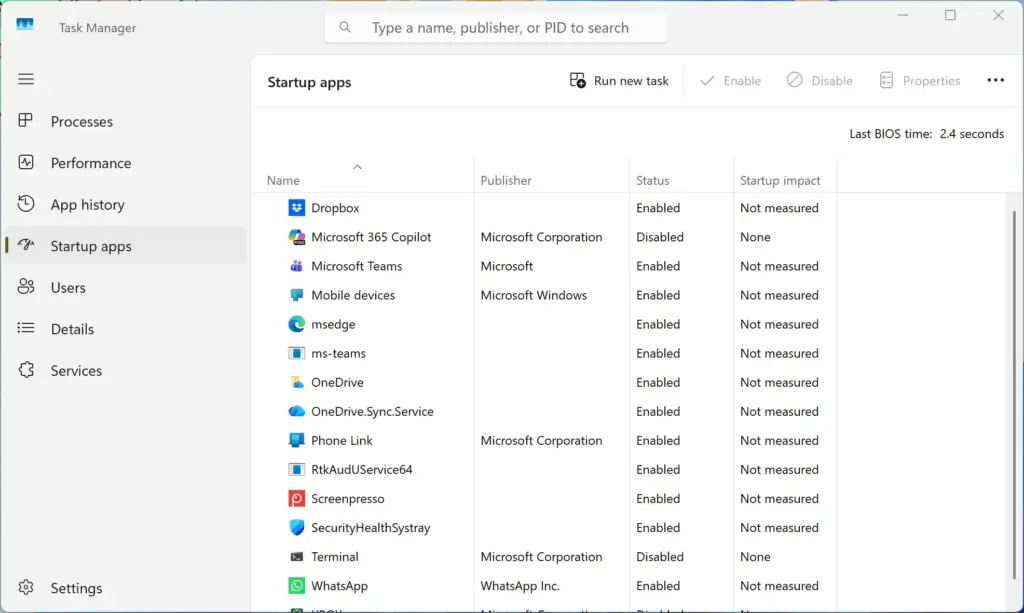
- Click Startup apps in the left-hand list. The icon looks like a speedometer or gauge. You should now see a list of programs that start with Windows 11, with a Status column and a Startup impact column.
- Look down the list for apps you do not need right away. Anything marked High under Startup impact is a good place to start. Leave security software and hardware drivers (for example audio or touchpad utilities) alone.
- Click an app you want to stop from starting automatically.
- Click Disable in the toolbar at the top of the Task Manager window. The Status for that app changes to Disabled.
This does not delete the app. It only stops it from launching when you sign in, and you can still open it manually at any time. To undo it, select the app in the same list and click Enable. The change takes effect the next time you restart. You can also manage this list in Settings Apps Startup.
Method 3Turn Off Background Apps
Turning off background permissions stops apps from running hidden after you close their windows. These apps sync data and check for updates, and each one holds on to some RAM. Switching them off recovers memory for your daily tasks.
You can control this per app in the Windows settings. The option only appears for Microsoft Store apps and some other modern apps. Classic desktop programs (installed from an .exe file) do not have it. For those, use the startup list from the previous section, or close them from the system tray.
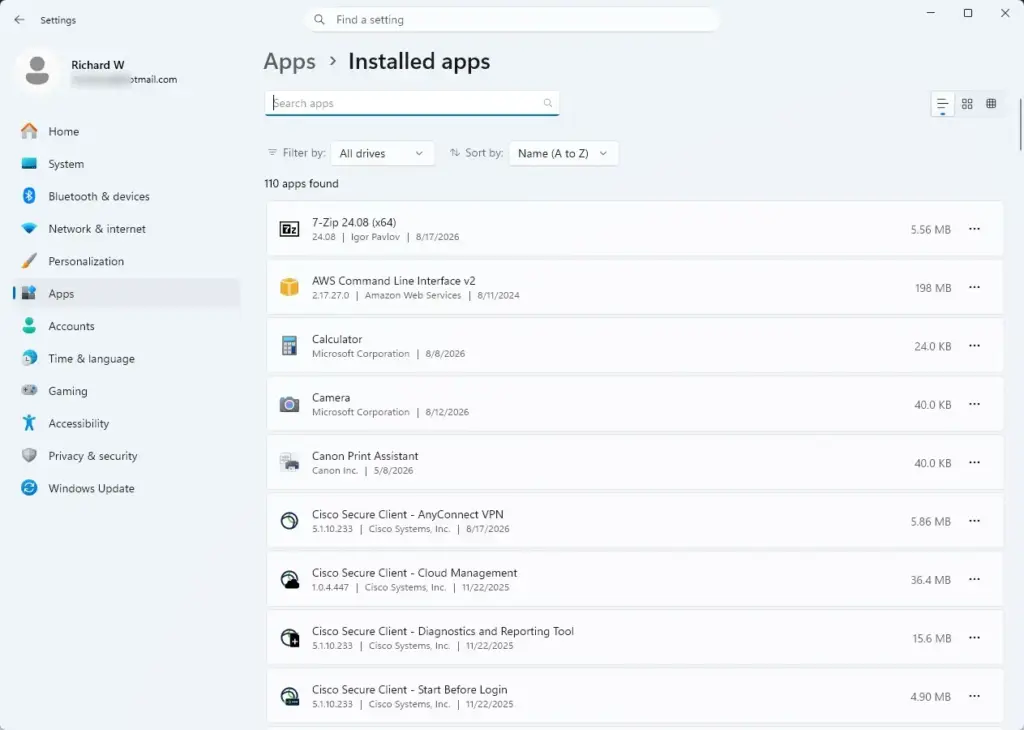
- Click the Start button and open Settings (the gear icon). You can also press Win+I.

Settings - Click Apps in the left-hand menu.
- Click Installed apps. You should now see a list of everything installed on the PC.
- Scroll through the list and find an app you know runs in the background and uses a lot of memory. Your Task Manager list from earlier can help you choose.
- Click the three dots button (…) next to the app name and select Advanced options.
- Find the section called Background apps permissions. Open the drop-down menu and change it from Always or Power optimized to Never.
If you do not see Background apps permissions for an app, it does not support the setting. Apps set to Never will not send notifications or update their data until you open them. If something stops working as you expect, change the setting back to Power optimized. Keep background activity off for apps you rarely use, so they do not quietly take your memory.
Method 4Adjust Windows Visual Effects for Better Performance
Adjusting visual effects turns off animations, transparency, and drop shadows. Lowering these graphical settings reduces the strain on your hardware and leaves more resources for the programs you care about.
The saving is modest on a recent PC, but on an older computer or one with limited memory it can make the system feel noticeably snappier.
- Click the Start button, type sysdm.cpl into the search box, and press Enter. The System Properties window opens.
- Click the Advanced tab at the top of the window.
- In the Performance section, click Settings. This opens the Performance Options window.
- On the Visual Effects tab, you will see four preset options and, below them, a list of visual features with checkmarks.
Performance Options - For the quickest result, select Adjust for best performance. This turns off most animations and shadows. Windows will look plainer, and font edges may look rougher. If you would rather let Windows decide, choose Let Windows choose what's best for my computer.
- If you want to keep some effects, select Custom and uncheck heavy items such as Animate windows when minimizing and maximizing and Enable transparent glass. If your version does not list a particular item, skip it.
- Click Apply and then click OK. The change applies straight away, and you should see the screen redraw with the new look.
To undo it, return to the same window and select Adjust for best appearance. You can also turn off transparency separately in Settings Personalization Colors, and animations in Settings Accessibility Visual effects.
Method 5Manage Browser Tabs and Extensions
Managing your browser tabs and extensions keeps heavy browsers like Google Chrome and Microsoft Edge from taking over your memory. Closing unused pages and removing old add-ons can recover a large amount of RAM.
If you leave fifty tabs open across three browser windows, your computer will run out of RAM quickly. Each tab, extension, and background page is its own process, and they add up.
- Close tabs you are not usingBookmark pages you want to read later and close the tabs you are finished with. Browser task managers (Shift + Esc in Chrome, or Browser task manager in Edge) show you which tab or extension uses the most memory.
- Use browser memory saversModern browsers have built-in features for this. In Microsoft Edge, look in Settings for Efficiency mode (also called Sleeping tabs). In Google Chrome, look for Memory Saver. These put inactive tabs to sleep so they stop using memory until you click them again. The exact wording varies by browser version.
- Remove unused browser extensionsClick the puzzle piece icon or the extensions menu in your browser. Remove any extension you installed once and no longer use. Extensions run constantly in the background and use memory, so removing them is a quick win. You can reinstall one later if you miss it.
Method 6Run a Virus and Malware Scan
A virus and malware scan finds hidden malicious software that mines digital currency or steals data in the background. Hidden threats like these can drain your computer's memory, and a regular scan catches them.
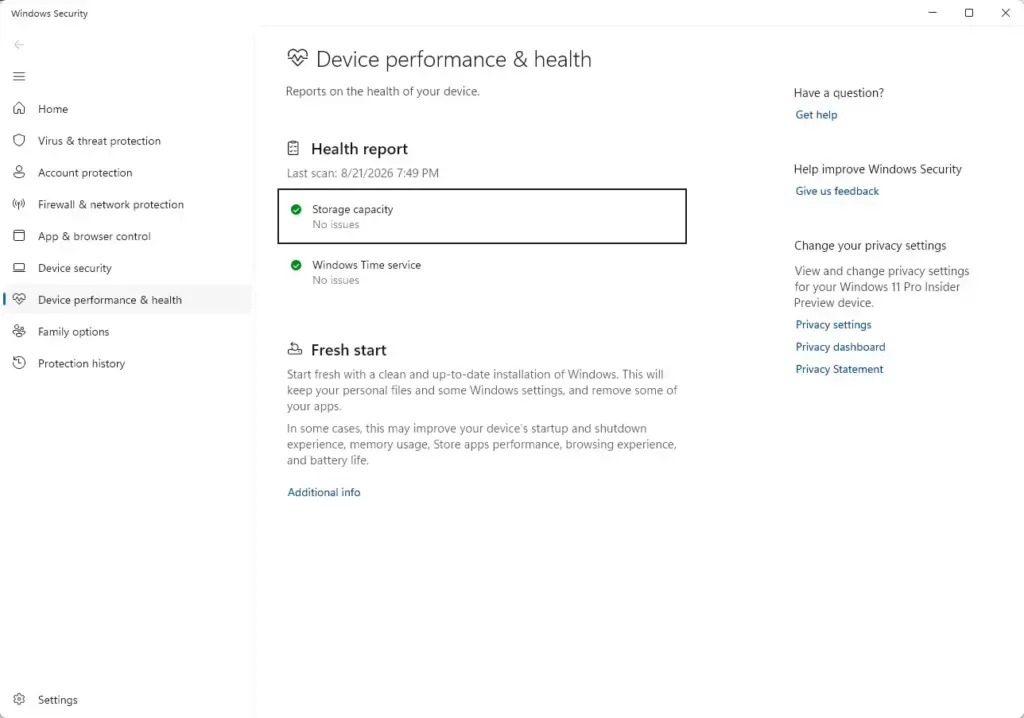
If Task Manager showed an unfamiliar process using a lot of memory, or the PC is slow with nothing obvious running, scan it. The built-in Windows Security app is enough for this and is already on your PC.
- Click the Start button, type Windows Security into the search box, and click the app when it appears.
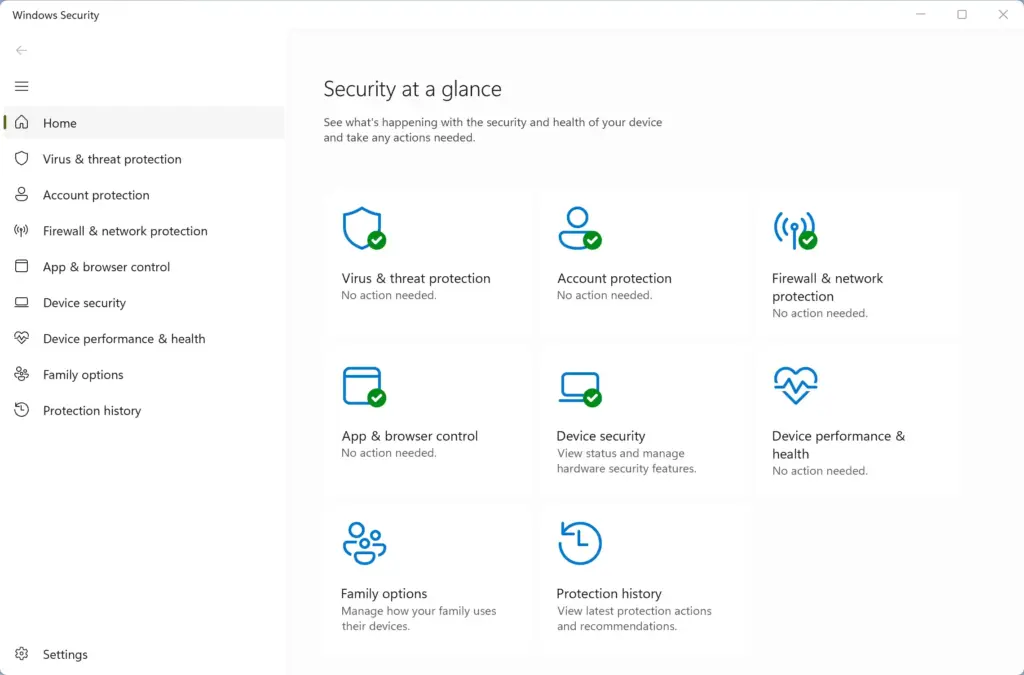
Windows Security - Click Virus & threat protection in the main window.
- Click the Scan options link under the Quick scan button. You should now see a list of scan types.
- Select Full scan to check every file and running program on your computer.
- Click Scan now. A full scan can take a long time, sometimes an hour or more depending on your drive speed. You can keep using the PC meanwhile, but it may feel slower.
If Windows Security finds suspicious files or malware, follow the on-screen instructions to remove or quarantine them. Removing malware matters because malicious programs often run hidden background processes that use memory and slow the computer. If the scan finds nothing and the problem persists, you can also try Microsoft Defender Offline scan from the same list of scan options. It restarts the PC and scans outside of Windows, which catches threats that hide while Windows is running.
Method 7Clear Temporary Files and System Cache
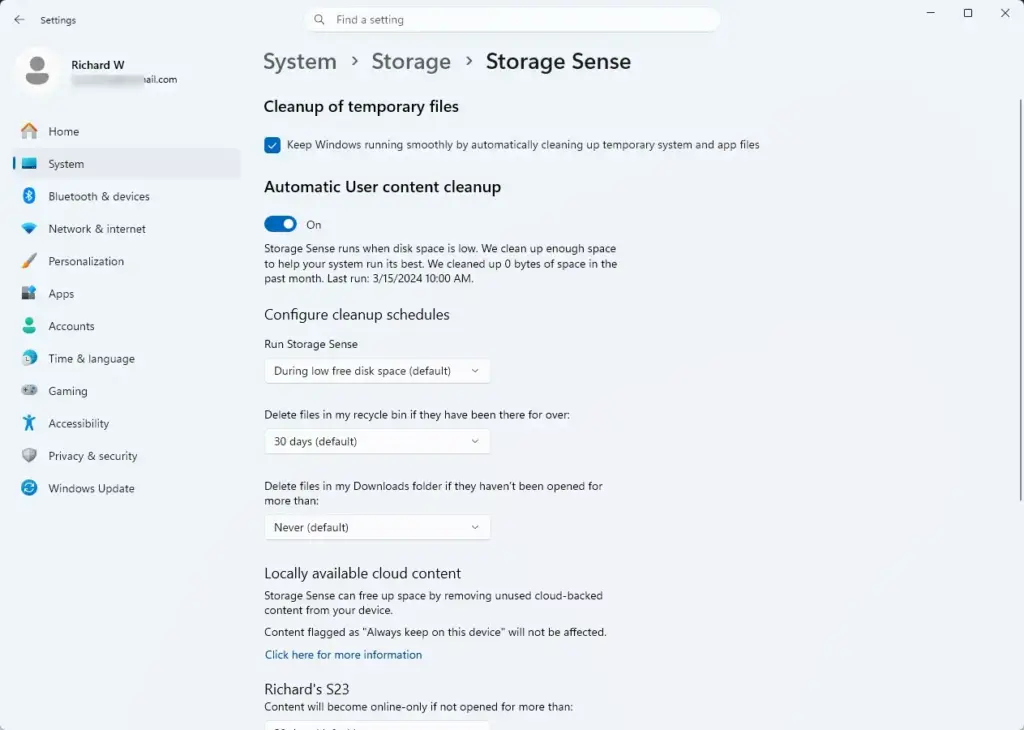
Clearing temporary files and system cache helps Windows 11 manage your storage drive and its virtual memory backup system. Deleting old cache files gives the operating system room to work.
Virtual memory is a method where Windows uses part of your storage drive as extra RAM when your physical memory fills up. If the drive is nearly full, Windows has little room for it, and the PC slows down. Cleaning out junk files will not free RAM directly, but it keeps enough free space for this backup system to work properly.
- Click the Start button and open Settings.
- Click System in the left-hand menu, then click Storage on the right.
- Wait a moment while Windows calculates what is taking up space on your drive.
- Click Temporary files. Windows will scan for files that are safe to delete, such as old update files, error reports, and the contents of your Recycle Bin.
- Check the boxes next to the items you want to remove. Read each entry first. Items such as Downloads and Recycle Bin may hold files you still want, so only tick them if you have checked.
- Click Remove files, then confirm if Windows asks. The list updates to show the space you freed.
Deleted temporary files cannot be restored from the Settings screen, but Windows recreates the ones it needs. A good target is to keep at least 10% to 15% of your drive free.
Method 8Check for Windows Updates and Driver Updates
Checking for Windows updates and driver updates fixes high memory usage caused by old software bugs and memory leaks. Updates apply the latest performance fixes from Microsoft and from hardware makers.
Keeping the system fully up to date means you have the latest patches. Do this even if the earlier steps helped, because a leaking driver will bring the problem back.
- Click the Start button and open Settings.
- Click Windows Update in the left-hand menu.

Settings › Windows Update - Click Check for updates.
- If Windows finds updates, let them download and install completely. Your computer may need to restart to finish the installation. If you see a Restart now button, save your work first and then click it.
To check for hardware driver updates:
- In the Settings app, click Windows Update again.
- Click Advanced options.
- Scroll down to the Additional options section and click Optional updates. If this entry is missing, Windows has no optional updates for your PC.
- Click Driver updates to see whether any hardware updates are waiting. Check the boxes for the ones you want, then click Download & install.
If a new driver causes problems, you can roll it back from Device Manager. Only install optional drivers you need. For a graphics driver, you can also get the latest version directly from the maker's website.
Advanced Expert Tips to Lower RAM Usage
If you have tried all eight basic steps and your Windows 11 RAM usage is still too high, two advanced options can help.
Expert Tip 1: Optimize Your Virtual Memory (Page File) Settings
Adjusting the virtual memory page file gives Windows 11 a better backup when your physical RAM runs low. You make the change in the advanced system properties. Most PCs do fine with the default automatic setting, so only try this if you are comfortable with it. You need an administrator account.
- Click the Start button, type sysdm.cpl, and press Enter to open System Properties.
- Click the Advanced tab.
- In the Performance section, click Settings.
- In the Performance Options window, click the Advanced tab at the top.
- In the Virtual memory section, click Change.
- Uncheck Automatically manage paging file size for all drives at the top. The options below it become available.
- Select your main system drive (usually drive C:).
- Select Custom size and enter an Initial size and a Maximum size in megabytes. The Recommended figure shown at the bottom of the window is a sensible starting point for the initial size. If you are unsure, leave it managed by the system.
- Click Set, then click OK. Windows will tell you to restart for the change to take effect.
Modifying virtual memory incorrectly can cause system instability, so when in doubt, leave automatic management turned on. To undo the change, return to this window, tick Automatically manage paging file size for all drives, click OK, and restart.
Expert Tip 2: Consider a Physical RAM Upgrade
Upgrading your physical RAM is the best long-term fix when your computer reaches its hardware limit during heavy tasks like gaming. Going up to at least 16 GB gives the system a permanent performance boost.
Windows 11 runs best with at least 16 GB of RAM for a smooth experience. Upgrading is often inexpensive and makes a big, permanent difference. On a desktop, buying a matching pair of memory sticks and fitting them in the motherboard is a relatively simple DIY job. Check your motherboard manual or your PC maker's specifications first, so you buy the right type and speed. The Memory screen in Task Manager (Performance tab) shows your current speed, type, and how many slots are in use. On a laptop, check with the manufacturer to see whether the memory is upgradeable, because some modern laptops have RAM soldered directly to the board.
Summary
Fixing high RAM usage in Windows 11 is usually straightforward and does not need new hardware. The built-in tools and a few settings changes are often enough to make a slow computer feel responsive again.
To recap, you can lower memory usage by restarting your computer regularly, turning off unnecessary startup apps, disabling background app permissions, adjusting visual performance settings, managing your browser tabs and extensions, scanning for viruses, cleaning out temporary files, and keeping your system updated. If all else fails, adjusting your virtual memory or upgrading your physical RAM will give your PC the boost it needs.
Have a question about this guide?
Answered by AI from this guide. Good questions may be added to this page — please don't include personal details.
Did this guide fix your problem?

About the Author
Richard
Tech Writer, IT Professional
Richard is a writer at Geek Rewind who turns complex IT tasks into clear, step-by-step guides. He draws on years of hands-on experience in system administration and enterprise IT operations, focusing on Windows, Linux and WordPress: the problems people actually run into, and the fixes that work. His server and WordPress guides come from systems he runs himself. Richard builds and maintains the platform behind Geek Rewind, from its Ubuntu servers and Nginx configuration to its custom WordPress plugins. Many new tutorials start with readers' questions, and he's always glad to answer them in the comments.
No comments yet — be the first to share your thoughts!