Should You Use Windows 11 Compressed Memory or Add Physical RAM

Windows 11 compressed memory is a built-in feature that shrinks inactive data directly inside your RAM to keep your PC fast when you run out of physical memory. Instead of moving background apps to a slow page file on your hard drive, Windows squishes that data down to use less space on your memory sticks.
Physical RAM consists of actual hardware chips installed on your motherboard, whereas compressed memory acts as a software fix that saves space without opening your computer case. Adding more physical RAM is always better if your PC has extra memory slots, but compression keeps things running smoothly for free until you are ready to buy an upgrade.
Yes, you should add physical RAM if your computer runs out of space, because built-in Windows 11 compressed memory only stretches your current hardware so far. While memory compression is free and works automatically, upgrading your actual memory chips gives your computer real room to breathe for heavy tasks.
How 🪟 Windows 11 Memory Compression Works
Windows 11 memory compression works by shrinking idle background data and storing it in a special part of your RAM so your PC runs smoother. When you stop using an app, the operating system squishes its files down to free up active space without needing a hardware upgrade.
When the Windows 11 compressed memory feature finds idle pieces of data, the Windows 11 compressed memory feature squishes the idle pieces of data down to a smaller size. The Windows 11 compressed memory feature keeps the squished files in a special area of your RAM. When you click back on that background app, Windows instantly expands the files back to the normal size. The entire process happens in milliseconds.
This feature offers several clear benefits:
- It reduces how often your computer has to use the slow hard drive for virtual memory.
- It keeps your system running smoothly even when you have multiple apps open.
- It works completely automatically in the background without needing your attention.
Windows 11 memory compression is not magic because compressing and decompressing data takes a tiny amount of your processor's power. On very old or weak computers, this extra work can sometimes cause a slight stutter. However, on modern computers, the processor handles the memory compression task easily without slowing down your everyday work.
Memory Compression vs. Adding Physical RAM
Choosing between memory compression and adding physical RAM depends on how you use your computer and what your hardware can handle. Let us compare the two approaches directly.
Memory Compression:
- Cost: Free. It comes built right into Windows 11.
- Installation: Requires no physical work or opening your computer case.
- Limitation: It can only stretch your current memory so far. If you have 8 gigabytes of RAM, compression helps, but it cannot turn 8 gigabytes into 32 gigabytes of heavy gaming power.
Adding Physical RAM:
- Cost: Requires buying new hardware sticks.
- Installation: Requires opening your laptop or desktop computer to insert the new memory chips (though some modern laptops have memory soldered down and cannot be upgraded).
- Benefit: Gives your computer actual physical room to breathe. Your apps get their own dedicated space without needing to share or get squished.
Adding physical RAM requires buying new hardware sticks and opening your computer case to insert them. This upgrade gives your computer actual physical room to breathe so your apps get dedicated space without needing to share or get squished.
How to Check Your Memory Compression Status Using PowerShell
Checking your memory compression status using PowerShell takes a few quick steps with administrator privileges. You can easily find out whether the built-in Windows 11 feature is currently turned on or off by running a simple status command in the command tool.
- Click the Windows Start button on your taskbar.
- Type PowerShell in the search box.
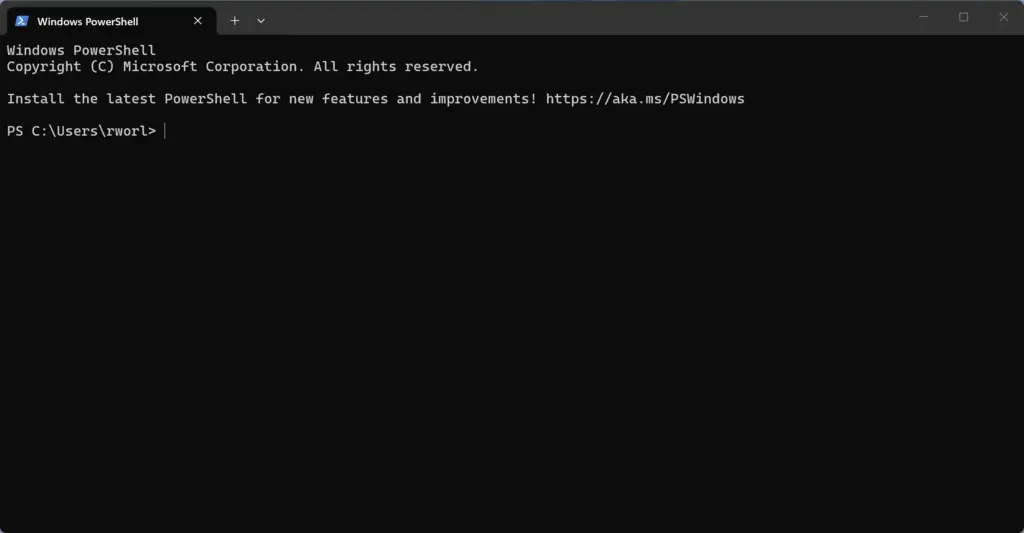
PowerShell - Right-click on Windows PowerShell in the search results and choose Run as administrator.
- If a security warning window pops up asking if you want to allow this app to make changes to your device, click Yes.
- Type this command in the PowerShell window and press Enter:
Look at the text on your screen to find the MemoryCompression line. If the MemoryCompression line says True, Windows 11 memory compression is turned on. If the MemoryCompression line says False, Windows 11 memory compression is turned off.
- Click the Windows Start button, type PowerShell, right-click Windows PowerShell, and select Run as administrator.
- Click Yes on the security prompt window.
- To turn memory compression on, type the following command and press Enter:Code
Enable-MMAgent -mc - To turn memory compression off, type the following command and press Enter:Code
Disable-MMAgent -mc
📝Good to KnowAfter changing this setting, restart your computer for the changes to take full effect.💡TipIf you recently changed your memory compression settings, you may also want to restart the background service that manages system maintenance.In the same administrator PowerShell window, you can restart this service by running the following commands one at a time, pressing Enter after each one:
Before you turn off the Windows 11 memory compression feature, you must consider potential slowdowns and heavy hard drive usage that happen when your RAM fills up. While disabling memory compression might give a tiny boost to competitive gaming, turning off memory compression stops Windows from shrinking background data, which can cause your computer to lag.
When you disable memory compression, Windows loses its ability to squish inactive background data. If your physical RAM fills up, Windows immediately starts dumping that data onto your hard drive page file. This sudden switch to hard drive storage causes noticeable stuttering, freezing, and slow response times when switching between open windows.
If you have a computer with a low amount of physical RAM—such as 4 gigabytes or 8 gigabytes—leaving memory compression enabled is almost always the better choice. Disabling it on low-memory systems will likely make your computer feel much slower during daily multitasking.
How to Tell If You Need More Physical RAM
Telling if you need more physical RAM is easy when you use the built-in Task Manager tool on your Windows 11 computer. By opening the performance tab and checking your memory usage percentage, you can quickly see if your system is running out of space and needs a hardware upgrade.
- Press the Ctrl + Shift + Esc keys on your keyboard at the same time to open the Task Manager.
- If the window looks small and simple, click the More details option at the bottom of the window.
- Click on the Performance tab at the top of the window.
- Click on Memory in the left-hand menu.
- Look at the graph and numbers on the screen. Pay close attention to the In use (Compressed) number and the percentage at the top right.
If your memory usage regularly sits between 80% and 95% while you do your normal daily work, your computer is struggling with its current physical RAM limit. In this scenario, memory compression is working overtime to keep your system afloat. Buying and installing more physical RAM will give your system immediate relief and make your computer feel brand new.
Summary
Windows 11 memory compression helps your PC run smoothly by shrinking idle background data, but it is not a permanent fix for heavy multitasking. While the built-in feature is free and works automatically, upgrading your physical RAM is still the best long-term solution if your system constantly runs out of memory space.
Was this guide helpful?

About the Author
Richard
Tech Writer, IT Professional
Richard is a writer at Geek Rewind who turns complex IT tasks into clear, step-by-step guides. He draws on years of hands-on experience in system administration and enterprise IT operations, focusing on Windows, Linux and WordPress: the problems people actually run into, and the fixes that work. His server and WordPress guides come from systems he runs himself. Richard builds and maintains the platform behind Geek Rewind, from its Ubuntu servers and Nginx configuration to its custom WordPress plugins. Many new tutorials start with readers' questions, and he's always glad to answer them in the comments.



No comments yet — be the first to share your thoughts!