What Happens When You Enable Windows 11 Memory Compression

The Benefits
The benefits of Windows 11 memory compression include smoother multitasking, fewer system slowdowns, and a longer lifespan for your storage drives. By shrinking inactive data directly inside your random access memory (RAM), the operating system avoids moving that data to a slow pagefile on your hard drive. This keeps your computer running fast and reduces unnecessary wear and tear on solid-state drives.- Better Multitasking: You can keep more applications open at the same time without your computer running out of memory.
- Fewer Slowdowns: By keeping compressed data in RAM instead of moving it to a pagefile on your storage drive, your computer avoids massive speed drops.
- Longer Drive Life: Writing and rewriting data to an SSD or hard drive causes normal physical wear over time. Memory compression reduces how often your computer writes data to the drive, which helps protect your storage hardware.
- Seamless Experience: The compression and decompression happen so fast that you will not notice any lag when switching between background tasks.
The Drawbacks
The drawbacks of Windows 11 memory compression are minor, but they include a tiny increase in processor usage and potentially confusing readings in Task Manager. Compressing and uncompressing data takes a small amount of processing power from your central processing unit (CPU). While this impact is nearly invisible on modern computers, older or low-end processors might occasionally show slight performance spikes.- Processor Usage: Compressing and uncompressing data requires a tiny amount of processing power from your Central Processing Unit (CPU). On modern computers, this impact is so small you will never notice it. However, on very old or low-end processors, it can occasionally cause a tiny spike in CPU utilization.
- Confusing Task Manager Readings: Sometimes users with massive amounts of RAM (such as 64GB, 128GB, or 192GB) notice that Windows is actively compressing memory even though they have tons of free RAM left. This can look like the computer is working harder than it needs to, but it is just Windows managing its memory efficiently in anticipation of future needs.
Task Manager
How to View Compressed Memory in Task Manager
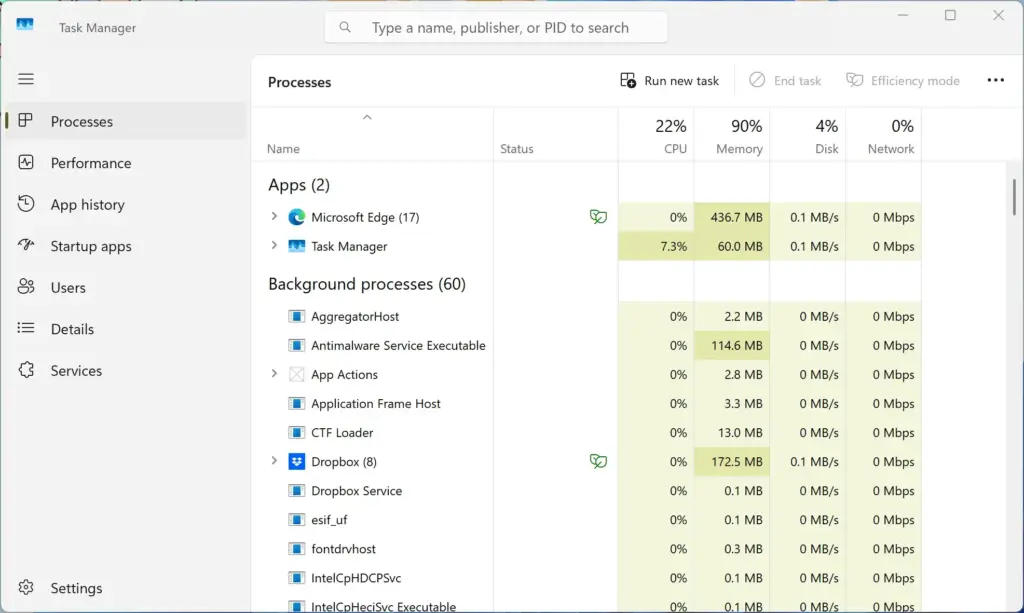
Viewing compressed memory in Task Manager lets you see exactly how much space your operating system is saving on your computer. You can open this built-in monitoring tool using a quick keyboard shortcut, navigate to the performance tab, and check the memory details section. This screen shows you real-time data about your hardware usage, including the exact amount of compressed data currently sitting in your RAM.
- Press Ctrl+Shift+Esc on your keyboard to open the Task Manager directly.
- If Task Manager opens in a compact view, click More details at the bottom.
- Click on the Performance tab on the left side of the window.
- Click on Memory in the list of hardware components.
- Look at the bottom of the window for detailed stats. Look for the label called Compressed. This number tells you exactly how much physical RAM is currently being saved through compression.
You may also see a process named System and compressed memory or simply System in the Processes tab. This process shows the CPU and RAM usage dedicated to managing system memory tasks, including compression.
Unique Expert Angle: Memory Compression on High-RAM vs. Low-RAM Systems
Memory compression in Windows 11 behaves quite differently on high-RAM versus low-RAM systems, sparking a common debate among power users. Workstation computers with 32 gigabytes or more of physical memory might still compress a few gigabytes of data even when most of the RAM sits completely empty. Understanding how the Windows 11 operating system handles this background compression helps clarify resource management.
The answer lies in how the Windows Memory Manager looks at efficiency. The Memory Manager does not wait until your RAM is 99% full to start organizing. It constantly evaluates memory pages in real time. Compressing inactive pages keeps your memory footprint tidy, reduces fragmentation, and ensures that if a sudden burst of activity happens, the system is already optimized to handle it.
However, if you are running specialized benchmark tests, extreme overclocking setups, or working with real-time audio production software where every single microsecond of processor delay matters, turning off Windows 11 memory compression via PowerShell can sometimes remove tiny performance hiccups. For 99% of everyday users, gamers, and office workers, leaving memory compression enabled provides a net benefit, regardless of whether you have 8GB of RAM or 128GB of RAM.
Unique Expert Angle: Interaction with Virtual Machines and Containers
Memory compression affects virtual machines and software development containers by changing how the host operating system shares its physical resources. Virtual machines run by taking a dedicated chunk of physical RAM from your main computer to act as an isolated system. When your host machine runs compression in the background, it actively manages these shared memory blocks to keep every running environment stable.
If your host machine has memory compression enabled, it manages the memory allocated to the host processes, but it does not directly compress the internal memory of the guest operating system inside the VM. However, if your host machine's RAM fills up because you are running multiple virtual machines at the same time, the host's memory compression steps in to compress the memory blocks belonging to the virtualization software itself.
This can create a layered memory management situation. The virtual machine tries to manage its own memory, while the host operating system tries to compress the virtualization wrapper. If you run heavy virtual machines on a computer with limited RAM, keeping host memory compression enabled prevents the host from thrashing pagefiles, keeping both your main desktop and your virtual machines stable.
Summary
Windows 11 memory compression is a default system feature that shrinks inactive data in your RAM to save space and prevent slowdowns. It stops your computer from moving important data to a slow pagefile on your storage drive. You can easily check or change your compression status using simple command-line tools, but keeping the feature turned on is recommended for almost all everyday computer users.
Windows 11 memory compression is a built-in tool that shrinks idle data sitting in your RAM so your PC runs faster and handles more apps at once. Think of it like packing clothes into a tight suitcase to save space instead of leaving them spread all over the room.
Without this feature, background programs take up full space in your memory. When you open a heavy app and run out of RAM, Windows has to move that extra data to your slow hard drive, which makes your computer lag. Turning on memory compression stops this slowdown by keeping your background data small and ready to unpack instantly.
Enabling Windows 11 memory compression shrinks inactive data and keeps it stored directly inside your fast physical RAM instead of moving it to a slower storage drive. This built-in feature helps your computer run smoother and switch between open programs much faster without slowing down or freezing.
Is Memory Compression Enabled by Default in 🪟 Windows 11?
Memory compression is enabled by default across all modern versions of Windows 10 and Windows 11. Microsoft builds this helpful feature directly into the core operating system to give your computer a big boost during everyday multitasking. Having memory compression running quietly in the background keeps your system snappy and responsive, even when you have many heavy applications open at the same time.
However, you might wonder if your computer is actually using Windows 11 memory compression, or you might want to check the status of Windows 11 memory compression. Because the Windows Memory Manager handles Windows 11 memory compression automatically, you do not normally need to change any system settings. Windows 11 memory compression works quietly in the background without requiring your attention.
How to Check Your Memory Compression Status Using PowerShell
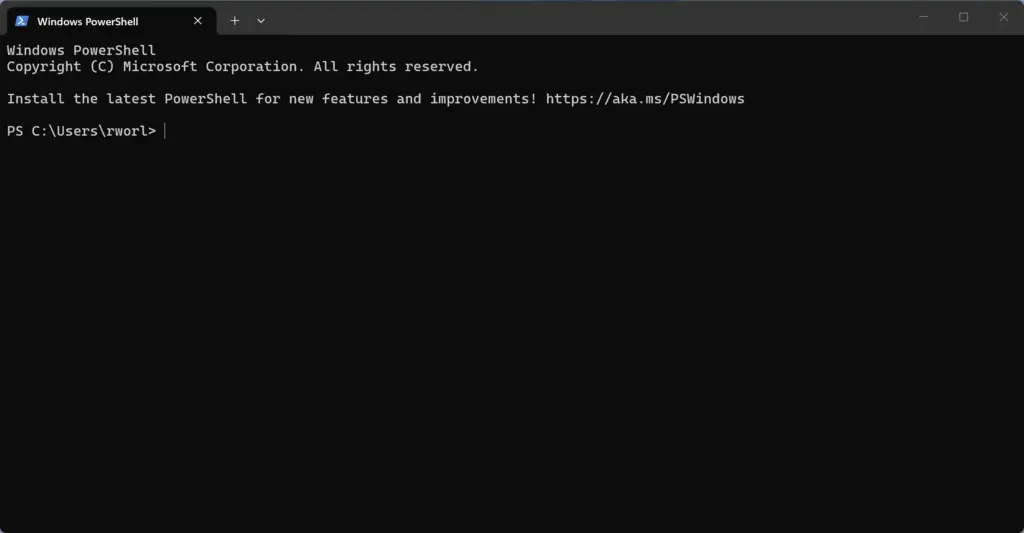
Checking your memory compression status using PowerShell is a straightforward process that takes just a few seconds. PowerShell is a built-in command-line tool that lets you manage advanced system settings and check underlying Windows features. You can open PowerShell with administrator rights and run a simple command to see if memory compression is currently active on your Windows 11 computer.
Here is how to check your current memory compression status:
- Click the Start button on your taskbar.
- Type PowerShell into the search box.
PowerShell - Right-click on Windows PowerShell in the search results and choose Run as administrator. (Admin privileges required)
A blue or black window will open on your screen. Type the following exact command and press the Enter key on your keyboard:
Look at the results that appear on the screen to check your Windows 11 computer. Find the specific line that says MemoryCompression. If the line says True, Windows 11 memory compression is turned on. If the line says False, Windows 11 memory compression is turned off.
How to Enable or Disable Memory Compression in 🪟 Windows 11
You can enable or disable memory compression in Windows 11 by running specific commands in PowerShell with administrator permissions. Most people should leave memory compression turned on for the best performance, but you might need to turn it off when troubleshooting high processor usage or running advanced system diagnostics.
How to Enable Memory Compression
- Click the Start button and type PowerShell.
- Right-click on Windows PowerShell and select Run as administrator. (Admin privileges required)
- Type the following command and press Enter:Code
Enable-MMAgent -mc
Restart your computer to make sure the changes take full effect.
How to Disable Memory Compression
- Click the Start button and type PowerShell.
- Right-click on Windows PowerShell and select Run as administrator. (Admin privileges required)
- Type the following command and press Enter:Code
Disable-MMAgent -mc
Restart your computer so the operating system applies the setting.
The Role of the SysMain Service
The SysMain service works alongside your system memory to improve computer performance in Windows 11 by managing how applications load into your RAM. Known as SuperFetch (a service that preloads apps you use often) in older versions released before Windows 10, the SysMain service analyzes your daily habits to preload frequently used programs directly into your memory so they open instantly.
The Windows SysMain service and the Windows 11 memory compression feature work hand in hand to manage your computer memory. Memory compression squeezes the data that SysMain and other programs put into your RAM. Stopping the SysMain service alters how Windows 11 handles background caching. However, stopping the SysMain service leaves the underlying Windows 11 memory compression engine completely untouched.
If you ever need to restart the SysMain service for troubleshooting purposes, you can do so through the Windows Services manager:
- Press the Windows Key + R on your keyboard to open the Run dialog box.

Run dialog - Type services.msc and press Enter.
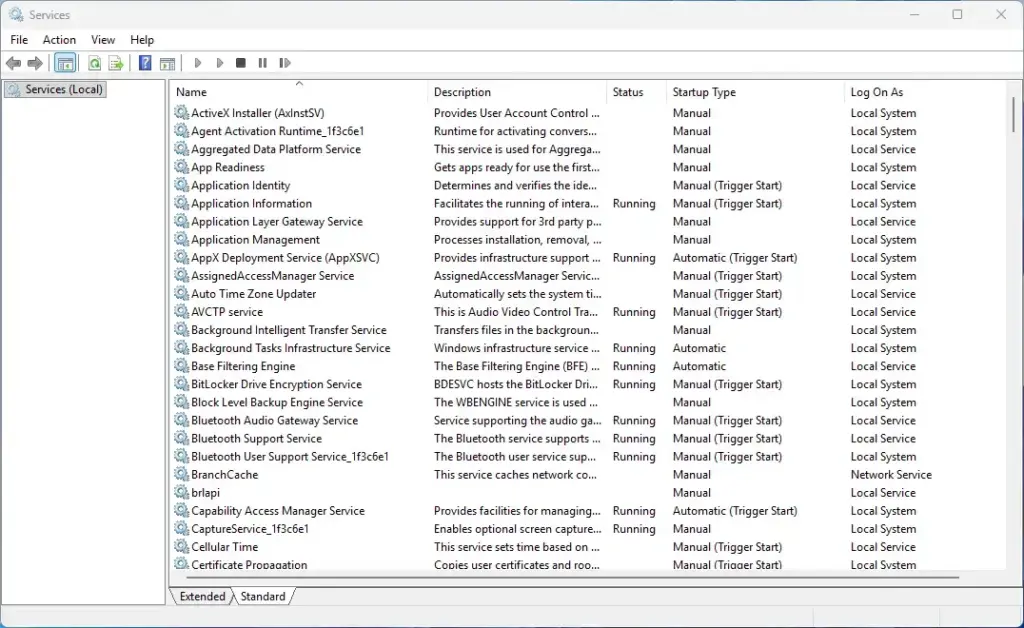
Services - Scroll down the list of services until you find SysMain.
- Right-click on SysMain and select Restart. (Admin privileges required)
Performance Impact: Pros and Cons
Like every feature in Windows 11, memory compression comes with a trade-off. Understanding the pros and cons helps you decide whether to keep the default settings.
The Benefits
The benefits of Windows 11 memory compression include smoother multitasking, fewer system slowdowns, and a longer lifespan for your storage drives. By shrinking inactive data directly inside your random access memory (RAM), the operating system avoids moving that data to a slow pagefile on your hard drive. This keeps your computer running fast and reduces unnecessary wear and tear on solid-state drives.- Better Multitasking: You can keep more applications open at the same time without your computer running out of memory.
- Fewer Slowdowns: By keeping compressed data in RAM instead of moving it to a pagefile on your storage drive, your computer avoids massive speed drops.
- Longer Drive Life: Writing and rewriting data to an SSD or hard drive causes normal physical wear over time. Memory compression reduces how often your computer writes data to the drive, which helps protect your storage hardware.
- Seamless Experience: The compression and decompression happen so fast that you will not notice any lag when switching between background tasks.
The Drawbacks
The drawbacks of Windows 11 memory compression are minor, but they include a tiny increase in processor usage and potentially confusing readings in Task Manager. Compressing and uncompressing data takes a small amount of processing power from your central processing unit (CPU). While this impact is nearly invisible on modern computers, older or low-end processors might occasionally show slight performance spikes.- Processor Usage: Compressing and uncompressing data requires a tiny amount of processing power from your Central Processing Unit (CPU). On modern computers, this impact is so small you will never notice it. However, on very old or low-end processors, it can occasionally cause a tiny spike in CPU utilization.
- Confusing Task Manager Readings: Sometimes users with massive amounts of RAM (such as 64GB, 128GB, or 192GB) notice that Windows is actively compressing memory even though they have tons of free RAM left. This can look like the computer is working harder than it needs to, but it is just Windows managing its memory efficiently in anticipation of future needs.
Task Manager
How to View Compressed Memory in Task Manager
Viewing compressed memory in Task Manager lets you see exactly how much space your operating system is saving on your computer. You can open this built-in monitoring tool using a quick keyboard shortcut, navigate to the performance tab, and check the memory details section. This screen shows you real-time data about your hardware usage, including the exact amount of compressed data currently sitting in your RAM.
- Press Ctrl + Shift + Esc on your keyboard to open the Task Manager directly.
- If Task Manager opens in a compact view, click More details at the bottom.
- Click on the Performance tab on the left side of the window.
- Click on Memory in the list of hardware components.
- Look at the bottom of the window for detailed stats. Look for the label called Compressed. This number tells you exactly how much physical RAM is currently being saved through compression.
You may also see a process named System and compressed memory or simply System in the Processes tab. This process shows the CPU and RAM usage dedicated to managing system memory tasks, including compression.
Unique Expert Angle: Memory Compression on High-RAM vs. Low-RAM Systems
Memory compression in Windows 11 behaves quite differently on high-RAM versus low-RAM systems, sparking a common debate among power users. Workstation computers with 32 gigabytes or more of physical memory might still compress a few gigabytes of data even when most of the RAM sits completely empty. Understanding how the Windows 11 operating system handles this background compression helps clarify resource management.
The answer lies in how the Windows Memory Manager looks at efficiency. The Memory Manager does not wait until your RAM is 99% full to start organizing. It constantly evaluates memory pages in real time. Compressing inactive pages keeps your memory footprint tidy, reduces fragmentation, and ensures that if a sudden burst of activity happens, the system is already optimized to handle it.
However, if you are running specialized benchmark tests, extreme overclocking setups, or working with real-time audio production software where every single microsecond of processor delay matters, turning off Windows 11 memory compression via PowerShell can sometimes remove tiny performance hiccups. For 99% of everyday users, gamers, and office workers, leaving memory compression enabled provides a net benefit, regardless of whether you have 8GB of RAM or 128GB of RAM.
Unique Expert Angle: Interaction with Virtual Machines and Containers
Memory compression affects virtual machines and software development containers by changing how the host operating system shares its physical resources. Virtual machines run by taking a dedicated chunk of physical RAM from your main computer to act as an isolated system. When your host machine runs compression in the background, it actively manages these shared memory blocks to keep every running environment stable.
If your host machine has memory compression enabled, it manages the memory allocated to the host processes, but it does not directly compress the internal memory of the guest operating system inside the VM. However, if your host machine's RAM fills up because you are running multiple virtual machines at the same time, the host's memory compression steps in to compress the memory blocks belonging to the virtualization software itself.
This can create a layered memory management situation. The virtual machine tries to manage its own memory, while the host operating system tries to compress the virtualization wrapper. If you run heavy virtual machines on a computer with limited RAM, keeping host memory compression enabled prevents the host from thrashing pagefiles, keeping both your main desktop and your virtual machines stable.
Summary
Windows 11 memory compression is a default system feature that shrinks inactive data in your RAM to save space and prevent slowdowns. It stops your computer from moving important data to a slow pagefile on your storage drive. You can easily check or change your compression status using simple command-line tools, but keeping the feature turned on is recommended for almost all everyday computer users.
Was this guide helpful?

About the Author
Richard
Tech Writer, IT Professional
Richard is a writer at Geek Rewind who turns complex IT tasks into clear, step-by-step guides. He draws on years of hands-on experience in system administration and enterprise IT operations, focusing on Windows, Linux and WordPress: the problems people actually run into, and the fixes that work. His server and WordPress guides come from systems he runs himself. Richard builds and maintains the platform behind Geek Rewind, from its Ubuntu servers and Nginx configuration to its custom WordPress plugins. Many new tutorials start with readers' questions, and he's always glad to answer them in the comments.



No comments yet — be the first to share your thoughts!