How to Enable or Disable Memory Integrity Core Isolation in Windows 11

- 31 steps
- Needs administrator rights
- Group Policy needs Windows 11 Pro, Enterprise or Education
- Includes a restart or sign-out
Memory Integrity is a Windows 11 security setting inside Core Isolation. Core Isolation is a group of protections that keep core parts of the operating system away from malicious code. Memory Integrity stops malware from reaching the most sensitive areas of your PC. It blocks hidden threats from taking over your system by making sure every driver running on version 22H2 or newer is safe and trusted. Microsoft also calls it hypervisor-protected code integrity (HVCI), so you may see that name in other guides and in policy settings.
Managing this feature can sometimes feel tricky when Windows blocks the change or shows confusing errors about broken drivers. You can safely turn it on or off through the Windows Security app to keep your system safe while letting your favorite apps and hardware run normally. This guide covers checking the current status, turning the feature on and off, fixing incompatible drivers, and the Group Policy method for Pro and Enterprise editions.
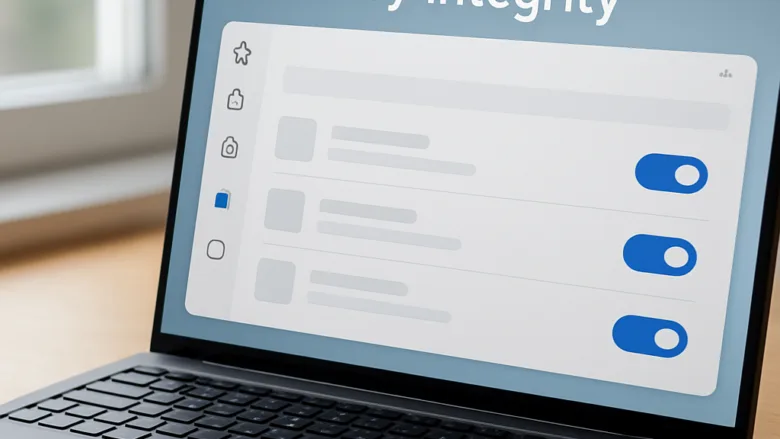
Open Windows Security, go to Device security, then click Core isolation details and switch the Memory integrity toggle to On to enable it, or to Off to disable it. Approve the User Account Control prompt if it appears. A restart may be needed before the change fully applies. Pro and Enterprise users can also use Group Policy.
What is Core Isolation and Memory Integrity?
Core isolation and memory integrity are built-in Windows 11 security features that protect your computer by creating a safe, isolated area of system memory. Core isolation separates normal operating processes from your computer hardware, while memory integrity specifically stops malicious software from attacking low-level system drivers.
Memory Integrity protects driver software. Drivers are small programs that help Windows talk to hardware like graphics cards and printers. They run with very high privileges, which makes them a favorite target. If a bad actor tries to put harmful code into a driver, Memory Integrity blocks that code right away. This stops malicious code from taking over your computer.
The feature relies on virtualization built into your processor. On many PCs, that virtualization has to be switched on in the UEFI/BIOS firmware. If Memory Integrity is missing or will not turn on and no driver is listed as the cause, check that setting. On some new PCs, and on some clean installs of Windows 11 22H2 or newer, Memory Integrity is already on by default.
While this setting offers strong protection, older software or specialized hardware drivers sometimes fail to work with it. If your computer relies on one of these older drivers, Windows blocks that driver from loading. This can cause your favorite programs or devices to stop working properly.
How to Check If Memory Integrity Is Enabled
Open the Windows Security app and check your device security settings to see if Memory Integrity is active. It takes about half a minute and changes nothing on your PC.
- Click the Start button on your taskbar and type Windows Security.
- Click the Windows Security app in the search results. The app opens with a list of protection areas.
- Click Device security in the left-hand menu.
- Under the Core isolation section, click the Core isolation details link. The Core isolation page opens.
- Look at the toggle switch next to Memory integrity. It shows whether the feature is On or Off.
If you do not see a Core isolation section at all, your hardware or firmware may not support it, or virtualization may be turned off in the firmware. If the toggle is greyed out, your PC may be managed by an organization that controls the setting through policy. In that case you need to ask your administrator.
How to Enable Memory Integrity in 🪟 Windows 11
You can enable memory integrity in Windows 11 by opening the Windows Security app, going to device security settings, opening the core isolation details, and switching the memory integrity toggle to the on position. This turns on extra protection to stop harmful software from getting into your system drivers. The toggle is available on both Home and Pro editions.
- Open the Windows Security app from your Start menu search.
- Select Device security from the side menu.
- Click Core isolation details.
- Click the toggle switch under Memory integrity to move it to the On position.
- If a User Account Control prompt appears asking for permission to make changes, click Yes. (Note: This step requires administrator privileges.)
- Restart your computer when Windows prompts you to finish turning on the feature. The protection does not become active until you restart.
If Windows shows a message that Memory Integrity can’t be turned on because of incompatible drivers, do not force it. Go to the troubleshooting section below, fix the drivers, and then try again. To undo the change later, follow the steps in the next section.
How to Disable Memory Integrity in 🪟 Windows 11
You can disable memory integrity in Windows 11 by opening the Windows Security app, clicking device security, opening the core isolation details, and turning off the memory integrity toggle switch. People usually turn this setting off when an older game, app, or piece of hardware will not run properly while it is active.
Turning it off lowers your protection against driver-based attacks. If you can, update or remove the one problem driver instead and leave the feature on. If you do turn it off to get something working, consider turning it back on once that software is updated or no longer needed.
- Open the Windows Security app by searching for it in your Start menu .
- Click Device security on the left side of the window.
- Click the Core isolation details link.
- Click the toggle switch under Memory integrity to move it to the Off position.
- If a User Account Control prompt appears asking for permission, click Yes. (Note: This step requires administrator privileges.)
- Restart your computer to apply the changes.
After the restart, open the same page again and confirm the toggle shows Off. To undo this, move the toggle back to On and restart.
How to Fix Common Problems When Memory Integrity Won’t Turn On
You can fix common problems when memory integrity will not turn on by checking your system for incompatible drivers that block the security setting. When this happens, Windows Security usually shows a Review incompatible drivers link. It lets you see the exact files you need to update or remove from your computer.
Clicking Review incompatible drivers shows a list of the specific driver files that block Memory Integrity from turning on. To fix the issue, you need to update the software that uses each driver, or remove that software.
- Open the Windows Security app and go to Device security Core isolation details.
- Click Review incompatible drivers to see the list of problematic software. If the link does not appear, try turning the toggle on first. Windows runs its compatibility check when you do.
- Note the names of the drivers or companies listed. Common culprits include older security tools like Trusteer Rapport, older printer software, or niche gaming accessories.
- Check the maker’s website for an updated version of the driver or app. An update is the best fix, because you keep the hardware working and keep Memory Integrity on.
- If no update exists, open Settings Apps Installed apps, find the software associated with those drivers, and uninstall it completely.
- If you cannot find the app in Installed apps, you may need to delete the specific driver file manually. The last troubleshooting section below explains how to do that safely.
- Restart your computer and try turning Memory Integrity back on using the steps in the enable section above.
If the same driver keeps appearing after you uninstall its app, it is probably left over from old software. Windows keeps the file even though nothing uses it any more.
Alternative Ways to Manage Memory Integrity (Group Policy and Registry)
You can manage memory integrity using alternative methods like local group policies or manual registry adjustments if the main security menu is locked or unavailable. These advanced methods let system administrators and home users control the security feature directly through system files and policy settings.
Registry changes can cause problems if you make a mistake, so back up the registry or create a restore point first. On Home, the Windows Security toggle is the safest method. The Group Policy Editor is available on Windows 11 Pro and Enterprise and is the better choice there for enforcing this setting.
To use the local Group Policy Editor:
- Press Win+R on your keyboard to open the Run dialog box.
- Type gpedit.msc and press Enter. (Note: This step requires administrator privileges and is only available on Windows Pro or Enterprise editions.) The Local Group Policy Editor opens.💡If gpedit.msc doesn't open on your PC
If
gpedit.mscdoes nothing or Windows says it can't find it, your PC is most likely running Windows 11 Home, which doesn't include the Local Group Policy Editor. To check your edition, open Settings > System > About and look under Windows specifications. If it says Home, skip the Group Policy method and use the Memory integrity toggle in Windows Security instead. Only Pro and Enterprise editions include the Group Policy Editor. If your PC is managed by a work or school, ask your IT administrator before changing any policy settings. - In the left folder tree, go to Computer Configuration Administrative Templates System Device Guard.
- Double-click the setting named Turn On Virtualization Based Security.
- Select Enabled. Then make sure the options below it are configured to turn on Secure Boot and Direct Memory Access Protection, along with virtualization-based protection of code integrity.
- For the code integrity option, choosing the setting without a UEFI lock lets you turn the feature off again from Windows later. A UEFI lock makes it harder to switch off.
- Click Apply and then OK, and restart your computer.
To undo the change, return to the same setting, select Not Configured or Disabled, click Apply and OK, and restart. If the toggle in Windows Security is greyed out afterward, a policy like this one is often the reason.
Advanced Troubleshooting: What to Do When Files Are Left Behind
You can fix stubborn memory integrity errors caused by leftover files by manually deleting old driver files hiding deep inside your system folders. Windows keeps blocking the security setting if it detects these leftover files, so you must find and remove the exact file names shown in the security warnings.
To fix this stubborn issue, find the exact file name shown in the security warning and delete it from your system storage manually. You will typically find these driver files in the system folders where Windows stores hardware instructions. Deleting these leftover files allows Windows Security to finally turn on Memory Integrity without any more error messages.
Only remove a driver that belongs to software you have already uninstalled or no longer use. Deleting a driver that a working device still needs can stop that device from working, or in the worst case stop Windows from starting. Before you delete anything, create a restore point and write down the exact file name from the warning. After deleting the file, restart and check the Core isolation page again. Do not remove files you cannot identify.
Summary
What you should see now: Memory Integrity runs with your drivers protected against malicious code. If a future feature update or driver installation disables the feature, return to the Core isolation settings in the Windows Security app to re-enable it. It is worth checking this page after major updates or after installing new hardware drivers, because that is when incompatible drivers tend to appear.
Frequently asked questions
How to force disable memory integrity in win11?
Forcing it off means editing the registry, which is risky, so back up first. Open Registry Editor as administrator, go to HKEY_LOCAL_MACHINE\SYSTEM\CurrentControlSet\Control\DeviceGuard\Scenarios\HypervisorEnforcedCodeIntegrity, and set Enabled to 0. Restart, then check Windows Security. If it still turns on, a driver or Group Policy is forcing it back on.
How to activate memory integrity 🪟 Windows 11?
Open Settings, go to Privacy & security, select Windows Security, then Device security. Under Core isolation, select Core isolation details and switch Memory integrity to On. Restart your PC when prompted. If the switch is greyed out or turns off again, an incompatible driver is blocking it.
How to disable memory integrity?
Disable Memory integrity by opening Windows Security, selecting Device security, then Core isolation details. Switch Memory integrity to Off, approve the admin prompt, and restart your PC. Turning it off lowers protection against attacks on core Windows parts, so only do this if an app or driver requires it.
How to turn memory integrity on?
Open Windows Security, choose Device security, and select Core isolation details. Turn Memory integrity on and restart. If the switch is greyed out, an incompatible driver is usually the cause. Windows Security lists the driver, so update or remove it first. Turning it on can take a restart to apply.
How to disable core isolation 🪟 Windows 11?
Core isolation has no single on/off switch in Windows 11. You turn off Memory integrity, the feature most people mean, in Windows Security under Device security, then Core isolation details. Switch Memory integrity to Off and restart. Group Policy or Windows Security settings managed by your organization may block the change.
How to turn off memory integrity 🪟 Windows 11?
Open Windows Security, go to Device security, and select Core isolation details. Set Memory integrity to Off and approve the prompt. Windows may ask for an administrator password. Restart your PC to finish. Turning it off reduces protection, so turn it back on once the app or driver you needed is updated.
Still have a question?
Answered by AI from this guide. Good questions may be added to this page — please don't include personal details.
Did this guide fix your problem?

About the Author
Richard
Tech Writer, IT Professional
Richard is a writer at Geek Rewind who turns complex IT tasks into clear, step-by-step guides. He draws on years of hands-on experience in system administration and enterprise IT operations, focusing on Windows, Linux and WordPress: the problems people actually run into, and the fixes that work. His server and WordPress guides come from systems he runs himself. Richard builds and maintains the platform behind Geek Rewind, from its Ubuntu servers and Nginx configuration to its custom WordPress plugins. Many new tutorials start with readers' questions, and he's always glad to answer them in the comments.
No comments yet — be the first to share your thoughts!