What Happens When You Enable Windows 11 HDR and How to Calibrate It Properly

Windows 11 HDR (High Dynamic Range) is a display mode that gives your screen a wider range of color and a bigger gap between its darkest and brightest points than standard dynamic range (SDR). Bright lights stand out more, and dark scenes show detail that would otherwise be crushed to black. You see this in games, movies and photos that are made for HDR.
Turning HDR on is only half the job. Calibrate it with the official Windows HDR Calibration app, or games and videos can look washed out or too bright. The app gives Windows the real limits of your monitor, so it can map content to what your hardware can display.
Enabling Windows 11 HDR switches your display to a much wider color palette and higher brightness range for deeper blacks and brighter highlights. To fix washed out colors, you can calibrate your monitor properly using the official Windows HDR Calibration tool downloaded from the Microsoft Store.
What Happens When You Turn On 🪟 Windows 11 HDR
When you turn on HDR, Windows switches the display from the standard color range to a much wider palette. Games and movies can then show brighter highlights and deeper shadows at the same time, and colors look more vivid and closer to real life. Here is what changes behind the scenes:
- Color Space ExpansionYour display moves from the standard sRGB color space to a much wider one, usually DCI-P3 or Rec. 2020. Your monitor can then show richer reds, deeper greens and more vibrant blues.
- Electro-Optical Transfer Function (EOTF)Windows stops using the traditional gamma curve, which was designed for old tube televisions. It uses the PQ (Perceptual Quantizer) curve instead. PQ is built around how the human eye perceives light levels.
- Metadata TransmissionWhen you open a movie or game that supports HDR, the application sends metadata to Windows. This tells your monitor how bright each scene should be. A bright flash in a dark cave looks intense, while a sunny day outdoors still looks balanced and natural.
- Auto HDR ActivationIf Auto HDR is on, Windows analyzes older games that only support SDR and adds HDR effects to them. You get a visual upgrade without waiting for a game update. Auto HDR works on many DirectX games, but not on every title, so results vary.
One thing to expect: with HDR on, the normal Windows desktop can look a little flat or dim at first. That is SDR content being mapped into an HDR signal. The calibration and SDR brightness steps later in this guide deal with it.
Requirements Before You Start
You need an HDR-compatible monitor that supports HDR10 and reaches a peak brightness of at least 400 nits. You also need a graphics card with HDMI 2.0 or DisplayPort 1.4 outputs, and cables that can carry the high-bandwidth signal. Check all three before you blame Windows for a missing HDR option.
- An HDR-Capable MonitorLook for a monitor that supports HDR10 and has a high peak brightness. 600 nits or more is ideal. 400 nits is the bare minimum for DisplayHDR certification, and at that level the HDR effect is modest. OLED monitors give the best results because they control light at the pixel level, so blacks stay truly black next to bright highlights.
- Modern Graphics HardwareYou need a dedicated graphics card, such as an NVIDIA GeForce GTX 10-series or newer or an AMD Radeon RX 400-series or newer. A modern processor with integrated graphics also works. Either way, it must support PlayReady 3.0 (a digital rights management system required for protected content) and hardware-accelerated video decoding. Without these, streaming apps may refuse to play HDR video.
- The Right CableConnect the monitor with a High-Speed HDMI 2.0 (or newer) cable or a DisplayPort 1.4 (or newer) cable. Older cables do not have enough bandwidth to carry HDR alongside high resolutions and refresh rates. If the HDR toggle is missing or greyed out, a worn cable or the wrong port on the monitor is a common cause.
Also check the monitor’s own on-screen menu. Some monitors ship with HDR or an “HDMI Ultra HD” style input mode switched off, and Windows will not offer HDR until you enable it there.
Step-by-Step: How to Turn On HDR in 🪟 Windows 11
To turn on HDR in Windows 11, open Settings and go to System Display. Choose your main monitor, open the HDR section, and switch on Use HDR. The change takes effect right away and you do not need to restart.
- Click the Start button and select Settings (the gear icon).
- Click System in the left sidebar, then click Display on the right.
- If you have more than one monitor connected, select your HDR-compatible display at the top of the page. The settings below apply only to the monitor you pick.
- Click HDR to open its settings.
- Switch the toggle next to Use HDR to On. The screen may flicker or go black for a second, and then the colors and brightness change.
If Use HDR is missing or greyed out, Windows does not see an HDR signal from that display. Check that HDR is enabled in the monitor’s own menu, that the cable and port meet the requirements above, and that your graphics driver is up to date. On a laptop, HDR can also be unavailable on the built-in screen when it does not support HDR. To undo the change, return to the same page and switch Use HDR to Off.
How to Calibrate Your Display Using the Windows HDR Calibration App
To calibrate Windows 11 HDR, download the official Windows HDR Calibration app from the Microsoft Store. Open it and follow the on-screen test patterns to set your dark and bright levels so your games and apps stop looking washed out. Turn HDR on first, because the app is meant to be run with HDR enabled.
- Open the Start menu , type Windows HDR Calibration, and click the app to open it.
- Make sure the app window is on the HDR monitor you want to calibrate. If you have more than one monitor, drag the window to the screen you are setting up before you go further.
- Read the welcome screen, follow its on-screen instructions, and click Next.
- Adjust the dark detail level. You will see a test pattern with dark rectangles. Move the slider at the bottom of the screen until you can just barely see the pattern inside the boxes, then click Next.
- Adjust the bright detail level. A new pattern with bright white boxes appears. Move the slider until the patterns inside the brightest boxes start to blend into the white background, then click Next.
- Adjust the maximum brightness. This screen tests how bright your monitor can get. Look at the numbers or patterns and move the slider until it matches your monitor’s peak brightness. If you are unsure of that figure, check your monitor manual, or adjust until the pattern is clearly visible without blooming (light bleeding around bright shapes). Click Next.
- Adjust the color saturation. This screen controls how vivid your colors look. Move the slider to a balance between rich, deep colors and natural-looking skin tones, then click Next.
- Type a name for your new color profile in the text box (for example, My-HDR-Monitor-Profile) and click Finish.
Windows saves the result as a color profile for that monitor and uses it for HDR content. If you do not like the result, run the app again and repeat the steps. Calibrate in the room lighting where you normally use the monitor, because ambient light changes how dark detail looks.
Advanced Pro Tip: Fixing SDR Content with ICC Profiles
If your normal desktop and apps look dull or washed out with HDR on, the quickest fix is the SDR brightness slider in HDR settings. For better color accuracy, you can add a custom ICC color profile for your monitor. Windows does not scale SDR content to HDR well by default, so a profile helps bring your regular apps and desktop back to normal colors.
- Open Settings System Display HDR
- Find the SDR content brightness slider and move it until apps and the desktop look right to you. Raise it if everything looks dim and dull. You will see the change straight away.
If that is not enough, advanced users often pair their Windows HDR calibration with a custom ICC (International Color Consortium) color profile made for their specific monitor model. You can often download these profiles from review sites like RTINGS or from your monitor manufacturer’s support website. Make sure the profile matches your exact model. To install one, right-click the downloaded profile file and choose Install Profile.
Once a custom ICC profile is installed for your monitor, it corrects the color tint of your standard desktop apps. Meanwhile, the Windows HDR Calibration app handles peak brightness and contrast. Together, they give you deep, punchy HDR in games and movies and natural, accurate colors on your normal desktop.
Advanced Pro Tip: Boosting Unsupported Games with RTX HDR
RTX HDR lets you add modern lighting to older games that only support standard dynamic range. If you have a compatible NVIDIA graphics card, you can turn it on in the NVIDIA app and apply AI-powered HDR to games that have no HDR of their own.
RTX HDR uses artificial intelligence to analyze your game in real time and add high-quality HDR lighting effects. It needs an NVIDIA GeForce RTX graphics card, a current NVIDIA driver, and HDR switched on in Windows. To use it:
- Open the NVIDIA app or the classic NVIDIA Control Panel on your computer.

Control Panel - Go to your graphics settings and look for the RTX Video or HDR enhancement section. Menu names change between driver and app versions, so look for an option labeled RTX HDR.
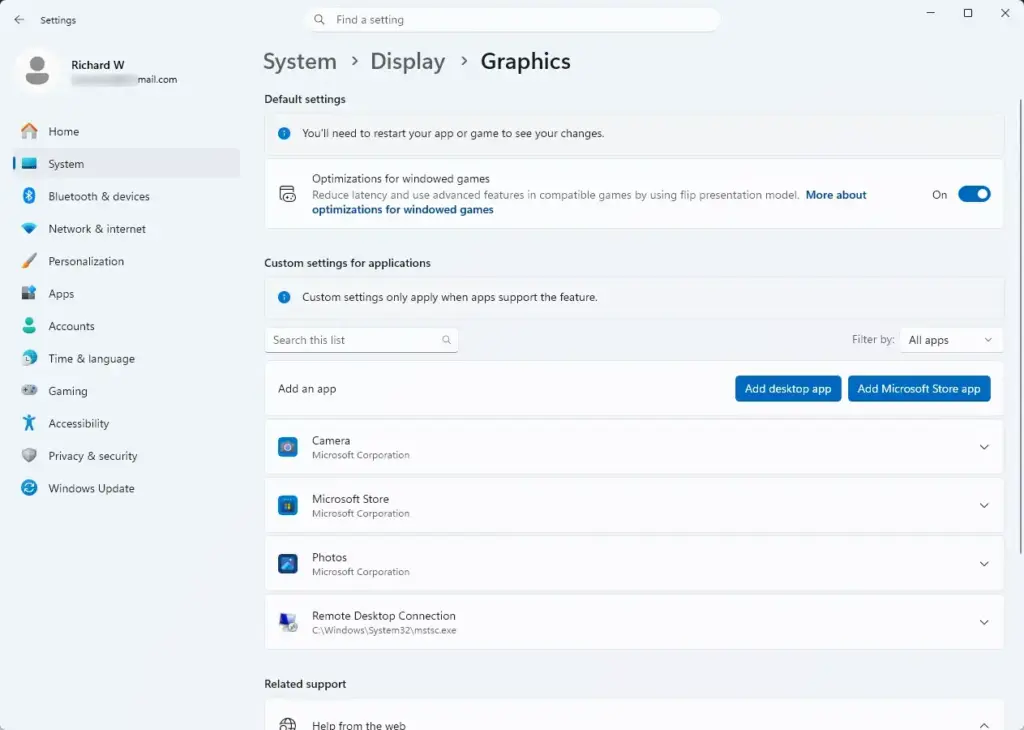
Settings › System › Display › Graphics - Enable RTX HDR for your games. Then start a game and check the picture. To undo it, switch the same option off.
If RTX HDR does not appear, update your NVIDIA driver and confirm that Use HDR is on for your monitor. Avoid running RTX HDR and Windows Auto HDR on the same game, since both try to do the same job. RTX HDR can also cost you a few frames per second, so check performance in demanding games.
Unlike standard Auto HDR, RTX HDR produces stronger highlights, deeper black levels and better preservation of fine detail in dark shadows. It can give classic games, released long before HDR existed on PC, a noticeably fresh look.
Summary
Enabling HDR in Windows 11 gives your games and movies a much wider color palette and higher brightness, but it depends on the right hardware and a proper setup. Check your monitor, cable and graphics card, turn on Use HDR in the display settings, and run the Windows HDR Calibration app. Then adjust SDR content brightness if your desktop looks flat.
Have a question about this guide?
Answered by AI from this guide. Good questions may be added to this page — please don't include personal details.
Did this guide fix your problem?

About the Author
Richard
Tech Writer, IT Professional
Richard is a writer at Geek Rewind who turns complex IT tasks into clear, step-by-step guides. He draws on years of hands-on experience in system administration and enterprise IT operations, focusing on Windows, Linux and WordPress: the problems people actually run into, and the fixes that work. His server and WordPress guides come from systems he runs himself. Richard builds and maintains the platform behind Geek Rewind, from its Ubuntu servers and Nginx configuration to its custom WordPress plugins. Many new tutorials start with readers' questions, and he's always glad to answer them in the comments.
No comments yet — be the first to share your thoughts!