How to Check HDR Display Support in Windows 11
HDR display support in Windows 11 shows if your screen can display vibrant colors and deep contrast.
High Dynamic Range (HDR) makes videos and games look more lifelike by offering a wider range of colors and brightness levels.
You can easily check if your Windows 11 PC and its monitor are ready for HDR. This is especially useful if you are looking to get the most out of new games or streaming services that support HDR content.
Windows 11 makes it simple to see your display’s HDR capabilities right in the settings.
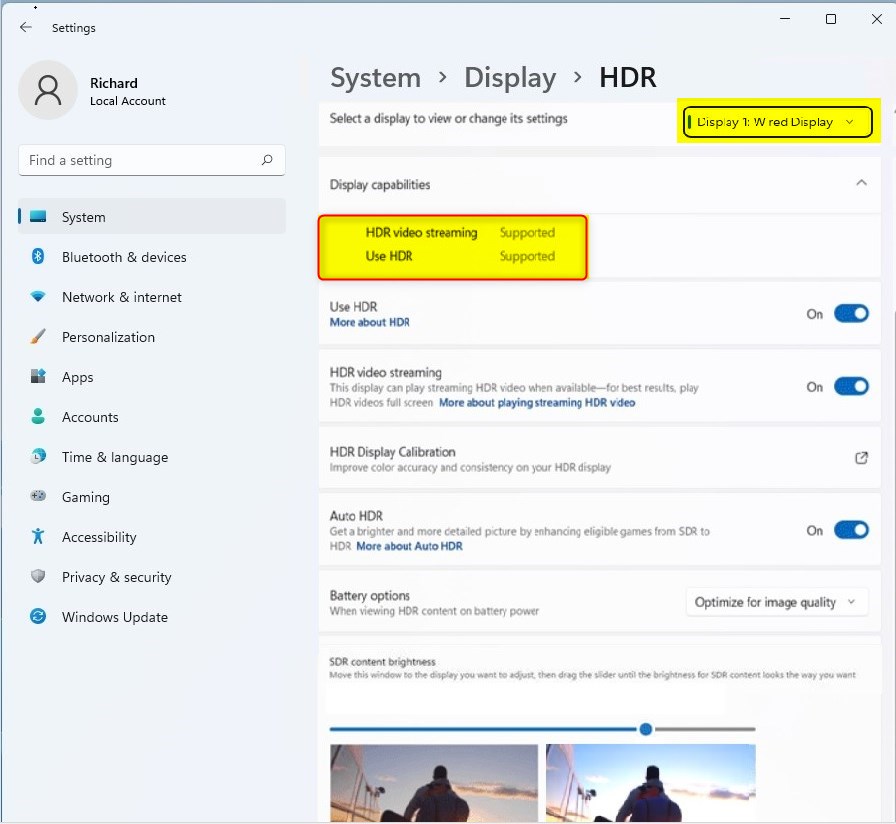
Go to Settings, click Display, then select HDR. Check the “Display capabilities” section to see if your monitor supports HDR. If it says “Supported,” you can enable it for richer colors.
Why check HDR support?
HDR, which stands for High Dynamic Range, makes your screen look much better by showing brighter brights and darker darks.
HDR Hardware Requirements Checklist
- GPU: Must support PlayReady 3.0 and have a modern graphics driver.
- Cable: Use HDMI 2.0 or higher, or DisplayPort 1.4.
- Monitor: Look for VESA DisplayHDR certification or Dolby Vision support.
| Requirement | Standard |
|---|---|
| HDMI | 2.0 or higher |
| DisplayPort | 1.4 or higher |
| DirectX | Version 12 or higher |
How to check your HDR support
You can check if your Windows 11 PC supports HDR using the built-in Settings app. Just follow a few simple steps to see your display’s capabilities without needing any extra programs.
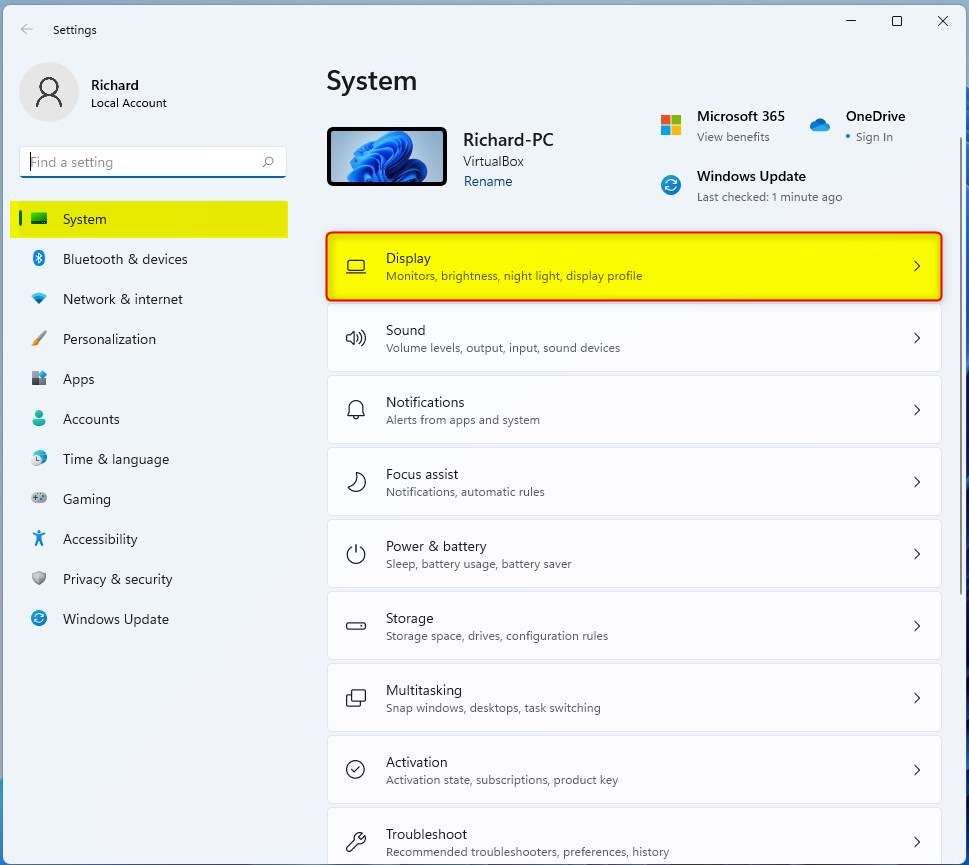
- Open the Settings app by pressing Windows key + I.

windows 11 start menu settings updated - Click on the Display tile on the right side.
windows 11 display tile - Look for the Brightness & color section and click HDR.
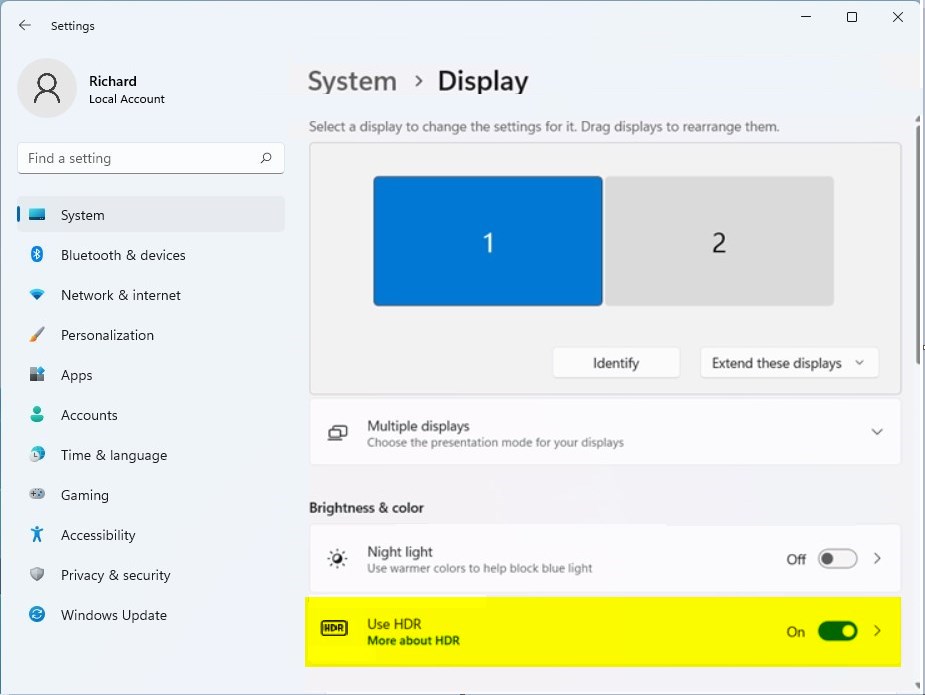
windows 11 use hdr tile - Select your monitor from the dropdown menu.
- Check the Display capabilities section to see if HDR is Supported.
Troubleshooting: Why is the HDR toggle missing?
If you can’t find the HDR toggle in your Windows 11 settings, it often means your graphics driver needs an update, or another setting like Night light is turned on.
How to calibrate your display
The Windows HDR Calibration app, available from the Microsoft Store, helps you fix washed-out HDR visuals by adjusting your specific monitor's brightness and color saturation. Downloading and running this official tool ensures your display's colors appear accurate, especially if they seem off.
How to enable Auto HDR for games
Auto HDR automatically upgrades the color and lighting of older games to High Dynamic Range (HDR) quality. To use Auto HDR, open the HDR settings menu in Windows 11 and toggle the Auto HDR switch to On. This feature works best with games built on DirectX 11 or DirectX 12.
Summary
Checking if your screen supports HDR in Windows 11 is simple and helps you enjoy better video quality.
Why does my HDR display look washed out?
Washed-out colors often happen because your monitor is not calibrated correctly for HDR content. Ensure you have the latest graphics drivers installed and use the Windows HDR Calibration app to adjust your peak brightness and color balance settings for a more natural, vibrant look.
Was this guide helpful?

About the Author
Richard
Tech Writer, IT Professional
Richard, a writer for Geek Rewind, is a tech enthusiast who loves breaking down complex IT topics into simple, easy-to-understand ideas. With years of hands-on experience in system administration and enterprise IT operations, he’s developed a knack for offering practical tips and solutions. Richard aims to make technology more accessible and actionable. He's deeply committed to the Geek Rewind community, always ready to answer questions and engage in discussions.

[…] post shows students and new users steps to change or adjust high dynamic range (HDR) or Standard dynamic range (SDR) content brightness in Windows […]
[…] Not all displays are optimized for HDR content. A display that doesn’t support HDR will stream in the appropriate Standard dynamic range (SDR). […]