How to Calibrate HDR Display in Windows 11

You calibrate your HDR display in Windows 11 to ensure accurate color and contrast for High Dynamic Range content, unlocking vibrant visuals.
HDR significantly boosts your display’s color gamut and brightness range, delivering more realistic and immersive images for everything from gaming to movies.
Windows 11 offers built-in calibration tools to properly tune your monitor for the HDR experience you desire.
Specifically, you’ll use the free Windows HDR Calibration app, available from the Microsoft Store, which guides you through setting your display’s peak brightness, black level, and white point.
Open the Windows HDR Calibration app and follow the on-screen instructions to adjust luminance sliders for dark, bright, and color saturation patterns. The app will save these settings to your display profile for optimized HDR visuals.
Why calibrate your HDR display?
Calibrating your HDR display in Windows 11 makes sure your screen shows colors and brightness just right, making movies and games look more real.
What happens when you finish?
When you finish calibrating your HDR display in Windows 11, your screen gets tuned to show HDR video perfectly, with better contrast and colors, and Windows saves a custom profile.
Hardware and Software Requirements
To calibrate your HDR display in Windows 11, you need specific hardware and software. Make sure your monitor supports HDR10 and you’re using a good cable like DisplayPort 1.4 or HDMI 2.1. Your computer also needs a graphics card with DirectX 12, and you’ll need to download the free Windows HDR Calibration app from the Microsoft Store.
You’ll need a monitor that supports HDR10. Use a high-quality cable like DisplayPort 1.4 or HDMI 2.1 for enough bandwidth (the amount of data that can be transferred).
Your graphics card needs to support DirectX 12. Don’t forget the official Windows HDR Calibration app from the Microsoft Store.
How to enable HDR in Windows settings
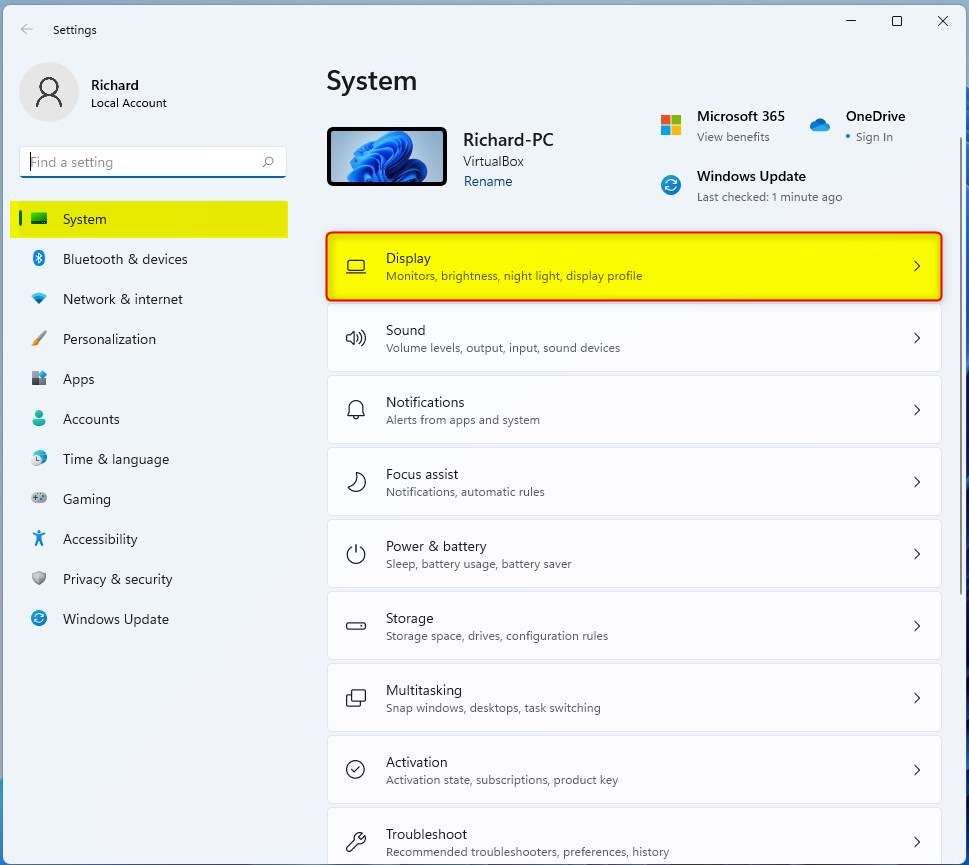
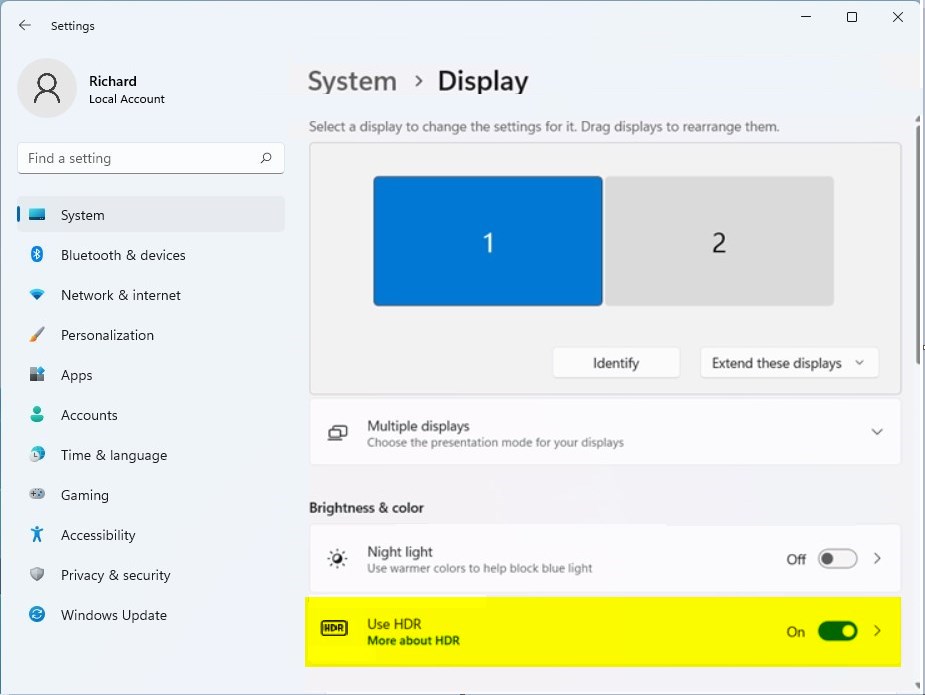
You can enable HDR in Windows 11 through the Settings app to improve picture quality for compatible content. Open Settings by pressing the Windows key and ‘I’ together, then go to System and then Display. Find the ‘Use HDR’ switch and turn it on to activate HDR mode on your screen.
- Open the Settings app by pressing Windows key + I.
- Click on System > Display.
- Toggle the Use HDR switch to On.
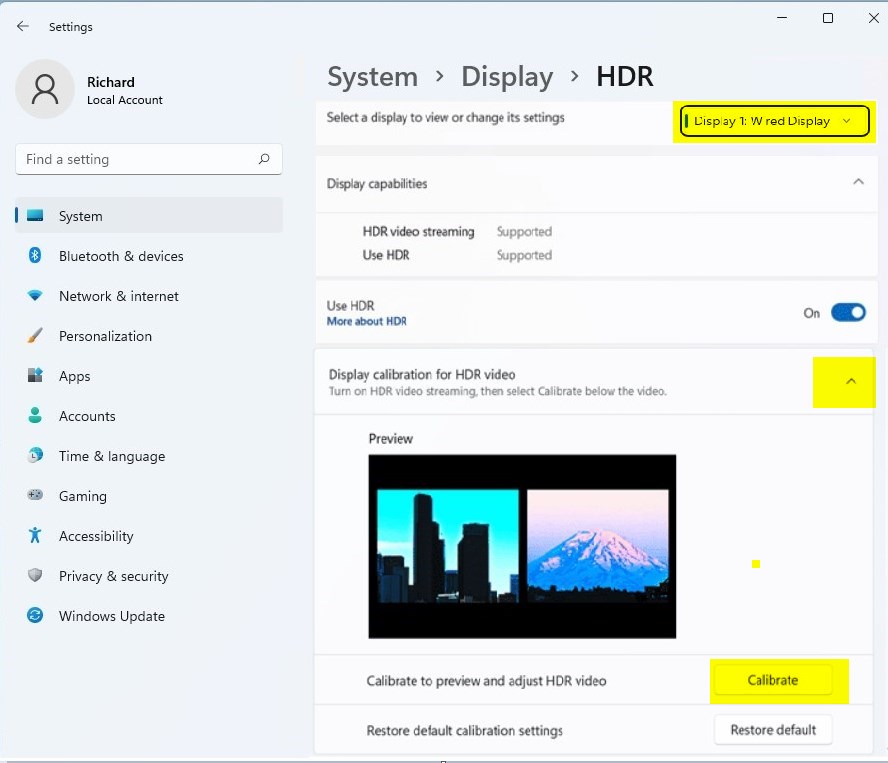
- Click on the HDR tile to open detailed settings.
- Ensure Auto HDR is enabled if you want your games to look better automatically.

Steps to calibrate your HDR display
- Open the Windows HDR Calibration app you downloaded.
- Follow the on-screen instructions to adjust the minimum and maximum luminance.
- You will see patterns for dark, bright, and color saturation.
- Adjust the sliders until the patterns are barely visible against the background.
- The app will save these settings to your display profile.
The steps to calibrate your HDR display in Windows 11 involve using the dedicated Windows HDR Calibration app. Open the app, and it will guide you through adjusting sliders for dark, bright, and color settings. Follow the on-screen patterns, making them just barely visible to fine-tune your display’s HDR performance accurately.
Advanced Calibration
If you’re a professional and want more control, tools like DisplayCal and Argyll let you fine-tune color volume and gamut coverage. These tools require a hardware colorimeter to measure light output accurately. Most users will find the Windows HDR Calibration app sufficient for daily tasks and gaming.
Summary
Calibrating your screen improves your viewing experience. By using the Windows HDR Calibration app and ensuring your settings are correct, you balance your brightness and contrast. This makes sure that your HDR videos and games look sharp and detailed, giving you the best picture quality your hardware can provide.
Why is my screen flickering after HDR calibration?
Flickering often happens due to an unstable cable or outdated graphics drivers. Ensure you are using a certified HDMI 2.1 or DisplayPort 1.4 cable. Try updating your GPU drivers via the manufacturer website or Device Manager to resolve handshake issues between the Windows OS and your monitor hardware.
Does Windows HDR Calibration work on all monitors?
No, it only works on monitors that support HDR10. If your monitor lacks HDR capabilities, the app will not be able to detect or calibrate the display. Always check your monitor manual to confirm it supports HDR before attempting to use the calibration tool for better color accuracy.
How do I reset my HDR calibration settings?
You can reset your HDR calibration settings in Windows 11 by going to Settings > System > Display > HDR and removing the color profile, or by deleting the profile file directly from the system folder.
Is the Windows HDR Calibration app necessary for gaming?
Yes, it is highly recommended. While Windows handles HDR automatically, the calibration app ensures your specific monitor hits its peak brightness and contrast targets. This provides a much better visual experience in games, preventing crushed blacks or blown-out highlights during intense gameplay sessions with high-contrast scenes.
Was this guide helpful?

About the Author
Richard
Tech Writer, IT Professional
Richard, a writer for Geek Rewind, is a tech enthusiast who loves breaking down complex IT topics into simple, easy-to-understand ideas. With years of hands-on experience in system administration and enterprise IT operations, he’s developed a knack for offering practical tips and solutions. Richard aims to make technology more accessible and actionable. He's deeply committed to the Geek Rewind community, always ready to answer questions and engage in discussions.

[…] can run the HDR Calibration app for best picture […]