Should You Enable Hardware-Accelerated GPU Scheduling in Windows 11?

- 4 ways to do it
- Needs administrator rights
- Includes a restart or sign-out
Hardware-accelerated GPU scheduling (HAGS) is a built-in Windows 11 display setting. It lets your graphics card manage its own video memory queue instead of leaving that work to your main processor. The direct handoff can cut input lag and keep frame rates steadier in heavy games and demanding apps.
Most computers running Windows 11 version 22H2 or newer benefit from turning this feature on. Older graphics cards might see no change, or occasional stuttering. Whether to switch it on depends on your hardware and on whether you notice performance drops during heavy graphics work. The setting is the same in Windows 11 Home and Pro, and you can reverse it at any time.
This guide covers what the feature does, four ways to change it, the hardware it needs, and what to do if the switch is missing.
Yes, if your PC runs Windows 11 version 22H2 or newer and has a supported graphics card, turn on hardware-accelerated GPU scheduling in Settings System Display Graphics Change default graphics settings. It lets your graphics card manage its own video memory queue, which can reduce input lag and steady frame rates in games.
What is hardware-accelerated GPU scheduling in 🪟 Windows 11?
Hardware-accelerated GPU scheduling lets your graphics card manage its own video memory. The CPU (Central Processing Unit, the main brain of your computer) no longer has to handle that job. This helps reduce input lag and improves response times for games and heavy apps on compatible computers.
Two terms matter here:
- The CPU (Central Processing Unit)This is the main brain of your computer. It handles everyday tasks and tells other parts what to do.
- The GPU (Graphics Processing Unit)This is your graphics card. It is built specifically to handle pictures, video effects, and game graphics.
Normally, your CPU manages the memory and decides how to send tasks to your graphics card. When you run a heavy game or program, the CPU has to work hard to keep the graphics card fed. That creates a small delay, called latency, which can make a game stutter or slow down.
With hardware-accelerated GPU scheduling on, the graphics card handles its own task queue. The CPU is freed up for other jobs, and input lag can drop by up to 15 percent in some games. Your system should feel smoother. The size of the gain depends on the game and the hardware, so treat the 15 percent as a best case, not a promise.
Why manage this feature?
Managing this setting lets you balance performance and stability for your own hardware. Turning it on often boosts frame rates and reduces stutter. Still, check how your system reacts, so you catch display problems or crashes during heavy tasks early.
When you turn the feature on, you might notice:
- Better frame rates in certain video games.
- Less input lag when you move your mouse or press keys during a game.
- Smoother performance when you run multiple heavy programs at the same time.
On some systems, though, turning it on can cause crashes, game freezes, or error messages. If your computer starts acting strangely after you change this setting, switch it off again and restart. The methods below show how to do both.
How to turn hardware-accelerated GPU scheduling on or off in 🪟 Windows 11
You have several ways to change this setting. The standard Settings app comes first because it is the safest. The Registry and PowerShell methods are backups for when the switch is missing or you want to script the change. Whichever method you use, restart the computer afterward, because the change does not take effect until you do.
If you only want to try the feature, use Method 1. Move on to the others only if the switch is missing or you need to change many computers.
Method 1Turn on or off via the Settings app (GUI)
The Settings app is the safest and easiest way to turn hardware accelerated GPU scheduling on or off. The switch sits under the default graphics settings. If you do not see it there, your graphics card or driver probably does not support it. See the requirements section further down. These steps take you from the Start button to the switch and the restart.
- Open the Start menu and select Settings. Settings is the gear icon. The Settings window opens with a list of categories on the left.

- Click System in the left-hand menu. The System options appear on the right.
- Click Display on the right side. The display options for your monitor open.
- Scroll down and click Graphics. The graphics page opens, with a list of apps and related options.
- Click the link Change default graphics settings near the top of the page. A page named for the default graphics settings opens.
- Find the option labeled Hardware-accelerated GPU scheduling. If it is not listed, the card or driver does not support it, so skip ahead to the requirements and troubleshooting sections.
- Click the switch to turn it On or Off. The switch label changes to show the new state.
- Restart your computer. Save your work first. The change does not apply until the restart is done.
After the restart, open the same page again to confirm the switch is in the position you chose. To undo the change, repeat the steps and flip the switch back, then restart again.
Method 2Turn on or off via the Windows Settings Menu (Alternative GUI Method)
The advanced display adapter properties are a secondary place to look if the option is missing from the main Settings page. In Windows 11 this window mostly shows information about your graphics card. The actual switch still lives in the Settings app. Treat this method as a way to check which adapter Windows is using, not as a second toggle.
- Open the Settings app from your Start menu.
- Go to System Display. The display options for your monitor appear.
- Scroll down and select Advanced display. A page opens with details about your monitor.
- Click Display adapter properties for Display 1 (or your active monitor). It is near the bottom of the page. A small properties window opens.
- Read the graphics card details and look through any tabs. The Adapter tab usually shows the card name and memory. If you do not find a scheduling option, go back to the main graphics settings page described in Method 1, because Windows 11 centralizes this control in the modern Settings app.
This window is also a quick way to see which graphics card Windows treats as active on the monitor. That helps if you have two graphics processors, which the troubleshooting section covers.
Method 3Turn on or off via the Windows Registry (GUI Steps)
You need administrator privileges. Registry changes affect the whole system, so before you start, back up the key. In Registry Editor, select the key, then choose File Export and save the file somewhere safe.
If the setting does not appear in your normal menu, use the Registry Editor like this:
- Press the Windows key, type Registry Editor, and click Run as administrator (⚠️ Admin privileges required). Click Yes if a User Account Control prompt appears. The Registry Editor window opens.
- Go to this key in the left sidebar of the Registry Editor:
HKEY_LOCAL_MACHINE\SYSTEM\CurrentControlSet\Control\GraphicsDrivers. Expand the folders one by one until you reach it.
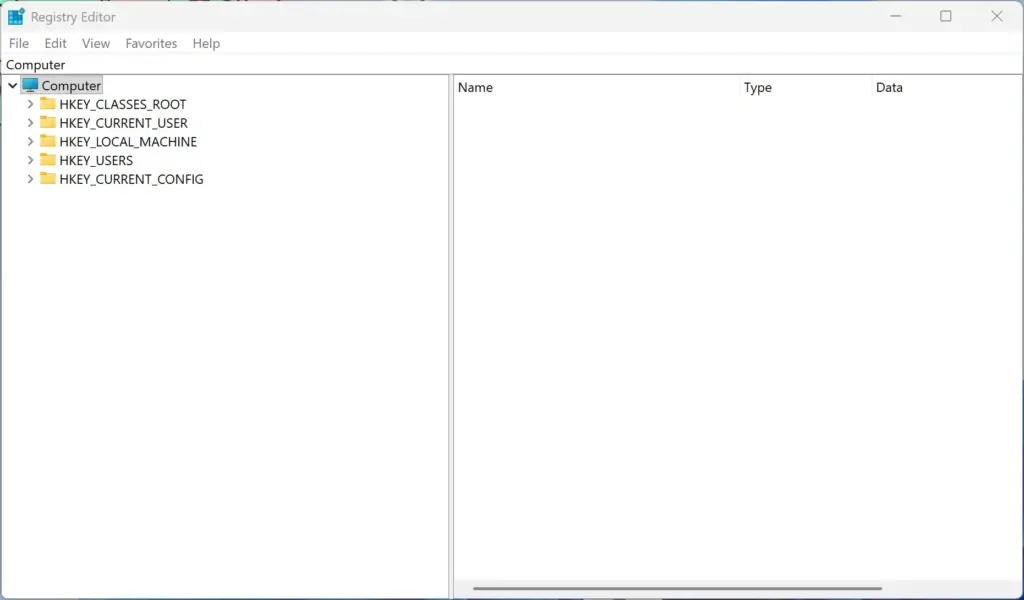
- Click the GraphicsDrivers folder. Its contents show up on the right side of the screen.
- Look for an entry named HwSchMode on the right side.
- Double-click HwSchMode if it exists. If it does not exist, right-click an empty space on the right side, select New, then click DWORD (32-bit) Value, and name it exactly
HwSchMode. - Double-click HwSchMode to open its settings box.
- Type 2 in the Value data box to turn the feature on. Type 1 instead to turn it off.
- Click OK and close the Registry Editor.
- Restart your computer. The change takes effect only after the restart.
Adding this value does not make an unsupported graphics card or old driver support the feature. If the switch is still missing in Settings after the restart, the hardware or driver is the likely cause. To undo the change, set the value to 1 again, or import the backup file you exported.
Method 4Turn on or off via PowerShell (GUI and Command Method)
PowerShell lets you change this setting with a text command instead of menus. That is handy if you set up computers often or want to repeat the change. You must open PowerShell as administrator, or the command will fail with an access error.
If you prefer command tools, use PowerShell:
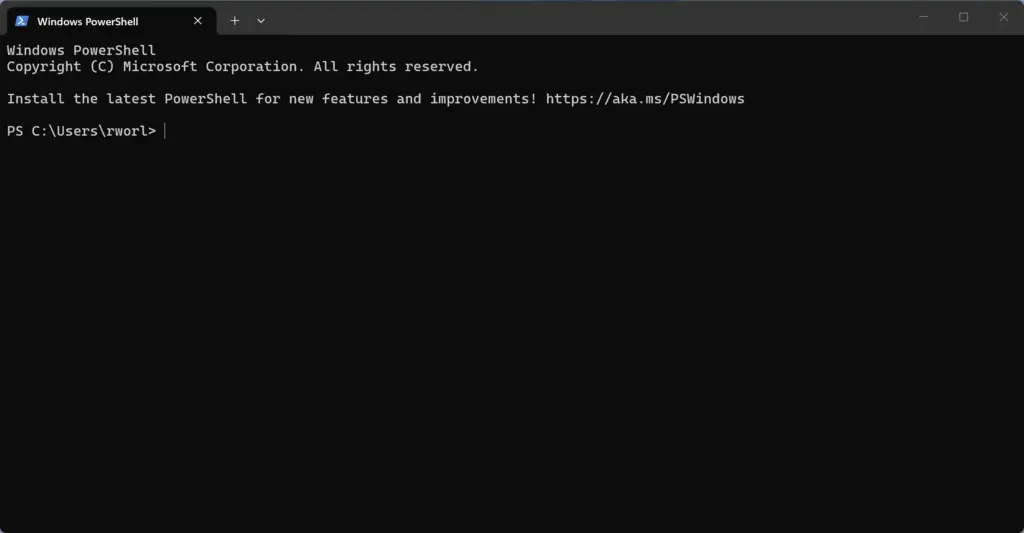
- Click the Start button, type PowerShell, right-click it, and choose Run as administrator (⚠️ Admin privileges required). A PowerShell window opens.
- Run this command to enable the feature, then press Enter:
Set-ItemProperty -Path "HKLM:\SYSTEM\CurrentControlSet\Control\GraphicsDrivers" -Name "HwSchMode" -Value 2 - Run this command instead to turn the feature off, then press Enter:
Set-ItemProperty -Path "HKLM:\SYSTEM\CurrentControlSet\Control\GraphicsDrivers" -Name "HwSchMode" -Value 1. Use only one of the two commands, not both. - Close the PowerShell window and restart your computer.
After the restart, check Settings System Display Graphics Change default graphics settings to confirm the switch matches what you set. If an error appears in red text in the PowerShell window, check that you opened it as administrator.
Additional considerations when managing hardware-accelerated GPU scheduling
Before you change this setting, keep a few technical details in mind. Not every computer reacts the same way, so what helped a friend's PC may do nothing on yours.
Hardware and driver dependency (system requirements)
Hardware-accelerated GPU scheduling needs a relatively modern graphics card and fully updated drivers. Older hardware or outdated drivers often hide the setting completely from your Windows 11 display options.
If the switch is missing, work through this list:
- Update your graphics driver. Get it from the card maker (NVIDIA, AMD, or Intel) or through Windows Update.
- Restart the computer.
- Open the graphics settings page again and check for the switch.
If it is still missing, your card most likely does not support the feature.
Variability in impact
The benefit depends on your computer and the games you play. Some systems get a noticeable boost in frame rates and smoothness. Others see no change, or minor stuttering. The only reliable way to know is to try it on your own machine, ideally with the same game or app before and after.
No native Group Policy support
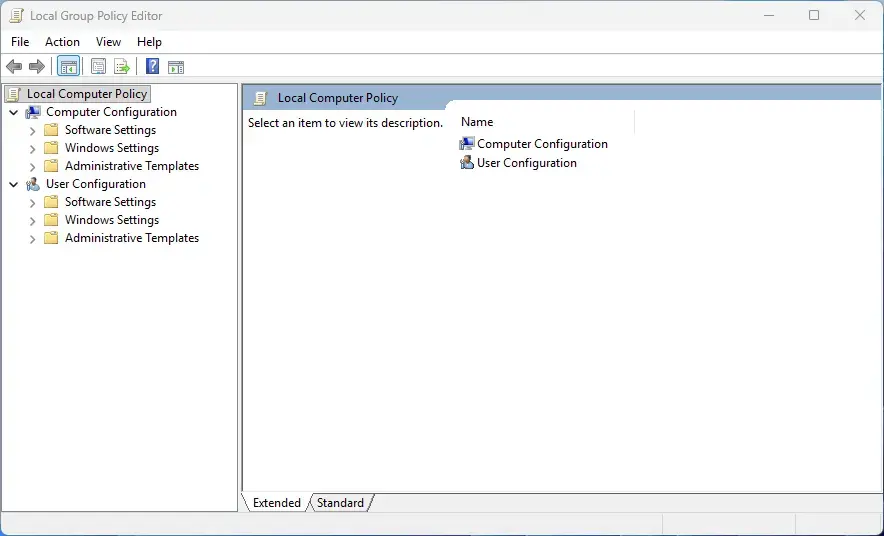
Windows does not provide a built-in Group Policy setting for hardware-accelerated GPU scheduling across many computers on a network. Administrators who manage business or school machines must use custom scripts, such as the Registry or PowerShell methods above, or change the setting by hand on each computer. Each machine still needs a restart before the change applies.
Unique Expert Tips: Troubleshooting missing settings and hidden conflicts
If the hardware-accelerated GPU scheduling switch is missing, the usual cause is a conflict between integrated and dedicated graphics, or a bad driver. Fixing that conflict should bring the switch back to your Windows 11 settings page.
If your laptop or desktop has two graphics processors, such as a low-power Intel chip built into the processor and a powerful NVIDIA card for gaming, Windows can get confused about which one drives the screen. On a desktop, make sure your monitor is plugged directly into your dedicated graphics card, not into the motherboard video port. Also install the official control panel software from your graphics card maker, because missing control software can hide these advanced Windows options.
Tip 2: Clean install your graphics drivers using DDU. If you added the registry value manually and the setting still does not show up, your graphics driver installation might be corrupted. Old driver files left behind during regular updates can block new Windows features. Use a free tool like Display Driver Uninstaller (DDU) in safe mode to completely remove your old graphics drivers. Then download and install the latest driver package directly from your hardware manufacturer. Download the new driver before you start, because your screen may fall back to basic resolution until it is installed.
Balancing performance and stability with GPU scheduling
Whether to keep hardware-accelerated GPU scheduling on comes down to testing your own computer. It is safe for most modern systems and tends to improve gaming smoothness. Still, test your favorite games after turning it on and watch for unexpected stuttering.
The best approach is to turn the feature on, restart your computer, and play your favorite games or use your heavy apps for a day or two. If everything runs smoothly, leave it on. If your games crash, your screen freezes, or strange graphical bugs appear, go back into your settings and turn it off, then restart. Let your own system's stability decide.
Summary
Hardware-accelerated GPU scheduling is a useful Windows 11 feature. It improves smoothness and reduces lag on most modern computers by letting your graphics card manage its own memory. You can turn it on or off through the standard display settings, or use the Registry or PowerShell methods as backups, to find what works best for your system.
Have a question about this guide?
Answered by AI from this guide. Good questions may be added to this page — please don't include personal details.
Did this guide fix your problem?

About the Author
Richard
Tech Writer, IT Professional
Richard is a writer at Geek Rewind who turns complex IT tasks into clear, step-by-step guides. He draws on years of hands-on experience in system administration and enterprise IT operations, focusing on Windows, Linux and WordPress: the problems people actually run into, and the fixes that work. His server and WordPress guides come from systems he runs himself. Richard builds and maintains the platform behind Geek Rewind, from its Ubuntu servers and Nginx configuration to its custom WordPress plugins. Many new tutorials start with readers' questions, and he's always glad to answer them in the comments.
No comments yet — be the first to share your thoughts!