How to Change Video Playback HDR Settings in Windows 11

HDR (High Dynamic Range) video playback in Windows 11 lets you watch movies and shows with brighter highlights, deeper shadows, and a wider range of colors than standard displays offer. Windows 11 turns off video enhancements by default, so your screen might show basic video even if your monitor supports HDR.
You can turn on HDR video playback in just a few clicks through the main display settings. This feature works with built-in laptop displays and external monitors that support HDR10.
Open Settings Apps Video playback and switch Stream HDR video to On to improve color and contrast. You can also check your display capabilities by going to System Display HDR, which tells you if your monitor and computer hardware are ready for high dynamic range content.
Checking If Your Display Is Optimized for HDR Video
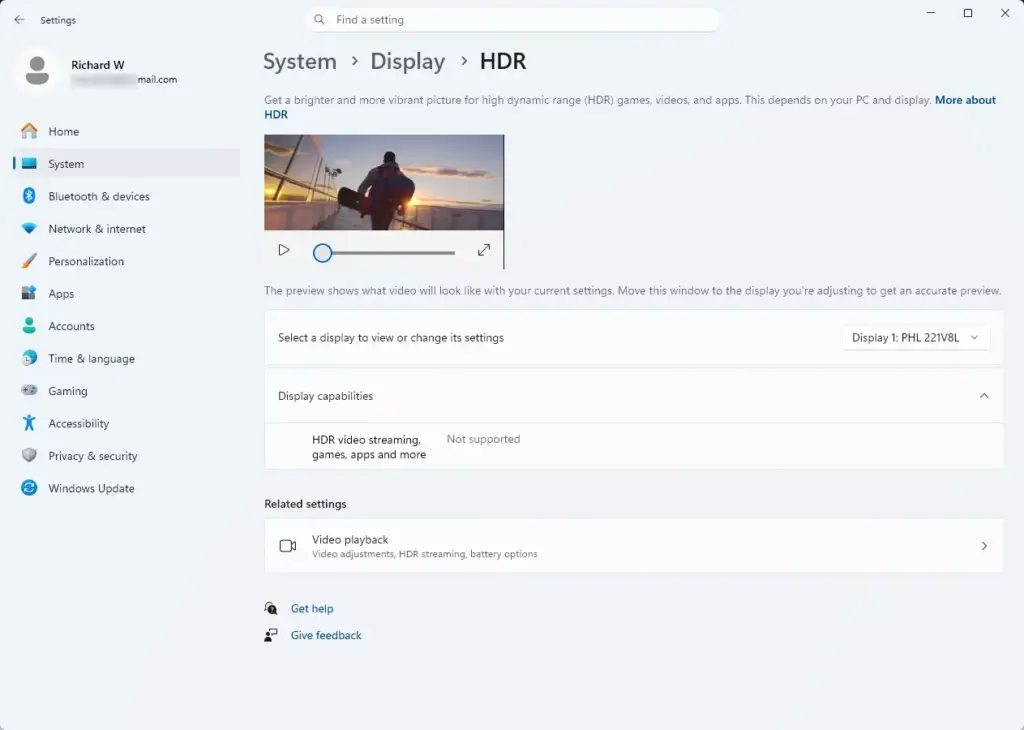
Checking if your display is optimized for HDR video in Windows 11 lets you know if your monitor supports high dynamic range content. Open Settings , select System, and click Display. Scroll down to HDR. Check whether your built-in hardware and screen support HDR video playback before changing any options.
- Click the Windows Start button and select Settings, or press the Win+I on your keyboard.
- In the Settings window, click on System on the left side, and then click on Display on the right side.
- At the top of the Display page, click on HDR.
- Look at the section labeled Display capabilities.
Here, Windows will tell you if your screen supports HDR. You will see information about whether your display is ready for HDR games, apps, and video streaming. If it says your display does not support HDR, you will need to check your cable connections or use a different monitor that features HDR support.
How to Turn On HDR Video Streaming in 🪟 Windows 11
Turning on HDR video streaming in Windows 11 automatically improves color and contrast in supported movies and shows. Open Settings , select Apps, and click Video playback. Find the Stream HDR video option and turn the switch on to make sure your streaming media plays with the best possible picture quality.
- Open the Windows Start menu and go to Settings .
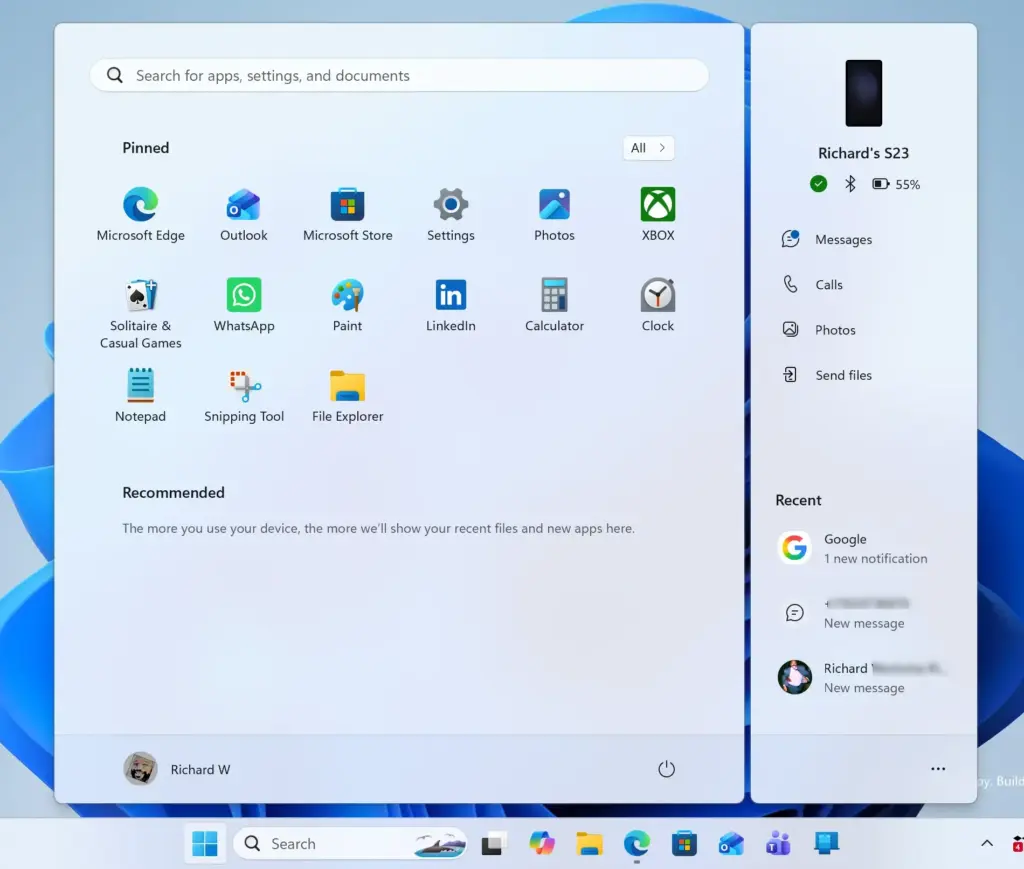
- Click on Apps on the left side of the window.
- Click on Video playback from the list of options.
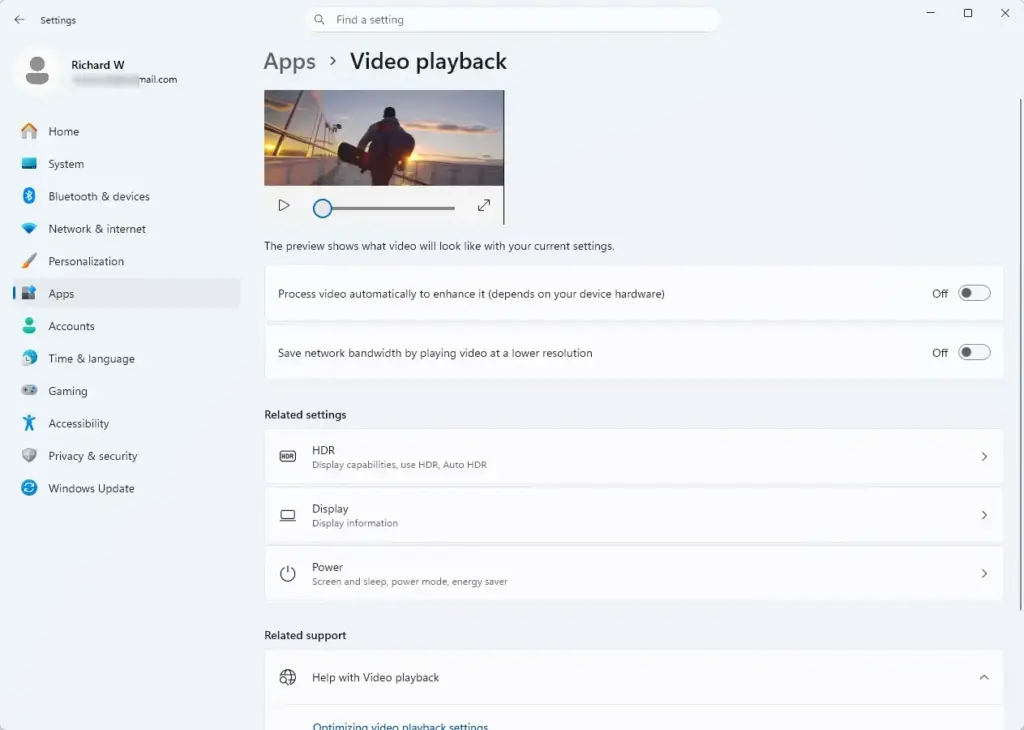
- Look for the setting that says Stream HDR video and turn the switch to the On position.
If a warning box pops up asking for permission, click Yes or enter your administrator password to continue.
Managing Power Options for HDR Laptops
Managing power options for HDR laptops prevents Windows from turning off high dynamic range features to save battery life. Open Settings, go to System, and select Display. Click HDR, expand the battery options, and choose to allow HDR even on battery power to keep your video quality crisp.
Keep video quality crisp even when running on battery power by adjusting a few hidden defaults:
- Open your Windows Settings app.

- Navigate to System and then click on Display.
- Click on HDR.
- Scroll down to find the power options section.
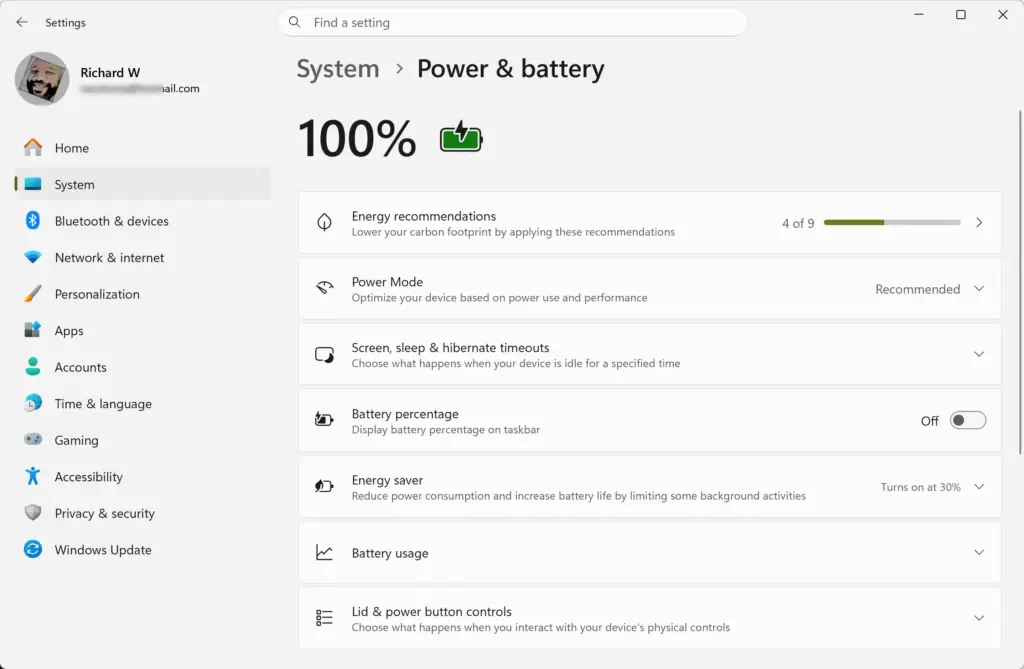
- Uncheck the box that stops HDR playback when running on battery power, or adjust the settings to your personal preference.
Dealing with Dolby Vision HDR Mode
Dealing with Dolby Vision HDR mode involves turning off the advanced format if your desktop apps or games look too dark or washed out. Open Settings, select System, and click Display. Choose HDR and turn off Dolby Vision to switch back to standard HDR and fix visual conflicts.
If you want to turn off Dolby Vision HDR mode and use standard HDR instead:
- Open your computer Settings.
- Go to System and select Display.
- Click on your HDR settings menu.
- Look for the Dolby Vision manufacturer settings or app installed on your computer and switch the mode to off.
Calibrate Your HDR Display for Maximum Accuracy
Calibrating your HDR display for maximum accuracy helps you move past generic factory settings to get true-to-life colors in Windows 11. Open the Microsoft Store app, search for and install the official Windows HDR Calibration tool, and follow the on-screen steps to adjust your screen like a professional.
To calibrate your screen like a professional:
- Open the Microsoft Store app on your Windows 11 computer.
- Search for and download the official free tool named Windows HDR Calibration.
- Open the app after it finishes installing.
- Follow the step-by-step instructions on your screen. The app will show you a series of test patterns and ask you to adjust sliders until the patterns blend into the background.
- Save your custom color profile when you finish. Your videos and games will instantly look sharper, more detailed, and accurately colored.
Fixing Night Light and HDR Color Clashes
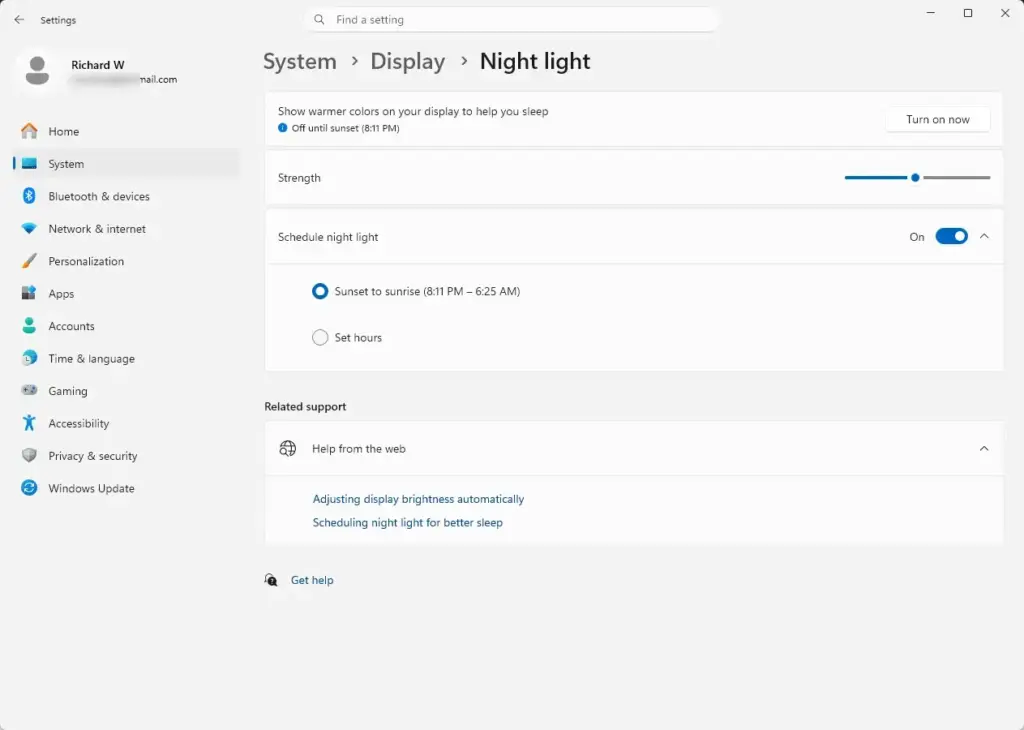
Fixing Night Light and HDR color clashes stops your screen from looking strangely red, oversaturated, or unnatural during late-night computer sessions in Windows 11. Open Settings, select System, and go to Display. Adjust your color settings or temporarily turn off Night Light to balance both features and restore normal video colors.
If your colors look unnatural at night:
- Open your Windows Settings.
- Go to System and click on Display.
- Click on Night light and temporarily turn the switch to Off to see if your normal HDR video colors return.
If you need blue light reduction, consider using specialized monitor hardware settings instead of the Windows software filter while watching high-end HDR videos.
Summary
This summary of Windows 11 HDR video settings highlights how to verify your monitor support, turn on streaming enhancements, and adjust power options. You now know how to fix washed-out colors, use the calibration app, and manage display features to get the best possible picture quality on your computer screen.
Was this guide helpful?

About the Author
Richard
Tech Writer, IT Professional
Richard is a writer at Geek Rewind who turns complex IT tasks into clear, step-by-step guides. He draws on years of hands-on experience in system administration and enterprise IT operations, focusing on Windows, Linux and WordPress: the problems people actually run into, and the fixes that work. His server and WordPress guides come from systems he runs himself. Richard builds and maintains the platform behind Geek Rewind, from its Ubuntu servers and Nginx configuration to its custom WordPress plugins. Many new tutorials start with readers' questions, and he's always glad to answer them in the comments.
No comments yet — be the first to share your thoughts!