Assign a Color Profile to a Display in Windows 11

A color profile in Windows 11 is an ICC file (a standard format named after the International Color Consortium, which describes how a display reproduces color). Assigning one takes about two minutes in the Color Management window. To open it, press Win+R, type colorcpl, and press Enter.
Recent builds of Windows 11 also add a Color profile drop-down at Settings System Display. Use it when it appears on your PC. This article covers both routes. Use whichever one your build shows.
You need the profile file, usually ending in .icc or .icm. Installing it needs administrator rights.
To assign a color profile to a display in Windows 11, press Win+R, type colorcpl, and press Enter. On the Devices tab, select your display, tick Use my settings for this device, click Add, choose your.icc.icm file, then click Set as Default Profile. Install the file first by right-clicking it and selecting Install Profile, which needs administrator rights.
What You Need Before You Start
Three things affect the process: where the profile comes from, which display you target, and your account type.
Get the Right Profile File
The best source is the support page for your exact monitor model. Look for a driver or “color profile” download. Manufacturers often bundle an ICC profile in the driver package, sometimes inside a ZIP file.
A profile made with a hardware calibrator (a device that sits on the screen and measures its colors) is more accurate than a generic one. It describes your individual panel, not the average for that model. If you have no profile at all, the built-in Display Color Calibration tool can create one. The Display Color Calibration section near the end of this article explains how.
Know Which Account Rights You Need
Installing a profile copies it into a protected system folder, so it triggers a User Account Control (UAC) prompt. A standard account must enter administrator credentials at that prompt. Assigning a profile for your own sign-in does not need administrator rights. Setting a profile for every user on the PC does.
Color Management works the same way on Windows 11 Home and Pro. There is no edition difference for this task.
How to Assign a Color Profile to a Display in 🪟 Windows 11
These steps install the profile and then customize color profiles for displays through the Color Management window, which works on every current build of Windows 11. Complete them in order.
- Download the profile file from your monitor maker's support page. Save it somewhere easy to find, such as the Downloads folder. If it arrives as a ZIP file, right-click it and select Extract All first.
- Right-click the
.iccor.icmfile. Windows 11 shows a short context menu. If you do not see the install option, select Show more options to open the full menu.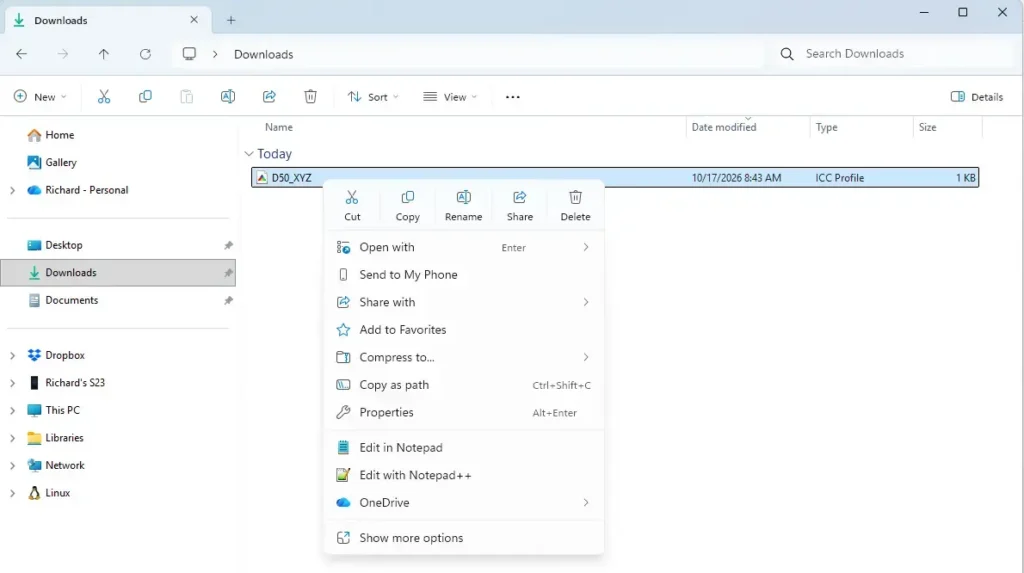
- Select Install Profile. This step needs administrator rights. Approve the UAC prompt if one appears. Nothing visible happens. Windows copies the file to
C:\Windows\System32\spool\drivers\color. - Press Windows + R. The Run dialog opens.

Run dialog - Type
colorcplin the box and press Enter. The Color Management window opens.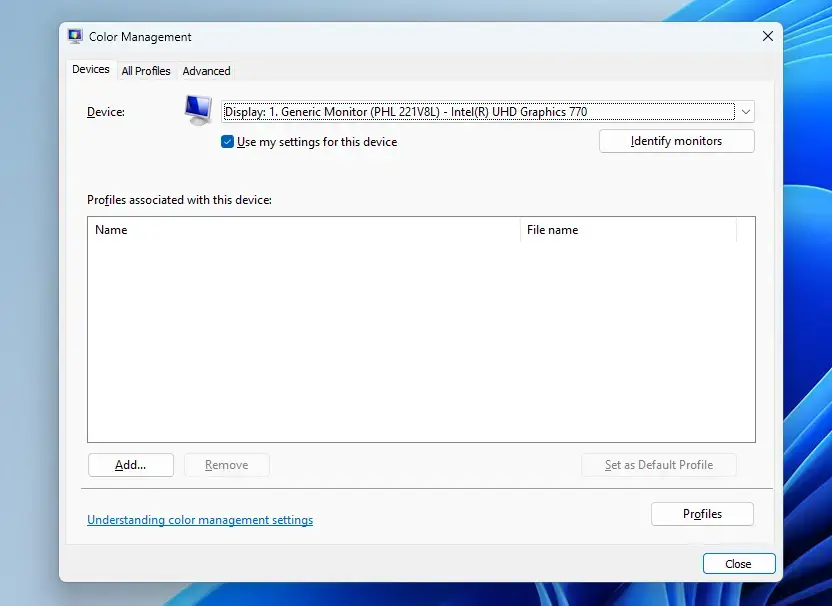
- Select the Devices tab. This tab lists every display and color device Windows detects.
- Open the Device drop-down and select your display. Entries look like "Display: 1. Generic PnP Monitor". PnP stands for plug and play, the standard that lets Windows detect hardware automatically. If you have several screens, select Identify monitors. A large number appears on each screen so you can match it to the list.
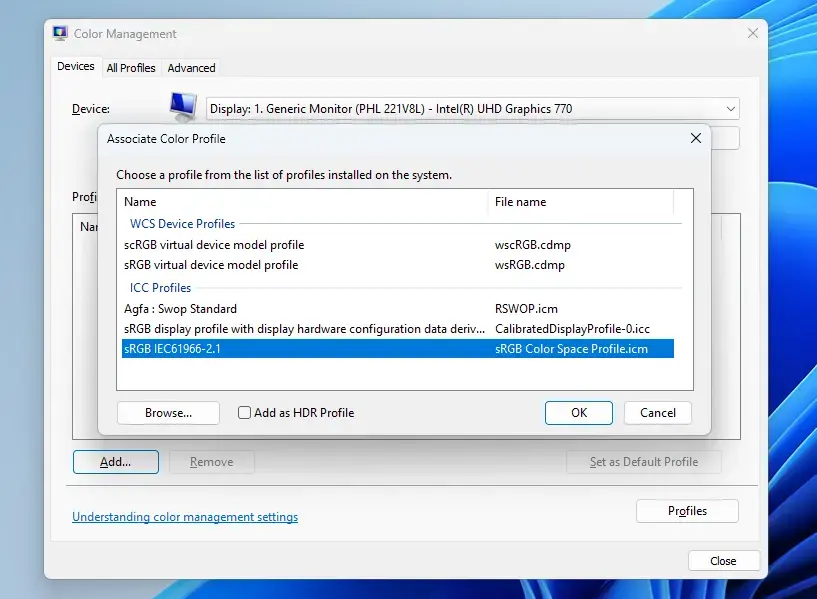
- Tick Use my settings for this device. Until you tick this box, you cannot change the profile list, and the Add button stays greyed out.
- Click Add. The Add Profile Association dialog opens with a list of installed profiles.
- Select your profile in the list. If it is not there, click Browse and open
C:\Windows\System32\spool\drivers\color. Then pick the file. - Click OK. The profile now appears under Profiles associated with this device.
- Select the profile, then click Set as Default Profile. The word "(default)" appears next to its name. Windows applies it right away, and the screen may flicker briefly as the colors shift.
- Click Close. You do not need to restart Windows. Apps that are already open may need to be closed and reopened before they use the new profile.
To confirm the change, run colorcpl again and check that your profile still shows "(default)" for that display. If you want a visible check, open a high-quality test photo before and after the change. Gray areas should look neutral, without a yellow or blue cast.
Apply the Profile to All Users on the PC
Other accounts keep the system default until you change it for them. This part needs administrator rights.
In the Color Management window, click Change system defaults at the bottom of the Devices tab. Approve the UAC prompt. A second window opens with the same Devices layout. Select the display, click Add to add the profile if it is not listed, and click Set as Default Profile.
If the Profile Is Missing From the Add List
If the profile does not appear in the Add Profile Association dialog, the install step probably did not finish. Check that the file exists in C:\Windows\System32\spool\drivers\color. If it does not, repeat the Install Profile step and make sure you approve the UAC prompt.
If the file is there but still missing from the list, click Browse and select it directly. If Windows rejects it, the file may be damaged or not a display profile. Download it again from the manufacturer.
Use a Different Profile on Each Monitor
Each display keeps its own profile list. Repeat steps 7 to 12 for every screen you use. Select the next display from the Device drop-down each time, and do not reuse one profile for a different monitor model. A profile describes one panel, and applying it to another gives wrong colors.
Two screens of the same model still have small differences. A profile from a calibrator for each unit gives the closest match.
Assign a Color Profile From the Settings App
This route is quicker when the option exists. If you do not see it, use the Color Management steps above.
The Settings list shows profiles that are already installed. Install the file first, as in steps 1 to 3 above.
- Open Settings. Press Windows + I.
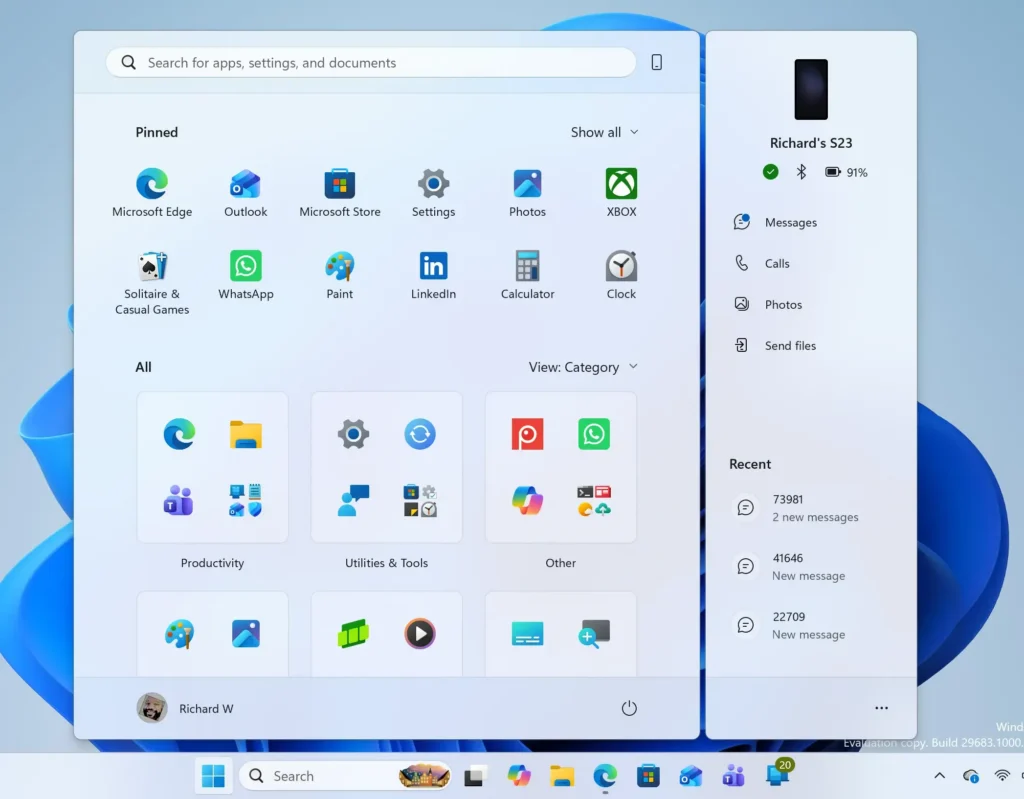
- Select System, then select Display. The page lists your connected screens at the top.
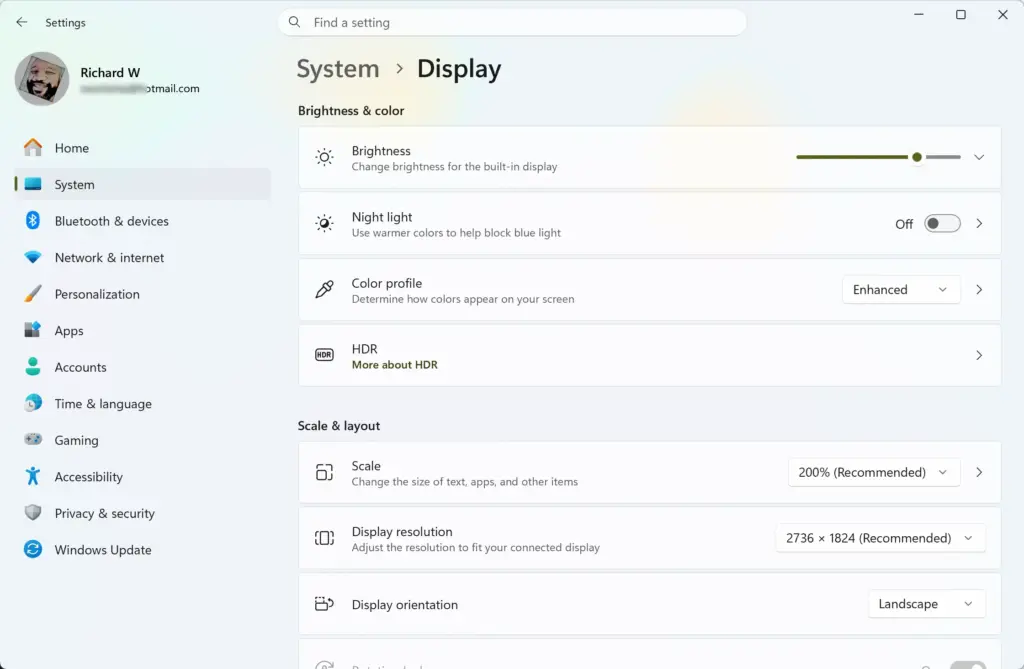
Settings › System › Display - Select the display you want to change. If you have more than one, click the numbered screen box at the top of the page.
- Find the Color profile drop-down. It sits in the Brightness & color section. Expand that section if it is collapsed.
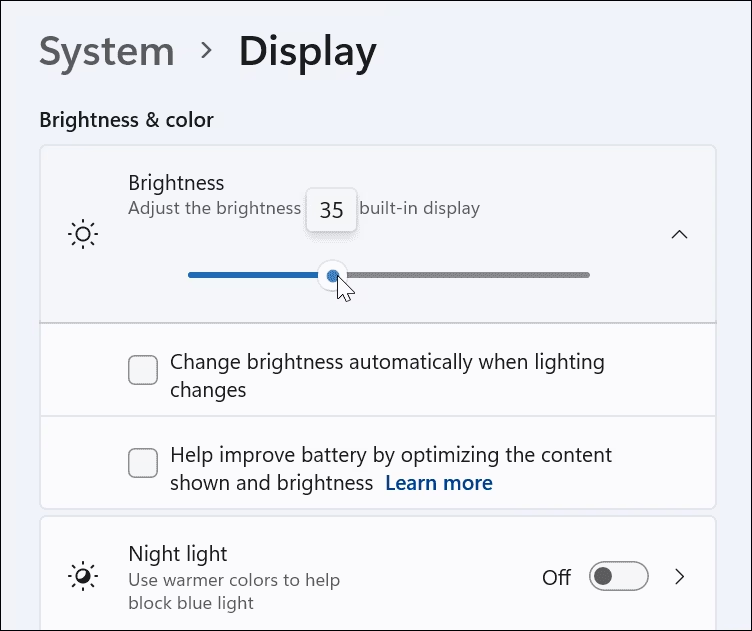
- Open the Color profile drop-down and select your profile. The screen changes color immediately. Windows saves the choice without a confirmation button.
If Color profile is missing, your build probably predates this option, or your display does not give Windows the details it needs to show the option. Use Color Management instead. The result is the same.
Open Color Management From Advanced Display
If you prefer to stay in Settings, you can reach the same Color Management window from there. Go to Settings System Display Advanced display Under the display information, select Display adapter properties for Display 1. The number changes with the screen you selected.
In the properties window, select the Color Management tab, then click the Color Management button. This opens the same window that colorcpl opens. Continue from step 6 in the main list.
Remove a Profile or Return to the Default
You can undo this change at any time. Removing a profile does not delete the file, so you can add it back later.
- Press Windows + R, type
colorcpl, and press Enter. - Select the Devices tab and choose the display from the Device drop-down.
- Select the profile you added under Profiles associated with this device.
- Click Remove. The profile disappears from the list.
- Select another profile in the list and click Set as Default Profile. Windows' standard profile is named sRGB IEC61966-2.1.
Windows reverts to the previous profile after you remove the default. If a button labeled Reset my settings to the system defaults appears on the Devices tab, you can click it instead. It clears your personal choices for that display and returns it to the system defaults.
Why Color Profiles Fail to Apply or Look Wrong
A profile is only one part of what you see on screen. These are the causes I check first when a profile seems to have no effect.
The Screen Looks the Same After You Assign It
Windows applies the profile's calibration data to the whole screen. Only apps that read color profiles (called color-managed apps) use the full profile, such as photo editors and some browsers. Many apps ignore it and show colors straight from the display. Reopen the app after you change the profile and check its own color settings.
If you use HDR (high dynamic range, a mode with a wider brightness and color range), test with HDR off first. Settings System Display lists the HDR setting for each screen. ICC profiles are built for standard dynamic range, so HDR mode can change how or whether they apply.
The Color Profile Option Is Missing or Greyed Out
If Add is unavailable in Color Management, tick Use my settings for this device first. If Change system defaults does nothing, you are probably not signed in as an administrator. Sign in with an administrator account, or enter administrator credentials at the UAC prompt.
If the Settings drop-down is missing, check your build. Open Settings System About and read the Version line under Windows specifications. Builds older than 24H2 do not offer it in the way described here, so use Color Management.
The Profile Resets After an Update or Driver Change
A graphics driver update or a Windows feature update can change the default profile. If your colors shift after an update, open Color Management and check which profile carries "(default)". Set yours again if needed.
Calibration software from a hardware maker can also load its own profile at startup and replace yours. If you use such software, let it manage the profile. If you want to turn that off, stop the program from loading at startup.
Create a Profile With the Built-in Calibration Tool
Windows includes Display Color Calibration, a wizard that adjusts gamma (how brightness shifts across the midtones), brightness, contrast and color balance by eye. It is less accurate than a hardware calibrator, but it creates a real profile you can assign like any other.
- Press Windows + R, type
dccw, and press Enter. The Display Color Calibration wizard opens. - Follow the on-screen pages. Each page shows a sample image and asks you to adjust a setting until the image matches the description.
- Select Finish on the last page to keep the new calibration. Select Cancel to keep your previous one.
The wizard saves its result as a profile for that display. Open Color Management afterward to confirm that it is listed and set as the default.
What to Do Next
If colors still look wrong after you assign a profile, return to the previous section and check HDR and any calibration software, then compare against a test image. To go back to Windows' standard colors at any point, remove the profile as described above. The next related task is adjusting Night light or brightness, which changes how the screen looks without replacing the profile you set.
Have a question about this guide?
Answered by AI from this guide. Good questions may be added to this page — please don't include personal details.
Did this guide fix your problem?

About the Author
Richard
Tech Writer, IT Professional
Richard is a writer at Geek Rewind who turns complex IT tasks into clear, step-by-step guides. He draws on years of hands-on experience in system administration and enterprise IT operations, focusing on Windows, Linux and WordPress: the problems people actually run into, and the fixes that work. His server and WordPress guides come from systems he runs himself. Richard builds and maintains the platform behind Geek Rewind, from its Ubuntu servers and Nginx configuration to its custom WordPress plugins. Many new tutorials start with readers' questions, and he's always glad to answer them in the comments.
No comments yet — be the first to share your thoughts!