How to Calibrate Your Display Color in Windows 11

Display color calibration in Windows 11 matches the colors on your monitor to real-world shades, so photos and videos look natural instead of washed out or too bright. The built-in Display Color Calibration tool walks you through a series of test screens that adjust gamma, brightness, contrast, and color balance. It takes about 5 to 10 minutes.
Correct settings fix common screen problems like faded blacks or overly strong blues. You do not need any special hardware or technical skills. The wizard works on both Home and Pro editions, and you do not need to be an administrator to run through it. It is a visual, by-eye calibration, so it will not match a hardware colorimeter. Still, it is a clear improvement on a screen that has never been adjusted.
Open Settings System Display, scroll to Color profile, and click Calibrate display. Follow the on-screen wizard to adjust gamma, brightness, contrast, and color balance by comparing test images until your monitor displays accurate colors. The process takes 5 to 10 minutes and requires no special hardware.
How to Calibrate Your Display in 🪟 Windows 11
Display color calibration in Windows 11 helps you adjust your monitor so photos, games, and videos show accurate colors and proper brightness. The built-in wizard fixes washed-out tones and incorrect contrast without any extra software.
There are two ways to reach the wizard. The main route is through Settings, and the steps below follow it. The other route is the Start menu. Type color management, open the tool, go to the Advanced tab, and click Calibrate display. Typing calibrate display color into Start search is a shorter way to reach the same wizard.
Before you begin, get the screen ready, because the results are only as good as the conditions you work in:
- Let the monitor warm up for about 20 to 30 minutes. Colors and brightness shift slightly while a screen heats up.
- Work in the lighting you normally use, and avoid direct glare on the screen. Calibrating in a dark room and then working in a bright one will make the result look off.
- Close any apps that change screen color, such as Night light or a third-party filter. They will skew your results. You can switch Night light off in Settings System Display.
These steps start the calibration wizard and walk you through it, so you can calibrate your display color in Windows 11 from start to finish.
Open Settings by pressing Win+I. You can also click the Start menu button, which is the Windows icon on the taskbar , and then click Settings. You should now see the Settings window with a list of categories on the left. For more help with this step, see Learn more about Windows Settings .
Click System on the left side of Settings. The right side now shows the system options, such as Display, Sound, and Notifications.
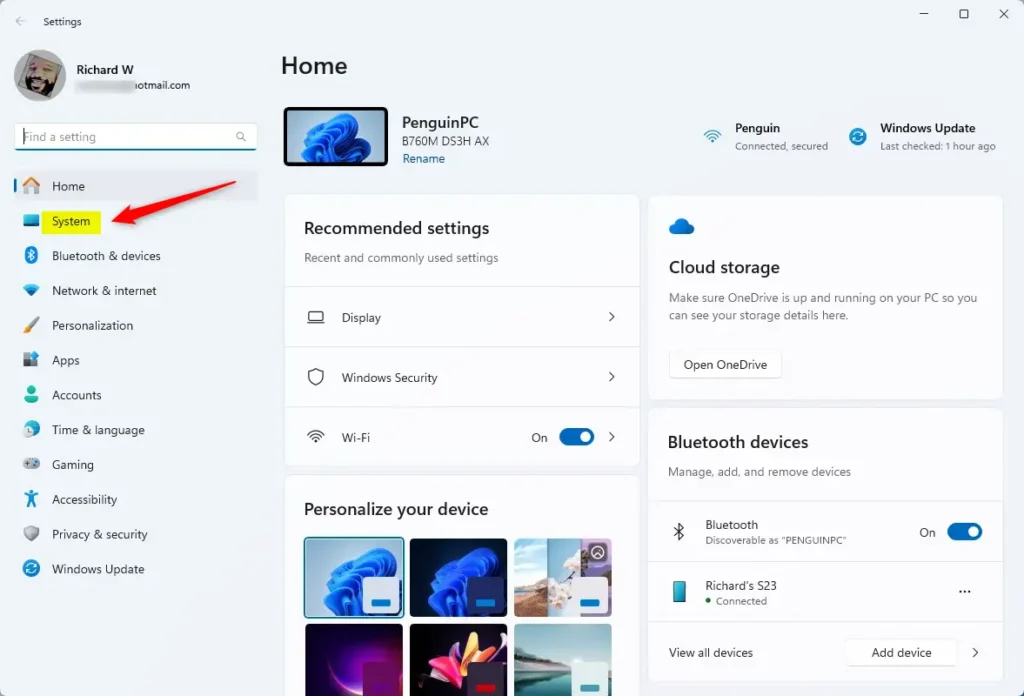
System in the Settings app Click Display on the right side to open the display settings. You should see your monitor or monitors at the top, followed by brightness, color, and scale options.
📝Good to KnowIf you use more than one monitor, click the one you want to calibrate in the preview at the top.Calibrate each monitor separately.
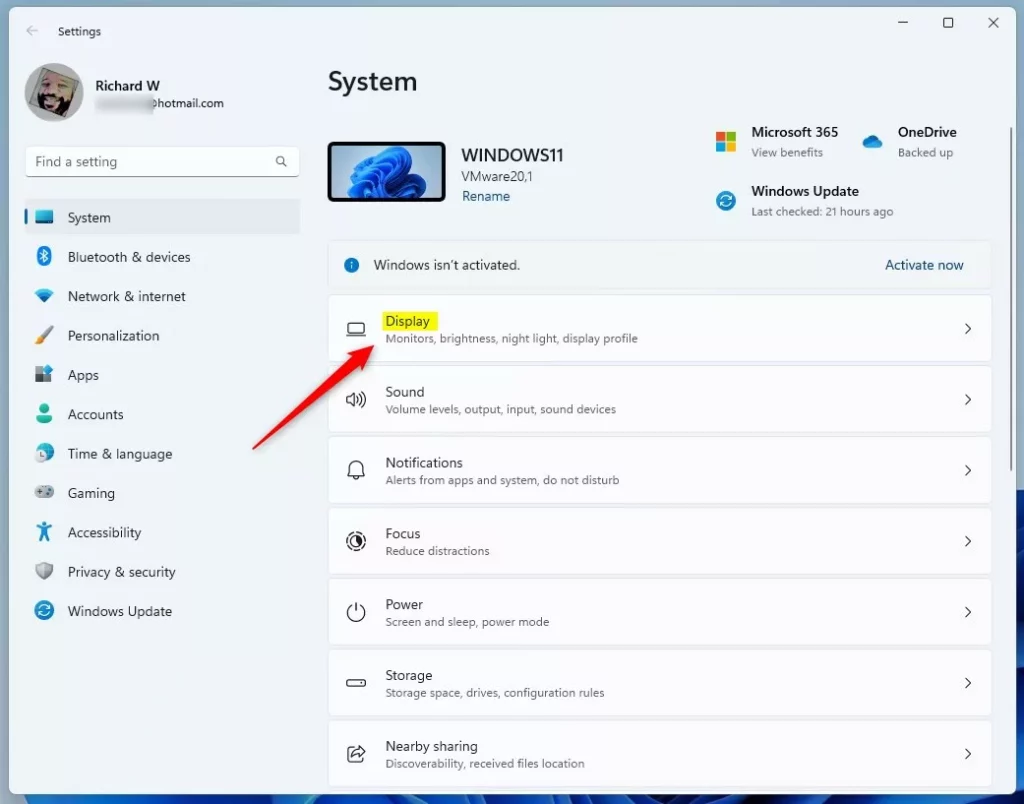
Windows Display Settings tile Scroll down and click Color profile. This opens the color choices for the monitor you selected.
Where this setting appears, and what it offers, depends on your Windows 11 version and your display driver. If you cannot find it, or it has no calibration button, do not worry. Close Settings, open the Start menu , type calibrate display color, and open the result. It starts the same wizard, and you can carry on from the next step.
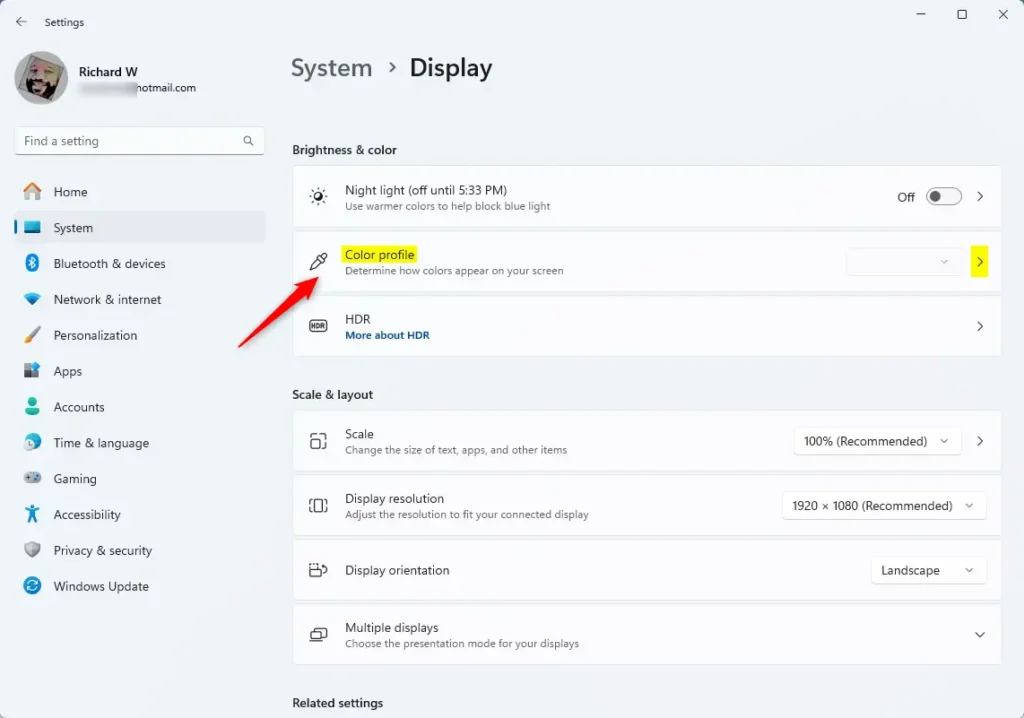
Windows 11 Settings app with Color profile tile highlighted. Click Calibrate display to start the calibration wizard. A wizard window should open with a welcome page.
The wizard opens on the screen it was launched from. If it opens on the wrong monitor, drag its window to the monitor you want to calibrate before you go further. For best results, set the wizard to full screen if it offers that.
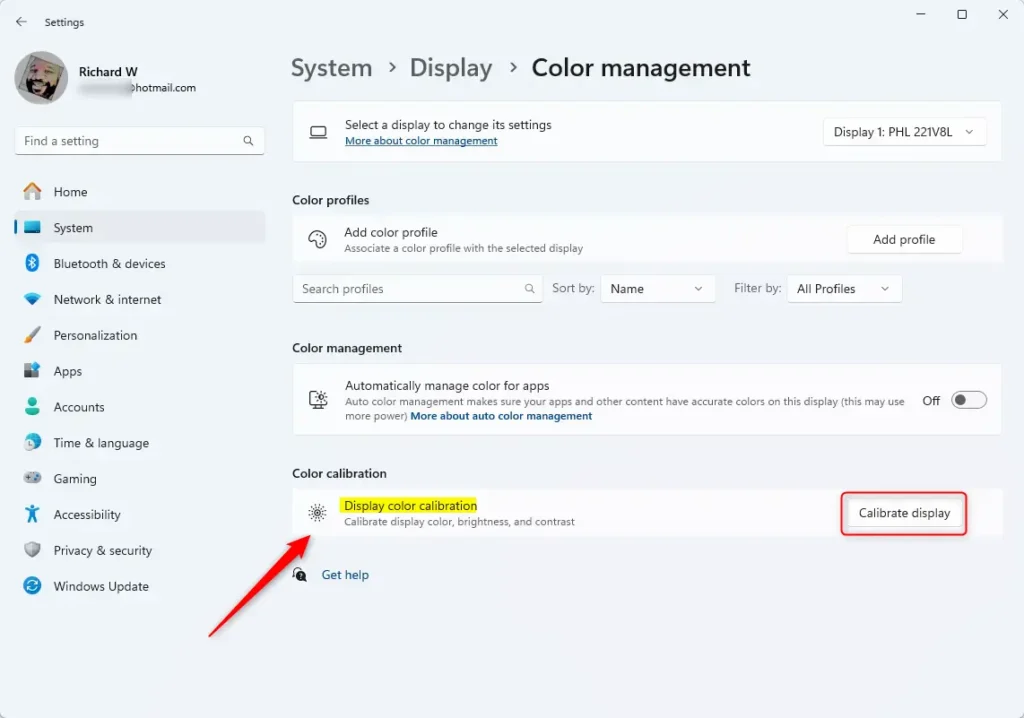
Calibrate display button Click Next and follow each wizard page carefully. The wizard adjusts your gamma, brightness, contrast, and color balance, in that order. On each page, read the short description and compare the sample images with the example shown.
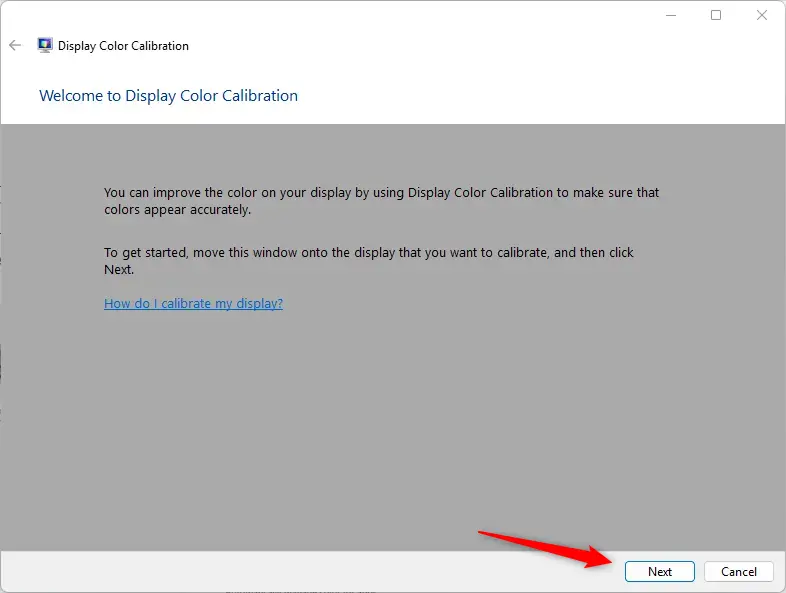
Windows 11 calibrate display wizard Keep clicking Next as you make adjustments. Here is what to do on each part:
- Set gamma. Move the slider until the small dots in the middle of each circle are as hard to see as possible.
- Set brightness and contrast. Many desktop monitors have physical buttons or an on-screen menu for these, so use them as the wizard describes. Many laptops do not have these controls, and you can skip those pages.
- Set color balance. Move the red, green, and blue sliders until the gray bars look neutral, with no color tint.
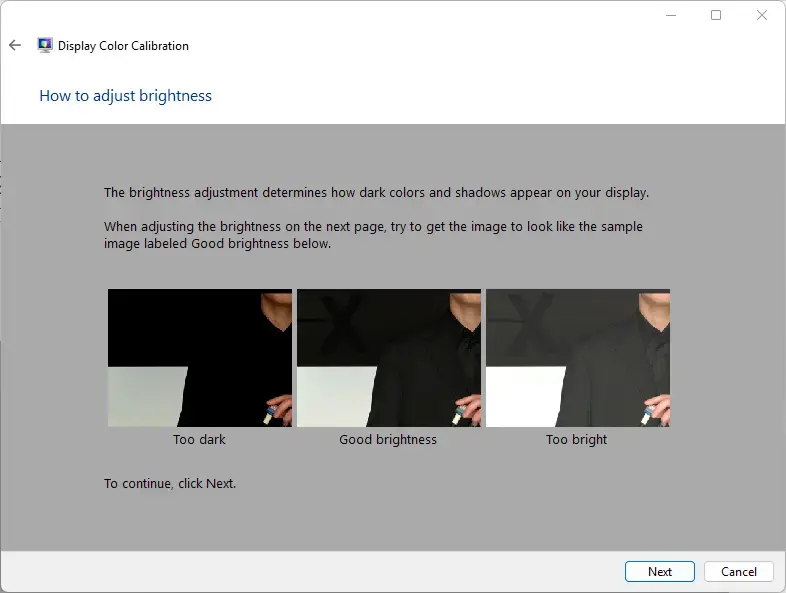
Calibration settings Click Finish on the summary page to keep the new settings. If you want to compare first, click Previous calibration and Current calibration to switch between the two before you finish.
The wizard may offer to open the ClearType Tuner after you finish. You can run it to sharpen text, or clear the checkbox and skip it. To discard your changes instead, click Cancel. You do not need to restart Windows. The new color profile applies right away.
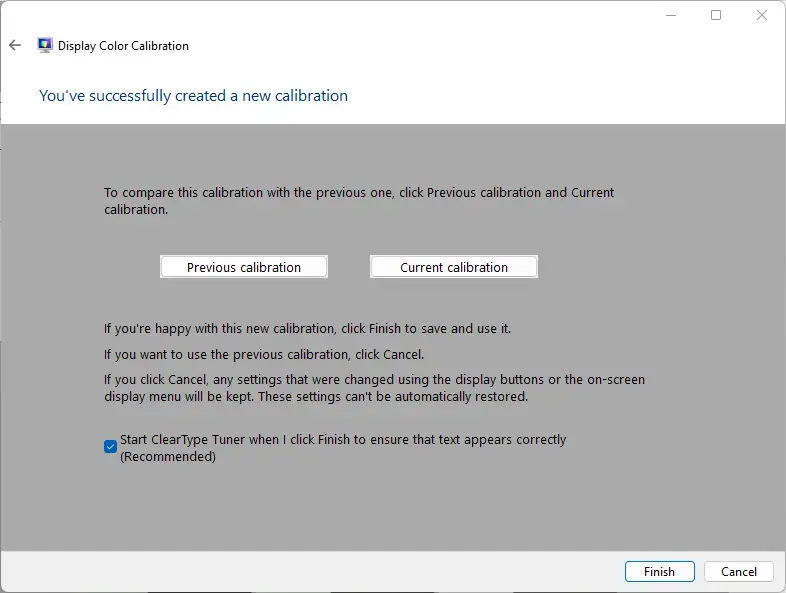
Finish calibration
That’s it! Your display should now show better and more accurate colors. Look at a photo you know well, or a page with a white background, and check that grays look neutral and dark areas still show detail.
If the result looks worse than before, run the wizard again and choose Previous calibration on the last page to go back to your old settings. You can repeat the wizard as often as you like, so there is no harm in trying again after a better warm-up or in different lighting.
Why Should You Calibrate Your Display?
- It makes colors look more natural and correct on your screen. Grays look neutral instead of tinted, and dark areas keep their detail.
- It improves your movie watching, photo viewing, and gaming experience, especially if your monitor's factory settings are too bright or too contrasty.
- It helps if you do photo editing or graphic design work. You'll see colors closer to the truth. For professional print or video work, a hardware colorimeter is still the more accurate choice.
- It's good to recalibrate if you get a new monitor, change your room lighting, or notice colors looking strange.
Calibrating your display color fixes washed-out images, incorrect contrast, and unnatural skin tones so your screen shows true-to-life colors. Recalibrate whenever you notice strange tints, buy a new screen, or start photo editing and graphic design work where accurate colors matter most for your final projects.
Summary
Display color calibration in Windows 11 is a simple feature that makes your screen colors look better and more natural. The route described here is Settings System Display Color profile Calibrate display. A built-in wizard then helps you adjust gamma, brightness, contrast, and color balance for a clearer picture.
If that route does not show a calibration button on your PC, search for calibrate display color in the Start menu to open the same wizard. Calibrate each monitor on its own, and run the wizard again whenever your screen or your lighting changes.
Have a question about this guide?
Answered by AI from this guide. Good questions may be added to this page — please don't include personal details.
Did this guide fix your problem?

About the Author
Richard
Tech Writer, IT Professional
Richard is a writer at Geek Rewind who turns complex IT tasks into clear, step-by-step guides. He draws on years of hands-on experience in system administration and enterprise IT operations, focusing on Windows, Linux and WordPress: the problems people actually run into, and the fixes that work. His server and WordPress guides come from systems he runs himself. Richard builds and maintains the platform behind Geek Rewind, from its Ubuntu servers and Nginx configuration to its custom WordPress plugins. Many new tutorials start with readers' questions, and he's always glad to answer them in the comments.
No comments yet — be the first to share your thoughts!