How to Set Up Custom ICC Color Profiles in Windows 11 Color Management

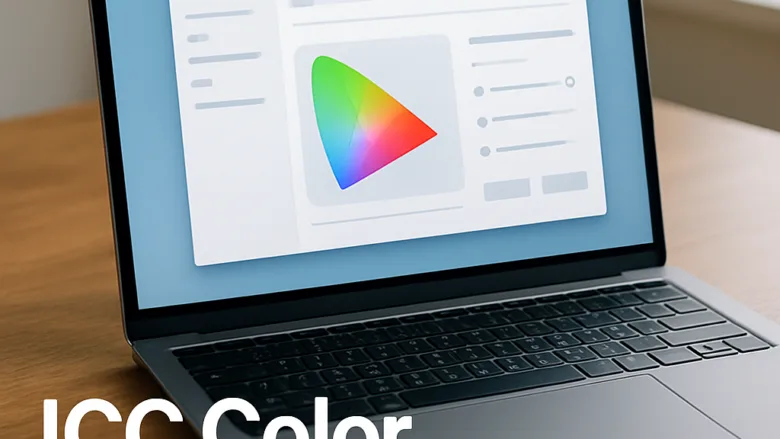
A custom ICC color profile fixes color shifts and makes your monitor show accurate tones. An ICC profile is a small file that describes how your specific screen panel displays color. Windows 11 uses it to correct the output.
Every monitor outputs colors a little differently out of the box because of manufacturing variations. Windows 11 reads your custom profile and applies a correction toward the standard it was built for. Photos and editing programs then look the way they should. You usually get a profile from a calibration device, from your monitor maker’s website, or from a profile you generated yourself. Profiles end in .icc or .icm.
Open the Start menu , type Color Management, and press Enter. Select your monitor from the Device dropdown, check Use my settings for this device, click Add, browse to your ICC profile file, and click Set as Default Profile. Then open the Advanced tab, click Change system defaults, check Use Windows display calibration, and close both windows to apply your custom profile.
Activating the profiles
To use a custom ICC profile, you need to turn on manual settings in the classic Color Management tool. Select your monitor, check Use my settings for this device, and add your profile. Windows then applies your calibration file instead of the factory default. The tool is the same on Windows 11 Home and Pro, and you don’t need to restart afterwards.
- Open the Start menu, type
Color Management, and press Enter. The Color Management window opens on the Devices tab. - Open the Device dropdown menu at the top of the window and select your monitor. This matters most if you have more than one display connected. If you are not sure which is which, click Identify monitors to show a number on each screen.
- Check the box labeled Use my settings for this device. This turns on manual profile management for that monitor. The profile list and the buttons below it become usable.
- Click the Add button. The Associate Color Profile window opens.
- Click Browse, find your downloaded or generated ICC profile on your drive, and click Add. The profile now appears in the list for that monitor.
- Select the new profile in the list and click Set as Default Profile. The default profile is the one shown in bold or marked as default.
- Click the Advanced tab at the top of the Color Management window.
- Click the Change system defaults button and confirm the administrator prompt. A second Color Management window opens. If the button asks for credentials you don’t have, you are on a standard account and will need an administrator to do this step.
- In this second window, click its Advanced tab and check Use Windows display calibration.
- Click Close on the system defaults window, then click Close on the main Color Management window to save your configuration. The screen may flicker briefly as the new calibration loads.
To undo this, open the same window, select the profile, and click Remove. Or uncheck Use my settings for this device to go back to the defaults.
Non colour-aware applications
Applications that are not color-aware ignore your color management settings and send raw sRGB data straight to the graphics card. Older games and many standard programs skip the operating system color pipeline. Images then render in your monitor’s native, uncalibrated color space instead of through your custom ICC profile. The result is oversaturated reds and greens, most noticeable on wide-gamut monitors.
Color-aware programs such as Photoshop and Lightroom read your ICC profile themselves, so they are not affected. If a particular program looks too saturated, it is probably not color-aware. Check whether it has its own color management or color space option. Otherwise accept that it will not follow your profile.
Games misbehaving
This usually happens when a full-screen DirectX or OpenGL mode takes direct control of the display output. The game bypasses the Windows gamma ramp, and your monitor reverts to harsh factory colors the moment the game launches.
- Open the game's graphics or video settings.
- Change the display mode from Fullscreen to Borderless Windowed (some games call this Windowed Fullscreen).
- Apply the change and check whether your colors stay the same. If the game asks for a restart, do that.
Borderless windowed mode often stops games from overriding your ICC color profile. Some games don't offer the option. In that case, a loader utility like the one in the next section can reapply your profile after the game starts.
DisplayProfile to easily switch between profiles
DisplayProfile is a lightweight, open-source utility that lets you switch between several ICC color profiles from the Windows taskbar. That is much quicker than opening the Color Management window each time your lighting conditions change. After you install it, you can apply a different display calibration with a couple of clicks. Download it only from the developer's official page, and scan the file before you run it.
Display Profile utility
DisplayProfile also helps with a common bug: custom ICC profiles that fail to load after the PC wakes from sleep or reboots. It applies changes directly to the video card gamma table instead of waiting for delayed Windows triggers.
- Launch DisplayProfile.
- Choose your primary monitor in the device selection menu.
- Select your preferred color profile and save it, so the utility keeps applying it.
- Put the PC to sleep, wake it, and check that the colors are still correct.
Fixing Delayed Profile Activation After Startup
It happens because the standard Windows color loader starts after the desktop shell. This creates a race condition, and your graphics driver applies its default settings last. A dedicated startup task, or a third-party loader started from that task, forces your custom ICC profile to apply right away.
- Open the Start menu, type
Task Scheduler, and press Enter. Task Scheduler opens. - Click Create Task in the Actions pane on the right side of the window. Use Create Task, not Create Basic Task, because only the full version has the options below. You need administrator privileges.
- On the General tab, name the task something recognizable, such as
Force ICC Profile. - Check Run with highest privileges near the bottom of the General tab.
- Switch to the Triggers tab and click New. Select At log on from the Begin the task dropdown menu, then click OK. If the profile still loads too early, you can also set Delay task for under the advanced settings in this dialog, for example 30 seconds.
- Switch to the Actions tab, click New, and leave Action set to Start a program.
- Click Browse and select your color management utility's executable. You can also point it to a custom script that reloads your profile.
- Switch to the Conditions tab. If you are configuring a laptop, uncheck Start the task only if the computer is on AC power. Otherwise the task will not run on battery.
- Click OK to save the task. Your calibration is now applied every time you sign in to your user account. Sign out and back in to test it.
To remove the task later, find it in the Task Scheduler Library, right-click it, and choose Delete.
Ensuring Calibration Survives Graphics Driver Updates
Graphics driver updates from NVIDIA, AMD, or Intel can wipe out your display settings. Installers routinely overwrite system color tables and reset your monitor to factory defaults. You can't fully prevent this, but the steps below make it less likely and make recovery quick.
- Open the Start menu, type
Color Management, and press Enter. - Click the Advanced tab.
- Click the Change system defaults button and confirm the administrator prompt to open the system defaults window.
- In this window, click the Advanced tab. Uncheck Use Windows display calibration, click Apply, and then check it again. This forces Windows to rewrite the profile association cleanly.
- Open your graphics manufacturer's control panel software and find the desktop color settings page. Select the option that lets other applications control color adjustments instead of the driver. The wording and location differ between NVIDIA, AMD, and Intel, and between driver versions.
- Back up your custom ICC profile by copying it from
C:\Windows\System32\spool\drivers\colorto a safe external backup folder. If a driver update or a major Windows feature update strips your configuration, you can re-add the file with the steps in the first section.
What to do next
Your custom color calibration should now load reliably at startup and stay active while you work. If it does not, recheck Use my settings for this device and the startup task first. As a next step, consider adjusting your display's physical brightness and contrast buttons so the monitor matches the white point specified in your new ICC profile.
Have a question about this guide?
Answered by AI from this guide. Good questions may be added to this page — please don't include personal details.
Did this guide fix your problem?

About the Author
Richard
Tech Writer, IT Professional
Richard is a writer at Geek Rewind who turns complex IT tasks into clear, step-by-step guides. He draws on years of hands-on experience in system administration and enterprise IT operations, focusing on Windows, Linux and WordPress: the problems people actually run into, and the fixes that work. His server and WordPress guides come from systems he runs himself. Richard builds and maintains the platform behind Geek Rewind, from its Ubuntu servers and Nginx configuration to its custom WordPress plugins. Many new tutorials start with readers' questions, and he's always glad to answer them in the comments.
No comments yet — be the first to share your thoughts!