How to Find the Accessibility Folder in Windows 11

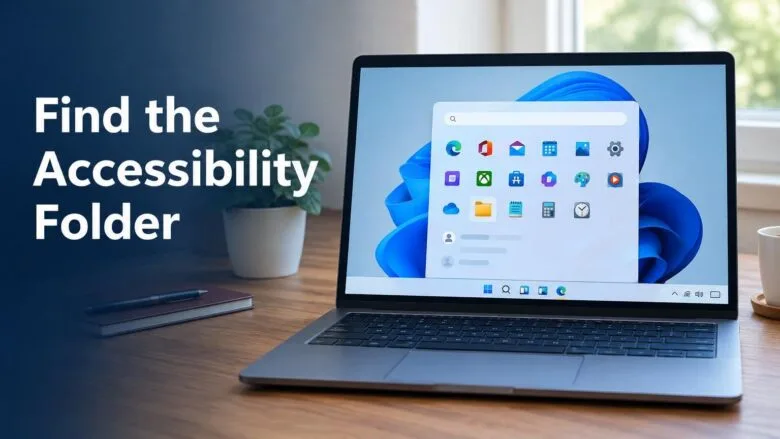
- 15 steps
- Needs administrator rights
The Accessibility folder in Windows 11 is a group of shortcuts inside the Start menu’s All apps list. It opens tools such as Magnifier, Narrator, and On-Screen Keyboard. The quickest route is Start All apps, then scroll to the letter A.
Windows 11 also has a separate Accessibility page in Settings. That page holds the options (text size, captions, color filters) rather than the apps. This post covers both locations, the faster ways to open them, and what to do when the folder does not appear.
The Accessibility folder is in the Start menu: select Start, then All apps, scroll to the letter A, and select Accessibility to see Magnifier, Narrator, and On-Screen Keyboard. For the options that change how Windows looks and responds, press Win+I and select Accessibility, or press Win+U to go there directly.
What the Accessibility folder is, and where Settings fits in
Two different places carry the name “Accessibility” in Windows 11, and people often mean one when they find the other. Knowing which you need saves time.
The first is the Accessibility folder in the Start menu. It is a list of app shortcuts, like any other program folder. Open a shortcut and the tool launches immediately. The exact contents depend on your Windows 11 version and edition, but Magnifier, Narrator, and On-Screen Keyboard are usually in the folder.
The second is the Accessibility page in the Settings app. This is where you change how Windows looks, sounds, and responds to your input. It is organized into three groups: Vision, Hearing, and Interaction. Turning a tool on or off, or changing how it behaves, happens here.
If you want to launch a tool, use the folder. If you want to adjust a feature, use Settings. None of the steps below needs administrator rights.
Find the Accessibility folder in the Start menu
These steps open the accessibility folder Microsoft includes in the Start menu, and then launch a tool from it.
- Select Start. The Start button is the Windows logo on the taskbar. The Start menu opens with your pinned apps at the top.
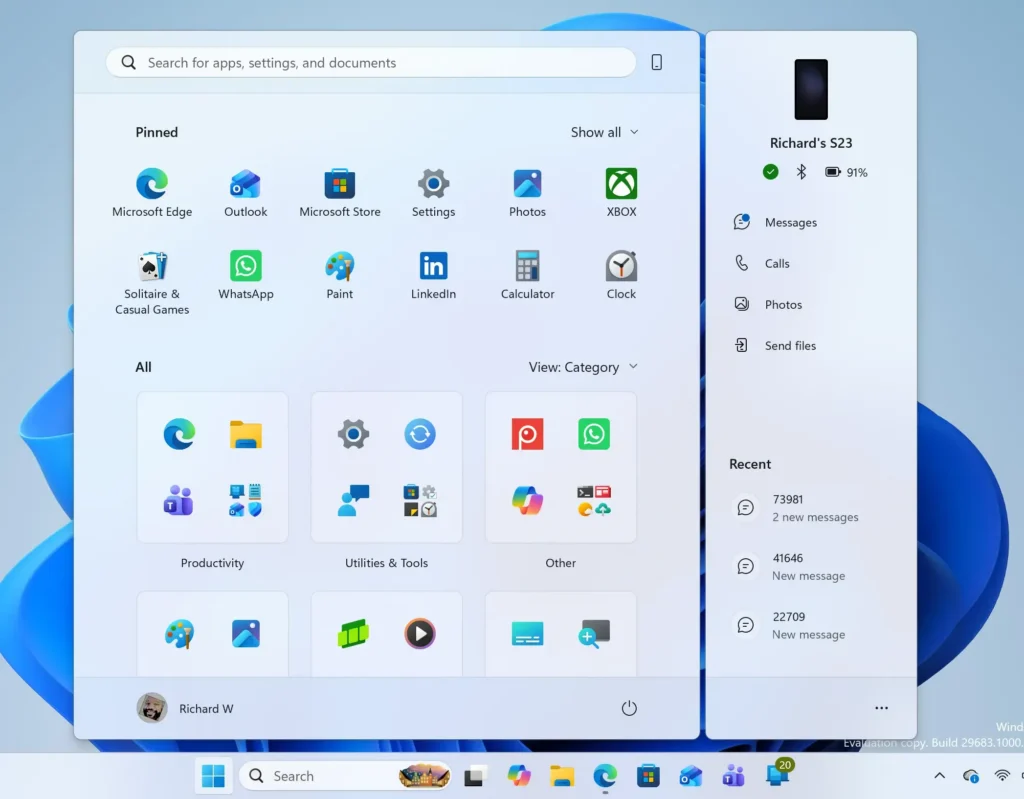
Windows 11 Start menu search panel for opening OpenSSH Client settings - Select All apps. The button sits at the top right of the Pinned section. The view changes to an alphabetical list of every installed app and folder.
- Scroll down to the letter A. Folders and apps share one alphabetical list, so the folder sits among the apps that start with A. You can also select any letter heading to jump to a letter grid, then select A.
- Select Accessibility. The folder expands in place and lists its tools. On some Windows 11 builds the folder carries a slightly different label, such as Windows Accessibility. The contents are the same kind of tools.
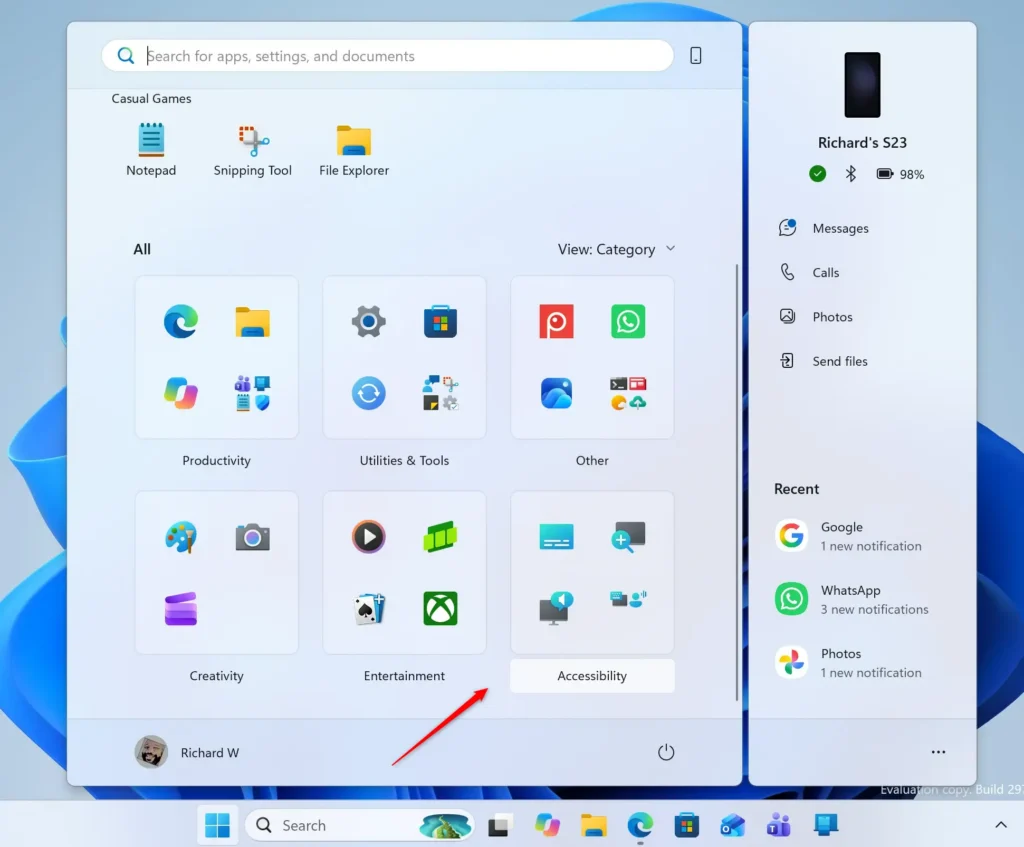
Start Menu - Select the tool you want to open. For example, choose Magnifier, Narrator, or On-Screen Keyboard. The tool starts straight away.
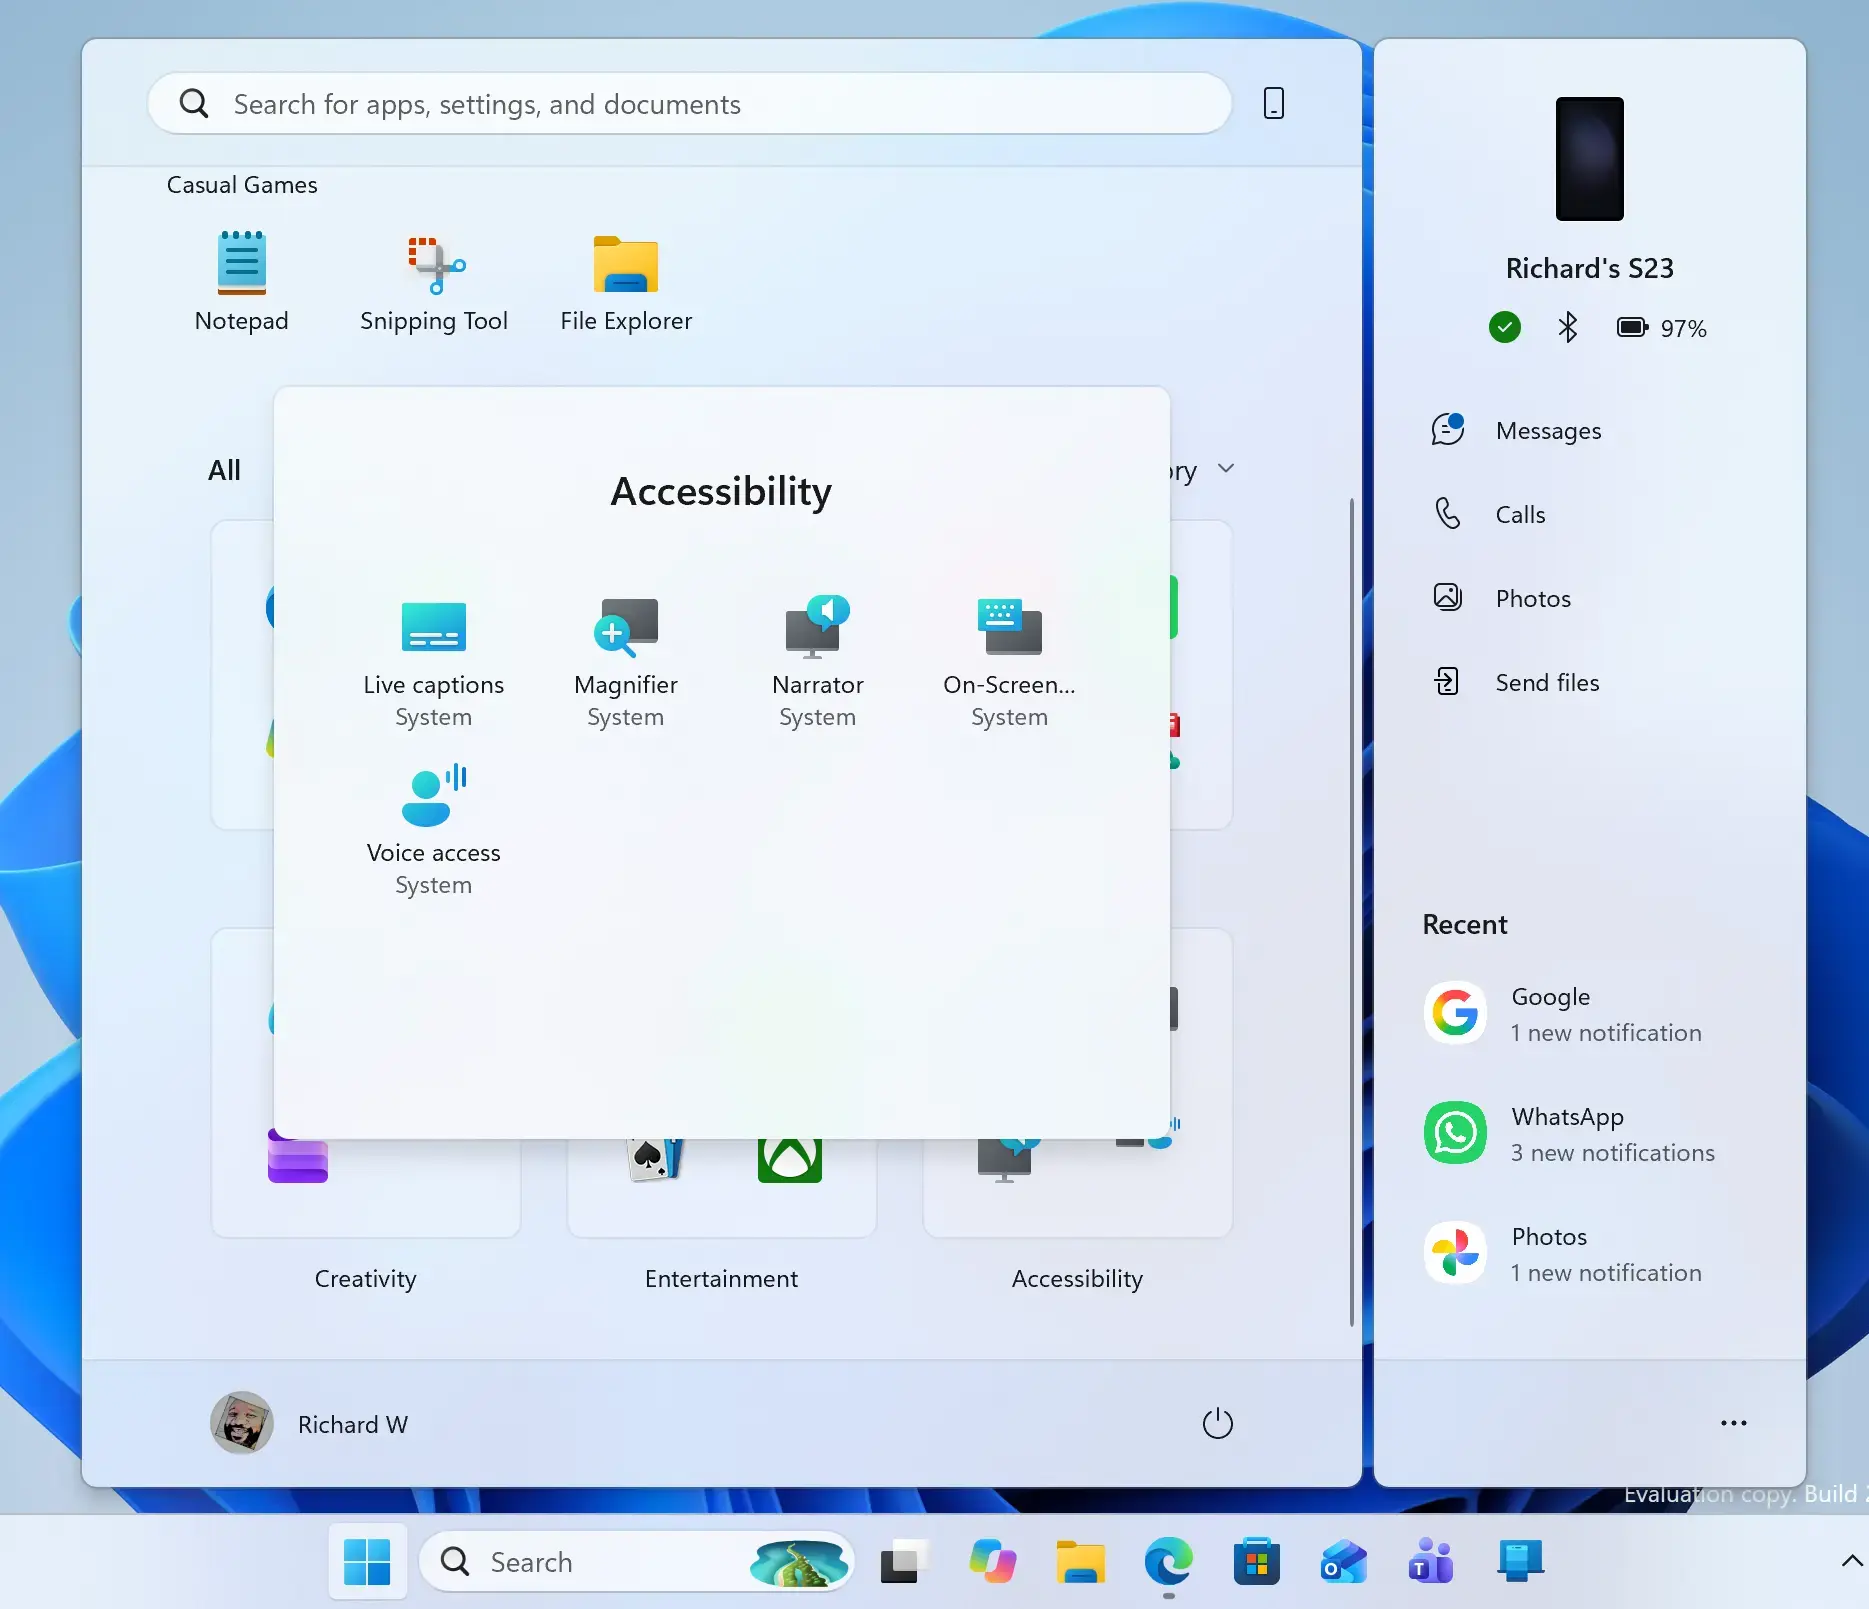
Accessibility folder listed under letter A in Windows 11 Start menu All apps
Narrator starts reading the screen aloud as soon as it opens. If that surprises you, press the Narrator key (Caps Lock by default, the key that turns Narrator on or off) together with Esc to close it. Magnifier closes with the Win plus Esc.
To collapse the folder again, select Accessibility a second time. Nothing is changed or installed when you open or close the folder.
Open Settings > Accessibility
This route opens the page where every Windows 11 accessibility option lives. Use it when you need to change a setting rather than launch an app.
- Press the Win and I together. The Settings app opens.
Windows 11 Start menu search panel for opening OpenSSH Client settings - Select Accessibility. It appears in the left-hand list. The right side now shows the accessibility categories.
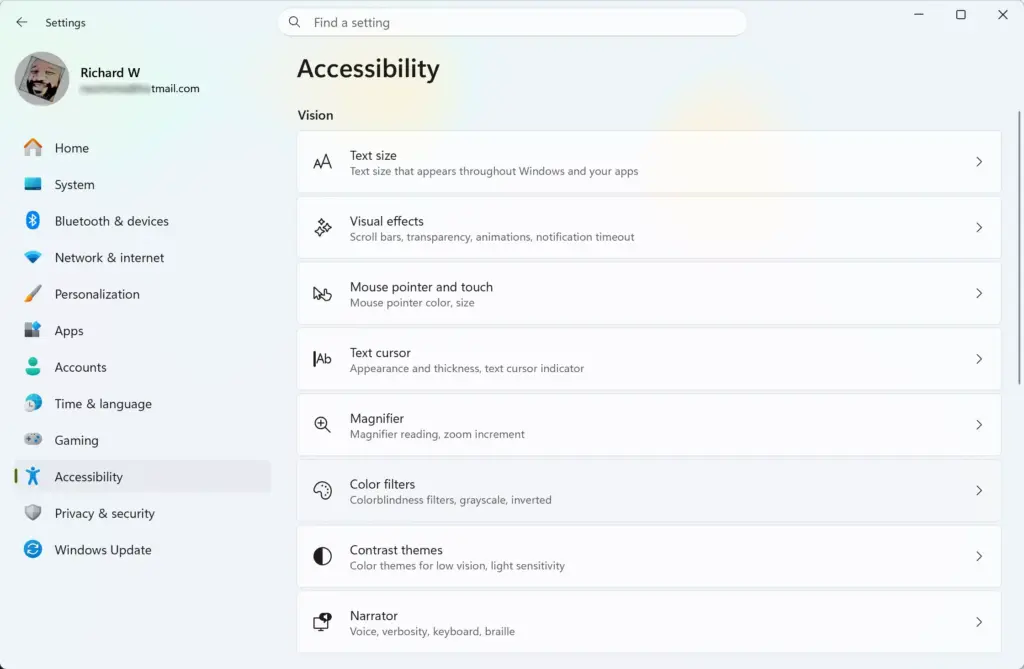
Settings › Accessibility - Select the category you need. The page is grouped into Vision, Hearing, and Interaction. Each entry opens its own page of toggles and sliders.
What each group contains
The groupings below match current Windows 11 releases. Individual entries can differ slightly between versions, so treat this as a map rather than a fixed list.
- Vision covers options that change what you see: text size, visual effects, the mouse pointer and touch feedback, the text cursor, Magnifier, color filters, contrast themes, and Narrator.
- Hearing covers audio options such as mono audio, and captions for spoken content.
- Interaction covers how you control the PC: speech, keyboard, mouse, and eye control.
Several of these have their own walkthroughs on this site. For a broader tour, read how to use Windows 11 accessibility features. If you want to set up language and speech options too, see how to configure Windows 11 accessibility.
Other ways to reach accessibility tools
The Start menu folder is not the only entry point. These alternatives are faster in specific situations.
Search from the Start menu
- Select Start and begin typing “accessibility”. Search results appear as you type.
- Select the result you want. A result named Accessibility opens the Settings page. To launch a specific tool, type its name instead, such as “Narrator” or “Magnifier”.
Searching by tool name is often quicker than opening the folder, especially if you use the same tool daily.
Use the Quick Settings panel
Quick Settings is the small panel that opens when you select the network, volume, and battery icons at the right end of the taskbar. It can hold an Accessibility button with toggles for features such as Narrator and Magnifier. Which toggles appear depends on your version.
- Press the Win and A together. The Quick Settings panel opens above the taskbar.
- Select Accessibility. A short list of toggles appears.
If the button is missing, select the Edit quick settings pencil icon at the bottom of the panel, select Add, and choose Accessibility from the list. Select Done to save the layout. To remove it later, open the same editing view and unpin it.
Use the sign-in screen
Pin accessibility tools so you can skip the folder
Pinning places a tool’s shortcut on the Start menu’s Pinned section or the taskbar. You then launch it with one click. This does not move or alter the original folder.
- Open the Accessibility folder. Follow the Start menu steps earlier in this post.
- Right-click the tool you want. A context menu appears.
- Select Pin to Start or Pin to taskbar. The shortcut now appears in the location you chose. The menu may also offer More, which holds extra pin options on some builds.
To undo this, right-click the pinned shortcut and select Unpin from Start or Unpin from taskbar. The tool stays in the Accessibility folder.
If the Accessibility folder is missing or a tool does not open
Several things can hide the folder or stop a tool from appearing. Work through these in order.
The folder is under a different name
The folder has had other names. Windows 10 called it Windows Ease of Access, and some Windows 11 builds call it Windows Accessibility. If you see no folder labeled Accessibility, scroll the All apps list through the letter A and also check under W. Search for a tool by name, such as “Magnifier”, as a quick test of whether the tool exists at all.
The All apps list looks different
Microsoft has changed the Start menu layout in newer Windows 11 releases. If your All apps view is not a plain alphabetical list, look for a view option near the top of the All apps page. Then switch back to the list view.
The folder may also be grouped differently if your build supports category or grid layouts. Control labels vary by version, so the exact names on your PC may differ from the ones shown here.
A setting is greyed out or locked
On a work or school PC, an administrator may control some accessibility settings. If a setting is greyed out, or Settings shows a message that your organization manages some options, you cannot change those options yourself. Contact your IT department. On a personal PC, check that you are signed in with your own account, because a limited account may not be allowed to change some system settings.
Narrator or Magnifier starts, but you cannot see or hear it
Narrator needs working audio output. Check that your speakers or headphones are connected and that the volume is not muted. For Magnifier, check the zoom level; it may be set so low that the change is hard to notice.
Settings Accessibility Magnifier holds its options. For setup details, see how to set up Windows Narrator for accessibility.
The desktop does not load, so you cannot reach the Start menu
If you sign in and see a black screen with no taskbar, the Start menu is out of reach. Microsoft has documented this problem in Windows 11 version 24H2 and 25H2 (the version codes shown in Settings System About), after certain updates. Microsoft’s documented temporary workaround is to open Task Manager, select Run new task, and enter explorer.exe (the Windows program that draws the desktop, taskbar and Start menu).
Microsoft says the issue is resolved in updates released on and after October 13, 2026, such as KB5127648. Install the latest updates through Settings Windows Update.
Go straight to the setting you need
Once you can reach Settings Accessibility, the pages below cover the settings readers most often change. Each one links to a full walkthrough on this site.
- Change the pointer’s size, color, and thickness with how to customize pointer appearance and cursor thickness in Windows 11.
- To reduce accidental key presses, read how to enable or disable Filter Keys in Windows 11. A related walkthrough, how to manage keyboard Filter Keys in Windows 11 Accessibility settings, covers the individual options.
- To add a color overlay to the display, read how to turn on Screen tint in Windows 11 Accessibility settings.
- Change how the mouse wheel scrolls with how to adjust mouse scroll settings in Windows 11 Accessibility settings.
What to do next
Pin the two or three tools you use most to the taskbar, so you no longer need to open the folder. Next, open Settings Accessibility and work through Vision, Hearing, and Interaction once, noting which options help. If you plan to dictate or control the PC by voice, read which speech recognition engine to use in Windows 11 accessibility speech settings.
Have a question about this guide?
Answered by AI from this guide. Good questions may be added to this page — please don't include personal details.
Did this guide fix your problem?

About the Author
Richard
Tech Writer, IT Professional
Richard is a writer at Geek Rewind who turns complex IT tasks into clear, step-by-step guides. He draws on years of hands-on experience in system administration and enterprise IT operations, focusing on Windows, Linux and WordPress: the problems people actually run into, and the fixes that work. His server and WordPress guides come from systems he runs himself. Richard builds and maintains the platform behind Geek Rewind, from its Ubuntu servers and Nginx configuration to its custom WordPress plugins. Many new tutorials start with readers' questions, and he's always glad to answer them in the comments.
No comments yet — be the first to share your thoughts!