How to Change Mouse Pointer Speed in Windows 11
This tutorial will show you how to change the mouse pointer speed in Windows 11. The mouse pointer (also called a cursor) is what you see on your screen when you move your mouse. You can adjust how fast or slow it moves to match your preference.
Adjust the “Mouse pointer speed” slider in Windows 11 Settings under Bluetooth & devices > Mouse. Move the slider left for slower speed or right for faster speed. You can also use Control Panel’s Mouse Properties or Registry Editor for adjustments.
Option 1Using Settings
- Open Settings by pressing
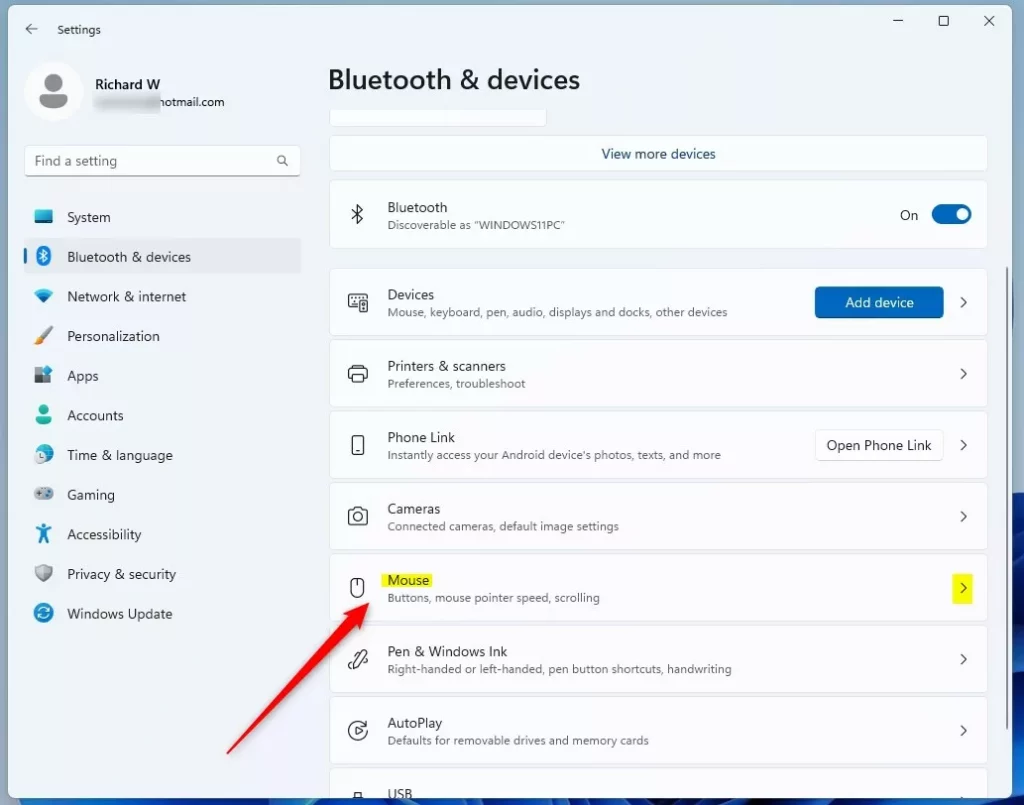
Win+I. - Click Bluetooth & devices on the left side.
- Click Mouse on the right side.
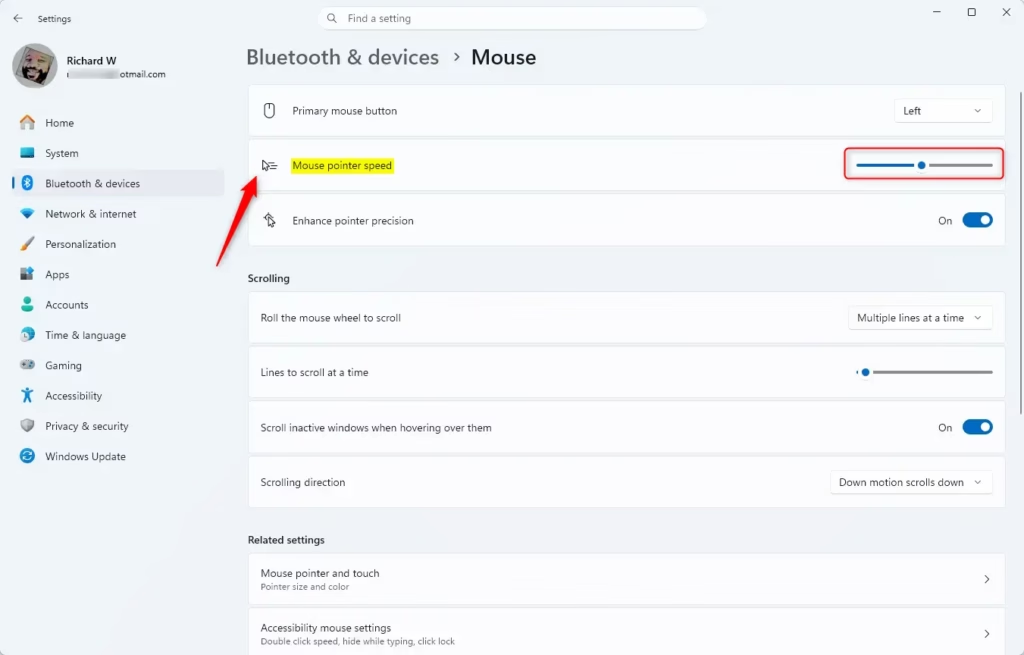
- Find the Mouse pointer speed slider. Move it left to make the pointer slower or right to make it faster.
- The slider shows speeds from 1 (slowest) to 20 (fastest). The default speed is 10.
- Close Settings when you’re done.
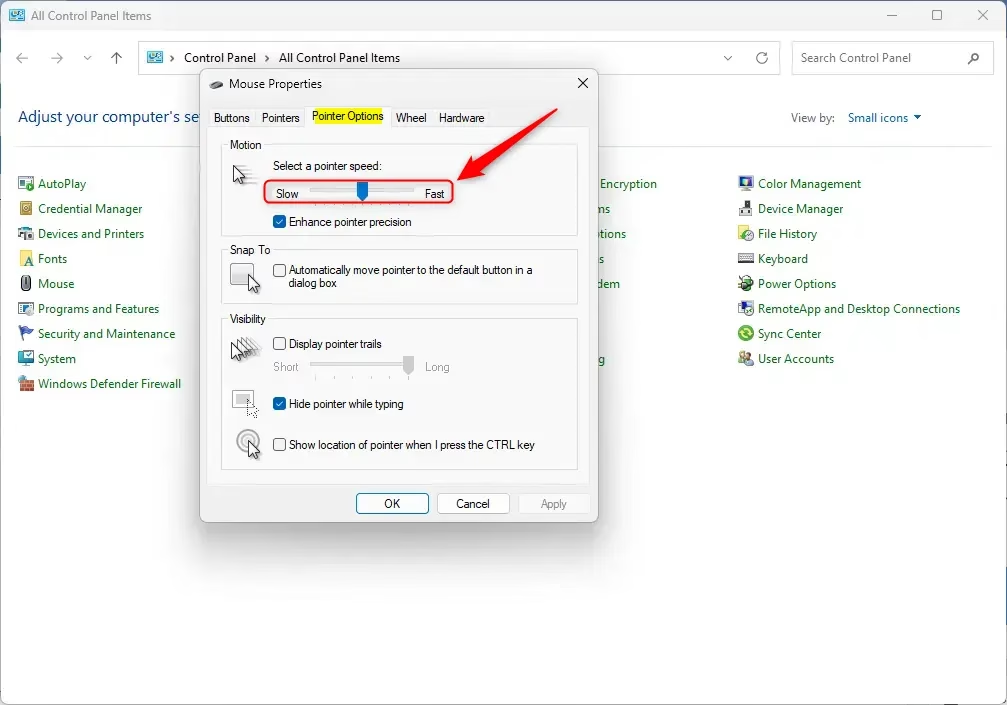
Option 2Using Control Panel
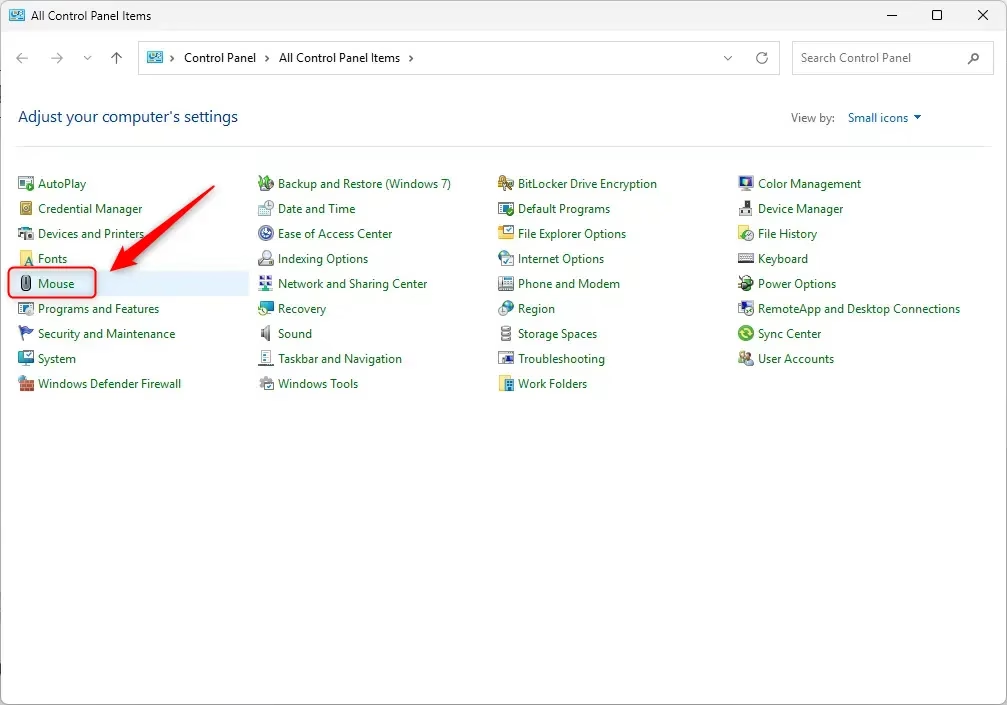
- Open Control Panel and find the Mouse icon.
- Click the Pointer Options tab.
- Adjust the Select a pointer speed slider. Move it left for slower or right for faster movement.
- Click OK to save your changes.
- Close Control Panel.
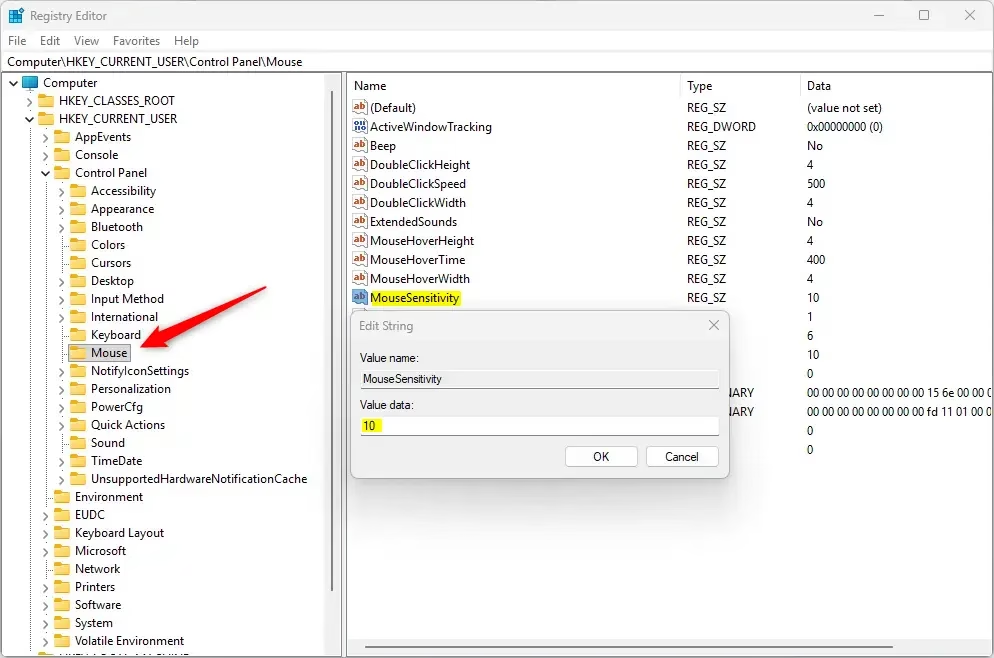
Option 3Using Registry Editor
⚠️ Note: This method requires admin privileges.
- Open Registry Editor by typing
regedit.exein your search bar and pressing Enter. - In the left pane, navigate to this location:
HKEY_CURRENT_USER\Control Panel\Mouse - In the right pane, find MouseSensitivity and double-click it.
- Type a number between 1 (slower) and 20 (faster). The default is 10.
- Click OK to save.
- Close Registry Editor.
Summary
You now know three ways to change your mouse pointer speed in Windows 11. The easiest method is using Settings. If you prefer the traditional approach, use Control Panel. For advanced users, Registry Editor offers direct control. Choose whichever method works best for you, and adjust the speed until your mouse feels comfortable to use.
Was this guide helpful?

About the Author
Richard
Tech Writer, IT Professional
Richard, a writer for Geek Rewind, is a tech enthusiast who loves breaking down complex IT topics into simple, easy-to-understand ideas. With years of hands-on experience in system administration and enterprise IT operations, he’s developed a knack for offering practical tips and solutions. Richard aims to make technology more accessible and actionable. He's deeply committed to the Geek Rewind community, always ready to answer questions and engage in discussions.


No comments yet — be the first to share your thoughts!