How to Create and Close a Desktop on Windows 11

Desktop creation and closing in Windows 11 lets you set up separate digital workspaces on your computer.
Think of these as extra screens where you can open different apps without cluttering your main view. Windows 11 makes it easy to manage these multiple desktops to keep your tasks organized.
For example, you could use one desktop for work apps like email and Word, and another for browsing the web or social media. This helps you focus on one set of tasks at a time.
Windows 11 introduced virtual desktops to help you organize your computer screen more effectively, making it simpler to switch between different activities.
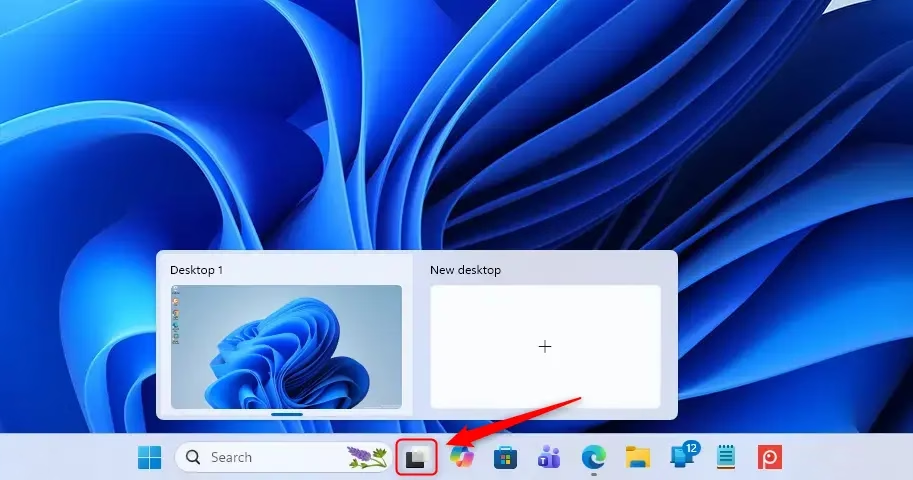
Open Task View by pressing Windows key + Tab or clicking its taskbar icon. Click “+ New desktop” to create one, and hover over a desktop thumbnail in Task View to see an ‘X’ button to close it.
Step 1Open Task View
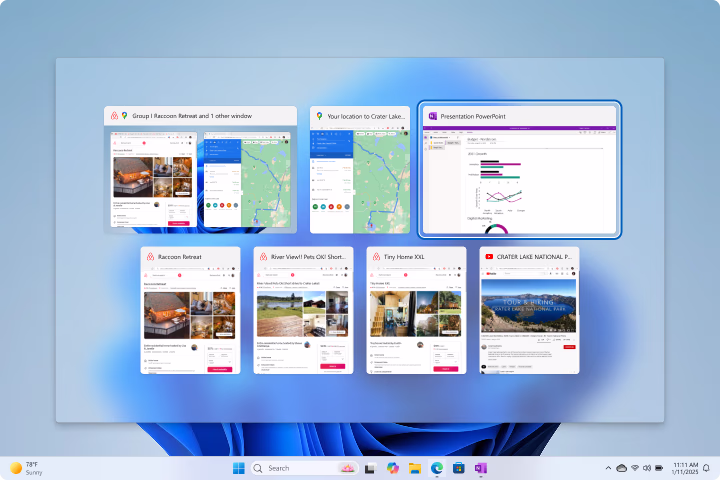
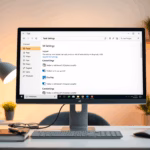
Task View in Windows 11 is a feature that shows all your open apps and lets you manage your virtual desktops. You can open Task View by clicking the Task View icon on your taskbar , which looks like two squares stacked on top of each other, or by pressing the Windows key and Tab together.
How to open Task View:
- Taskbar Button: Look for an icon on your taskbar that looks like two squares stacked on top of each other. It’s usually near the Start button . When you hover over it, it will say “Task view.” Click it.
💡TipIf you don’t see this button, right-click on an empty spot on your taskbar , choose “Taskbar settings,” and turn on the “Task view” option. - Keyboard Shortcut: Press the Windows key + Tab at the same time. This will open Task View quickly.
Step 2Create a New Desktop
Creating a new desktop on Windows 11 helps you organize your work. Once Task View is open, find the ‘+ New desktop’ button at the top. Clicking this creates a fresh, empty desktop.
To make a new desktop:
- Look for a button that says + New desktop. It’s usually next to the small pictures of your desktops at the top.
- Click on + New desktop.

Windows 11’s virtual desktops let you organize your open programs. A new preview, likely named “Desktop 2,” will appear at the top of your screen. This new Desktop 2 is empty and ready for new programs. Your first desktop, still open with all its original apps, remains unchanged.
Clicking an existing desktop preview in Windows 11 switches your view to that specific desktop, rather than creating a new virtual desktop. This action helps users quickly navigate between their already set-up virtual desktops for better organization.
Step 3Add Apps to Your New Desktop
Adding apps to your new Windows 11 virtual desktop is a simple process that helps keep your spaces organized. First, switch to the new desktop you created in Task View. Then, open the applications you want to use on that specific desktop, like opening your email or a project tool.
Adding apps to a new Windows 11 desktop works best when you open the applications directly from that new desktop. For example, if you create a new desktop for your work tasks, open your email program or project management software while on that specific work desktop. This keeps your apps organized and easy to find for each different task.
- Switch to your new desktop (like “Desktop 2”) by clicking its picture in Task View.
- Open any apps you want to use on this desktop, just like you normally would.
Step 4Close a Desktop
Closing a desktop on Windows 11 helps declutter your screen. To close a desktop, open Task View, then move your mouse over the desktop you wish to remove. A small ‘X’ button will appear in the corner of that desktop’s preview; click it to close it.
- Open Task View (Windows key + Tab).
- Move your mouse over the desktop picture you want to close.
- Click the small ‘X’ button that appears in the top corner of that desktop picture.
Don’t worry, any apps you had open on that desktop will automatically move to another one.
Reference:
Summary
Windows 11 virtual desktops let you create separate workspaces to keep your apps and tasks organized.
Does 🪟 Windows 11 have virtual desktops?
Yes, Windows 11 fully supports virtual desktops. This feature allows you to create multiple, separate desktop environments on your computer, each with its own set of open applications. It’s a great way to organize your tasks and improve focus by dedicating specific desktops to different workflows.
How do I view virtual desktops in 🪟 Windows 11?
You can view and manage your virtual desktops in Windows 11 by opening Task View. Click the Task View icon on your taskbar (it looks like two stacked squares) or press Windows key + Tab. This will display all your open windows and virtual desktops, allowing you to switch between them.
What are the disadvantages of using a virtual desktop?
While great for organizing, it’s possible to get confused if you don’t manage them well, forgetting which apps are where. They might also use a bit more system power, which could slow down older or less capable computers.
How to access virtual desktop on 🪟 Windows 11?
To access virtual desktops on Windows 11, open Task View by clicking its icon on the taskbar or by pressing the Windows key + Tab. From Task View, you can see all your current desktops, switch between them, create new ones, or close existing ones with ease.
Was this guide helpful?

About the Author
Richard
Tech Writer, IT Professional
Richard, a writer for Geek Rewind, is a tech enthusiast who loves breaking down complex IT topics into simple, easy-to-understand ideas. With years of hands-on experience in system administration and enterprise IT operations, he’s developed a knack for offering practical tips and solutions. Richard aims to make technology more accessible and actionable. He's deeply committed to the Geek Rewind community, always ready to answer questions and engage in discussions.
No comments yet — be the first to share your thoughts!