How to Activate Windows Security on Your Device in Windows 11

- 28 steps
- Needs administrator rights
- Includes a restart or sign-out
Windows Security turns on Microsoft Defender Antivirus and Microsoft Defender Firewall. To activate it on your device, open Settings Privacy & security Windows Security, select Open Windows Security, and turn on each protection that shows a warning. Microsoft Defender Antivirus is the scanner that blocks viruses and other malware (harmful software).
The steps below cover Real-time protection, Cloud-delivered protection, Tamper Protection, the firewall, and app and browser checks. They work on Windows 11 Home and Pro. The sections after the steps cover the common reasons the switches do not stay on, such as another antivirus program, a greyed-out switch, or an app that will not open.
To activate Windows Security on Windows 11, open Settings Privacy & security Windows Security, select Open Windows Security, then turn on each protection with a warning. Real-time protection and Microsoft Defender Firewall need administrator approval. Switches stay off if another antivirus program is installed. No restart is needed.
Before You Start
You do not need to restart the PC after the steps below. A restart helps only if you remove another antivirus program first.
How to Activate Windows Security on Your Device
These steps activate Windows Security on your device by turning on its main protections, from the antivirus engine to the firewall. Follow them in order. Two steps need administrator approval. Each one is marked Administrator step below.
- Open Settings. Press the keys
Windows key + I, or right-click the Start button and select Settings. The Settings window opens with a list of categories on the left.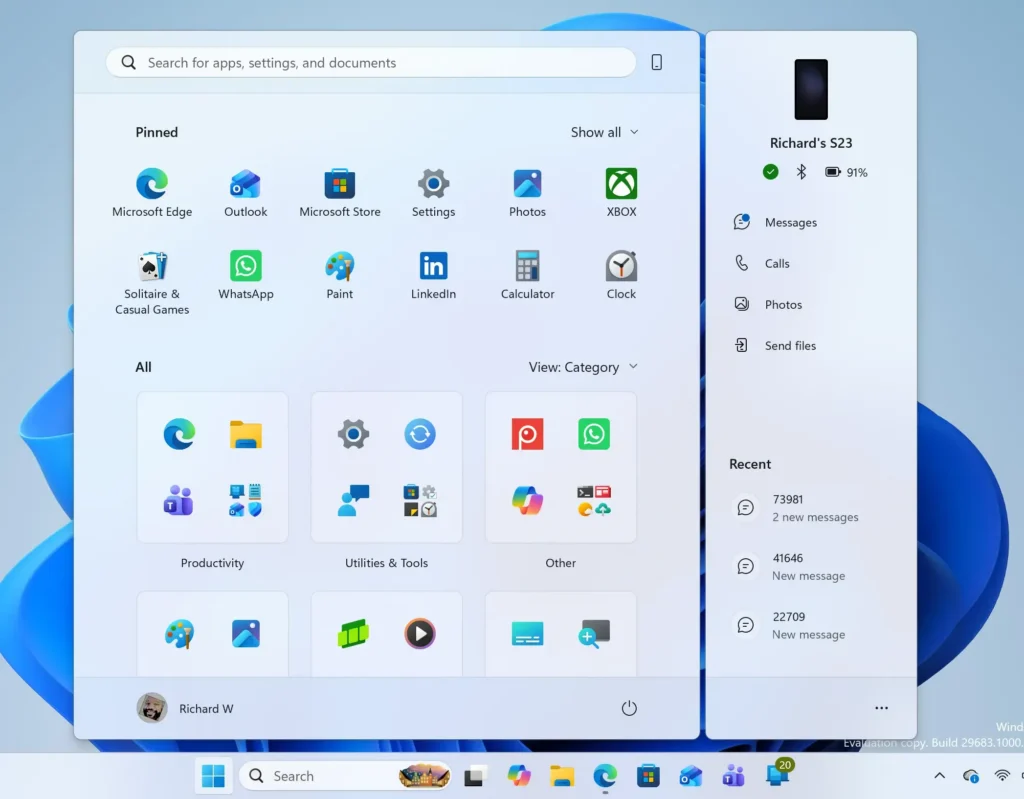
Windows 11 Start menu search panel for opening OpenSSH Client settings - Select Privacy & security. This category sits in the left pane. The right pane shows security and permission options.
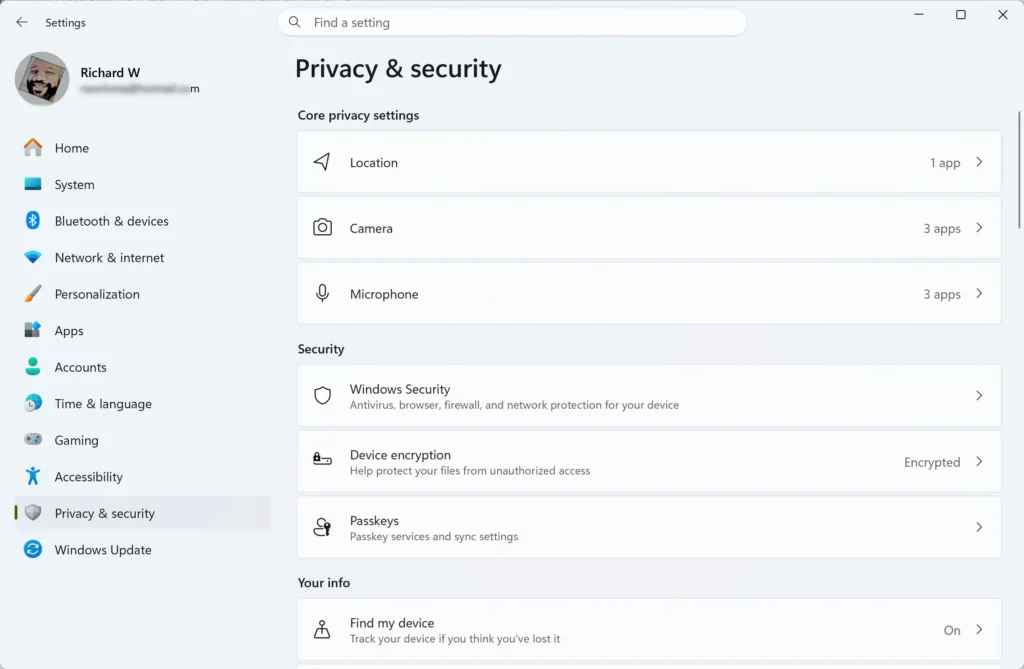
- Select Windows Security. The page lists the protection areas, each with a status such as Actions recommended or a green check mark.
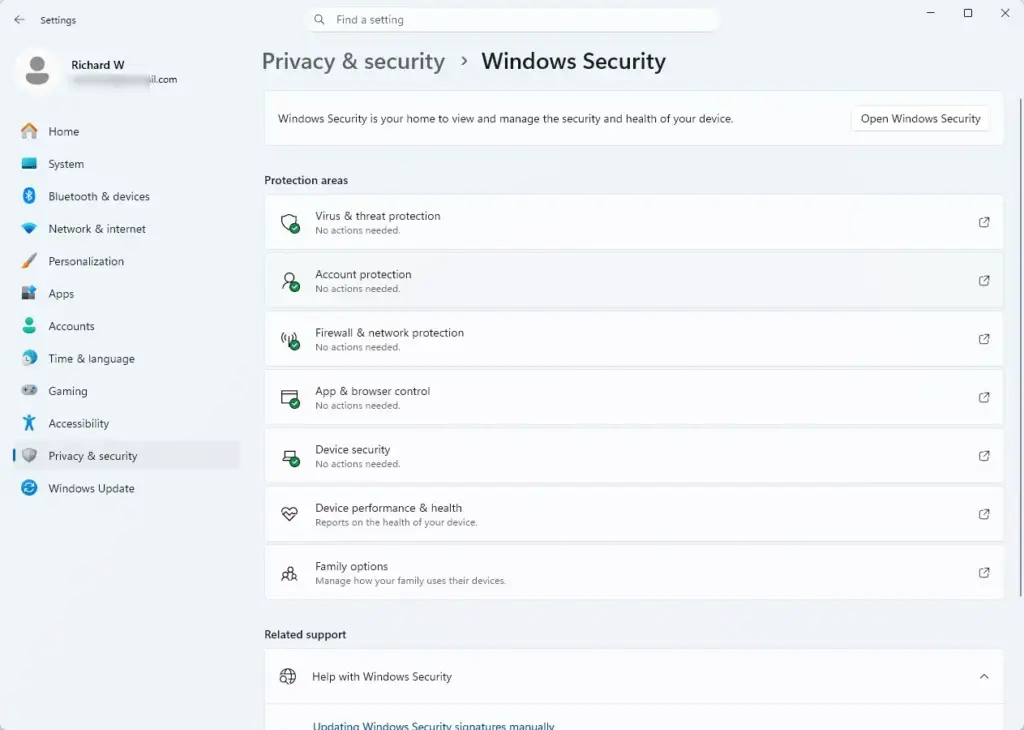
Settings › Privacy & security › Windows Security - Select Open Windows Security. The Windows Security app opens in its own window and shows a Home page with a tile for each protection area. Each tile shows a status icon. The section What the Status Icons Mean below explains each one.
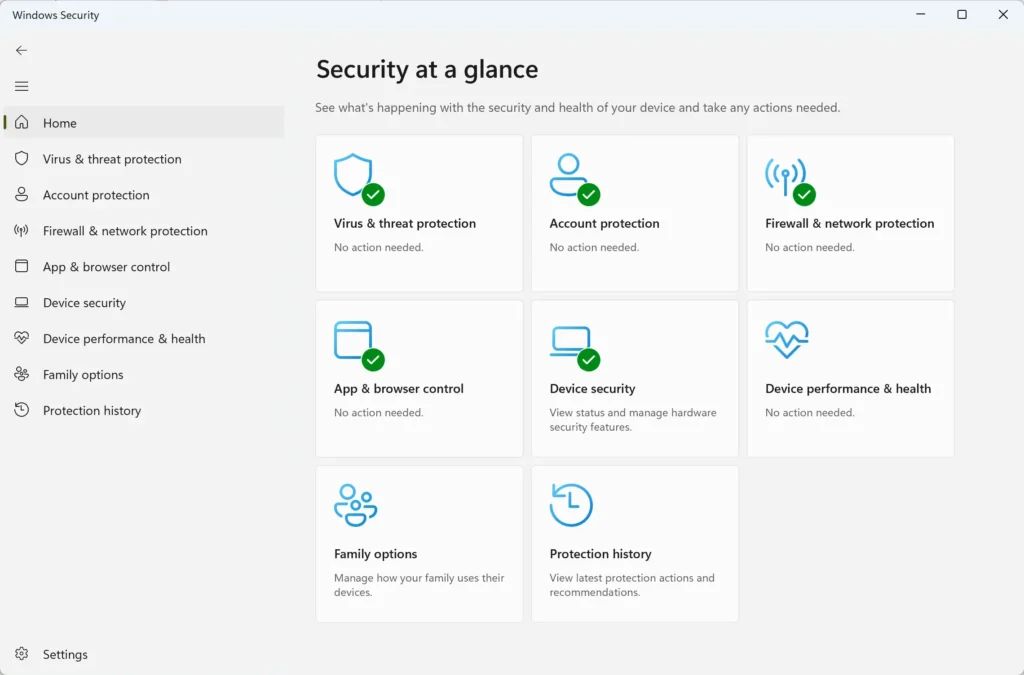
Windows Security - Select Virus & threat protection. This is the antivirus page. If protection is off, the page shows a warning near the top.
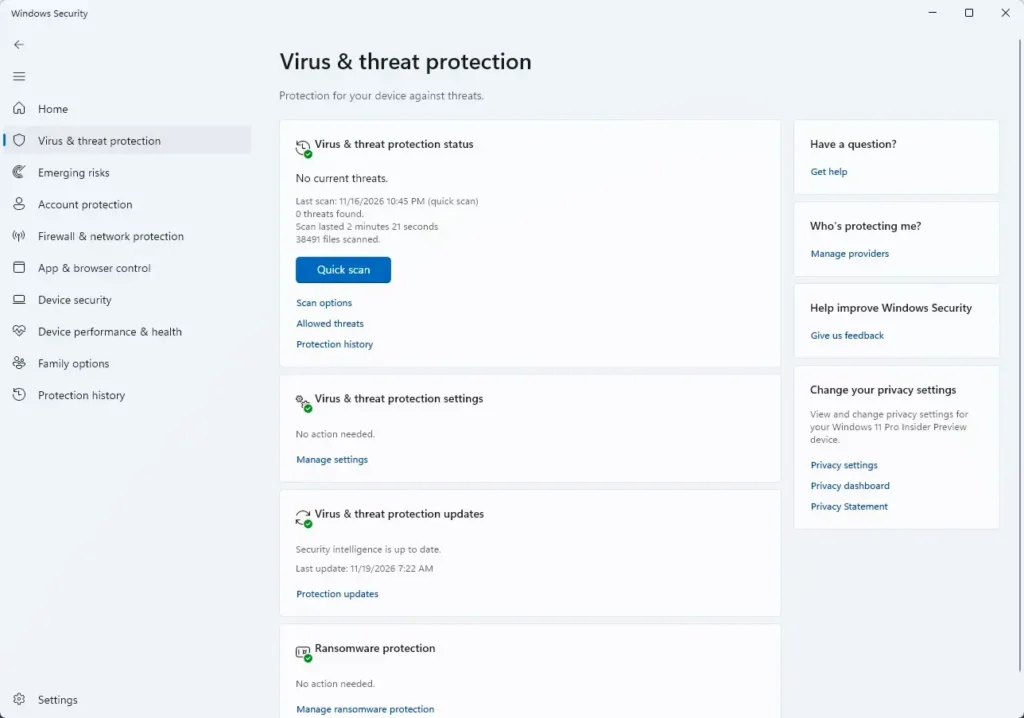
Windows Security - Select Turn on if the button appears. The button shows only when Microsoft Defender Antivirus is off. If you see the name of another antivirus product instead, go to the troubleshooting section below.
- Select Manage settings under Virus & threat protection settings. This page holds the individual switches for the antivirus engine.
- Turn on Real-time protection. Real-time protection scans files as you open, download or run them. Administrator step: select Yes on the User Account Control prompt. The switch changes to On.
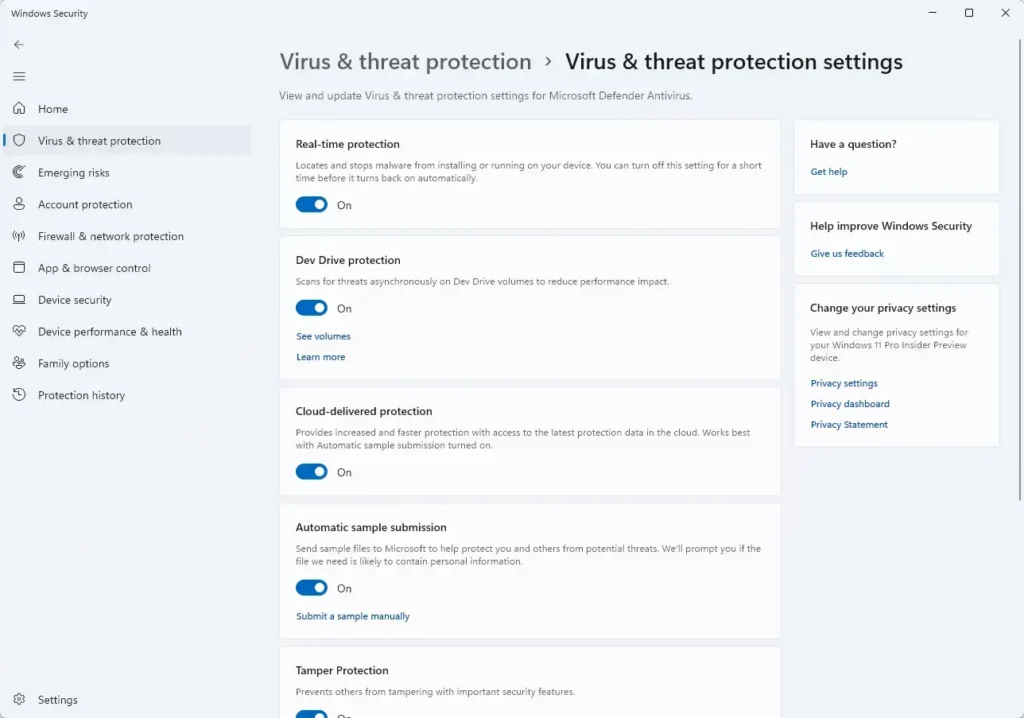
Windows Security - Turn on Cloud-delivered protection. This lets Windows check suspicious files against Microsoft’s online threat data, which is newer than the virus definitions (lists of known threats) stored on your PC. You need an internet connection for it to work.
- Turn on Tamper Protection. This blocks other apps and scripts from changing key Windows Security settings without your approval. The Tamper Protection switch is on this same Manage settings page. Scroll down to find it. Select Yes if prompted.
- Go back to the Home page. Select the back arrow at the top left of the app, or select Home in the left pane.
- Select Firewall & network protection. The page lists three network profiles, which are the kinds of network the PC can join: Domain network (a work network), Private network and Public network. The active profile is marked (active).
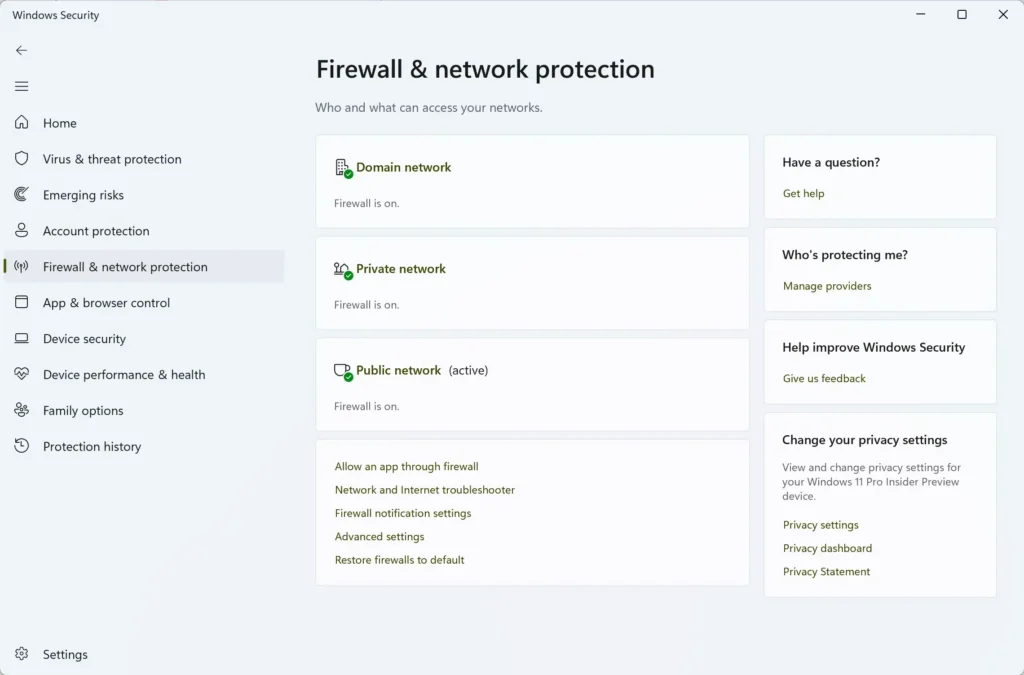
Windows Security - Open each profile and turn on Microsoft Defender Firewall. Administrator step: approve the User Account Control prompt. Turn it on for all three profiles so the PC stays protected when you move between home, work and public Wi-Fi. Use the back arrow to return after each one.
- Select App & browser control from the Home page. This area covers SmartScreen (a feature that warns you about unrecognized apps, files and websites).
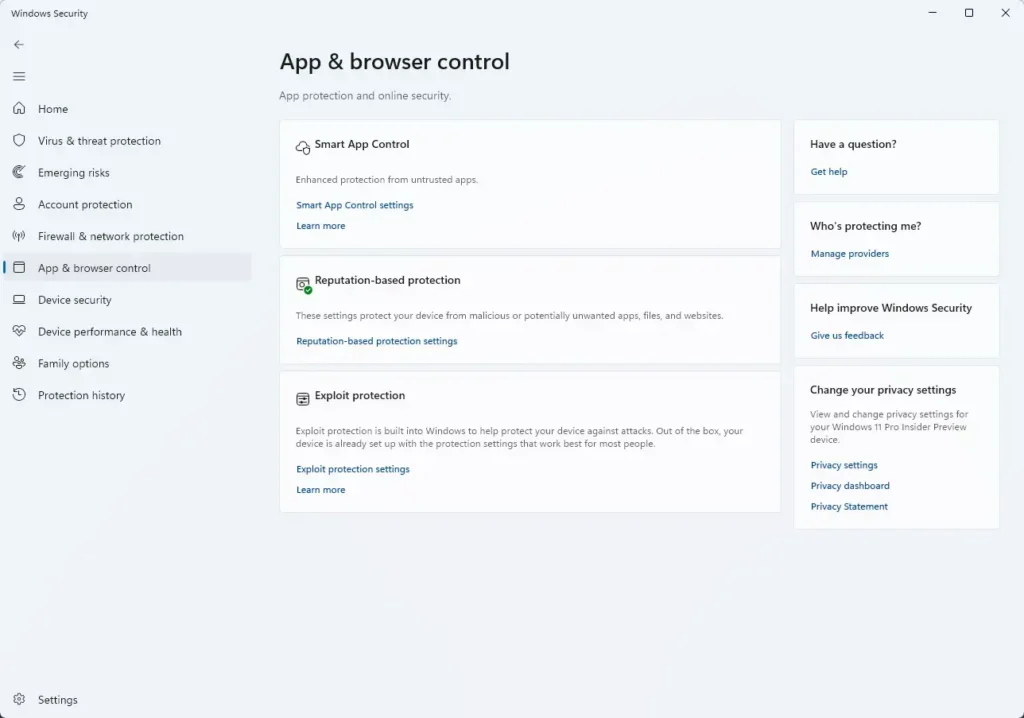
Windows Security - Select Reputation-based protection settings, then turn on Check apps and files and SmartScreen for Microsoft Edge. Turn on the other switches on the page unless you have a reason to leave them off. Our guide to enabling or disabling SmartScreen filtering in Windows 11 Security explains each one.
- Select Virus & threat protection again, then select Quick scan. A quick scan checks the folders where malware usually hides and confirms the antivirus is working. A progress bar appears, and when it finishes Windows reports whether it found threats.
- Return to Home and check the tiles. When every area you turned on shows a green check, Windows Security is active.
If a tile still shows a yellow triangle after these steps, select it. Windows names the problem and usually offers a button to fix it.
What the Status Icons Mean
The Home page uses three icons. A green check means the area is on and needs nothing from you. A yellow triangle means Windows recommends an action, such as running a scan or turning on a setting. A red X means a protection is off or a problem needs your attention now.
The Device security tile covers hardware features like Secure Boot (a startup check that blocks untrusted boot software) and the TPM (a security chip on the motherboard). A yellow triangle here usually comes from your PC’s hardware or firmware settings. You cannot fix it from inside the app. Our guide to checking device security status with baseline protection explains what the tile reports. If a tile is missing from the app, it may have been hidden, as described in how to hide or display the Device security section in Windows Security.
If Windows Security Says Another Antivirus Is Running
When a third-party antivirus is active, the Virus & threat protection page names that product and the Defender switches are unavailable or turn themselves off. Windows allows only one real-time antivirus at a time, so you must remove or disable the other product first.
Uninstalling the other product is the reliable fix. Use these steps to hand protection back to Microsoft Defender Antivirus.
- Open Settings. Press
Windows key + I. - Select Apps, then select Installed apps. A list of installed programs appears.
- Find the other antivirus program. Scroll the list or type its name into the search box above it.
- Select the three dots next to it, then select Uninstall. Follow the uninstaller’s prompts. Some vendors also provide a separate removal tool on their website if the normal uninstall leaves files behind.
- Restart the PC. After you sign in, open Windows Security and check Virus & threat protection. Microsoft Defender Antivirus should be active again, and you can continue from step 7 in the main list.
If you want to keep the other product, Windows Security can still run occasional scans alongside it. On the Virus & threat protection page, look for Microsoft Defender Antivirus options and turn on Periodic scanning. The option appears only while another antivirus is installed.
If the Windows Security App Won’t Open or Shows a Blank Page
Some cleanup and “optimizer” tools disable or damage Windows Security. When that happens, the app may close at launch, show a blank window, or refuse to load. A repair resets the app without touching your files.
- Open Settings. Press
Windows key + I. - Select Apps, then select Installed apps.
- Find Windows Security in the list. Type its name into the search box to find it faster.
- Select the three dots next to it, then select Advanced options. The page shows a Reset section with Repair and Reset buttons.
- Select Repair. Wait for a check mark to appear next to the button.
- Try opening Windows Security again. If it still fails, return to the same page and select Reset. Reset clears the app’s own data, so it forgets any app-level preferences you set, but it does not remove your files.
If the Windows Security entry is missing from the list or the buttons are unavailable, install pending updates under Settings Windows Update. Updates can restore missing system components. After the update finishes, restart the PC and try the main steps again.
If the Toggles Are Greyed Out or Say “Managed by Your Organization”
A greyed-out switch usually has one of three causes. The first is that you are signed in with a standard account, so Windows will not let you change the setting. Sign in with an administrator account and try again.
The second is another antivirus program, covered above. The third is a message such as Some of these settings are managed by your organization.
This message appears on work or school PCs, where an administrator controls Windows Security remotely. It can also appear on a home PC that once joined a work account, or after software changed its settings. On a work PC, you cannot override the setting, so ask your IT team. On a personal PC, check Settings Accounts Access work or school and remove any work or school account you no longer use.
Tamper Protection can also stop other software from changing Windows Security. If you cannot change a setting and Tamper Protection is on, that is the feature doing its job.
How to Turn Windows Security Protections Off Again
Turn off a protection only for a short, specific reason, such as installing a trusted program that a scan keeps blocking. To reverse any step above, return to the same page in Windows Security and switch the toggle to Off. Approve the User Account Control prompt when it appears.
When you turn off Real-time protection from the app, Windows turns it back on by itself after a short time. This protects you if you forget. For longer-lasting exclusions, add the specific file or folder to the exclusions list (the items the scanner skips) on the Manage settings page instead of leaving the whole antivirus off.
Switch off Tamper Protection before you try to change protected settings, then turn it back on straight afterward. Leaving it off removes a safeguard that malware often targets.
Other Windows Security Settings Worth Checking
Once the main protections are on, a few related settings are worth a look. They are optional, and each has its own guide.
- Notifications. Windows Security sends alerts about scans, threats and settings that need action. To turn all notifications on or off, follow the guide to enabling or disabling all Windows Security notifications. For a different approach, read the alternative guide to allowing or hiding Windows Security notifications.
- Ransomware protection. Controlled folder access blocks unapproved apps from changing files in protected folders. It can interrupt some programs, so read whether you should enable Controlled folder access before you switch it on.
- Drive encryption. Device encryption protects your files if the PC is lost or stolen. See how to enable device encryption in Windows 11.
For another walkthrough of the first steps, see how to turn on Windows Security in Windows 11.
What to Do Next
Open Windows Security once a week or so and check the Home page for yellow or red icons. A new warning there is the quickest sign that another program has changed a protection. If it keeps turning off after a Windows feature update or a software install, check for a third-party antivirus first, then run the repair steps above.
Next, decide how much Windows Security should interrupt you by adjusting its alerts with the Windows Security notifications guide.
Have a question about this guide?
Answered by AI from this guide. Good questions may be added to this page — please don't include personal details.
Did this guide fix your problem?

About the Author
Richard
Tech Writer, IT Professional
Richard is a writer at Geek Rewind who turns complex IT tasks into clear, step-by-step guides. He draws on years of hands-on experience in system administration and enterprise IT operations, focusing on Windows, Linux and WordPress: the problems people actually run into, and the fixes that work. His server and WordPress guides come from systems he runs himself. Richard builds and maintains the platform behind Geek Rewind, from its Ubuntu servers and Nginx configuration to its custom WordPress plugins. Many new tutorials start with readers' questions, and he's always glad to answer them in the comments.
No comments yet — be the first to share your thoughts!