How to turn On or Off Device Encryption in Windows 11
Device Encryption in Windows 11 protects your computer’s data by scrambling it, making it unreadable if your device is lost or stolen.
This built-in security feature acts like a digital lock for your files. When it’s active, anyone trying to access your hard drive without the correct password or recovery key will see only scrambled data.
Device Encryption is available on many Windows 11 computers, including Windows 11 Home edition. This security feature often turns on automatically when you set up a new PC with a Microsoft account.
Enable device encryption in Windows 11 by going to Settings > Privacy & security > Device encryption and toggling it on. This feature requires TPM 2.0 and signing in with a Microsoft account.
Turning On Device Encryption
Device Encryption in Windows 11 keeps your personal files safe from unauthorized access. This feature scrambles your data, making it unreadable without the correct login. To turn Device Encryption on, press the Windows key and I to open Settings, then go to Privacy & security and select Device encryption.
Open Settings. Press the Windows key and the I key on your keyboard together. This opens the Settings app.
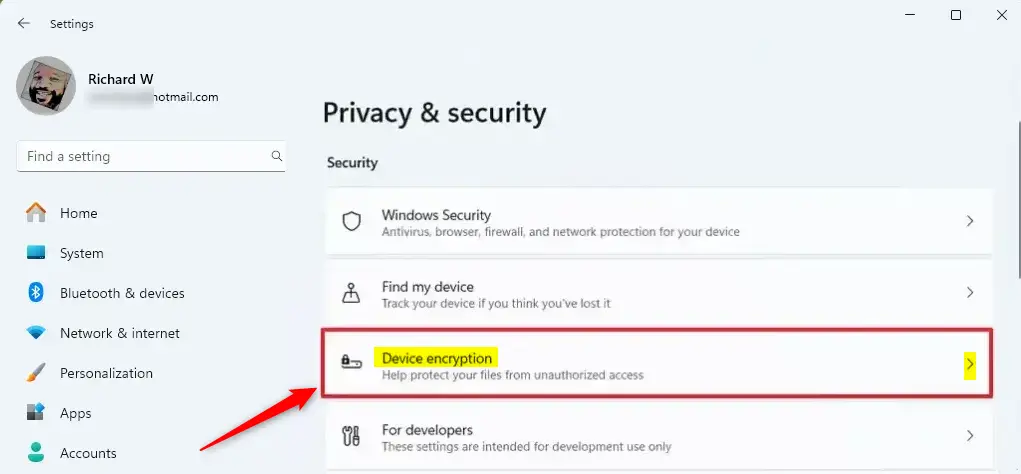
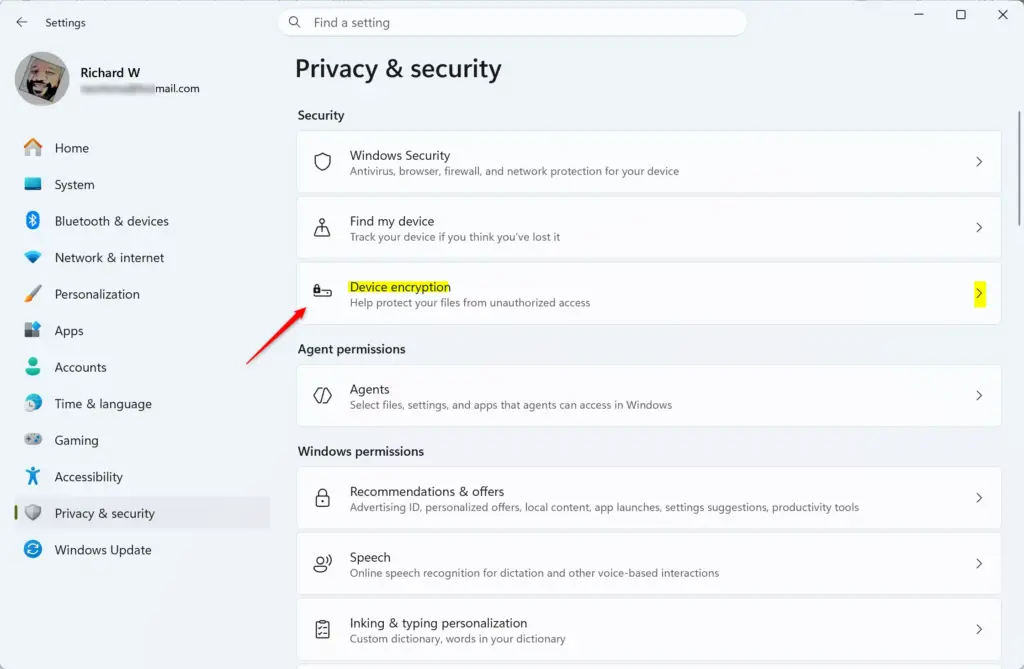
Go to Privacy & security. In the Settings window, click on Privacy & security in the left sidebar. Then, on the right side, click on Device encryption.
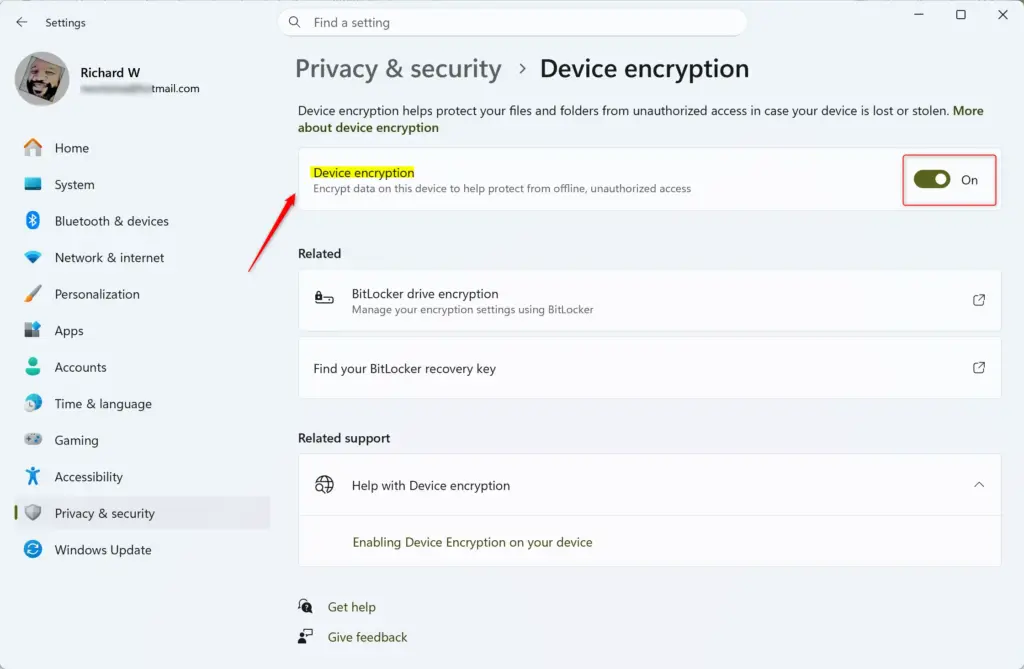
💡TipIf you don’t see “Device encryption” under Privacy & security, your computer might not support it. You might be able to use standard BitLocker if you have Windows Pro, Enterprise, or Education.Turn on Device Encryption. You will see a switch for Device encryption. Click it to turn it on. You might see a User Account Control (UAC) prompt asking for permission. Click Yes to continue. (Requires Administrator privileges)
Device encryption scrambles your drive's data after you start the process. You will likely see a message like "Encryption is in progress." Device encryption can take a while, depending on how much data you have and your computer's speed. Do not turn off your computer while device encryption is happening; let device encryption finish completely.
⚠️WarningDo not shut down or restart your computer while encryption is happening. This could cause problems. If you are using a laptop, make sure it is plugged in.Close Settings. Once encryption is done, you can close the Settings window. Your computer is now encrypted!

Back up your BitLocker Recovery Key. Windows creates this BitLocker recovery key for your encrypted drive. You must save this key in a safe place. If your computer has a problem and won't start, or if you need to access your drive from another device, this key lets you retrieve your data. You can usually back up this key when you first turn on encryption, or find the key later in BitLocker settings. Save the key to a USB drive, a cloud storage service, or print it and keep it safe.
Tip: To find your recovery key later, go to Settings > Privacy & security > Device encryption. Look for an option to “Back up your recovery key.” If you don’t see it, search for “BitLocker” in the Windows search bar and select “Manage BitLocker.”
Turning Off Device Encryption
If you need to disable Device Encryption in Windows 11, the process is straightforward. You’ll need to access the same settings menu used to turn it on. Open Settings by pressing Windows key + I, navigate to Privacy & security, and then choose Device encryption on the right side to turn it off.
Open Settings. Press the Windows key + I on your keyboard to open the Settings app.
Go to Privacy & security. In the Settings window, click on Privacy & security in the left menu. Then, on the right side, select Device encryption.
Tip: If the Device encryption option is greyed out or missing, make sure you are logged in as an administrator. If you still can’t access it, your computer might not have had Device Encryption turned on, or it’s not supported.
Turn off Device Encryption. You will see the Device encryption switch. Click it to turn it off. You will likely see a User Account Control (UAC) prompt asking for confirmation. Click Yes. (Requires Administrator privileges)
Turning off Device Encryption requires confirmation. A dialog box will appear asking if you are sure you want to turn off Device Encryption. Click the "Turn off " button in the confirmation dialog box.
Drive decryption finishes when your computer finishes unscrambling your drive's data. A message stating "Decryption is in progress" will appear. This process can take a long time, depending on your drive size and the amount of data. Do not turn off your computer during drive decryption. Let the drive decryption finish completely.
Warning: Stopping the decryption process can cause data loss or make your drive unusable. Make sure your computer is plugged into a power source if it’s a laptop.
Close Settings. Once decryption is complete, you can close the Settings app. Your computer’s drive is no longer encrypted by this feature.
Summary
Device Encryption in Windows 11 is a security feature that scrambles your data to protect it. You can turn this feature on or off through the Settings app, specifically under Privacy & security. Both enabling and disabling Device Encryption require administrator privileges and can take some time to complete.
How to tell if device encryption is enabled in 🪟 Windows 11?
To see if you can use device encryption Type and search [System Information] in the Windows search bar①, then click [Run as administrator]②. At the bottom of the System Information window, find [Device Encryption Support]③. If the value says [Meets prerequisites]④, then device encryption is available on your device.
Was this guide helpful?

About the Author
Richard
Tech Writer, IT Professional
Richard, a writer for Geek Rewind, is a tech enthusiast who loves breaking down complex IT topics into simple, easy-to-understand ideas. With years of hands-on experience in system administration and enterprise IT operations, he’s developed a knack for offering practical tips and solutions. Richard aims to make technology more accessible and actionable. He's deeply committed to the Geek Rewind community, always ready to answer questions and engage in discussions.


No comments yet — be the first to share your thoughts!