How to Verify Device Encryption Support in Windows 11

Device encryption support in Windows 11 lets you automatically protect your computer’s data by making it unreadable to unauthorized people.
You can check if your PC can use this feature by looking for the “Device encryption” setting in Windows Security. This security feature is similar to BitLocker Drive Encryption but works automatically.
To use Device Encryption, your computer often needs specific hardware, like a Trusted Platform Module (TPM) version 2.0. If your PC lacks this, you won’t be able to turn on Device Encryption.
Finding out if your system supports this protection is simple and helps keep your personal files safe.
Check your system information by running msinfo32 and looking for “Automatic Device Encryption Support.” Alternatively, go to Settings > Privacy & security > Device encryption to see if the feature is available and enabled.
Prerequisites for Device Encryption
Prerequisites for Device Encryption. For Device Encryption to work on Windows 11, your PC needs certain hardware. This includes a TPM 2.0 chip, UEFI firmware with Secure Boot turned on, and support for Modern Standby. A Microsoft Account is also necessary to automatically back up your recovery key.
- A TPM 2.0 chip (Trusted Platform Module).
- UEFI firmware with Secure Boot enabled.
- A Microsoft Account (for automatic recovery key backup).
- Modern Standby support (for automatic encryption).
Device Encryption vs. BitLocker
Device Encryption is a simplified version of BitLocker, designed for most users and working automatically on compatible hardware. For Windows 11 Pro, Enterprise, or Education users, standard BitLocker offers more advanced features. It gives you more control over how your drives are locked and managed.
Check Support Using System Information
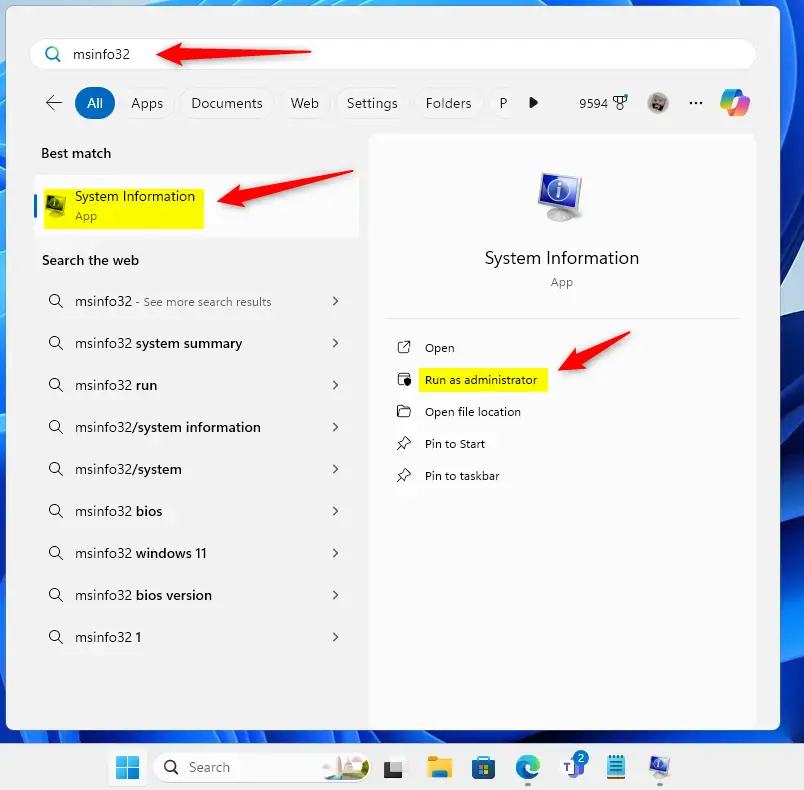
Checking if your Windows 11 PC supports Device Encryption is possible using the built-in System Information tool. Open msinfo32 and run it as an administrator, then scroll down to find the ‘Automatic Device Encryption Support’ line.
- Click the Start menu and type
msinfo32. - Right-click “System Information” and select “Run as administrator.” (Requires admin privileges)
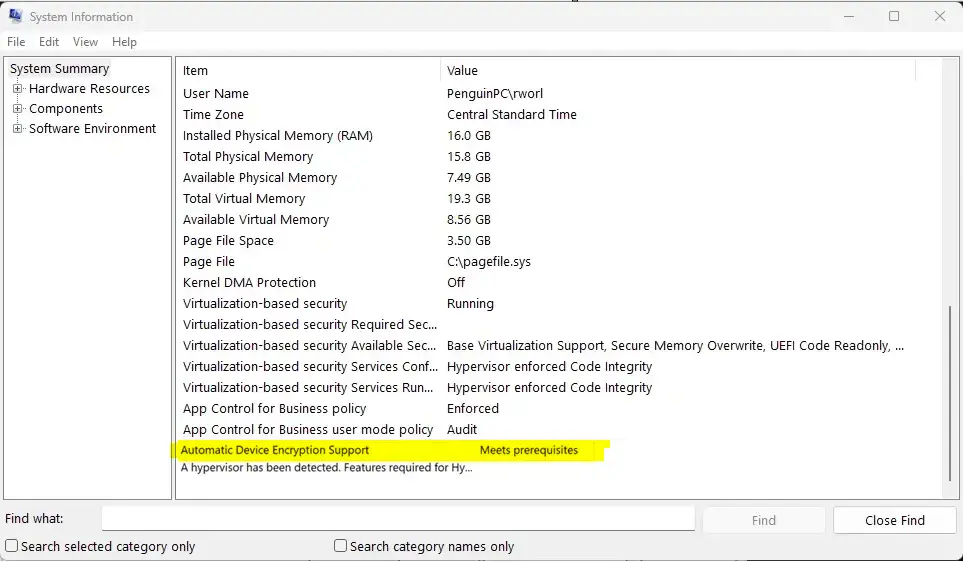
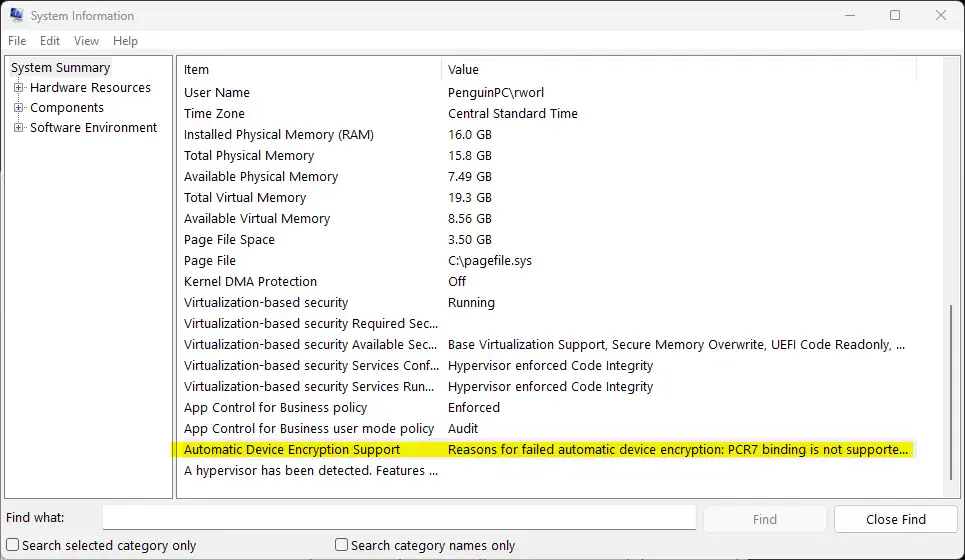
- Scroll down the list until you see “Automatic Device Encryption Support.”
- If your computer is ready, it will say “Meet prerequisites.” If not, it will explain why.
Check Support Using Windows Settings
A very straightforward way to see if Device Encryption is available on your Windows 11 computer involves checking the Settings app. Navigate to Privacy & security, then click on Device encryption to view its status and control it.
- Open the “Settings” app by pressing the Windows key + I.
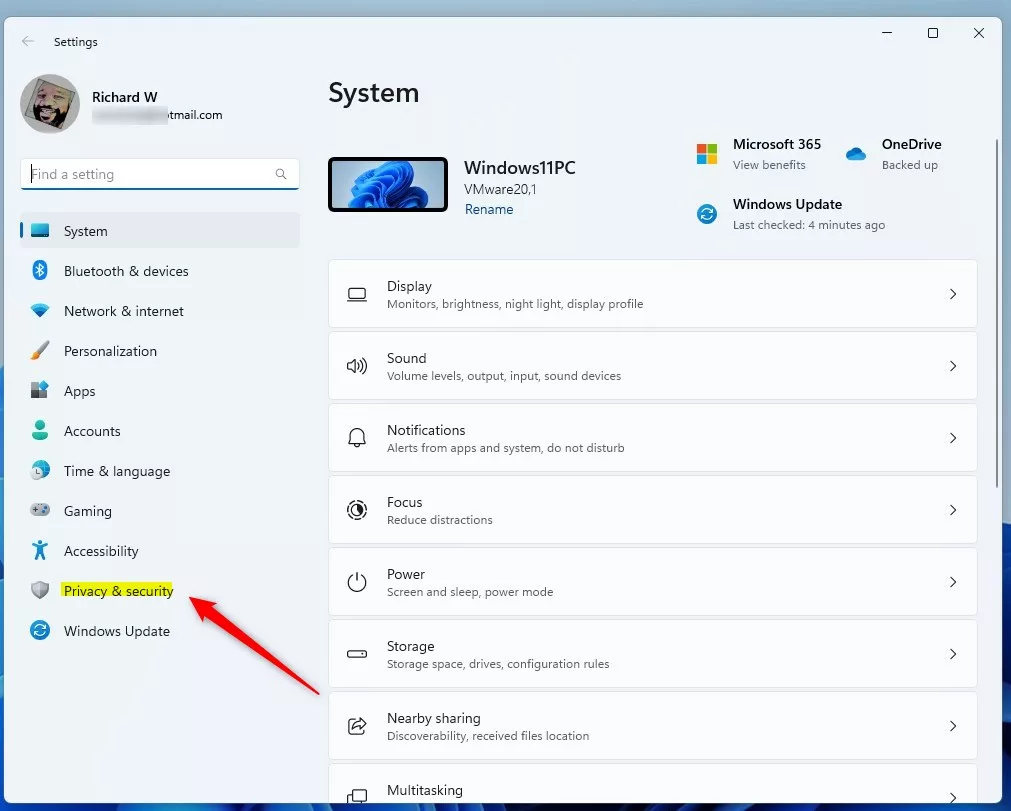
- Click “Privacy & security” on the left menu.
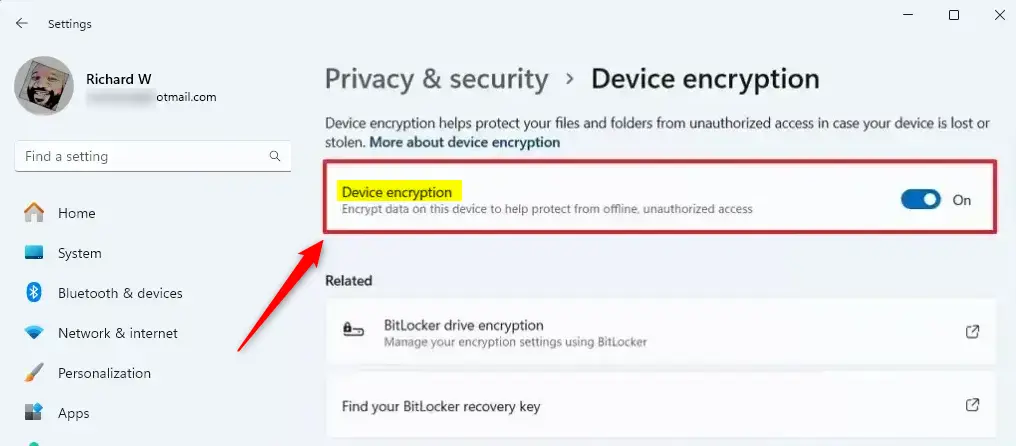
- Click the “Device encryption” tile on the right.
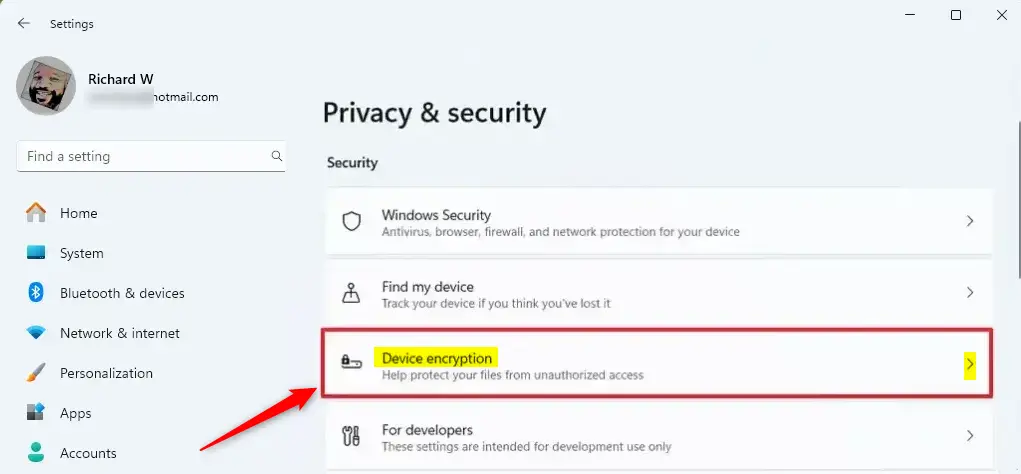
- Here, you can see if the feature is available and toggle it on or off.
Summary
Device Encryption is a key security feature for Windows 11 that protects your data using your PC’s TPM 2.0 chip and Secure Boot. Checking your support status in System Information or Settings helps ensure your device is ready, and always remember to back up your recovery key.
Reference: Microsoft Official Documentation
Does device encryption slow down my computer?
For most modern computers, you will not notice any speed difference. Windows uses hardware-based acceleration to handle encryption tasks. This means the processor does not have to work extra hard, keeping your system running smoothly while your data stays protected in the background.
What happens if I forget my recovery key?
If you forget your recovery key and cannot access your account, you may lose access to your files permanently. Windows cannot bypass this security measure. Always save your key to your Microsoft account or print a physical copy to avoid being locked out of your device.
Can I use device encryption without a Microsoft account?
While you can technically use encryption, it is highly discouraged. A Microsoft account is required to automatically back up your recovery key to the cloud. Without this, you have no way to recover your data if the system fails or asks for a key unexpectedly.
Was this guide helpful?

About the Author
Richard
Tech Writer, IT Professional
Richard, a writer for Geek Rewind, is a tech enthusiast who loves breaking down complex IT topics into simple, easy-to-understand ideas. With years of hands-on experience in system administration and enterprise IT operations, he’s developed a knack for offering practical tips and solutions. Richard aims to make technology more accessible and actionable. He's deeply committed to the Geek Rewind community, always ready to answer questions and engage in discussions.


[…] article explains how to check if your device’s “Secure Boot” is enabled, disabled, or not supported on Windows […]