How to Delete a User Profile on Windows 11

Deleting a user profile on Windows 11 lets you clear out old accounts and free up disk space by removing personal folders like Documents, Pictures, and Desktop from your PC. This process erases the profile files while leaving the underlying user account intact on your system.
You need administrator rights to delete a user profile. Back up anything important from the target account before you start. The Delete button in the steps below removes the profile data permanently. It does not go to the Recycle Bin , so you can’t restore it afterward.
Open Settings System About, click Advanced system settings, go to the Advanced tab, click Settings under User Profiles, select the profile you want to remove, click Del, and confirm. The profile folder and all its contents are permanently erased.
What is a User Profile?
A user profile is the personal space on the computer that stores a person’s files, app settings, and desktop preferences. That includes Documents, Pictures, Downloads, Desktop, and the per-user settings that apps keep. Removing old profiles cleans up the PC and frees storage, which adds up on shared machines with several accounts.
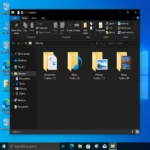
Profile folders live in one place on your PC, usually at C:\Users. For instance, a user named JohnDoe would have their profile folder at C:\Users\JohnDoe. Open File Explorer and look at the 📁C:\
When that user signs in again, Windows will create a fresh profile folder with default settings.
Why Delete a User Profile?
It is also a common fix when a profile is corrupted. Signing in again gives the user a clean profile without having to recreate the account.
If you want the account gone as well, this method is not the right one. Use Settings Accounts Other users instead, select the account, and choose the option to remove it along with its data.
Before You Start
Check these two things before you start:
- The user is signed out completely. Windows will not let you delete a profile that is in use, and the Delete button stays greyed out for it. This also applies to the account you are currently signed in with.
- You are signed in as an administrator. Standard accounts can't delete other profiles. You may also see a User Account Control prompt along the way. Click Yes to continue.
⚠️ Admin privileges required. This works the same on Windows 11 Home and Pro.
Steps to Delete a User Profile in 🪟 Windows 11
- Sign out the user: Ask the user to sign out. If you are managing the PC yourself, switch to a different admin account first.
- To sign out, click Start, click the account name or icon, and choose Sign out.
- If the user has left their session open in the background, sign in as an admin and open Task Manager. On the Users tab, right-click the account and choose Sign off. Unsaved work in that session will be lost.
- Open Advanced System Settings:
- Click the Start button and select Settings (the gear icon).
- Go to System About
- On the right side, under Related links, click Advanced system settings. The System Properties window opens.
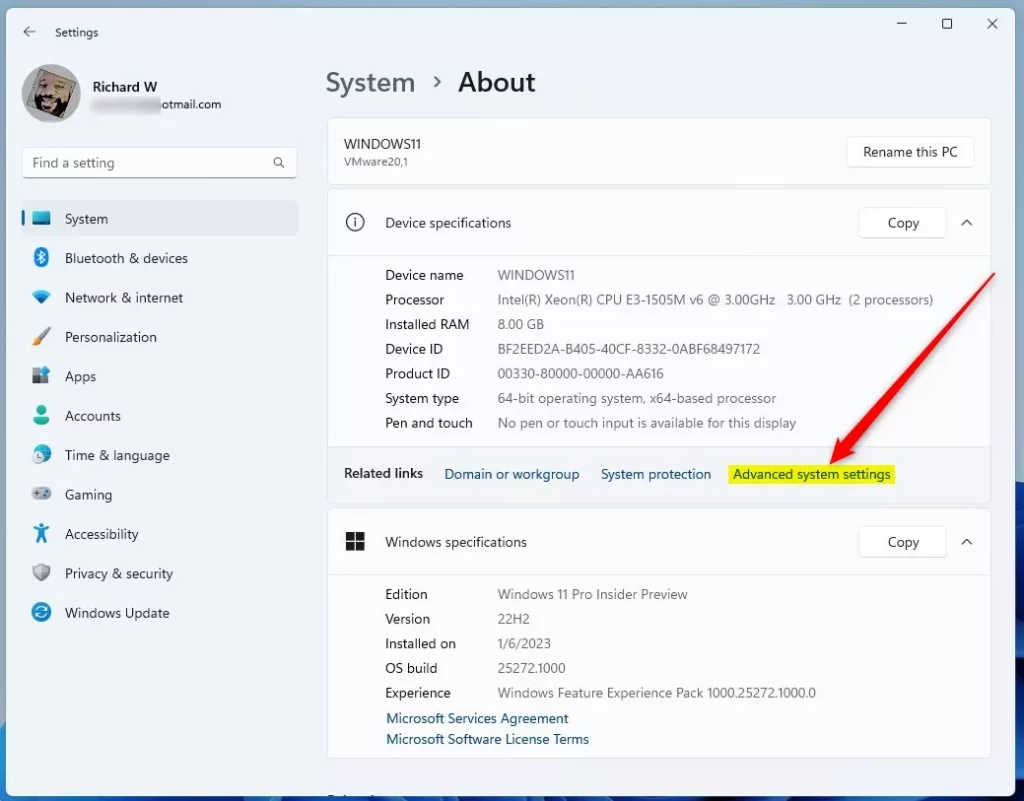
The profile list is not in the regular Settings app. It sits in the older System Properties window, which is why you opened Advanced system settings in the last step. Make sure the other user is still signed out before you continue.
- Open User Profiles Settings:
- In the System Properties window, click the Advanced tab.
- Under User Profiles, click the Settings button. A User Profiles window opens with a list of the profiles stored on this PC.
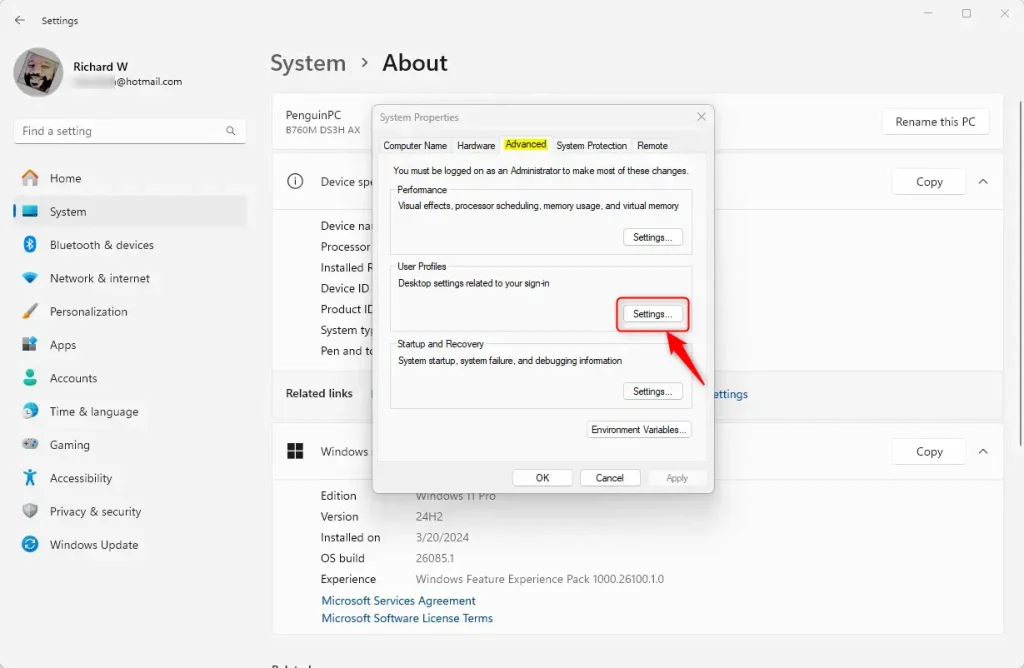
The list shows each profile's name, size, type, status, and last-modified date. The size column helps you spot which old profiles are taking the most space. Check the name carefully before you delete anything, because you can't undo the deletion.
- Select and Delete the Profile:
- From the list, click the user profile you want to remove.
- Click the Delete button. If it is greyed out, the profile is probably in use, or you are not running as an administrator.
- When asked to confirm, click Yes. The profile disappears from the list.
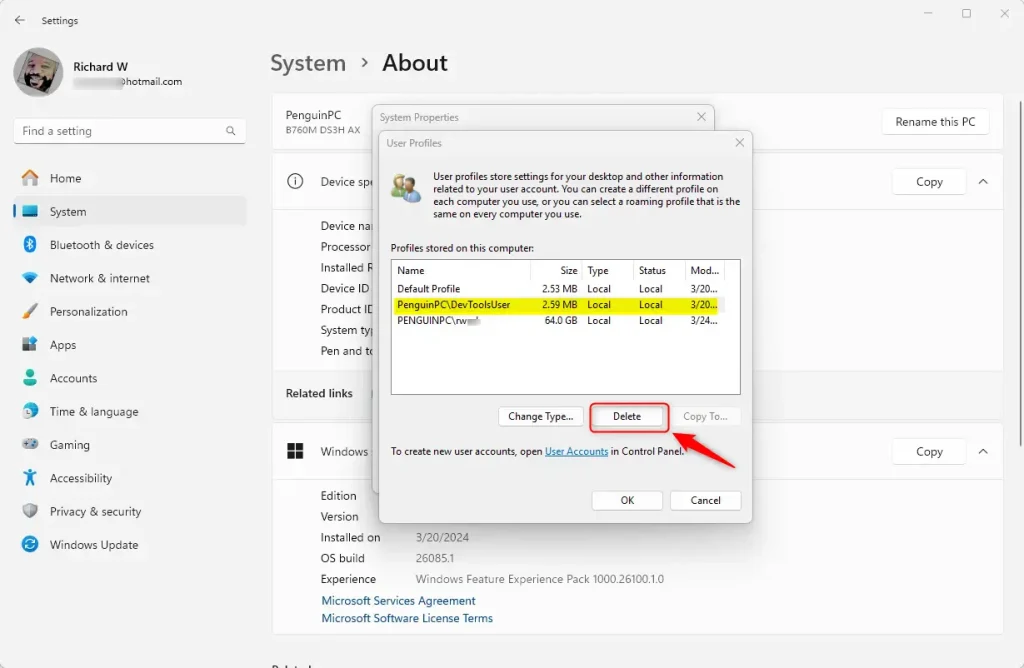
That's the only confirmation Windows asks for, so make sure you picked the right profile. No restart is needed afterward.
- Finish Up: Click OK to close the User Profiles window, then click OK again to close System Properties. The selected user profile is now deleted. You can open C:\Users in File Explorer to confirm the folder is gone.
What Happens Next?
The next time the user signs into their account, Windows will create a brand new profile folder with default settings and folders. It will be like starting fresh. The first sign-in takes a little longer while Windows builds the profile. The user will need to set up their apps and preferences again, and any files you didn't back up will be gone.
Summary
- You can delete a user profile folder without deleting the user's account.
- The user must be signed out before you delete their profile.
- You need admin privileges to delete profiles.
- Use Advanced System Settings to find and delete profiles safely.
- Confirm the deletion when prompted.
- A new profile folder is created when the user signs in again.
Deleting a user profile on Windows 11 requires administrative access and a signed-out user to prevent file errors. You can safely remove profile data through the Advanced system settings menu without deleting the underlying user account, and Windows will create a fresh folder if that user ever signs back in. Back up anything you need first, because the deletion is permanent.
Was this guide helpful?

About the Author
Richard
Tech Writer, IT Professional
Richard is a writer at Geek Rewind who turns complex IT tasks into clear, step-by-step guides. He draws on years of hands-on experience in system administration and enterprise IT operations, focusing on Windows, Linux and WordPress: the problems people actually run into, and the fixes that work. His server and WordPress guides come from systems he runs himself. Richard builds and maintains the platform behind Geek Rewind, from its Ubuntu servers and Nginx configuration to its custom WordPress plugins. Many new tutorials start with readers' questions, and he's always glad to answer them in the comments.



No comments yet — be the first to share your thoughts!